Inside Dell Inspiron 3552 – disassembly, internal photos and upgrade options
We already did a piece regarding our initial impressions of the ultra-budget Dell Inspiron 3552 and now we are going to take a closer look on the inside. This article would be also helpful to people who are planning to buy the notebook but are unsure what upgrade options the machine offers. But keep in mind that if you are planning on cleaning and changing the thermal paste, you are in for some massive disassembly. Here’s why…
You can check the following link for more information about prices and availability: http://amzn.to/1ou80tC
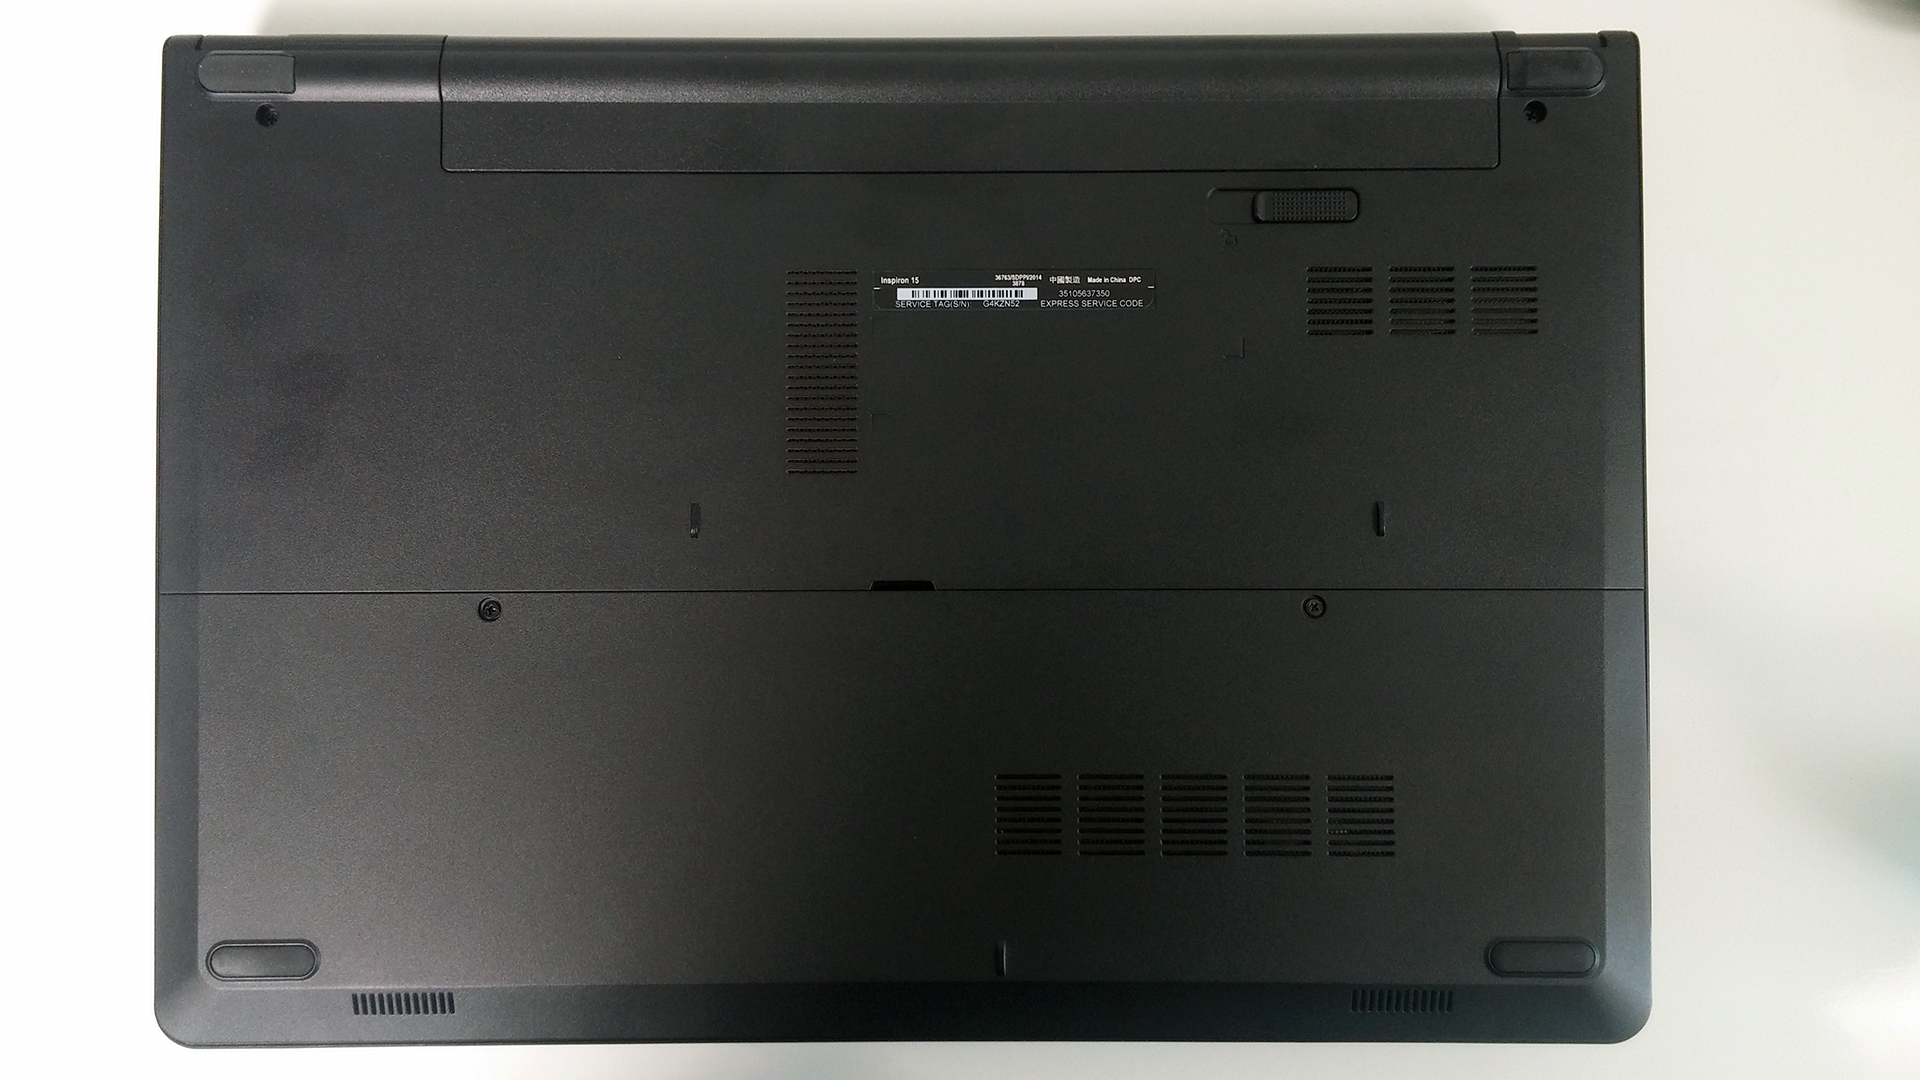
1. Removing the service cover
Luckily, if you are planning a simple RAM or storage upgrade, the laptop offers pretty easy access to those two. You will just need to remove the two screws holding the lid and then pry it up.
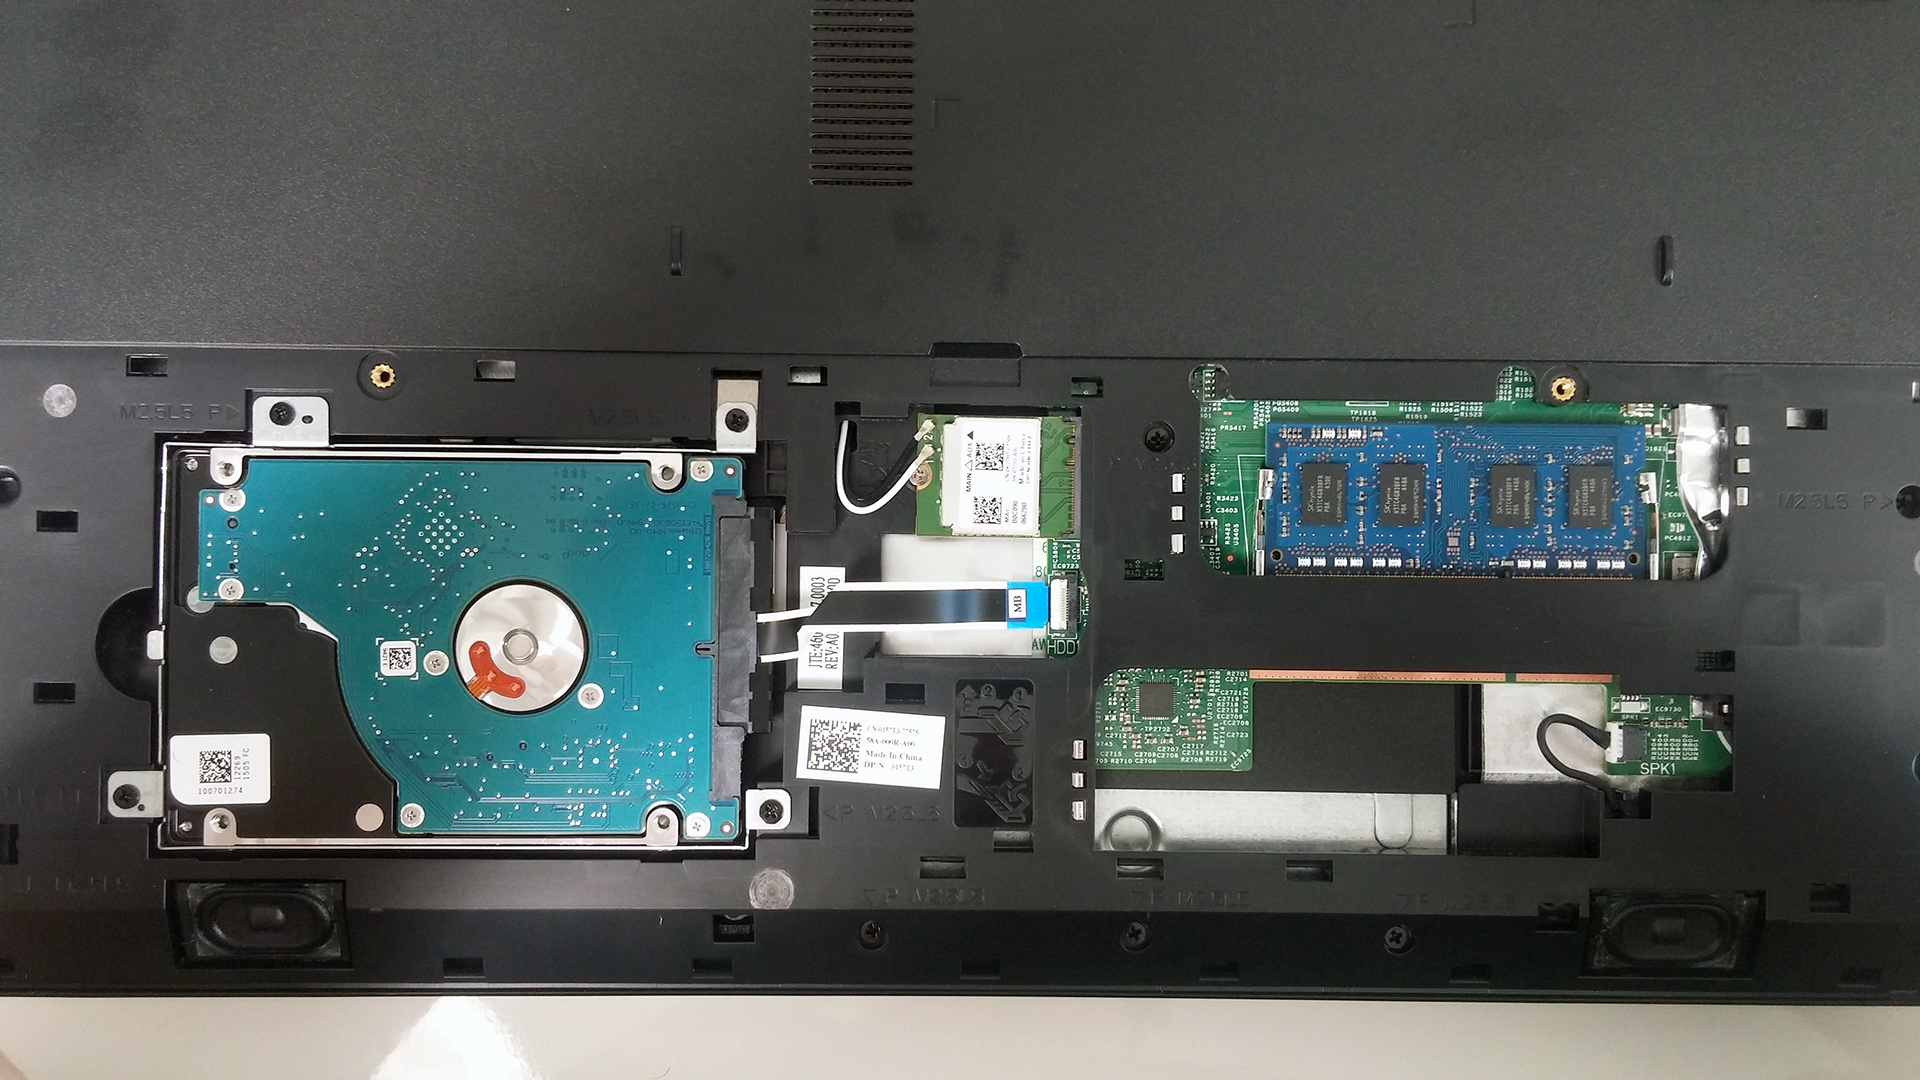
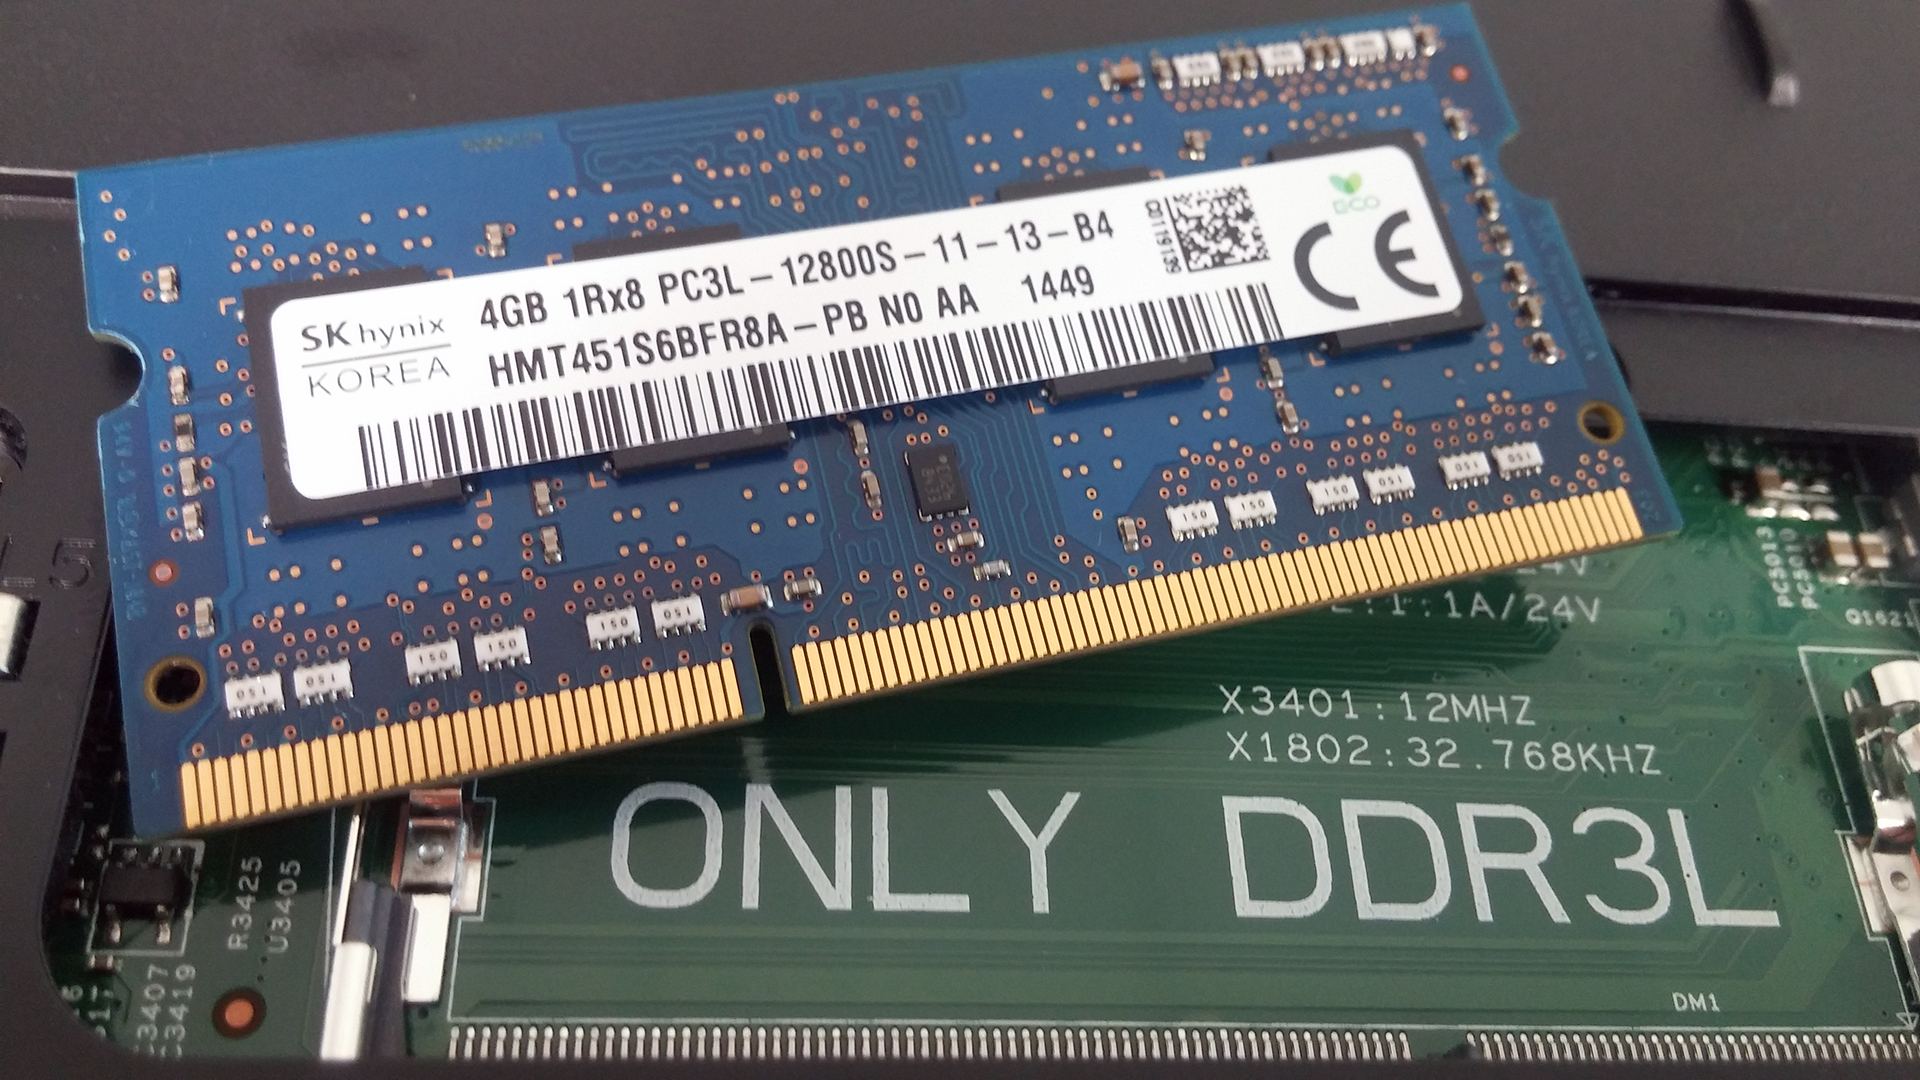
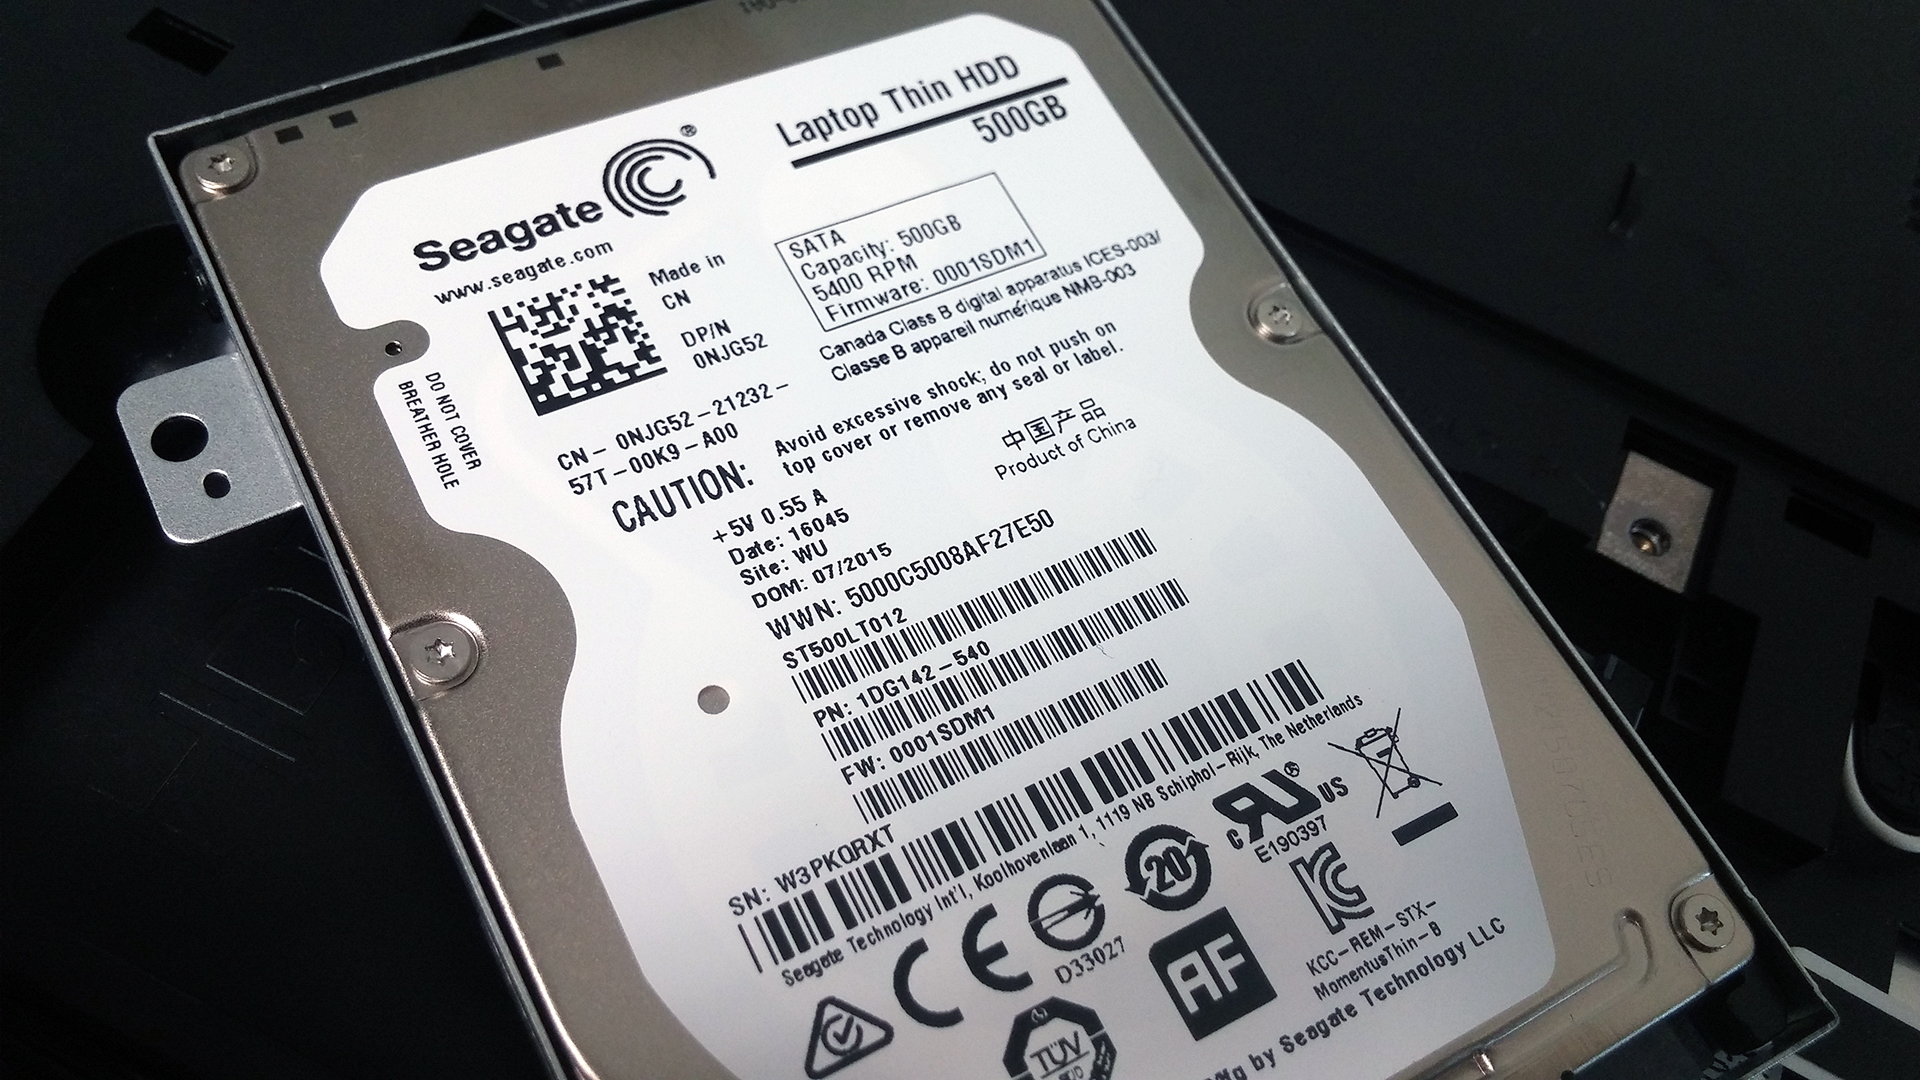
The cover revealed a 500GB Seagate HDD spinning at 5400 rpm and a single RAM slot occupied by an SK hynix 4GB DDR3L-1600 chip. M.2 SSD slot is nowhere to be found and that’s quite acceptable given the asking price. You also have easy access to the Wi-Fi module, which is manufactured by Realtek with model number RTL8723BE. Oh, and don’t forget to remove the battery before you do anything else – it is easily accessible and can be removed just by pushing two lever buttons. It’s rated at 40Wh, which is pretty high for a laptop at this price range.


2. Removing the keyboard
If you still need to perform a full disassembly, we suggest starting with the keyboard. You need to pry it up with a plastic tool of some sort and start with the upper left or upper right corner. Once you’ve removed the keyboard, disconnect the cables and unscrew the remaining bolts that are located beneath the keyboard.


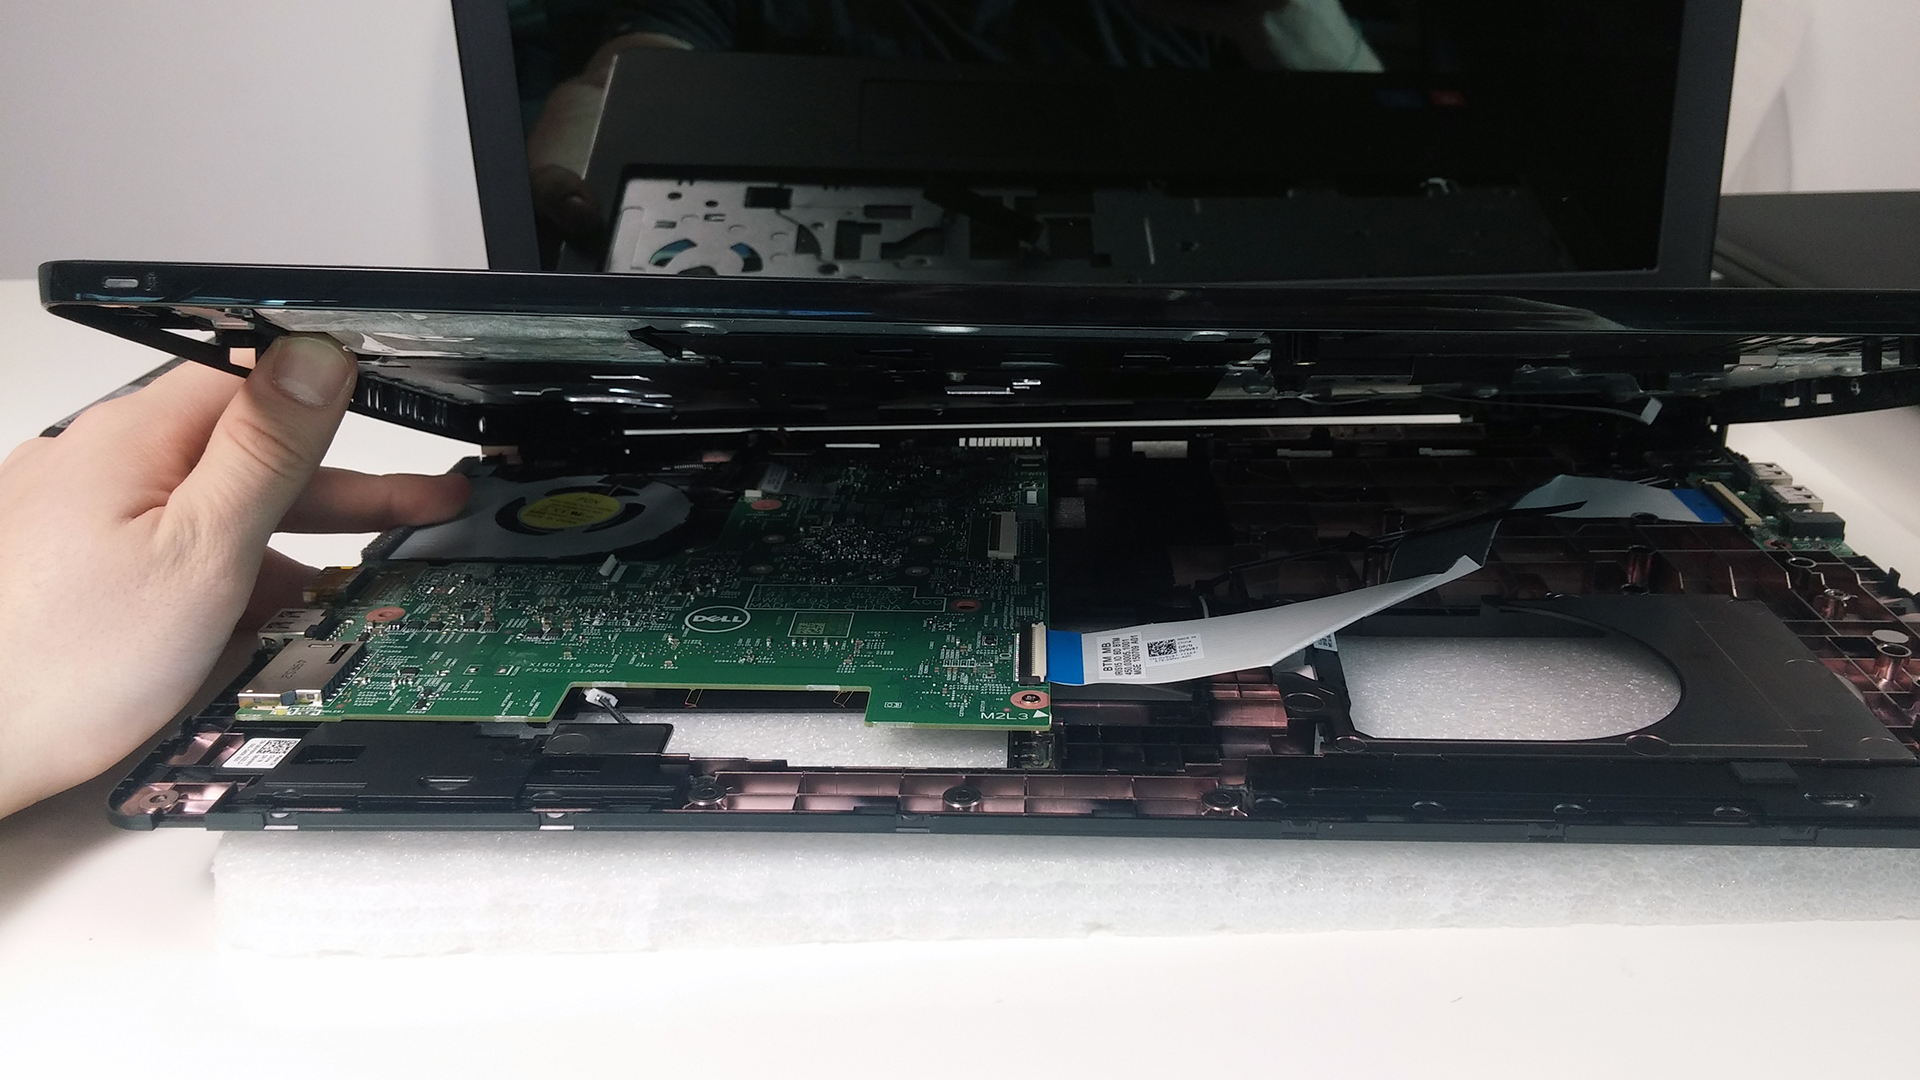
3. Full disassembly
Then turn the laptop around, remove all the screws holding the chassis and pry up the whole bottom. Be careful when doing so because it’s pretty easy to damage the sides of the chassis. Also, we suggest removing the keyboard tray instead of just forcing the bottom plate, just like it’s shown on the photos below.
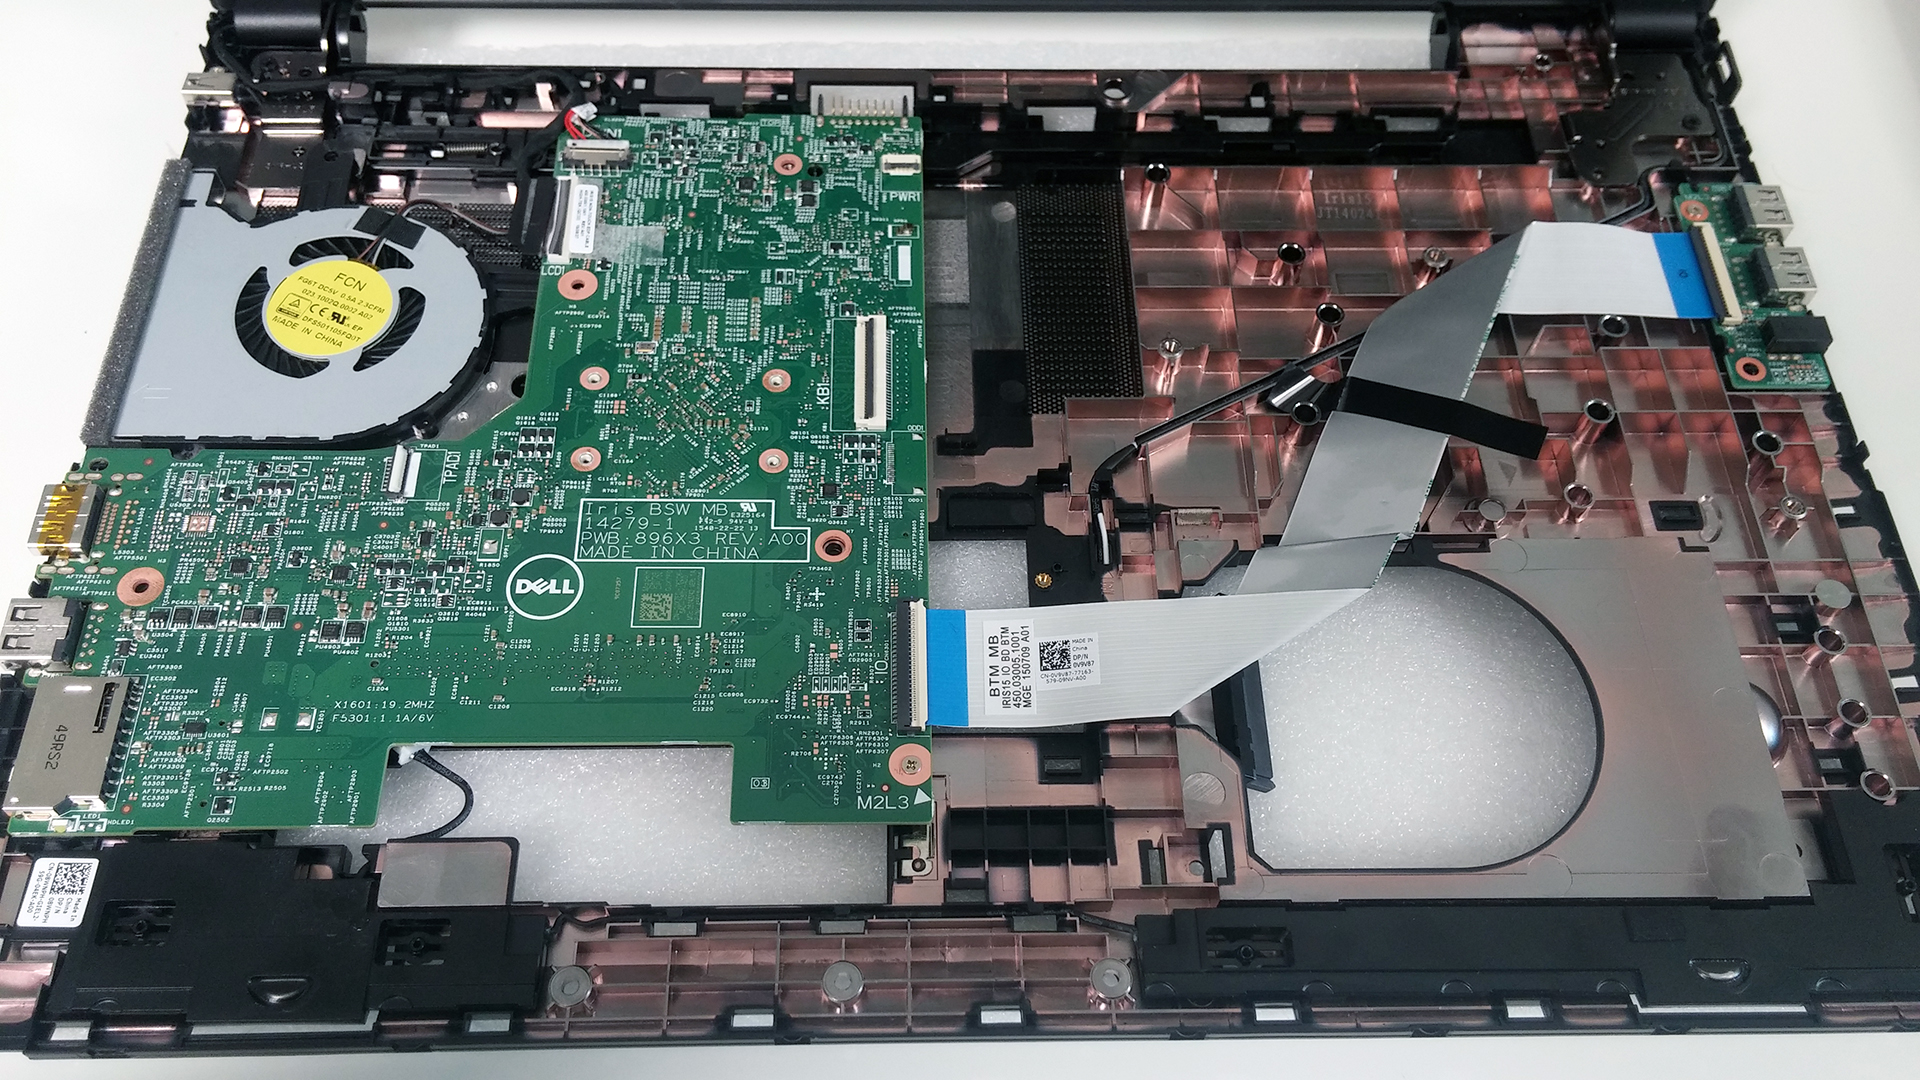
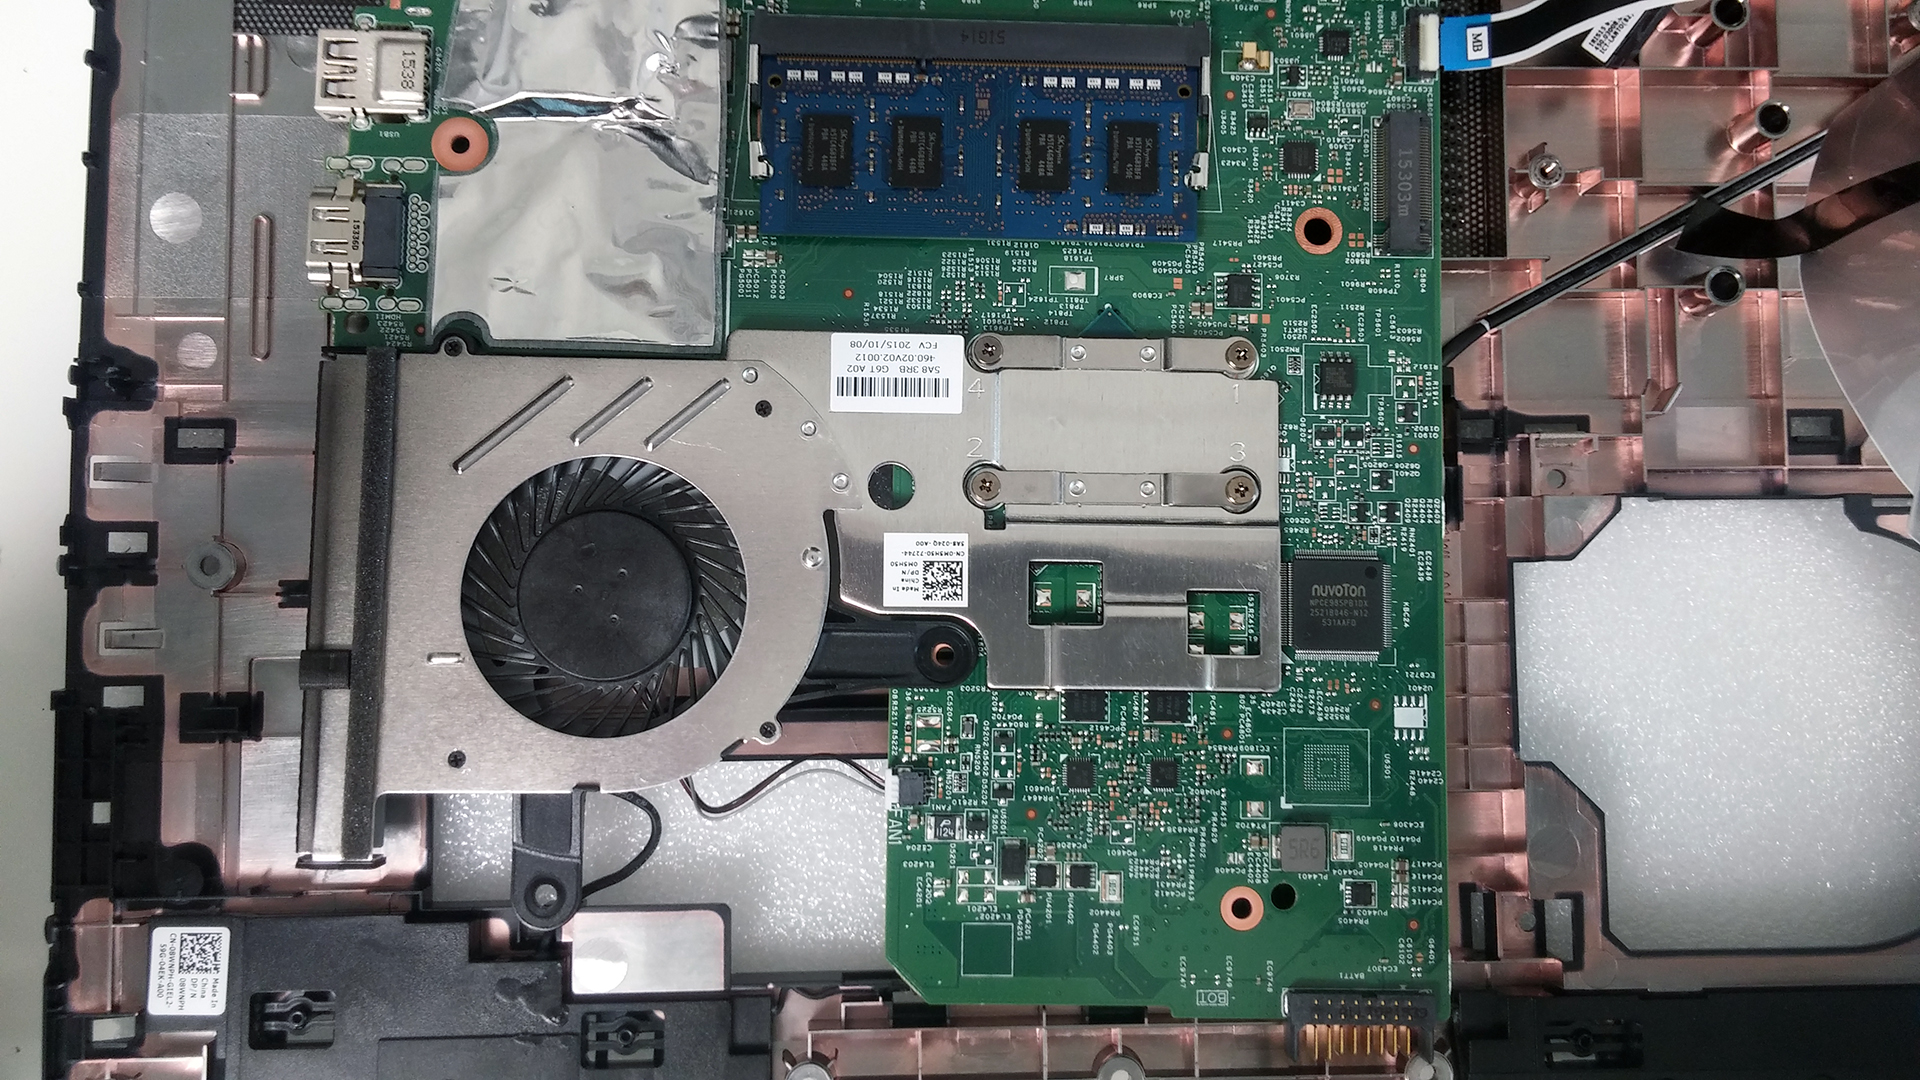
The motherboard is attached with only one screw to the bottom, but there are a couple of cables that need to be removed also. After that, you can flip the motherboard around and you can see the cooling design on the close-up photo below. It might not seem much, but it should be sufficient for a good cooling since we are dealing with a quad-core Pentium N3700 CPU from the Broadwell generation.
You can check the following link for more information about prices and availability: http://amzn.to/1ou80tC


![[June 2026] Best-Selling Laptop Brands on Amazon Global – Apple’s Unrivaled Dominance in Units and Revenue](https://laptopmedia.com/wp-content/uploads/2026/07/GLOBAL-Best-Brands-400x225.jpg)
![[June 2026] Amazon Global: Top 10 Best-Selling Laptops – Apple’s New MacBook Neo Storms to #1, Reshaping the Market with Affordability](https://laptopmedia.com/wp-content/uploads/2026/07/Best-Selling-Laptops-GLOBAL-Top-10-400x225.jpg)
![[June 2026] Amazon Global: Top 10 Best-Selling Gaming Laptops – Acer’s Nitro V 16S AI Dominates Sales, While ASUS Leads Overall Revenue](https://laptopmedia.com/wp-content/uploads/2026/07/Best-Selling-Gaming-Laptops-GLOBAL-Top-10-400x225.jpg)
![[June 2026] Global Ranking of Best-Selling Laptop GPUs on Amazon – NVIDIA RTX 5060 is the Top-Selling Dedicated GPU](https://laptopmedia.com/wp-content/uploads/2026/07/Best-Selling-GPUs-GLOBAL-Top-10-400x225.jpg)
![[June 2026] Global Ranking of Best-Selling Laptop CPUs on Amazon – Apple M5 Dominates, AMD Ryzen 7 260 Gets Solid Premium Share](https://laptopmedia.com/wp-content/uploads/2026/07/Best-Selling-CPUs-GLOBAL-Top-10-400x225.jpg)
