Inside Dell Inspiron 5593 – disassembly and upgrade options
So, does the budget price tag indicate excessive cost-cutting measures, or it just speaks of a great deal?
Check out all Dell Inspiron 5593 prices and configurations in our Specs System or read more in our In-Depth review.
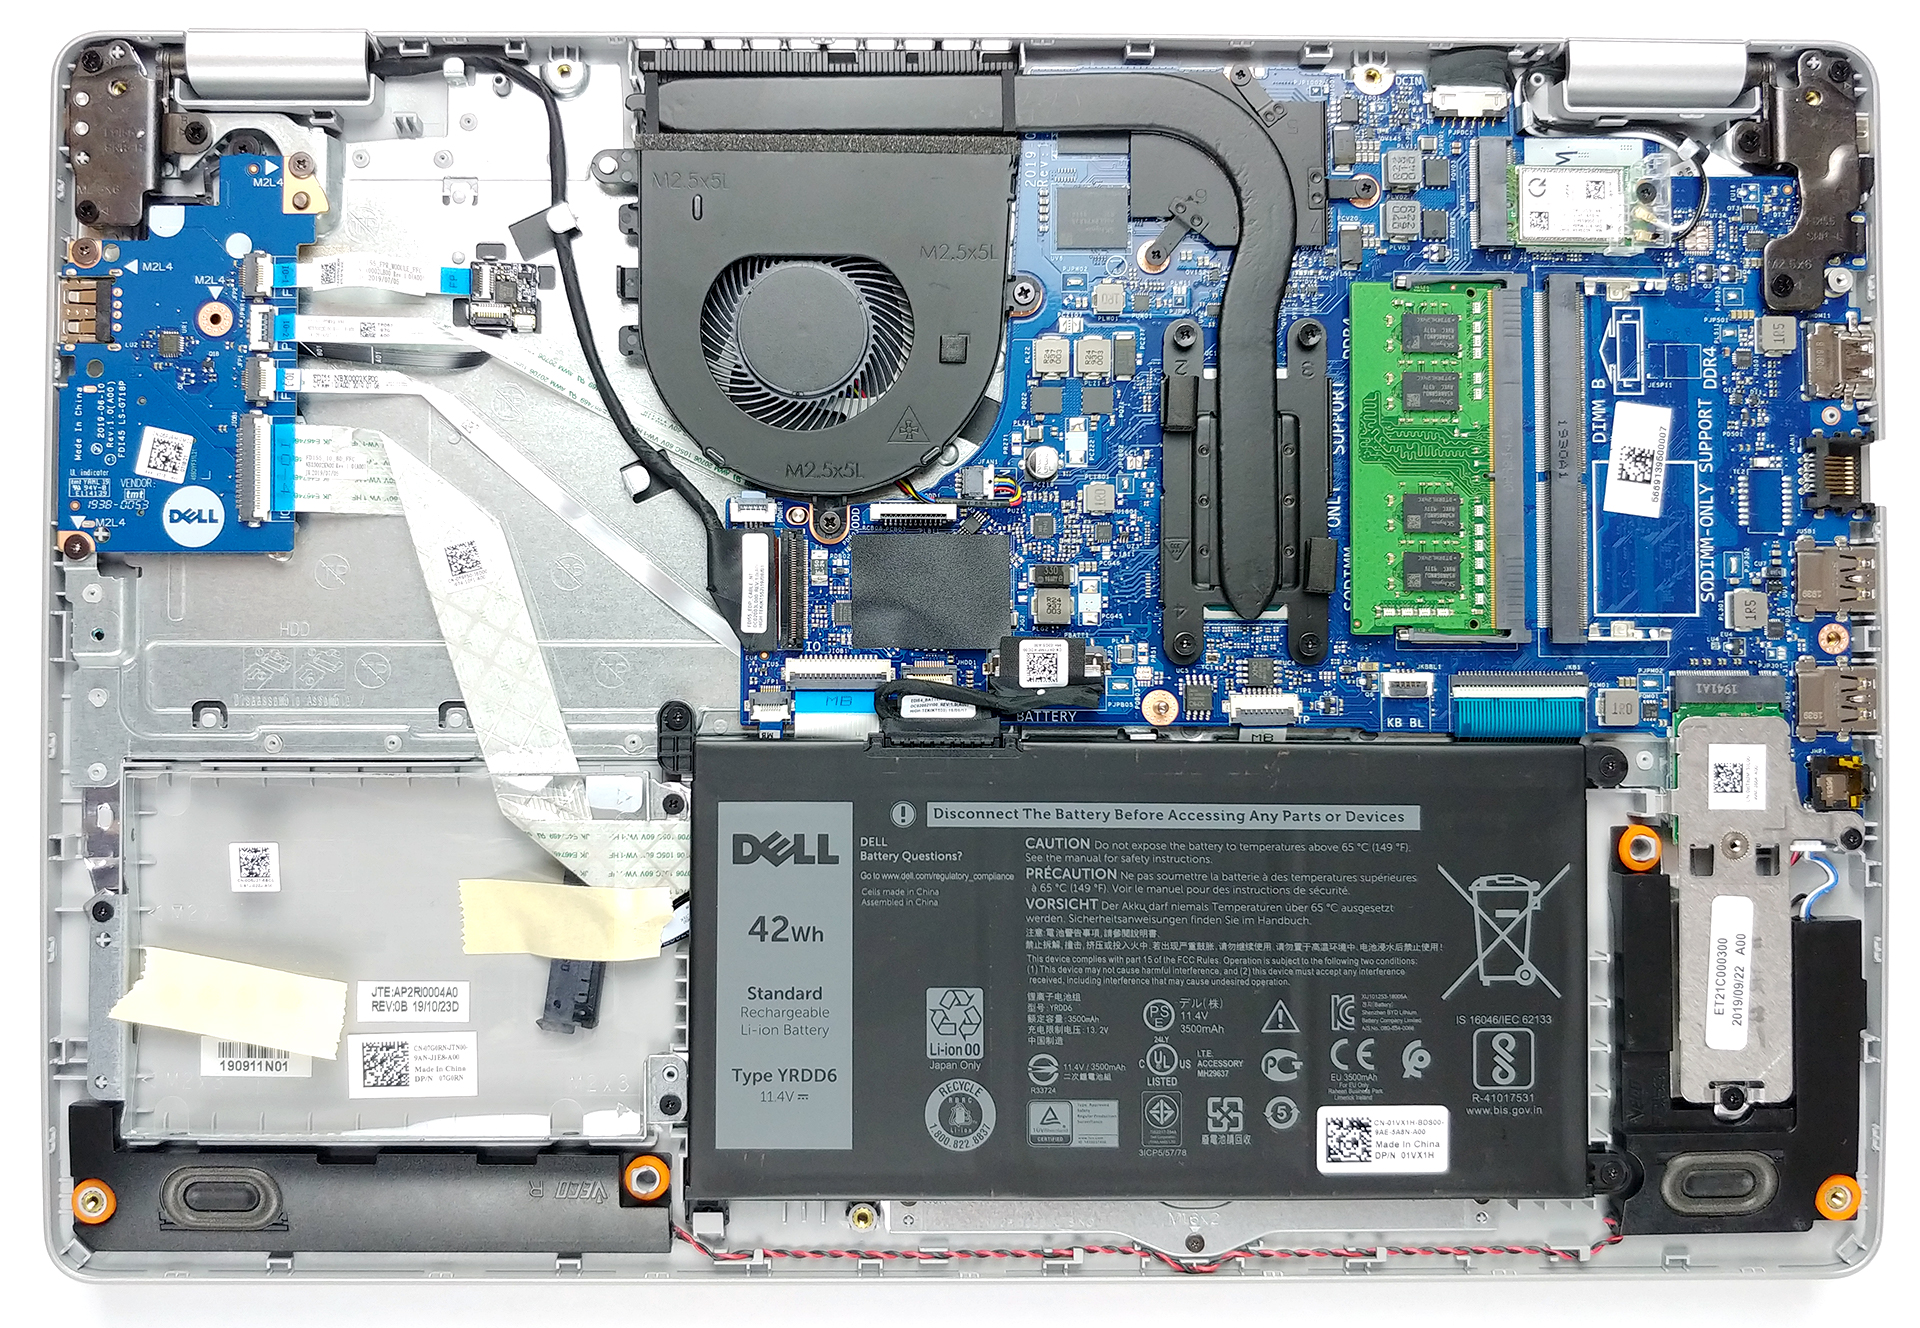
1. Remove the bottom plate
This notebook’s bottom panel is held in place by 9 Phillips-head screws. After you unscrew them you can pop the clips with a plastic tool and lift the plate up towards you. This will reveal a view that is not for the faint-hearted. How could Dell leave so much free space inside?
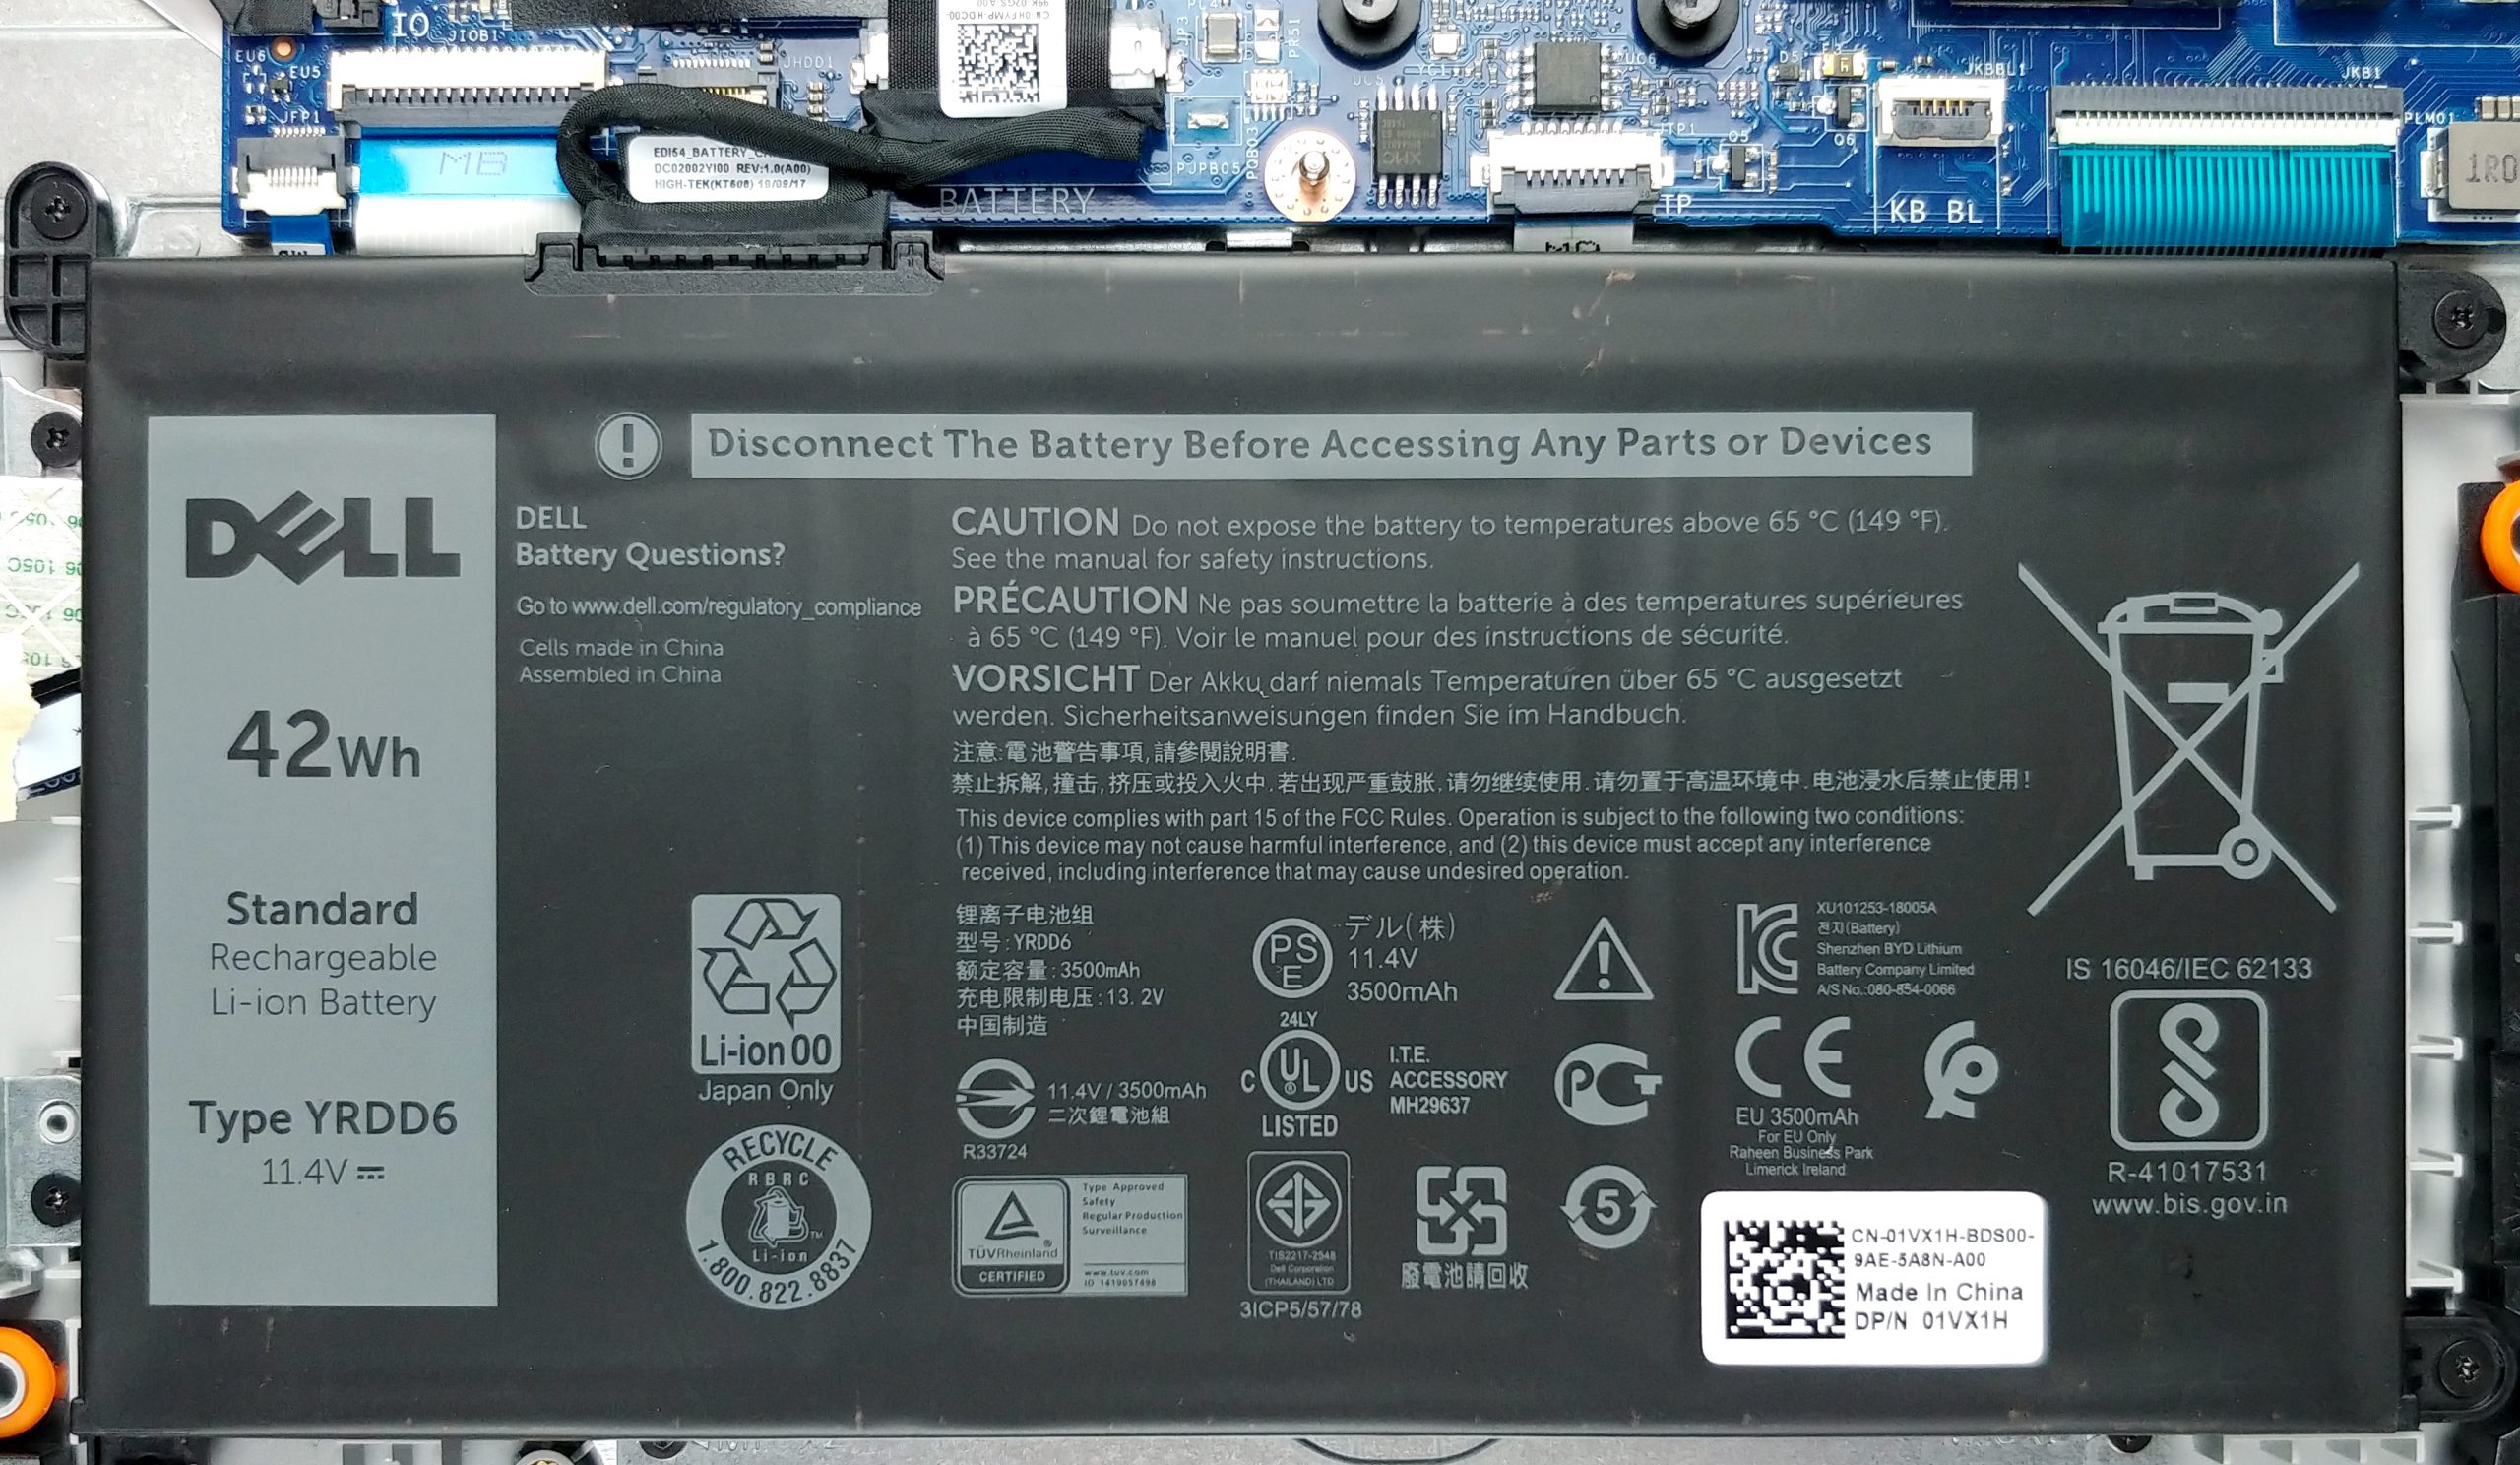
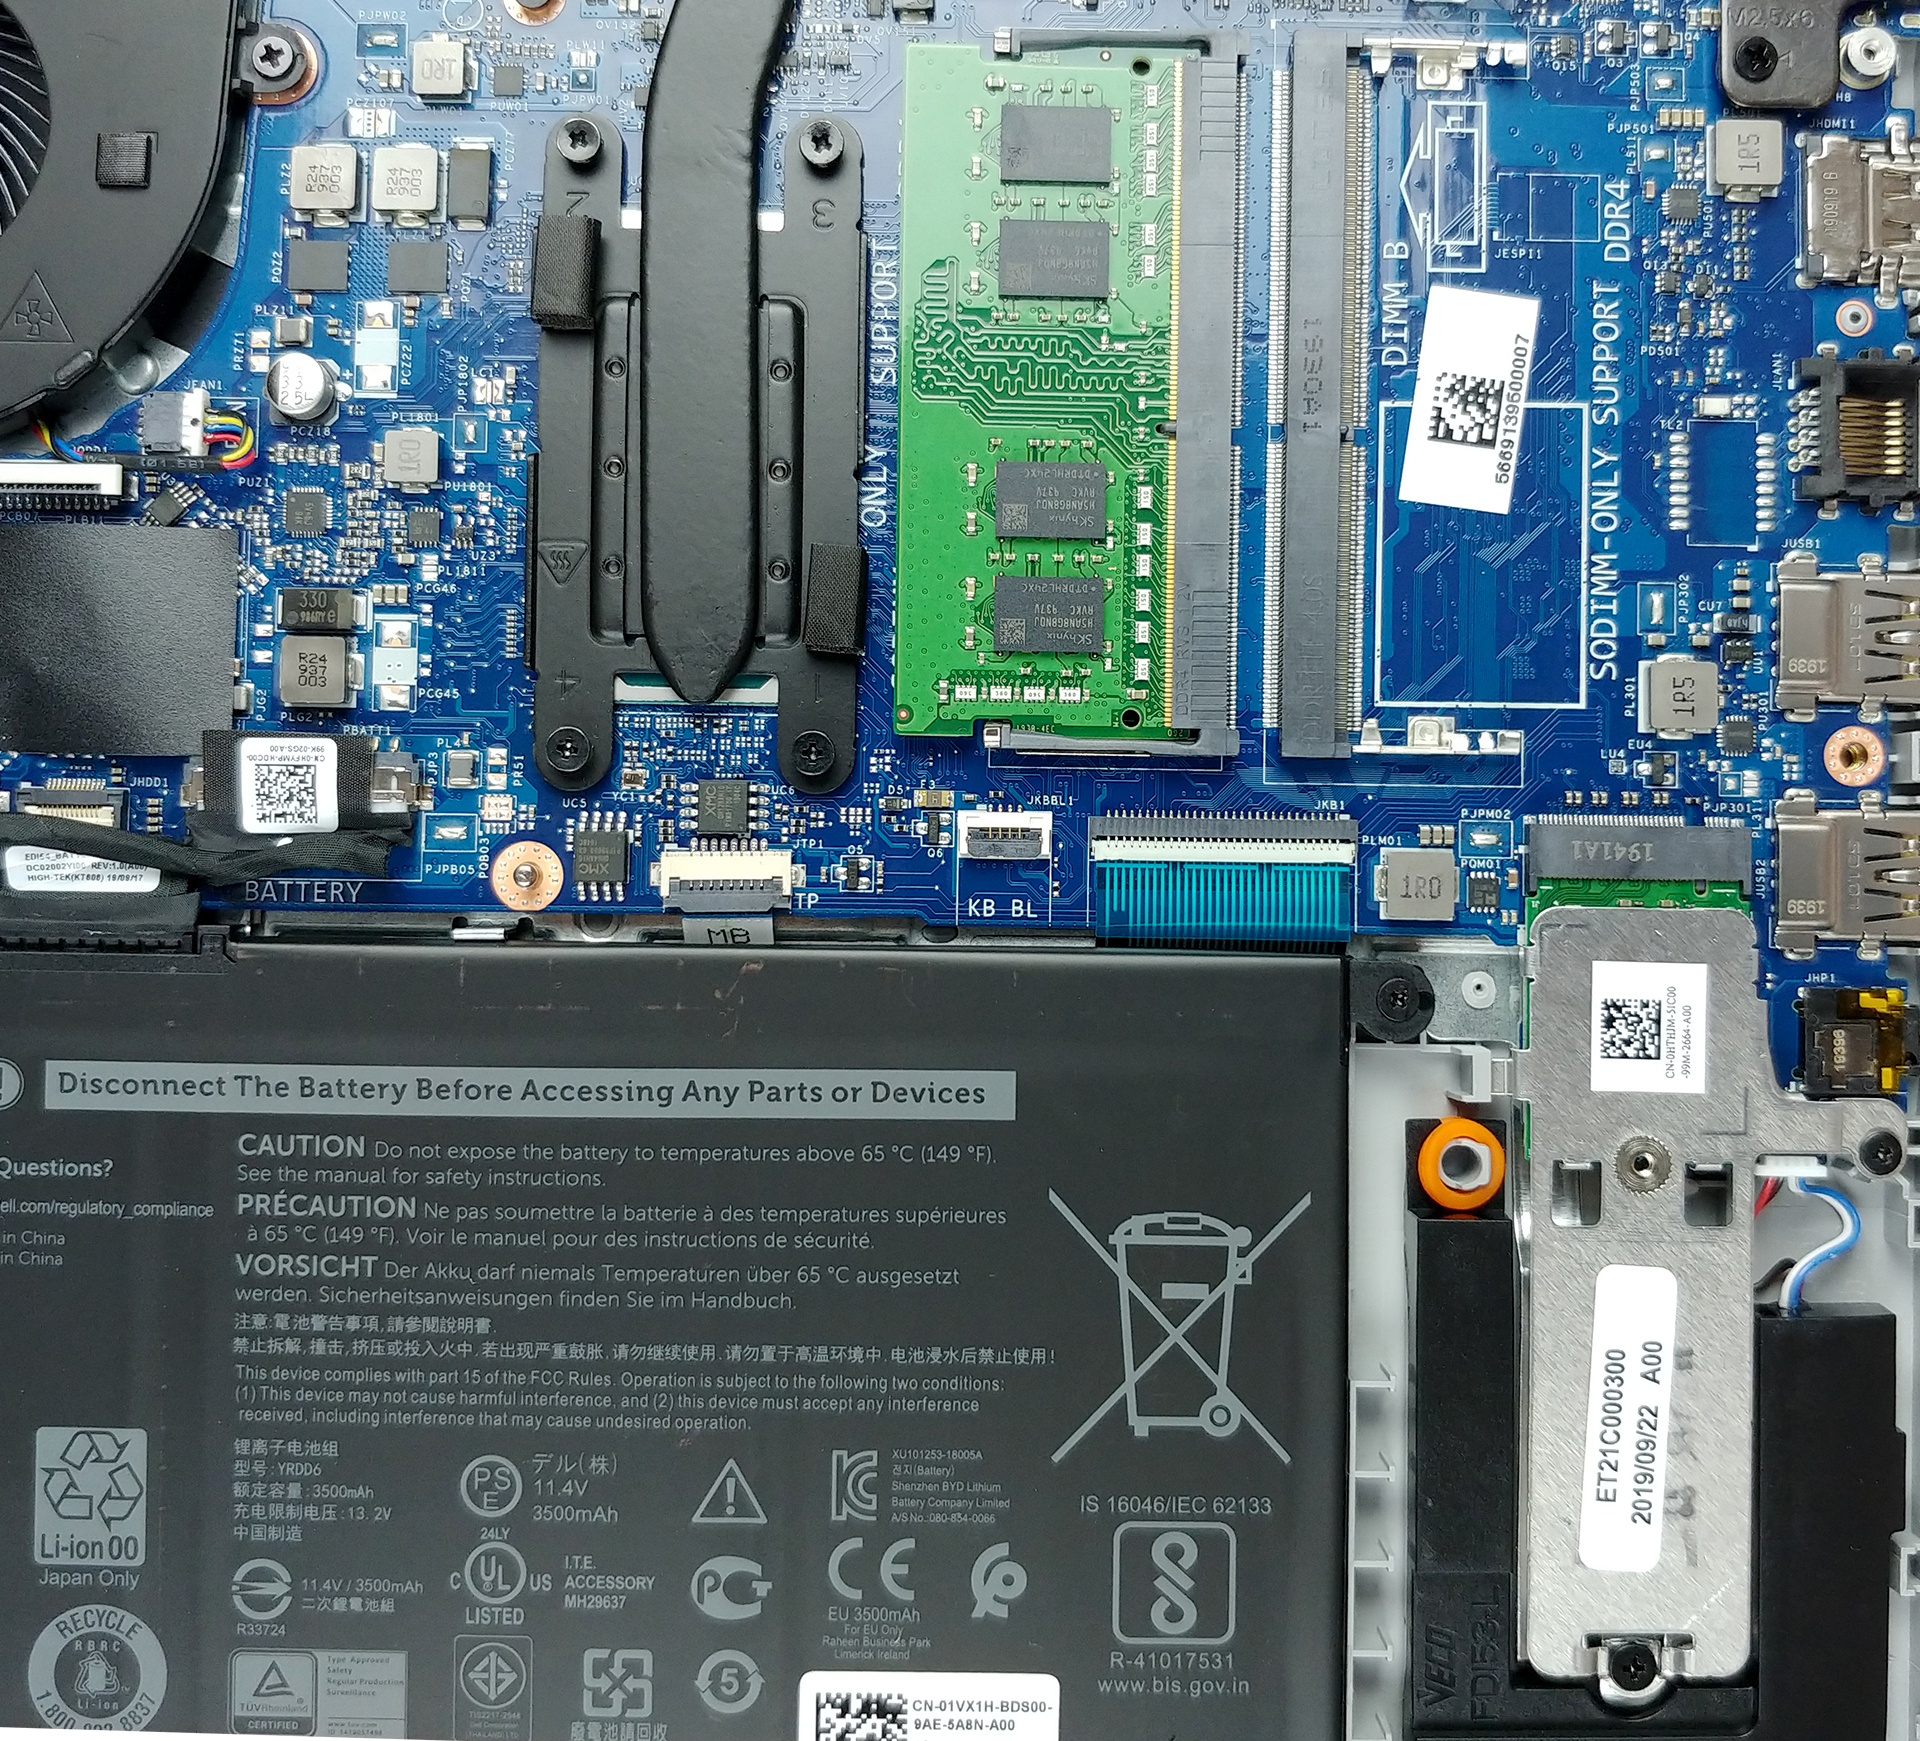
2. Battery
Then at the bottom, something that really could have benefited from the free space – a 42Wh battery.
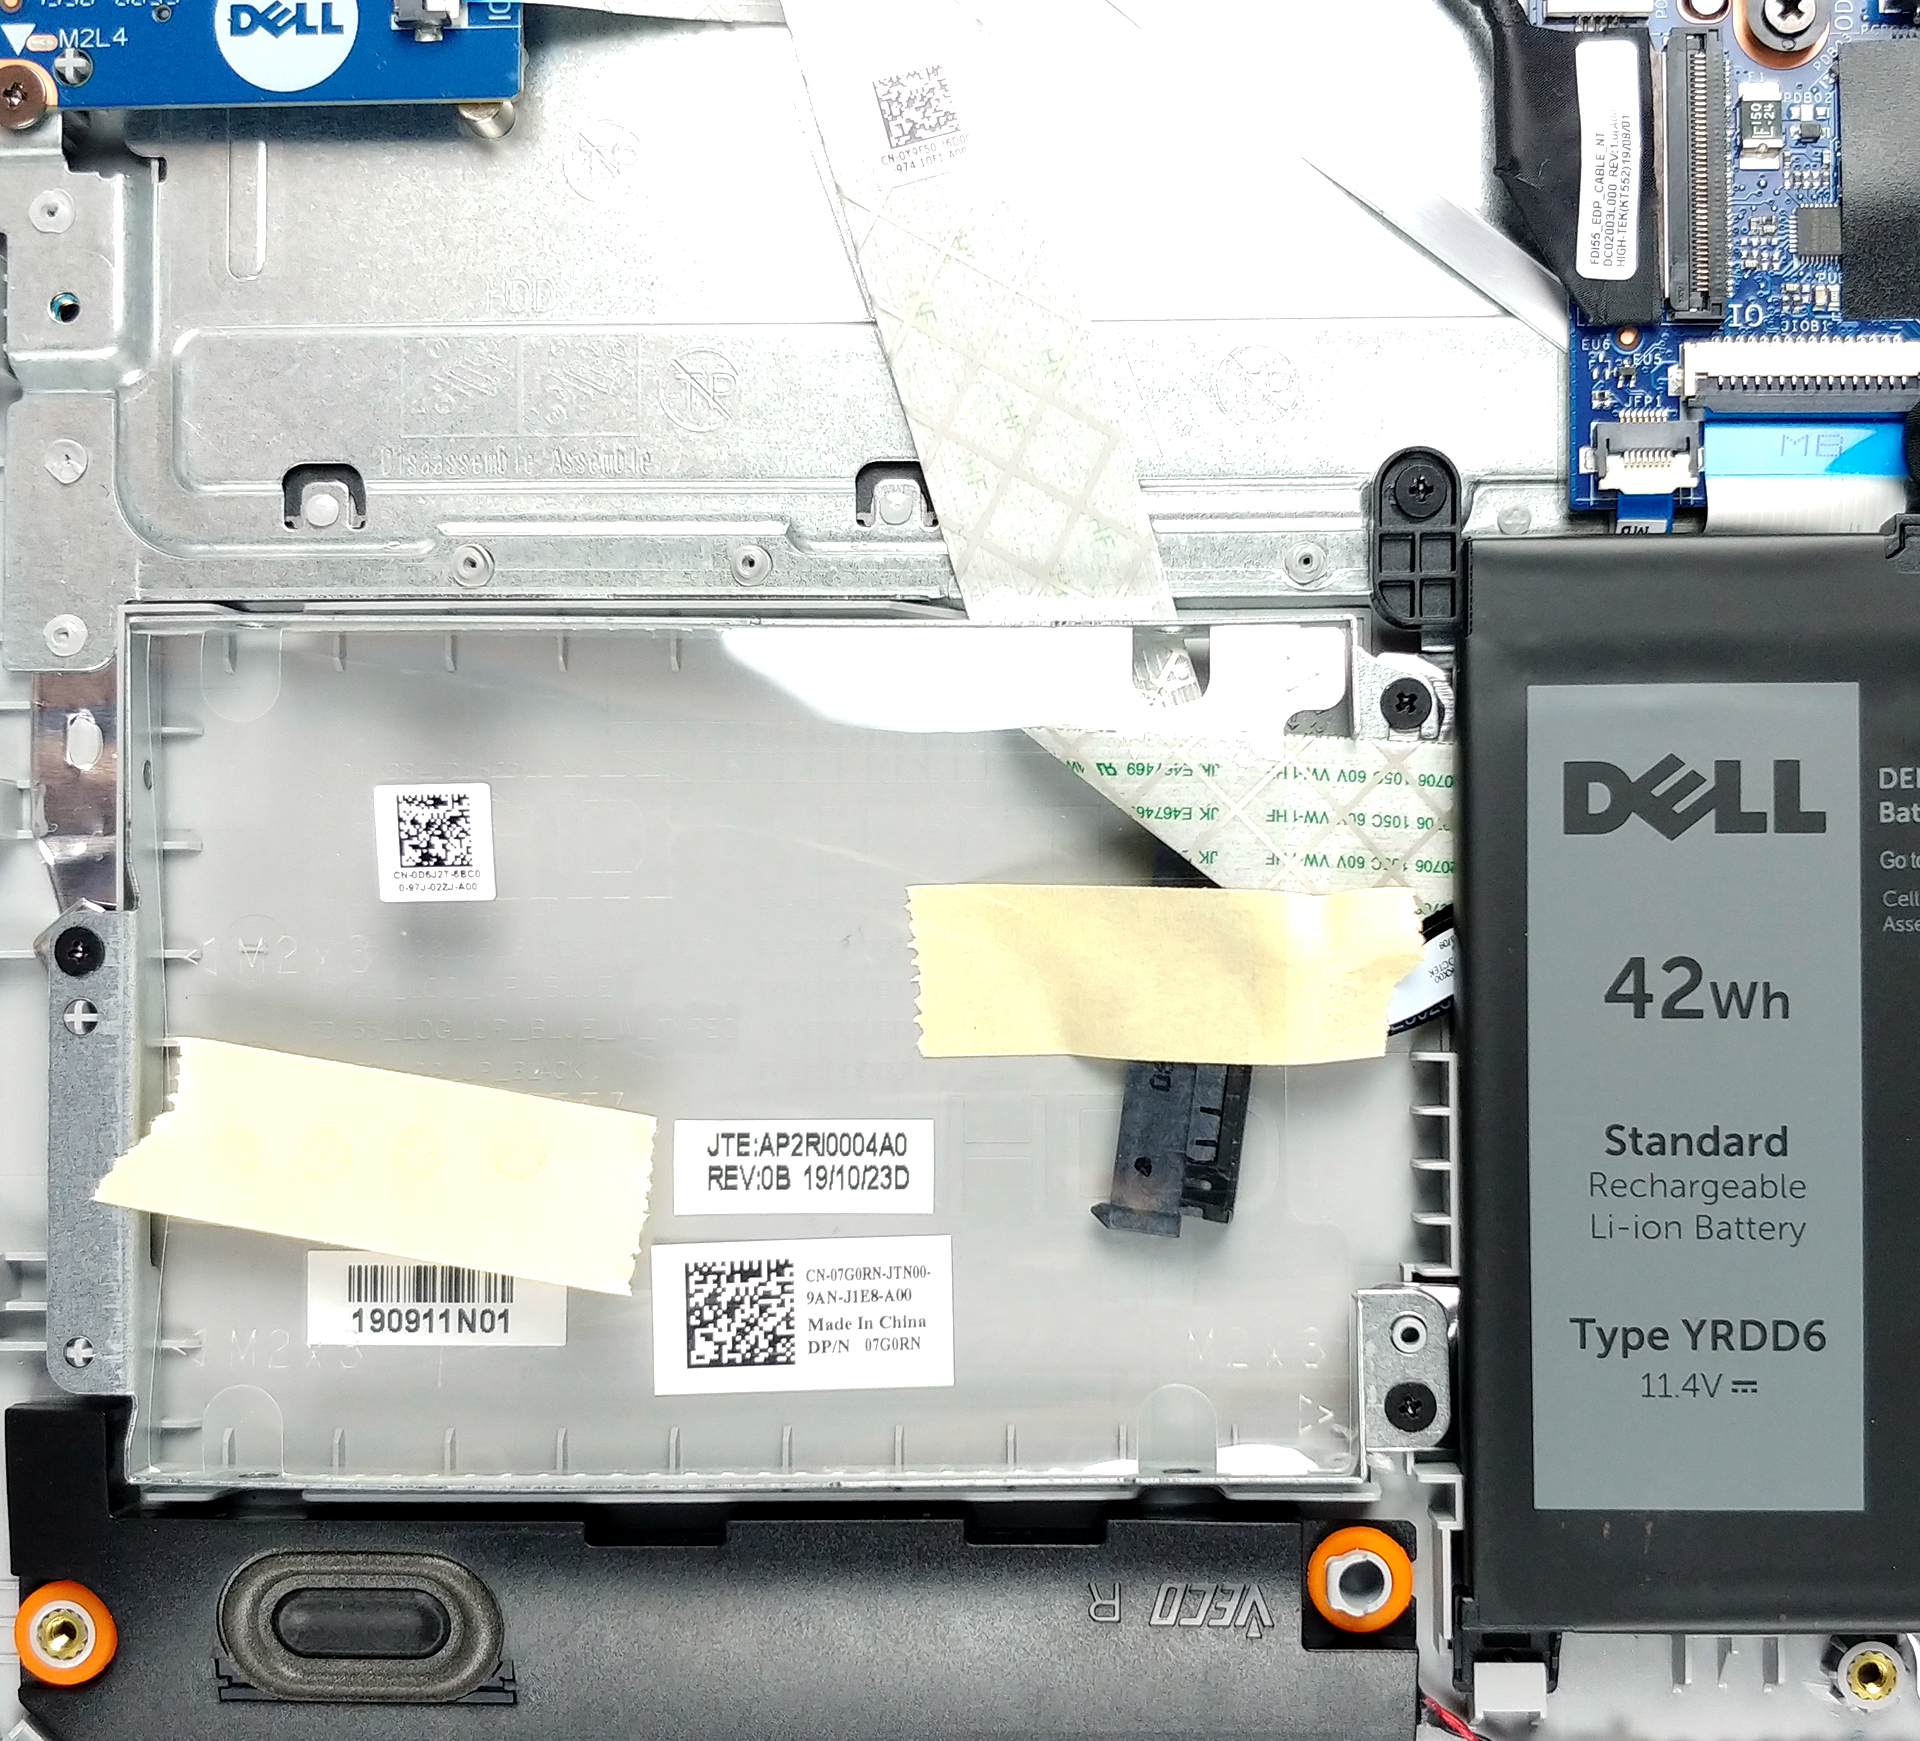
3. Memory and storage
In terms of upgradability, Dell is on point. There are two RAM DIMMs that support up to 16GB of DDR4 memory in total. While this doesn’t sound like that much, keep in mind that the device can work with 3200 MHz memory modules. In addition to that, there is a 2.5″ SATA drive slot that has its SATA cable taped to the chassis and an M.2 slot that can accommodate up to 1TB PCIe x4 drives.
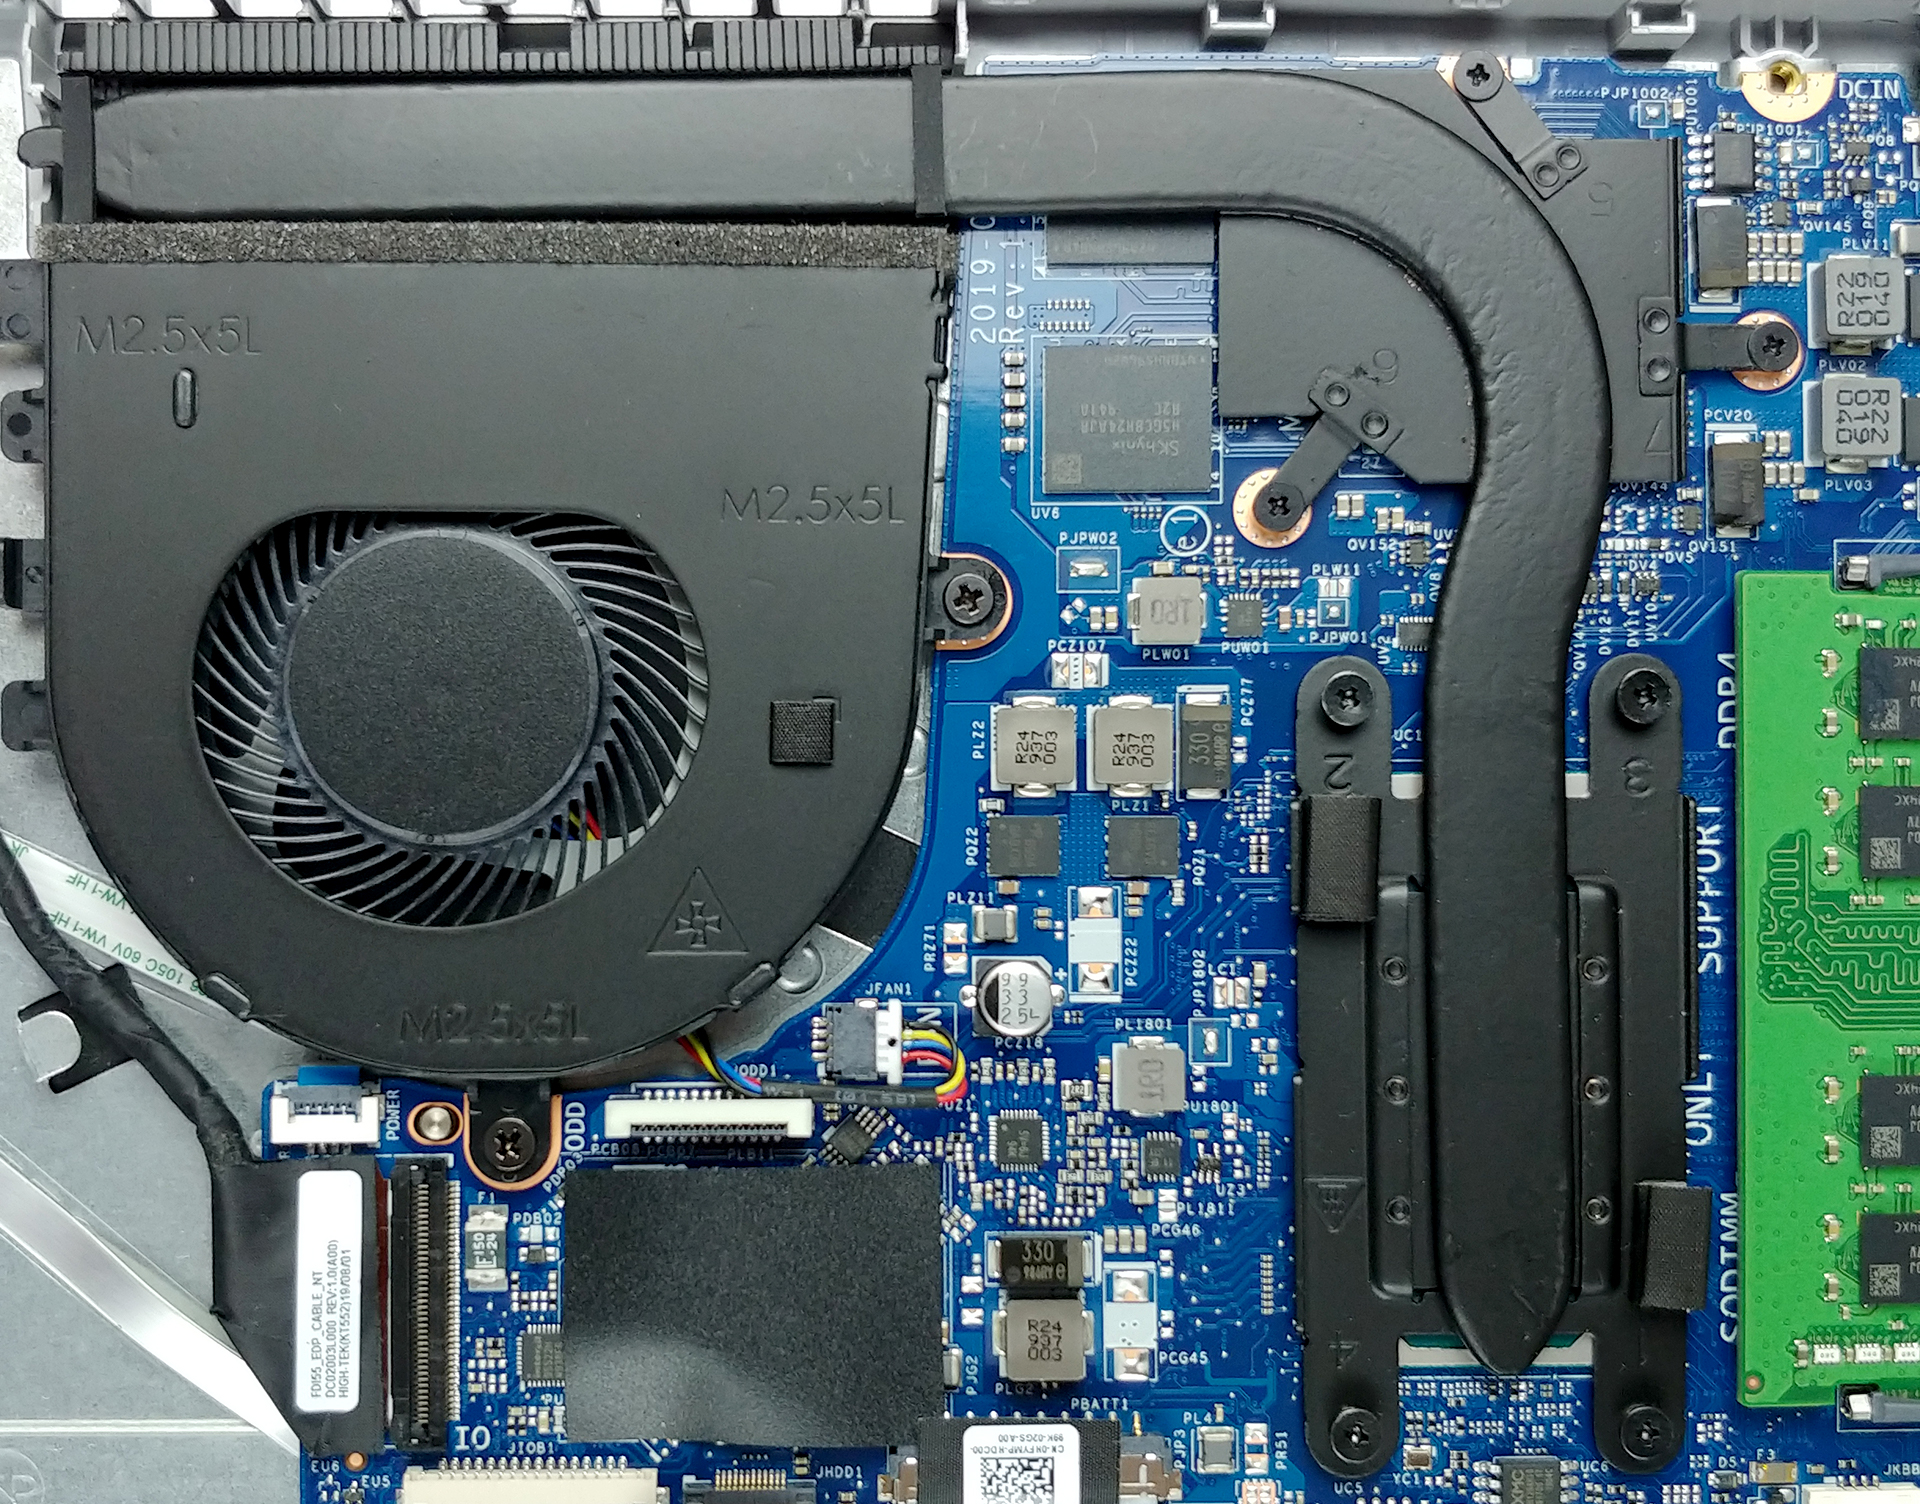
4. Cooling system
Despite the fact that the manufacturer had to redesign the entire motherboard, they still put that terrible, single heat pipe solution on the machine. Indeed, the heat pipe is thick enough that it could be placed in the G7 7790. However, cooling both the CPU and the GPU with the same thermal transfer element and only a single fan – not a good idea.
Check out all Dell Inspiron 5593 prices and configurations in our Specs System or read more in our In-Depth review.


![[June 2026] Best-Selling Laptop Brands on Amazon Global – Apple’s Unrivaled Dominance in Units and Revenue](https://laptopmedia.com/wp-content/uploads/2026/07/GLOBAL-Best-Brands-400x225.jpg)
![[June 2026] Amazon Global: Top 10 Best-Selling Laptops – Apple’s New MacBook Neo Storms to #1, Reshaping the Market with Affordability](https://laptopmedia.com/wp-content/uploads/2026/07/Best-Selling-Laptops-GLOBAL-Top-10-400x225.jpg)
![[June 2026] Amazon Global: Top 10 Best-Selling Gaming Laptops – Acer’s Nitro V 16S AI Dominates Sales, While ASUS Leads Overall Revenue](https://laptopmedia.com/wp-content/uploads/2026/07/Best-Selling-Gaming-Laptops-GLOBAL-Top-10-400x225.jpg)
![[June 2026] Global Ranking of Best-Selling Laptop GPUs on Amazon – NVIDIA RTX 5060 is the Top-Selling Dedicated GPU](https://laptopmedia.com/wp-content/uploads/2026/07/Best-Selling-GPUs-GLOBAL-Top-10-400x225.jpg)
![[June 2026] Global Ranking of Best-Selling Laptop CPUs on Amazon – Apple M5 Dominates, AMD Ryzen 7 260 Gets Solid Premium Share](https://laptopmedia.com/wp-content/uploads/2026/07/Best-Selling-CPUs-GLOBAL-Top-10-400x225.jpg)
