Inside Dell Precision 15 3520 – disassembly, internal photos and upgrade options
Dell’s Precision 15 3520 isn’t hard for maintenance, although there’s not service lid for easy access to the internals. Still, the bottom plate comes off pretty easy.
You can find the available configurations and their prices here: http://amzn.to/2rcztTi
1. Removing the bottom
You can pry up the bottom panel after you remove all the screws around the chassis. Removing the bottom gives access to all of the hardware including the cooling system.


2. Storage
Here’s the biggest downfall of the laptop – you can either use a 2.5-inch HDD/SSD or an M.2 SSD. The motherboard supports both standards but the positioning of the M.2 slot makes it impossible to insert a 2.5-inch drive. Our unit, however, came with an M.2 PCIe NVMe SSD from Toshiba with 256GB capacity.

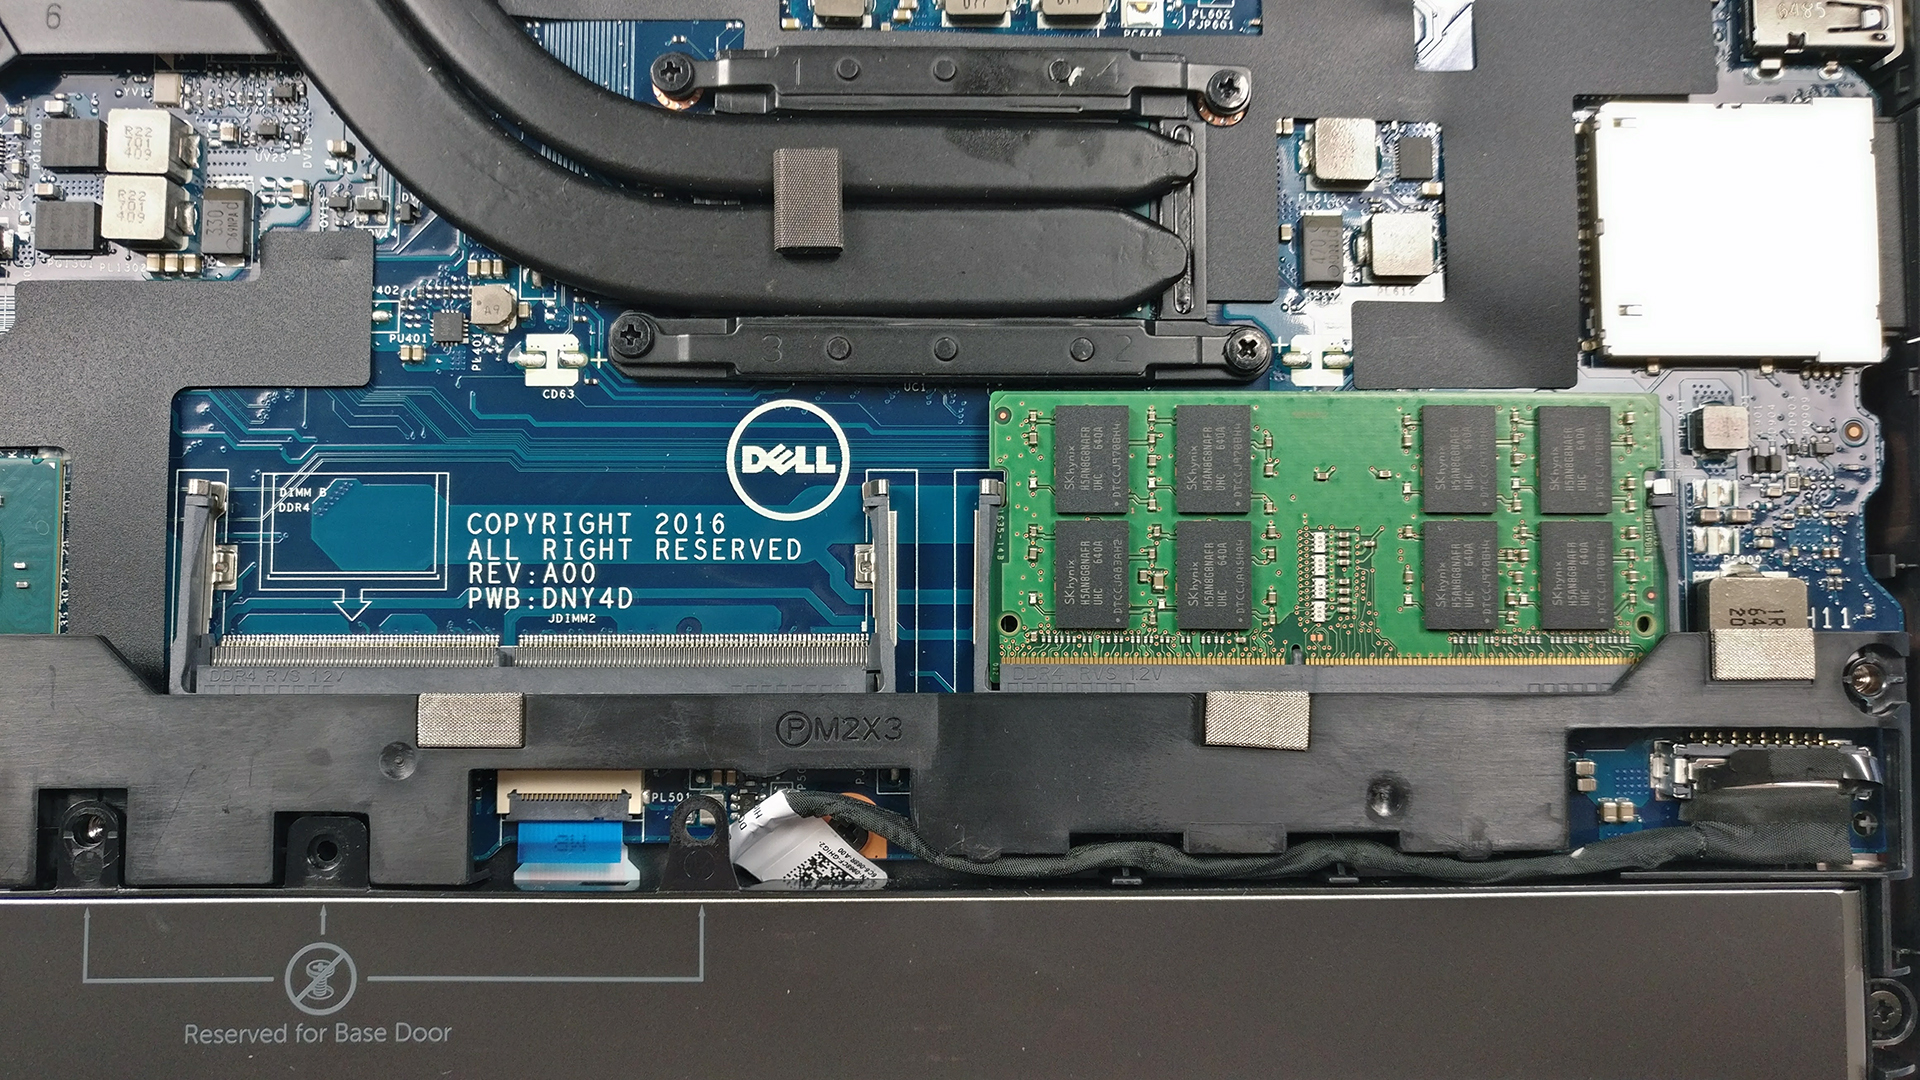
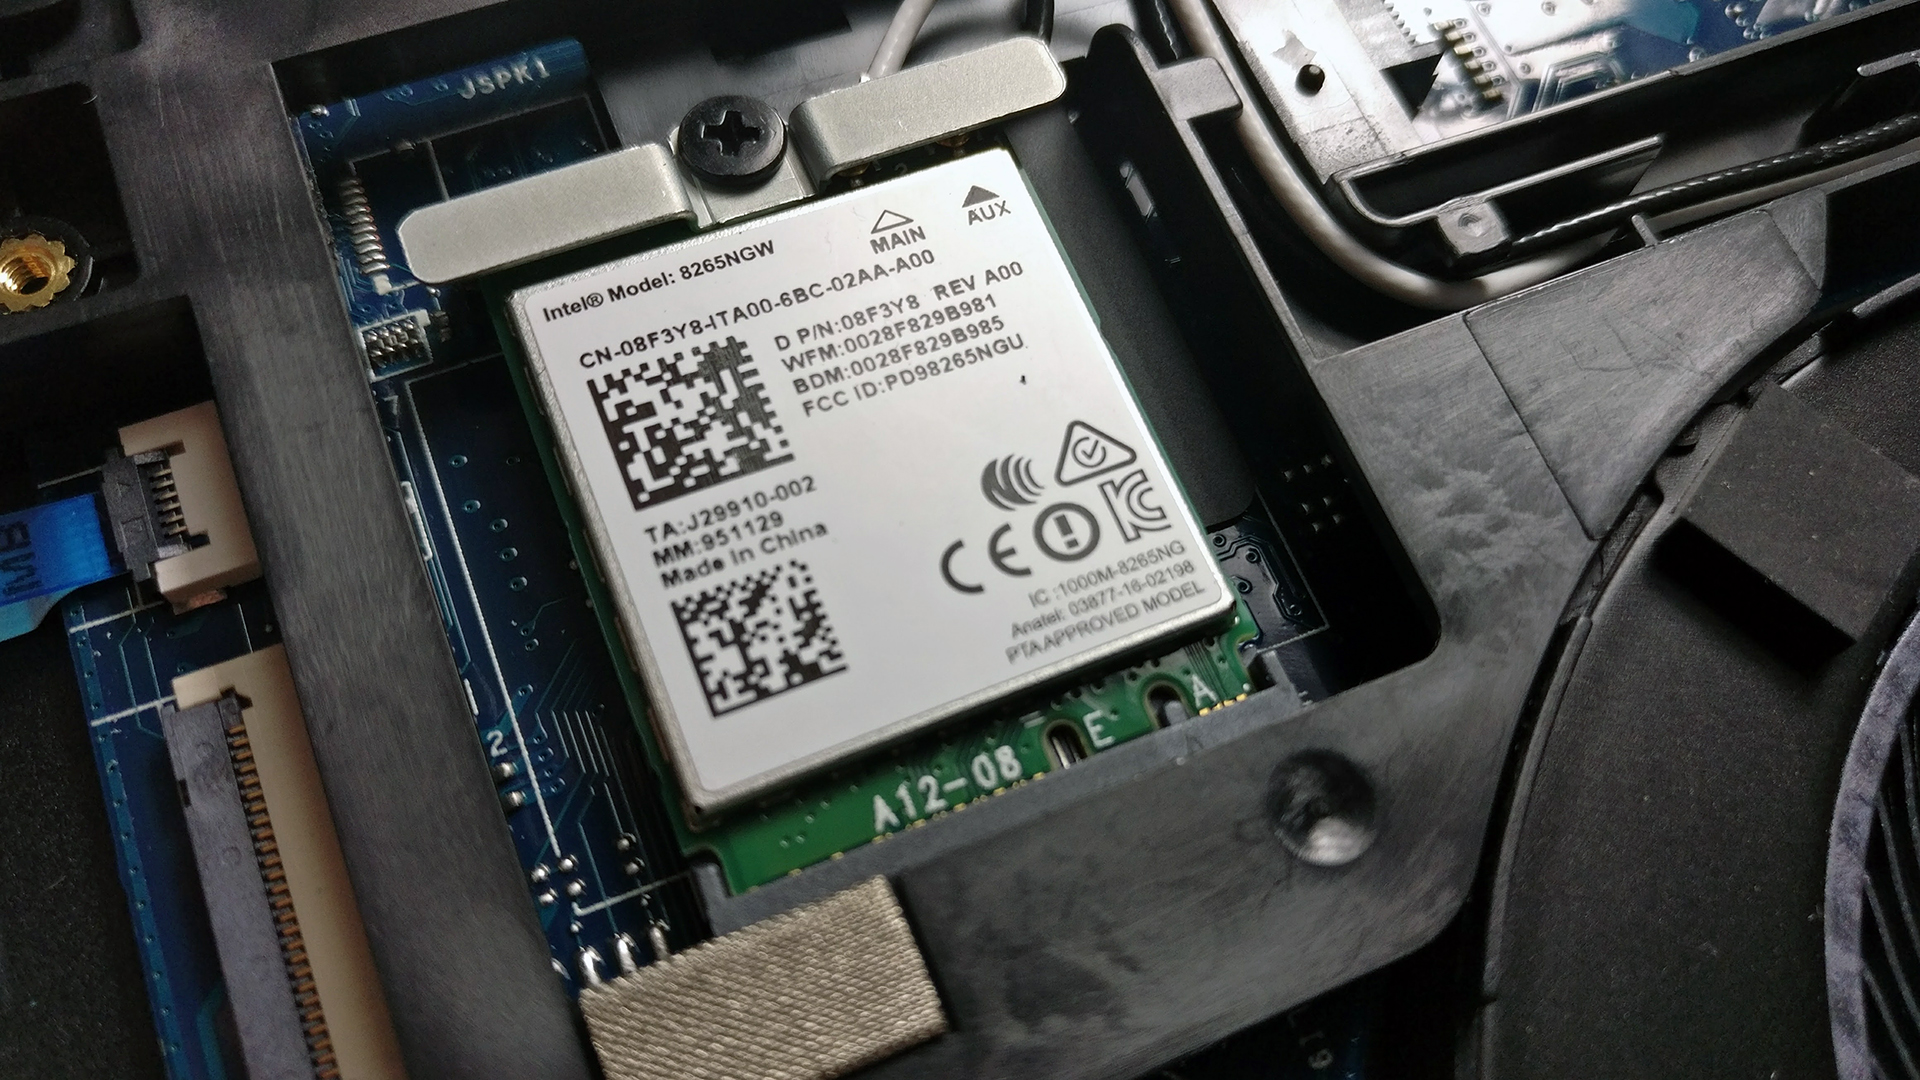
3. Memory, battery and Wi-Fi
As usual, the mainboard holds two RAM slots each supporting up to 16GB of DDR4-2400 chips. The unit we reviewed featured only one 8GB DDR4-2400 RAM chip manufactured by SK Hynix.

The Wi-Fi card is located next to the cooling fan and BIOS battery. It’s Intel 8265NGW.
The battery is located under the wrist rest area and it’s rated at 68Wh delivering excellent runtimes.

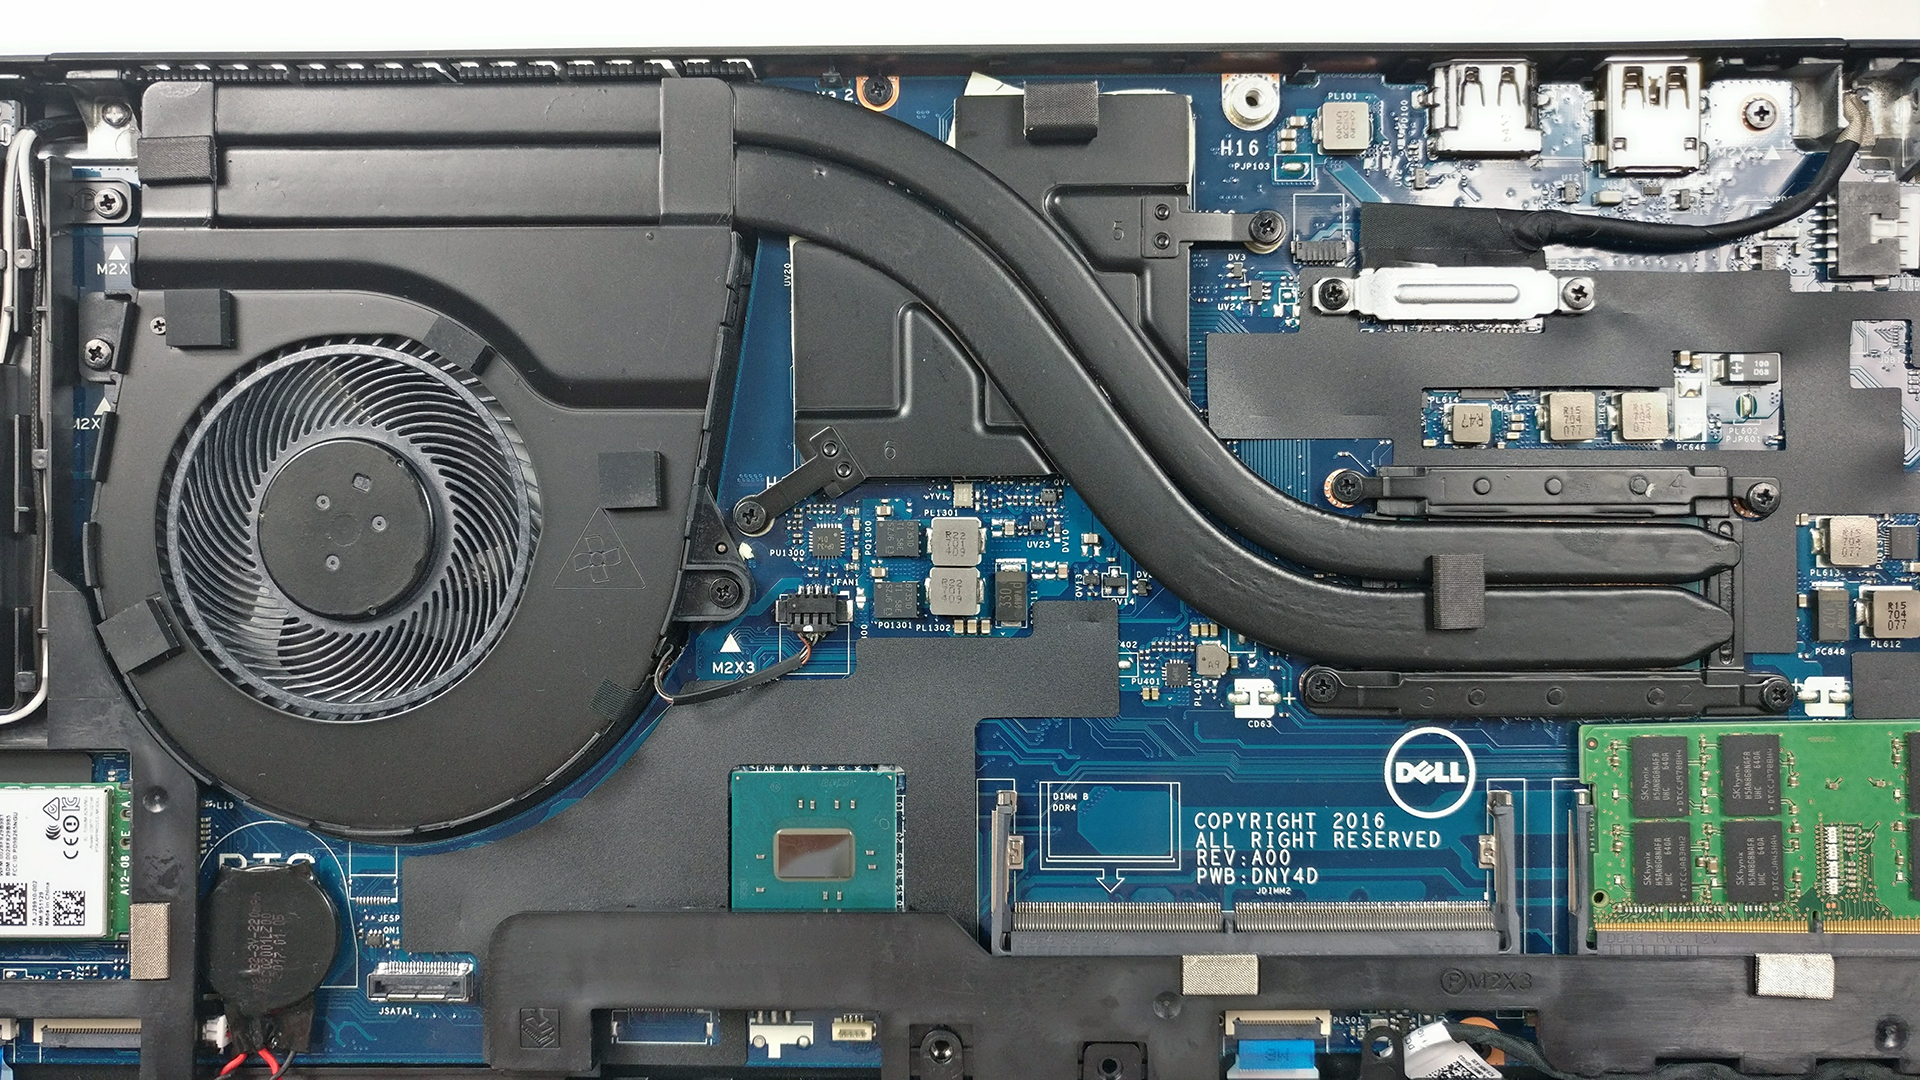
4. Cooling system
The cooling system consists of two heat pipes going across both heatsinks – for the CPU and GPU – and a single fan takes care of the heat management. Our tests confirm that the currently implemented just isn’t enough to support the hardware under heavy workload.
The full review of the Dell Inspiron 15 3520 can be found here.
You can find the available configurations and their prices here: http://amzn.to/2rcztTi


![[June 2026] Best-Selling Laptop Brands on Amazon Global – Apple’s Unrivaled Dominance in Units and Revenue](https://laptopmedia.com/wp-content/uploads/2026/07/GLOBAL-Best-Brands-400x225.jpg)
![[June 2026] Amazon Global: Top 10 Best-Selling Laptops – Apple’s New MacBook Neo Storms to #1, Reshaping the Market with Affordability](https://laptopmedia.com/wp-content/uploads/2026/07/Best-Selling-Laptops-GLOBAL-Top-10-400x225.jpg)
![[June 2026] Amazon Global: Top 10 Best-Selling Gaming Laptops – Acer’s Nitro V 16S AI Dominates Sales, While ASUS Leads Overall Revenue](https://laptopmedia.com/wp-content/uploads/2026/07/Best-Selling-Gaming-Laptops-GLOBAL-Top-10-400x225.jpg)
![[June 2026] Global Ranking of Best-Selling Laptop GPUs on Amazon – NVIDIA RTX 5060 is the Top-Selling Dedicated GPU](https://laptopmedia.com/wp-content/uploads/2026/07/Best-Selling-GPUs-GLOBAL-Top-10-400x225.jpg)
![[June 2026] Global Ranking of Best-Selling Laptop CPUs on Amazon – Apple M5 Dominates, AMD Ryzen 7 260 Gets Solid Premium Share](https://laptopmedia.com/wp-content/uploads/2026/07/Best-Selling-CPUs-GLOBAL-Top-10-400x225.jpg)

This fan can barely handle the heat of just that powerful CPU, let alone another discrete graphics card
I have installed M.2 SSD and 2.5″ HDD both in my Dell Precision laptop after a little bit alteration.
you said right “The motherboard supports both standards but the positioning of the M.2 slot makes it impossible to insert a 2.5-inch drive” in a usual.
How did you get that right?
Please share your journey, I’m at the same cross roads.
Thank you
You have to remove the HDD caddy. That will give you enough clearance to place a Sata Drive, in between the Nvme SSD and the battery. Some people have use double side tape to hold the Drive down, but there is enough space to be creative. You can hold the Drive either with the internal chassis of the laptop or Hold it with the battery itself as it is secured with screws. In my case i inserted “spacers” next to the Sata Drive to pressure it into the battery preventing it from moving. Then secure it to the battery with… Read more »
i used a small enclosure just dont forget to add somthing under and in between so it doesnt bend the ssd