Inside Dell XPS 13 9300 – disassembly and upgrade options
As usual, the XPS 13 9300 doesn’t excel with its upgradability. However, this doesn’t prevent us from taking a peek inside!
Check out all Dell XPS 13 9300 prices and configurations in our Specs System or read more in our In-Depth review.
1. Remove the bottom plate
To get inside, you need to unscrew 8 Torx-head screws. After that, pry your way around the bottom panel, with the help of a sharp plastic tool. We found it to be easier to start from the front, just below the battery LED.

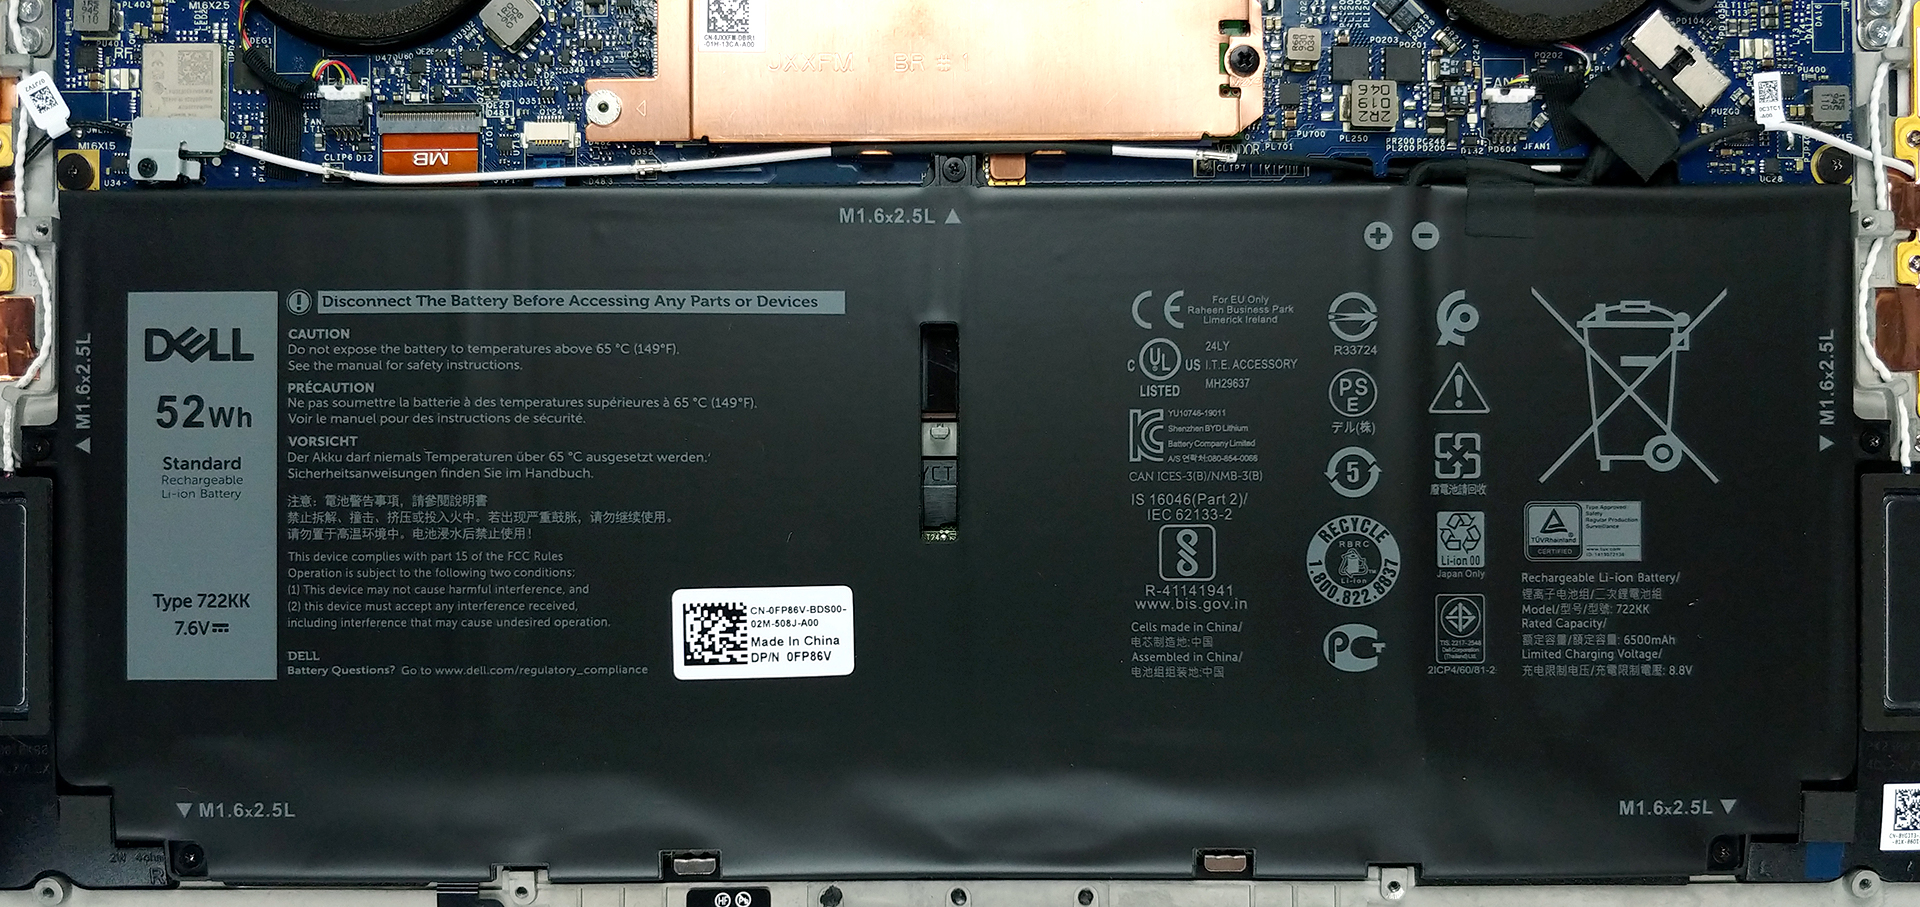
2. Battery
Battery-wise, the laptop features a 4-cell 52Wh unit.
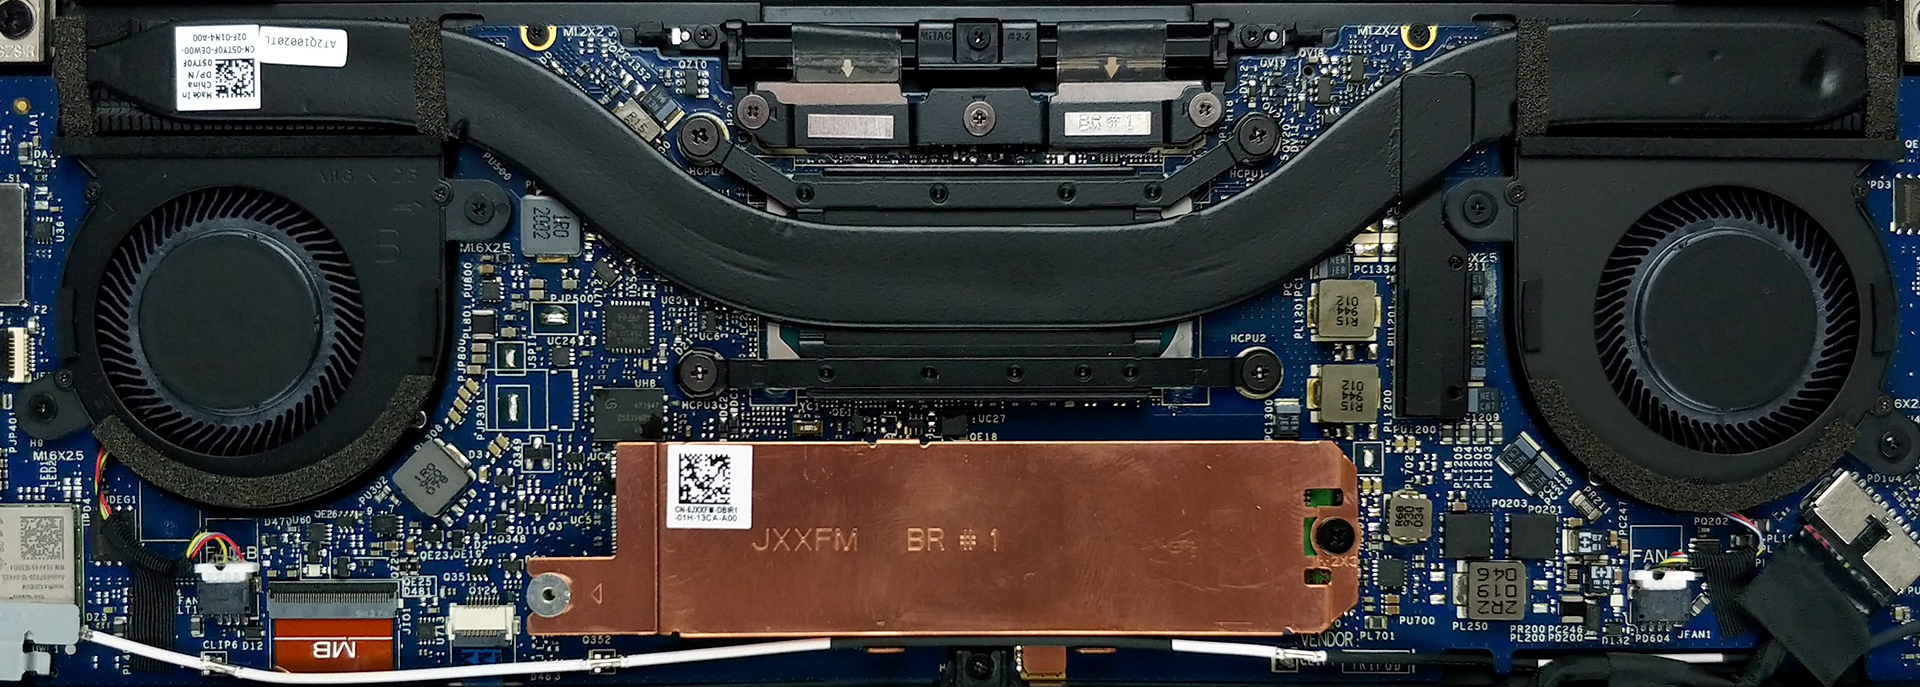
3. Cooling, memory, and storage
In contrast to last year, where Dell was using two tiny heat pipes, now you can see a single thick boy, which brings the heat to two heat spreaders on the opposite sides of the device. Additionally, there are two very small fans, blowing the heat away from them.
Traditionally, the XPS 13 comes with its memory soldered to the motherboard. In their official specs sheet, Dell states that it provides models, equipped with 4GB, 8GB, 16GB, and 32GB of LPDDR4x memory, working at 3733 MHz. That’s quite the range. And in terms of storage, there is a single M.2 PCIe x4 drive slot.
Check out all Dell XPS 13 9300 prices and configurations in our Specs System or read more in our In-Depth review.


![[June 2026] Best-Selling Laptop Brands on Amazon Global – Apple’s Unrivaled Dominance in Units and Revenue](https://laptopmedia.com/wp-content/uploads/2026/07/GLOBAL-Best-Brands-400x225.jpg)
![[June 2026] Amazon Global: Top 10 Best-Selling Laptops – Apple’s New MacBook Neo Storms to #1, Reshaping the Market with Affordability](https://laptopmedia.com/wp-content/uploads/2026/07/Best-Selling-Laptops-GLOBAL-Top-10-400x225.jpg)
![[June 2026] Amazon Global: Top 10 Best-Selling Gaming Laptops – Acer’s Nitro V 16S AI Dominates Sales, While ASUS Leads Overall Revenue](https://laptopmedia.com/wp-content/uploads/2026/07/Best-Selling-Gaming-Laptops-GLOBAL-Top-10-400x225.jpg)
![[June 2026] Global Ranking of Best-Selling Laptop GPUs on Amazon – NVIDIA RTX 5060 is the Top-Selling Dedicated GPU](https://laptopmedia.com/wp-content/uploads/2026/07/Best-Selling-GPUs-GLOBAL-Top-10-400x225.jpg)
![[June 2026] Global Ranking of Best-Selling Laptop CPUs on Amazon – Apple M5 Dominates, AMD Ryzen 7 260 Gets Solid Premium Share](https://laptopmedia.com/wp-content/uploads/2026/07/Best-Selling-CPUs-GLOBAL-Top-10-400x225.jpg)
