Inside HP 470 G7 – disassembly and upgrade options
Once again, HP has tried to hide most of its precious screws with the help of the rubber strips. However, they are easily removable with a flat-head screwdriver, or preferably a plastic tool.
Check out all HP 470 G7 prices and configurations in our Specs System or read more in our In-Depth review.
1. Remove the bottom plate
After you take out the rubber feet, remove all of the Phillips-head screws you see. Then, turn the laptop around and open the lid. This is where the prying process happens. Next, make your way around with a guitar pick, and remove the bottom panel from the chassis.
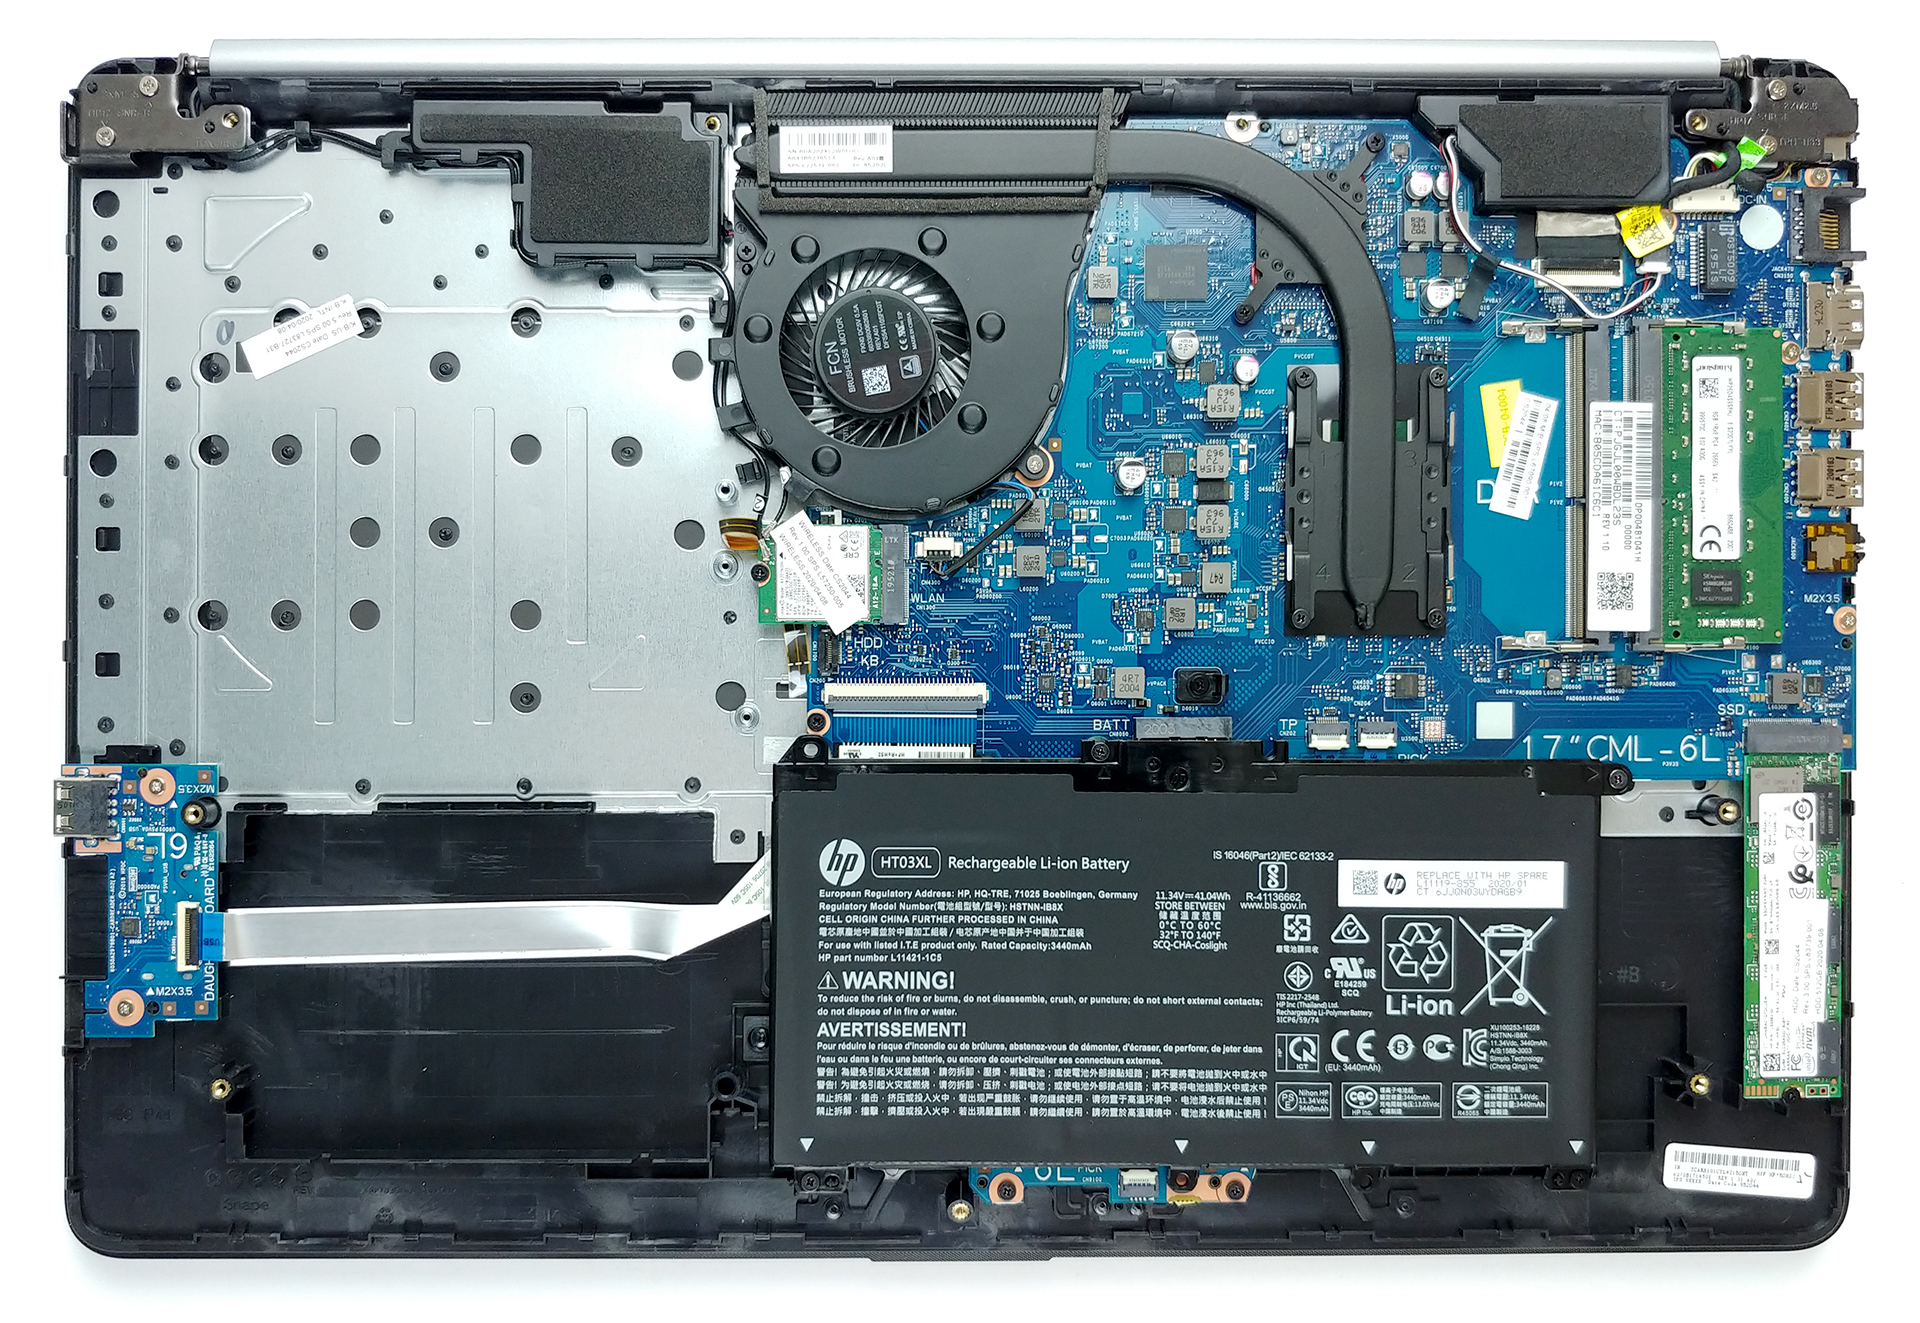
2. Battery
As of the battery, there is a modest 41Wh unit, powering the huge 17-inch screen.

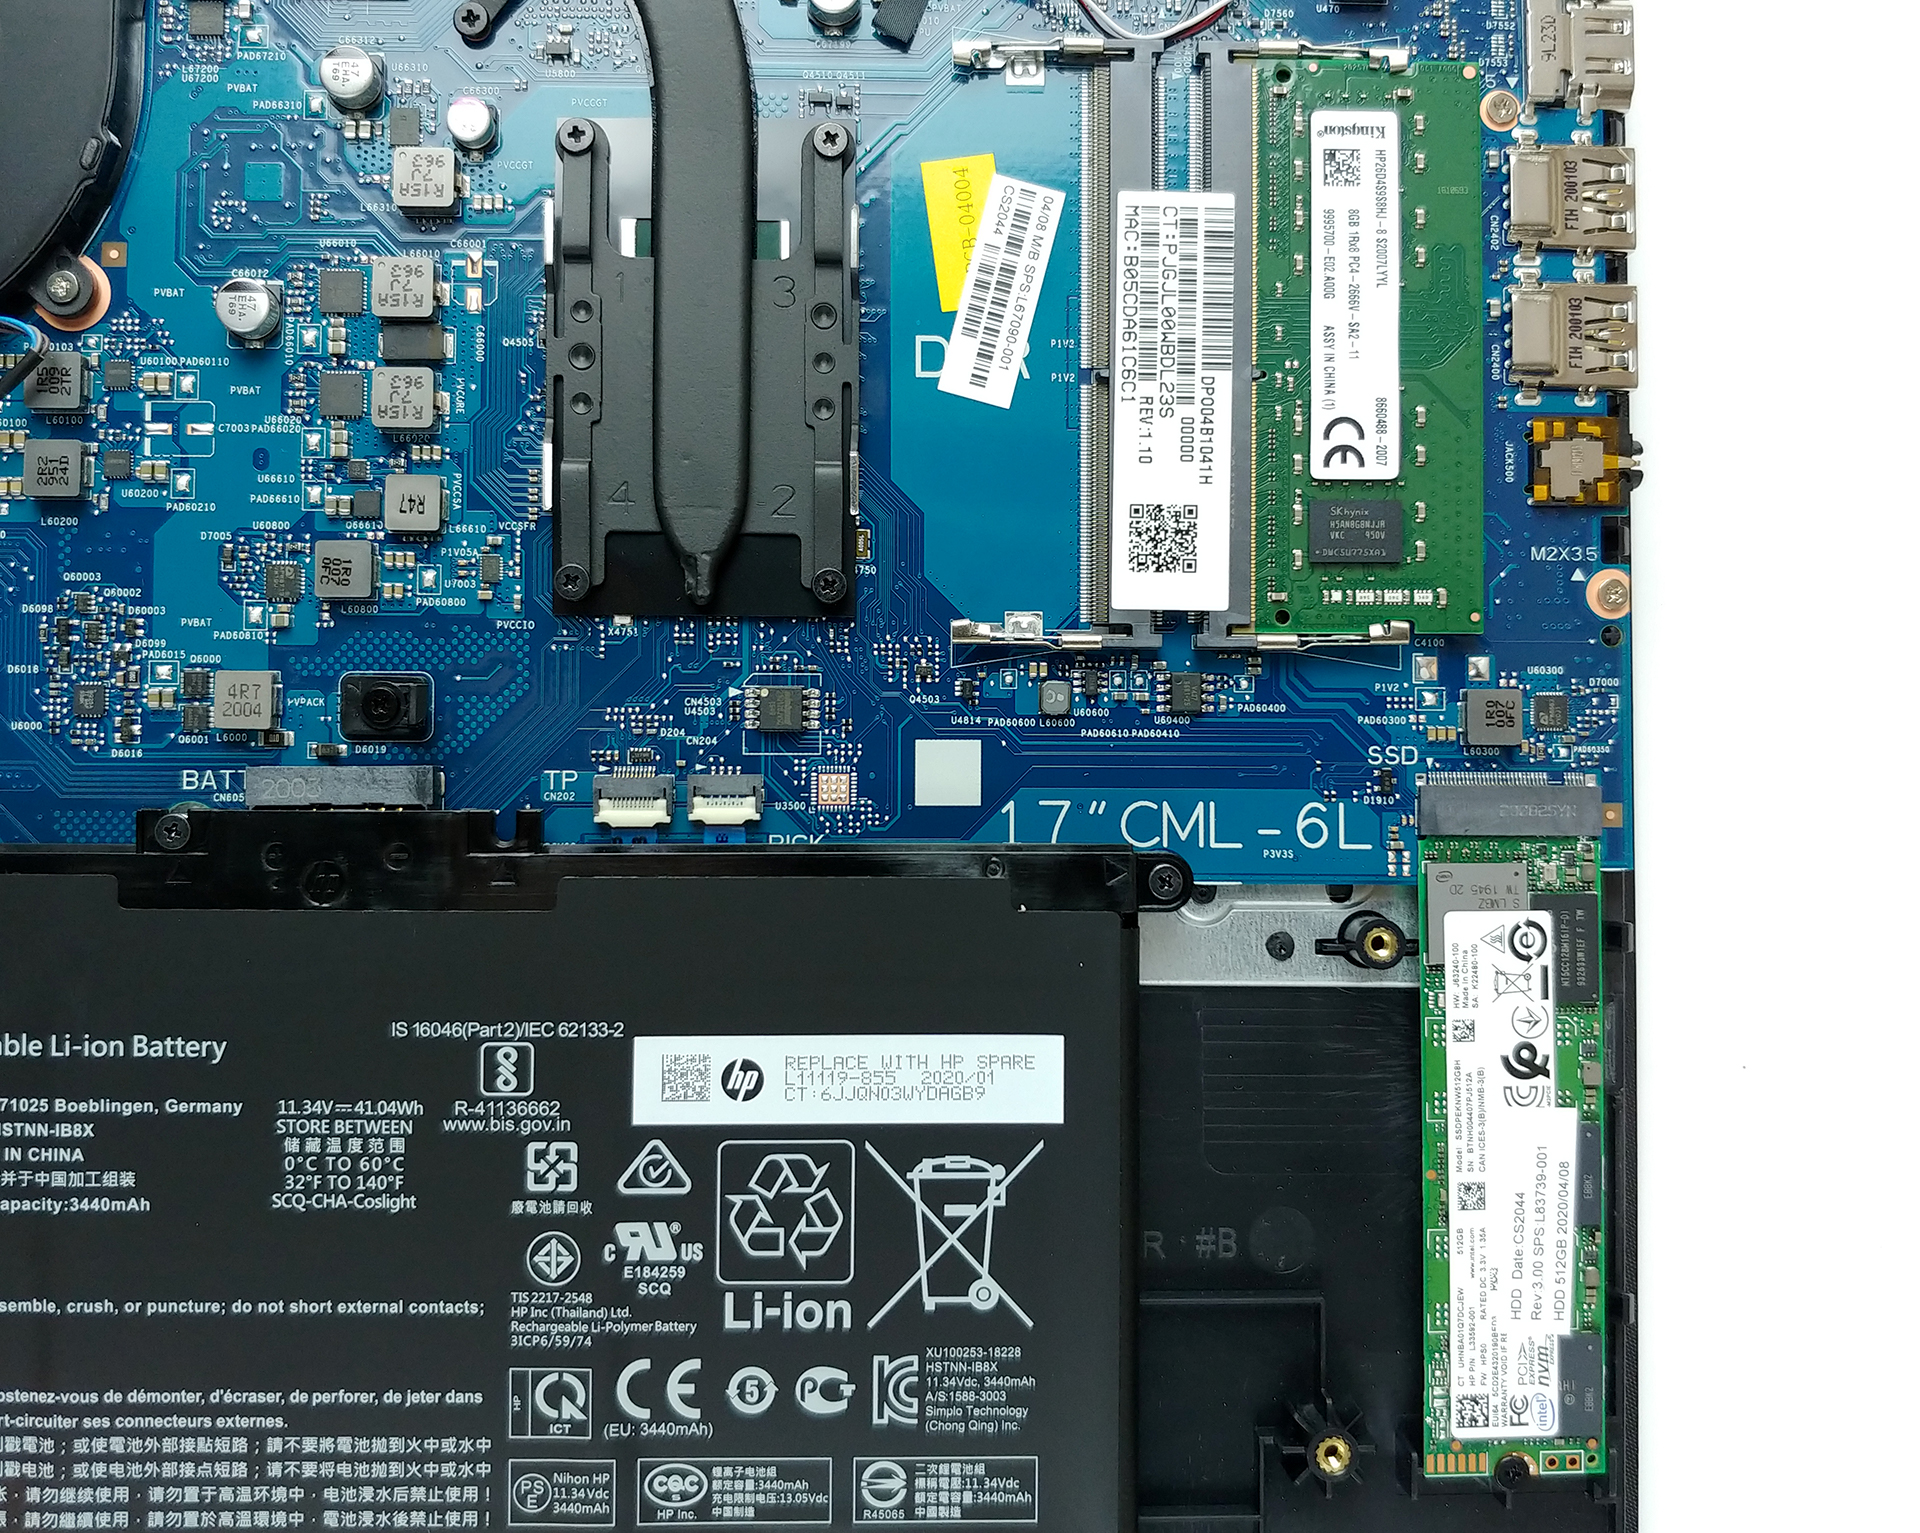
3. Memory and storage
In terms of upgradability, the 470 G7 is well packed. There are two RAM SODIMM slots, which support up to 16GB of DDR4 memory, working at 2666 MHz. Storage-wise, you can see an M.2 slot with PCIe x2 and SATA support, as well as a 2.5″ SATA drive bay.
4. Cooling system
Inside, you’ll see a single, thick heat pipe, cooling both the CPU and the graphics card. Despite the fact we are talking about energy-efficient hardware, it is usually not a great idea to connect your two main heat sources.

Check out all HP 470 G7 prices and configurations in our Specs System or read more in our In-Depth review.


![[June 2026] Best-Selling Laptop Brands on Amazon Global – Apple’s Unrivaled Dominance in Units and Revenue](https://laptopmedia.com/wp-content/uploads/2026/07/GLOBAL-Best-Brands-400x225.jpg)
![[June 2026] Amazon Global: Top 10 Best-Selling Laptops – Apple’s New MacBook Neo Storms to #1, Reshaping the Market with Affordability](https://laptopmedia.com/wp-content/uploads/2026/07/Best-Selling-Laptops-GLOBAL-Top-10-400x225.jpg)
![[June 2026] Amazon Global: Top 10 Best-Selling Gaming Laptops – Acer’s Nitro V 16S AI Dominates Sales, While ASUS Leads Overall Revenue](https://laptopmedia.com/wp-content/uploads/2026/07/Best-Selling-Gaming-Laptops-GLOBAL-Top-10-400x225.jpg)
![[June 2026] Global Ranking of Best-Selling Laptop GPUs on Amazon – NVIDIA RTX 5060 is the Top-Selling Dedicated GPU](https://laptopmedia.com/wp-content/uploads/2026/07/Best-Selling-GPUs-GLOBAL-Top-10-400x225.jpg)
![[June 2026] Global Ranking of Best-Selling Laptop CPUs on Amazon – Apple M5 Dominates, AMD Ryzen 7 260 Gets Solid Premium Share](https://laptopmedia.com/wp-content/uploads/2026/07/Best-Selling-CPUs-GLOBAL-Top-10-400x225.jpg)

You forgot to mention removing the CD Rom. There are two hidden screws there.