Inside Lenovo ThinkPad X13 Yoga – disassembly and upgrade options
This is a premium business/professional laptop that has very few issues, but one of them is the lack of memory upgrades.
Check out all Lenovo ThinkPad X13 Yoga prices and configurations in our Specs System or read more in our In-Depth review.
1. Remove the bottom plate
The bottom panel of this device is held in place by 8 captive Phillips-head screws. After you undo them, remove the stylus from its tray and pry the panel with a plastic tool.
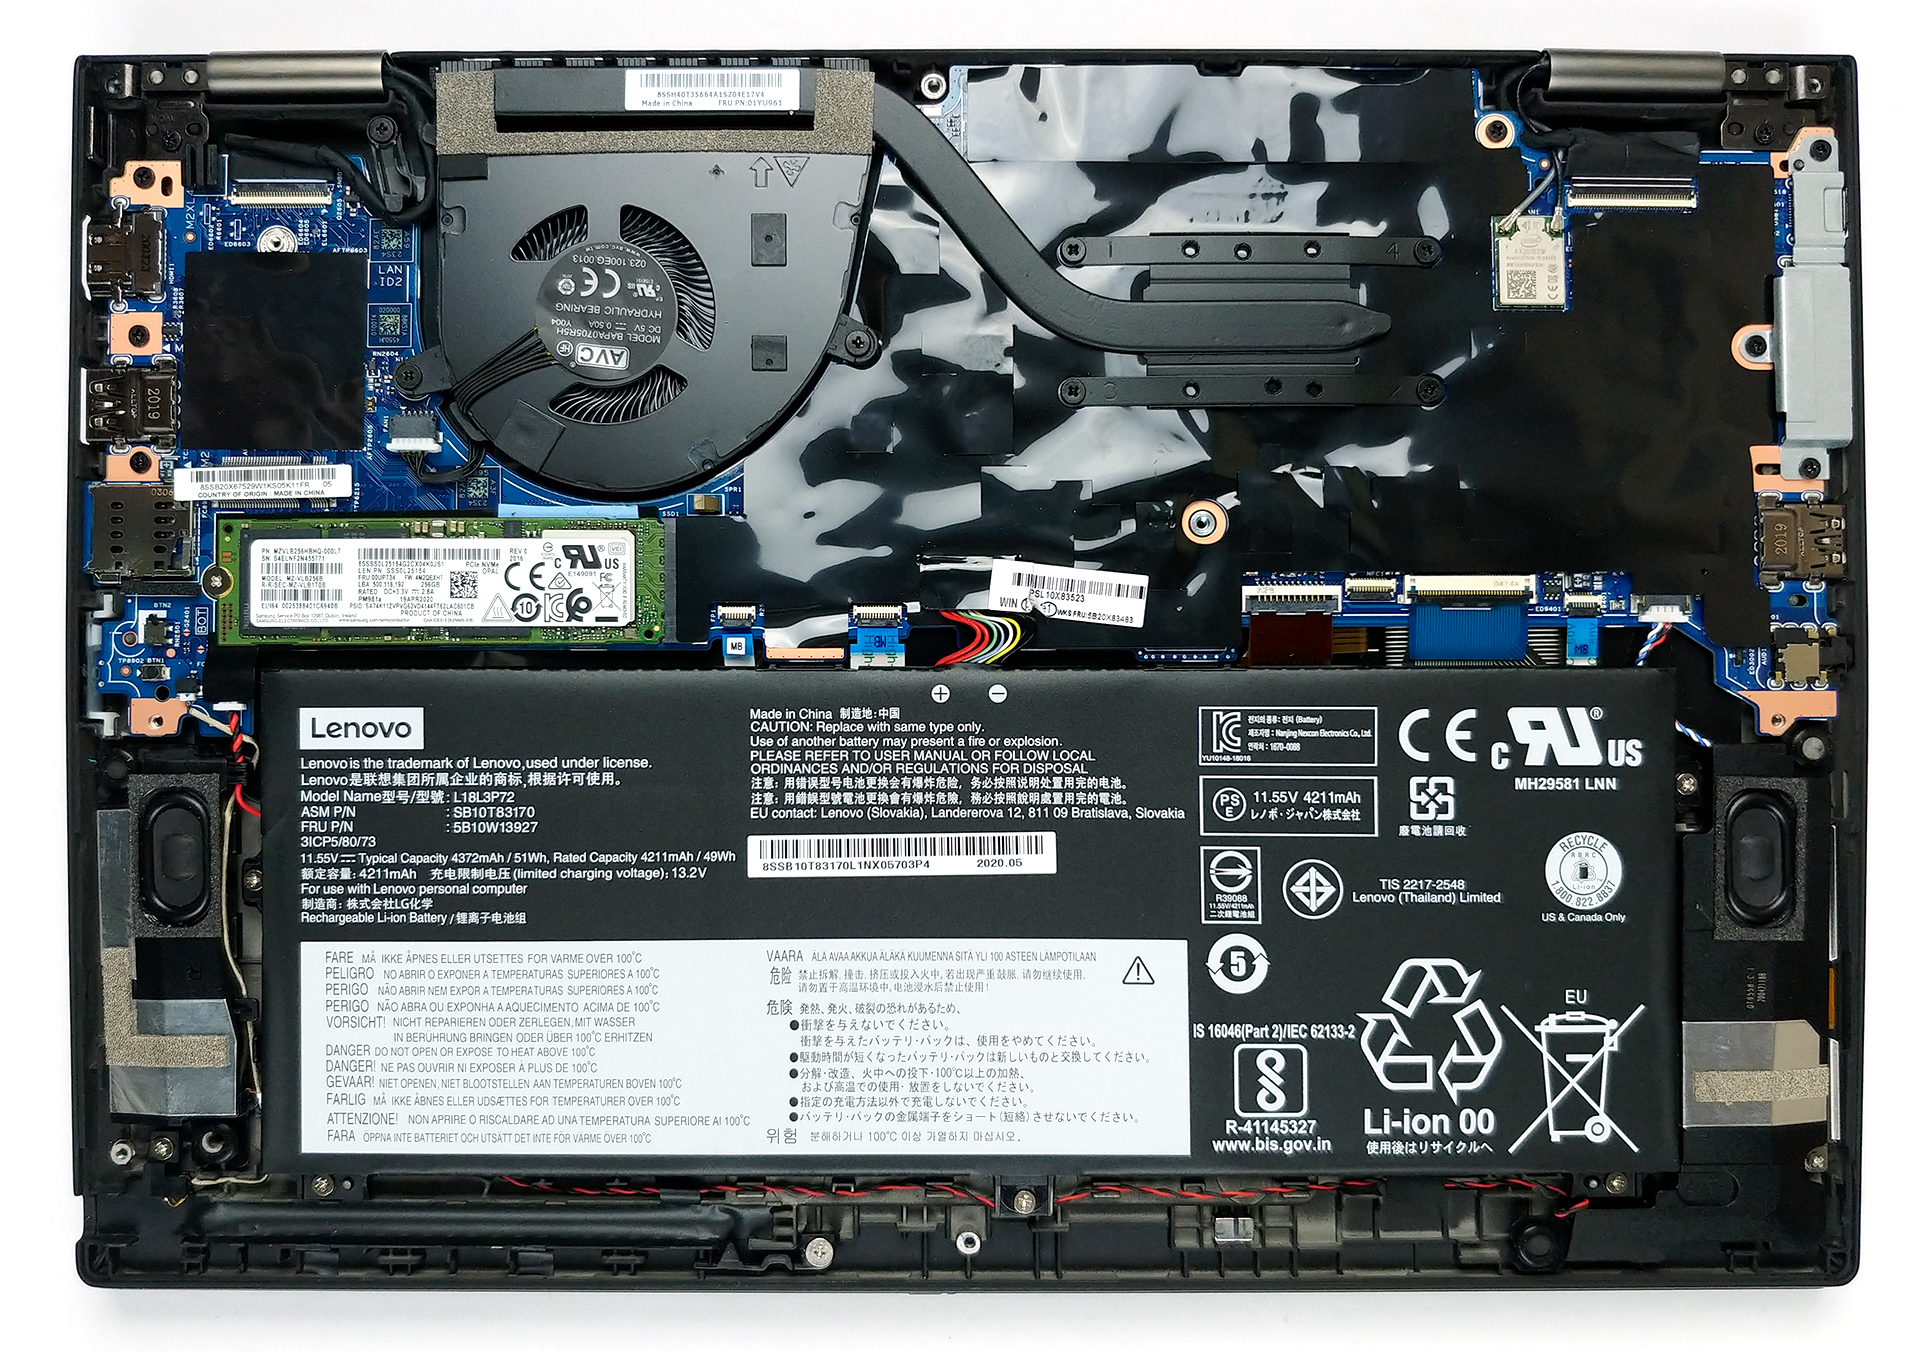
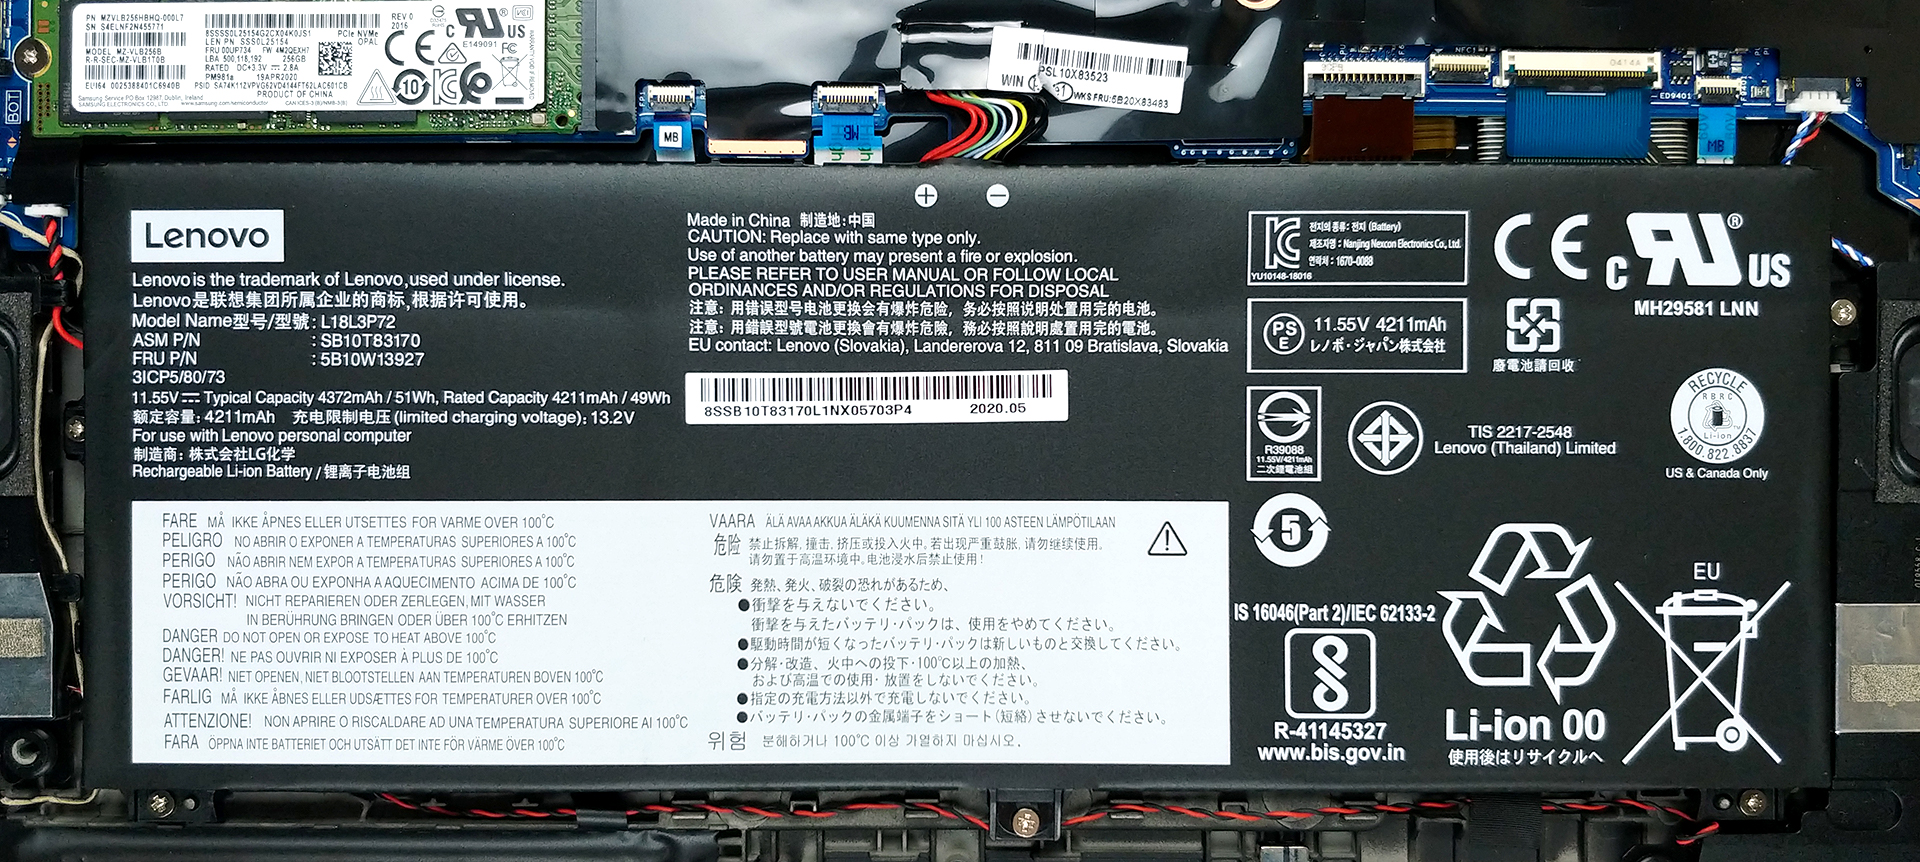
2. Battery
As far as the battery capacity goes, Lenovo has put a 51Wh unit inside of the Thinkpad X13 Yoga.
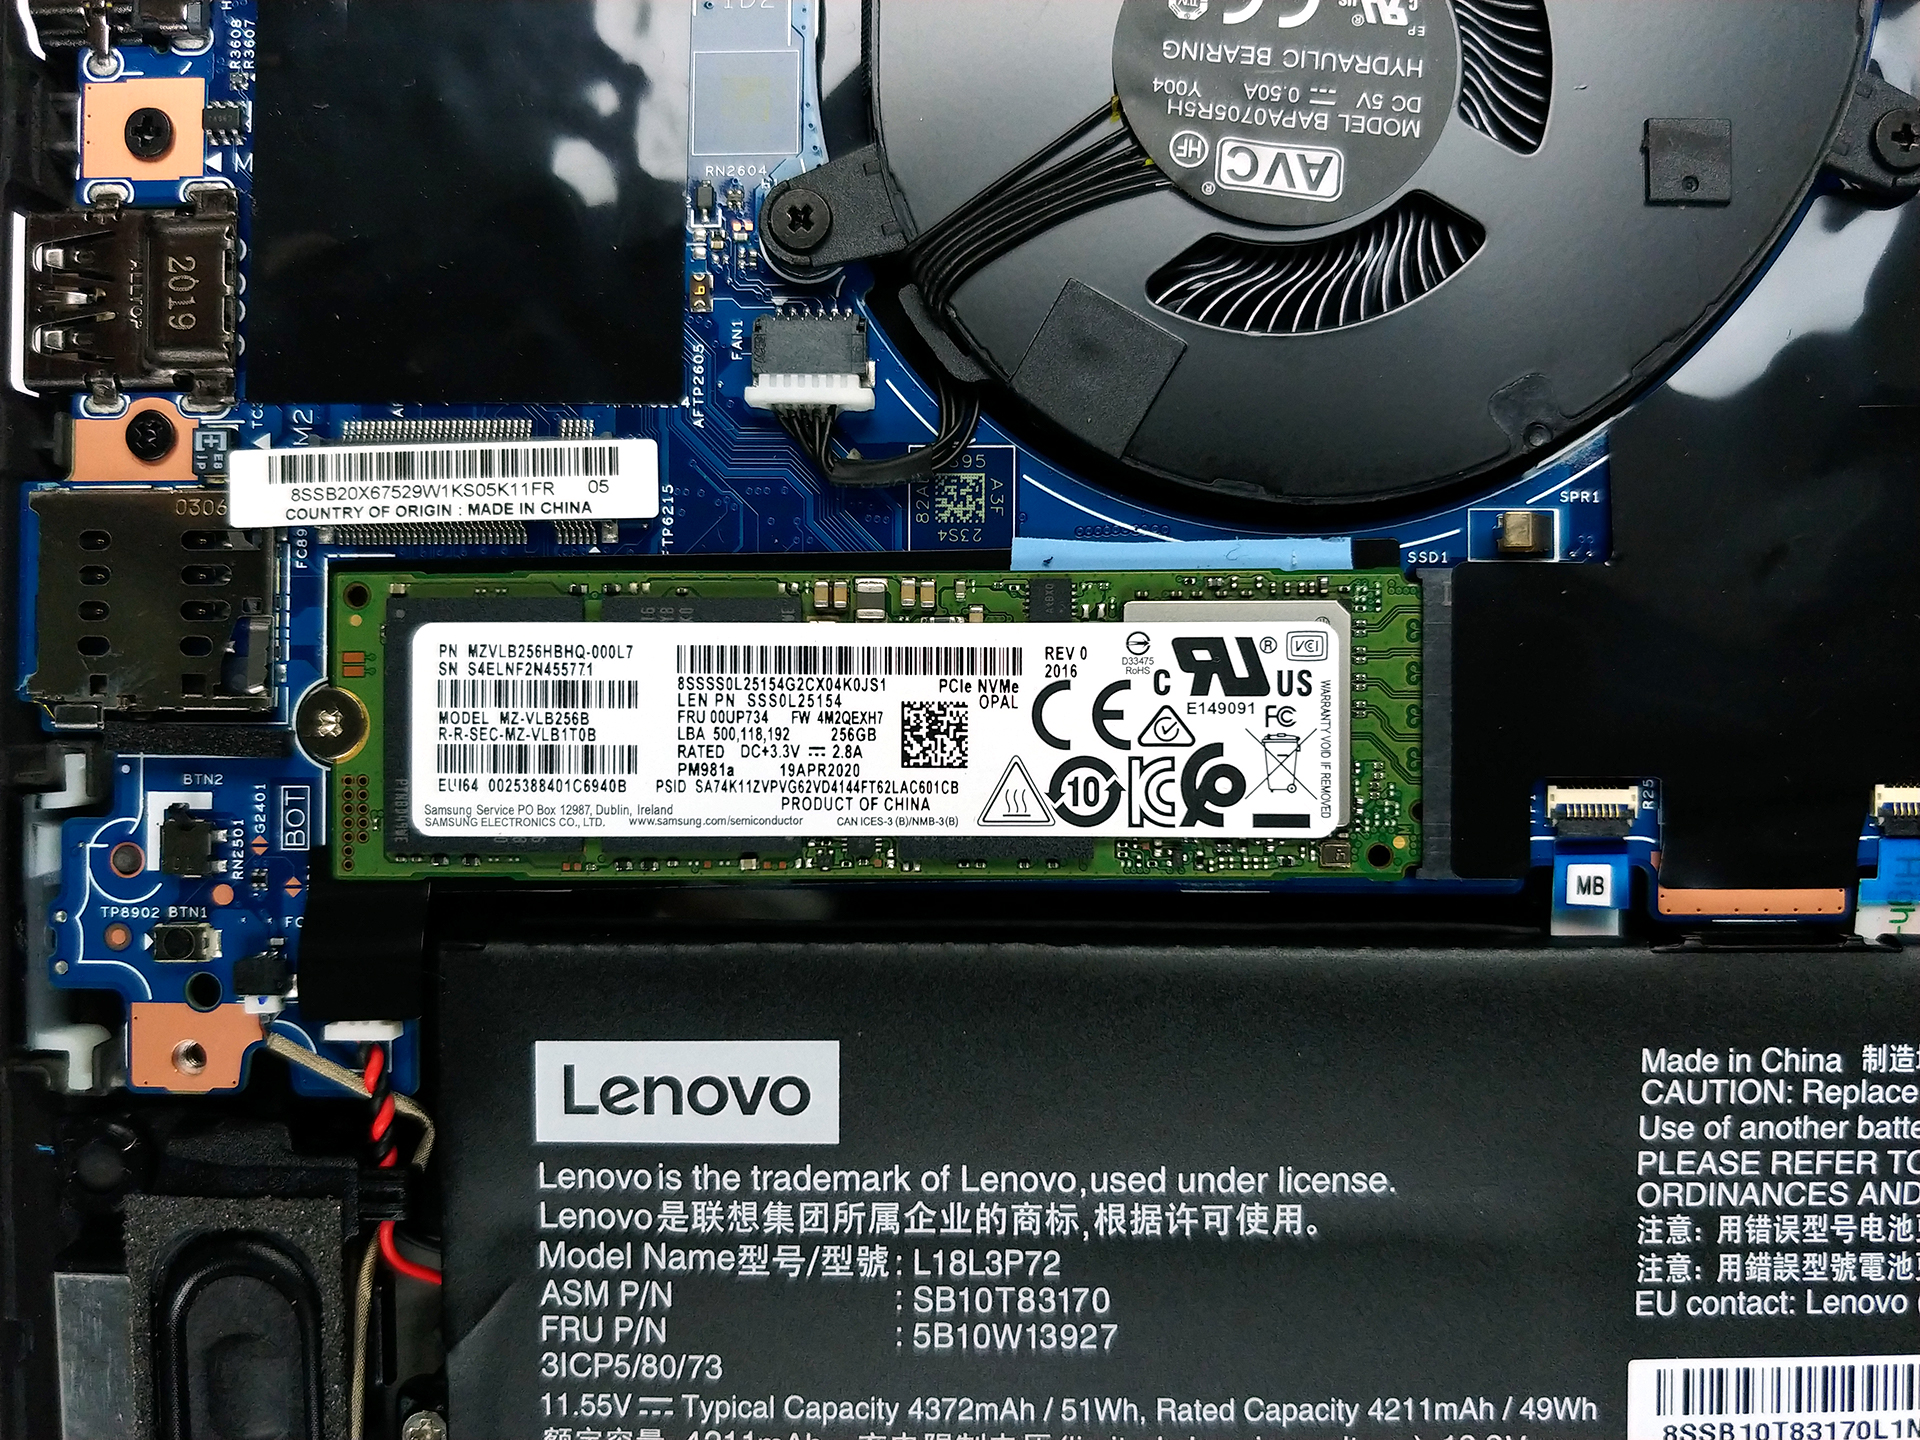
3. Memory and storage
Sadly, there is no option for memory upgrades, as all of the memory chips are soldered to the motherboard. That said, this model can be configured with 8 or 16GB of DDR4 RAM, working at 2666MHz. At least, there is the relief you can put a larger or faster SSD in the form of an M.2 PCIe x4 drive.
4. Cooling system

Check out all Lenovo ThinkPad X13 Yoga prices and configurations in our Specs System or read more in our In-Depth review.


![[June 2026] Best-Selling Laptop Brands on Amazon Global – Apple’s Unrivaled Dominance in Units and Revenue](https://laptopmedia.com/wp-content/uploads/2026/07/GLOBAL-Best-Brands-400x225.jpg)
![[June 2026] Amazon Global: Top 10 Best-Selling Laptops – Apple’s New MacBook Neo Storms to #1, Reshaping the Market with Affordability](https://laptopmedia.com/wp-content/uploads/2026/07/Best-Selling-Laptops-GLOBAL-Top-10-400x225.jpg)
![[June 2026] Amazon Global: Top 10 Best-Selling Gaming Laptops – Acer’s Nitro V 16S AI Dominates Sales, While ASUS Leads Overall Revenue](https://laptopmedia.com/wp-content/uploads/2026/07/Best-Selling-Gaming-Laptops-GLOBAL-Top-10-400x225.jpg)
![[June 2026] Global Ranking of Best-Selling Laptop GPUs on Amazon – NVIDIA RTX 5060 is the Top-Selling Dedicated GPU](https://laptopmedia.com/wp-content/uploads/2026/07/Best-Selling-GPUs-GLOBAL-Top-10-400x225.jpg)
![[June 2026] Global Ranking of Best-Selling Laptop CPUs on Amazon – Apple M5 Dominates, AMD Ryzen 7 260 Gets Solid Premium Share](https://laptopmedia.com/wp-content/uploads/2026/07/Best-Selling-CPUs-GLOBAL-Top-10-400x225.jpg)
