Inside Toshiba Satellite Radius 12 – disassembly, internal photos and upgrade options
The ultra-slim portable 12-inch convertible from Toshiba has some neat build quality, but it’s quite hard to disassemble and not as tricky at the same time. Here’s what we found inside. If you are interested in the model, we suggest you read our first impression piece and also visit Amazon.com for prices, configurations and availability.
1. Removing the bottom cover
This one is a bit tricky. First you need to unscrew all the bolts at the bottom.

Then, on the contrary of what you think you should do, don’t try prying up the bottom piece. You will need to crack open the keyboard tray, but we suggest you start with the back side of the machine – where the plastic element meets the metal piece. Pop out the back side near the main vents and proceed with the rest of the clips.

2. What we found inside
After you’ve popped out the keyboard tray, remove the bottom cover and proceed with the cleaning/upgrading but we suggest disconnecting the battery first.
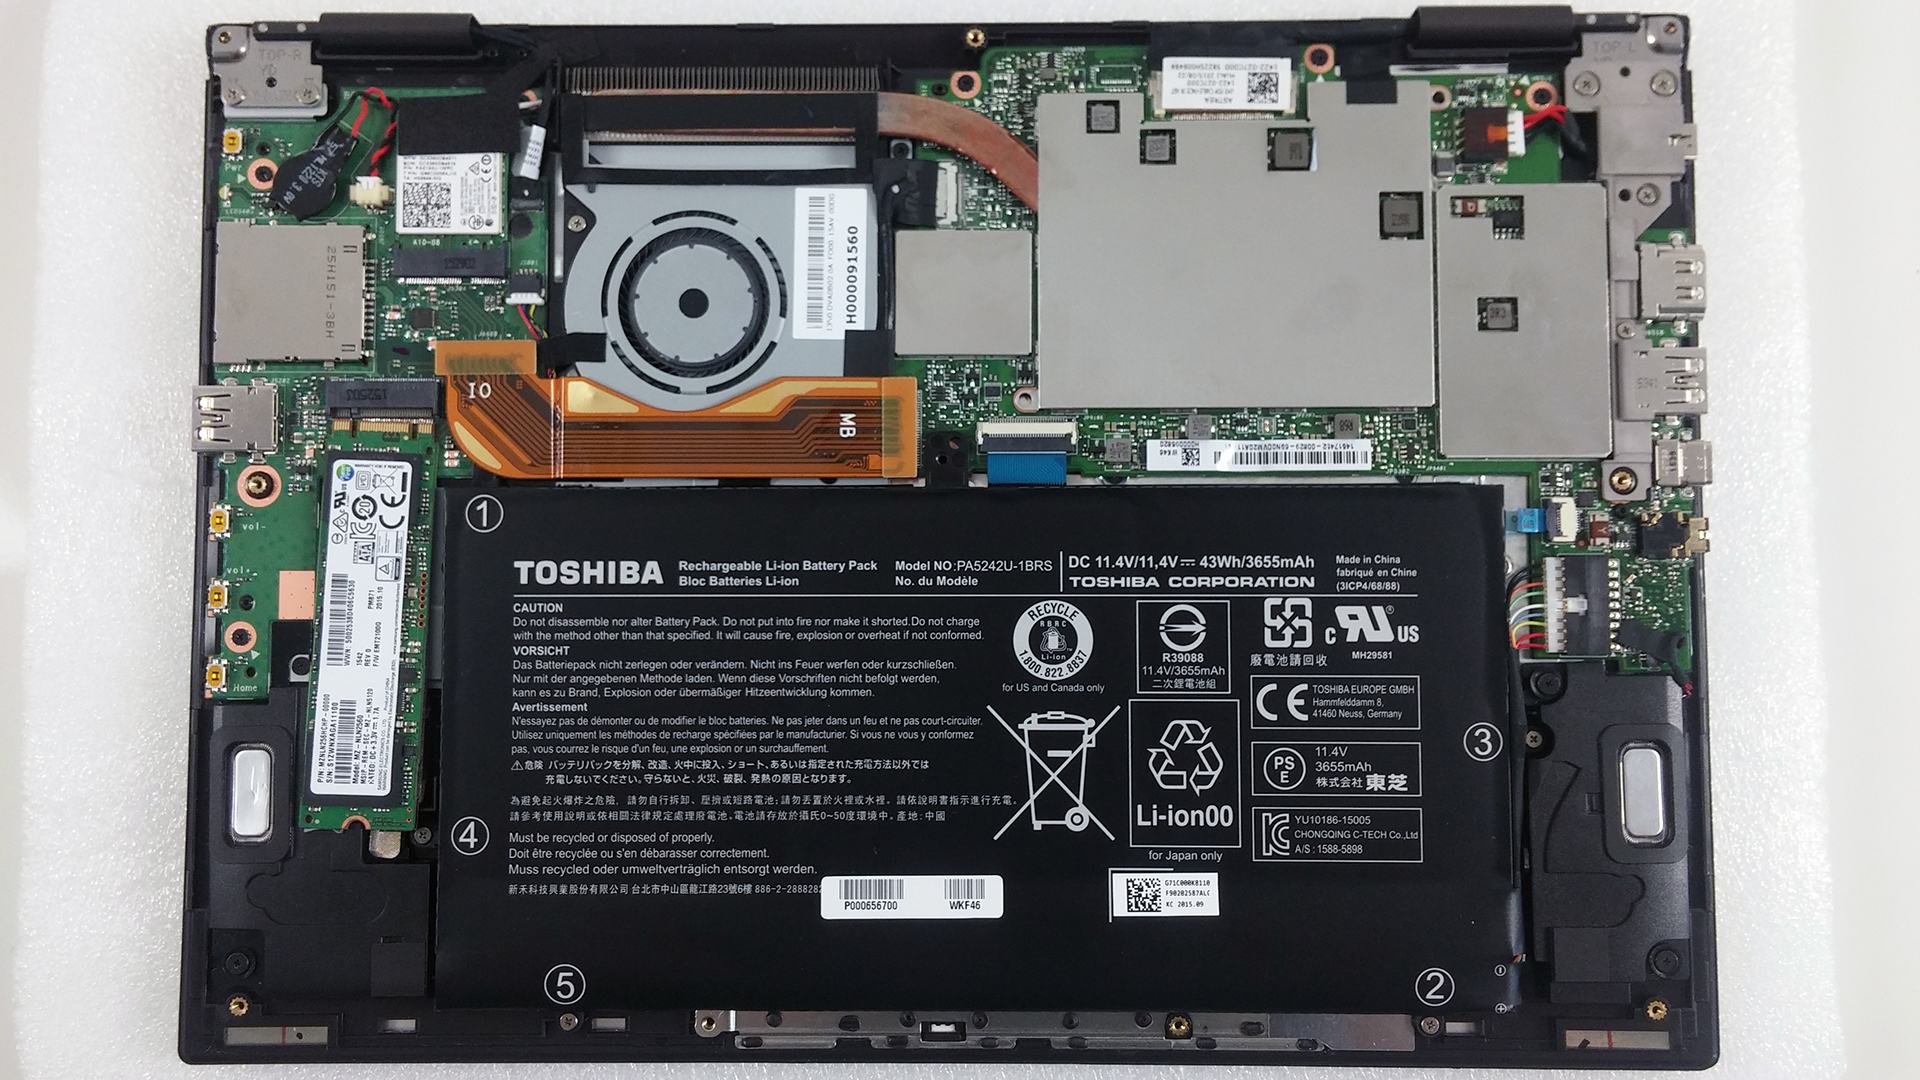
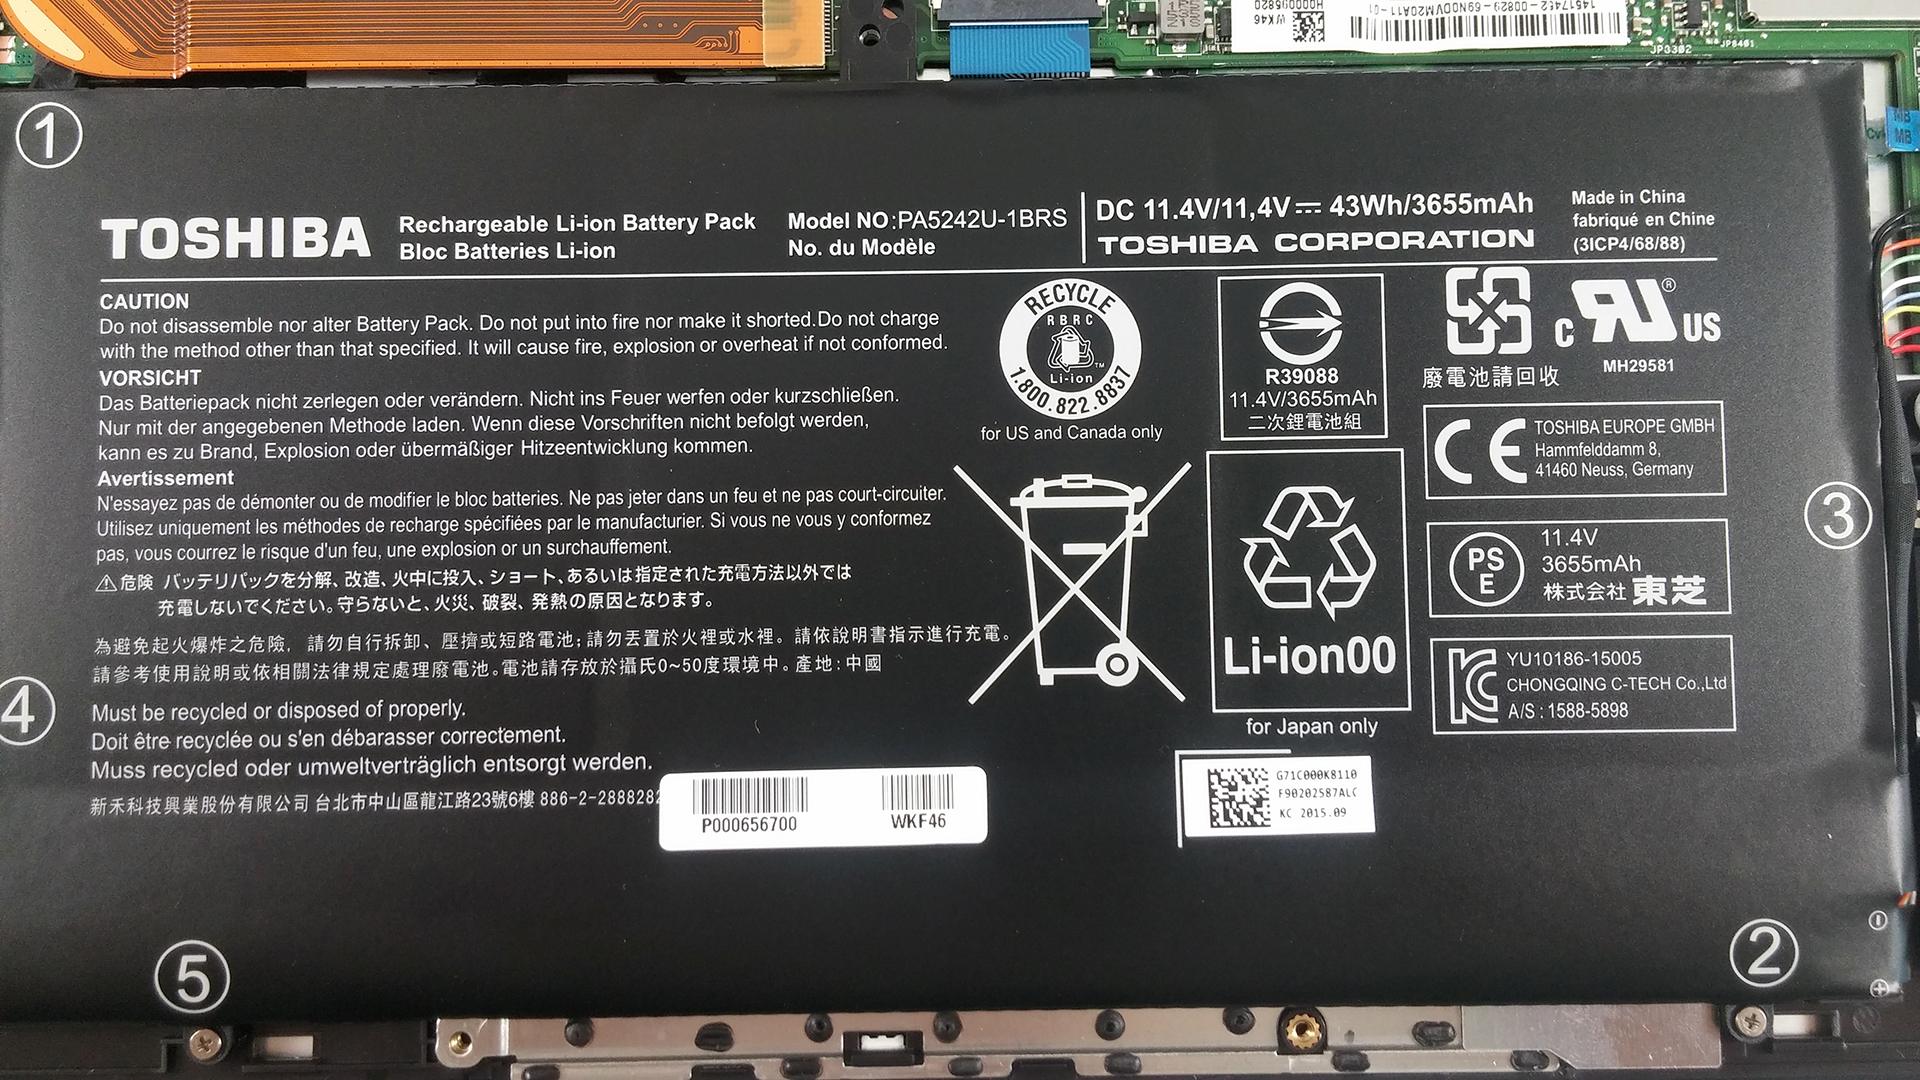
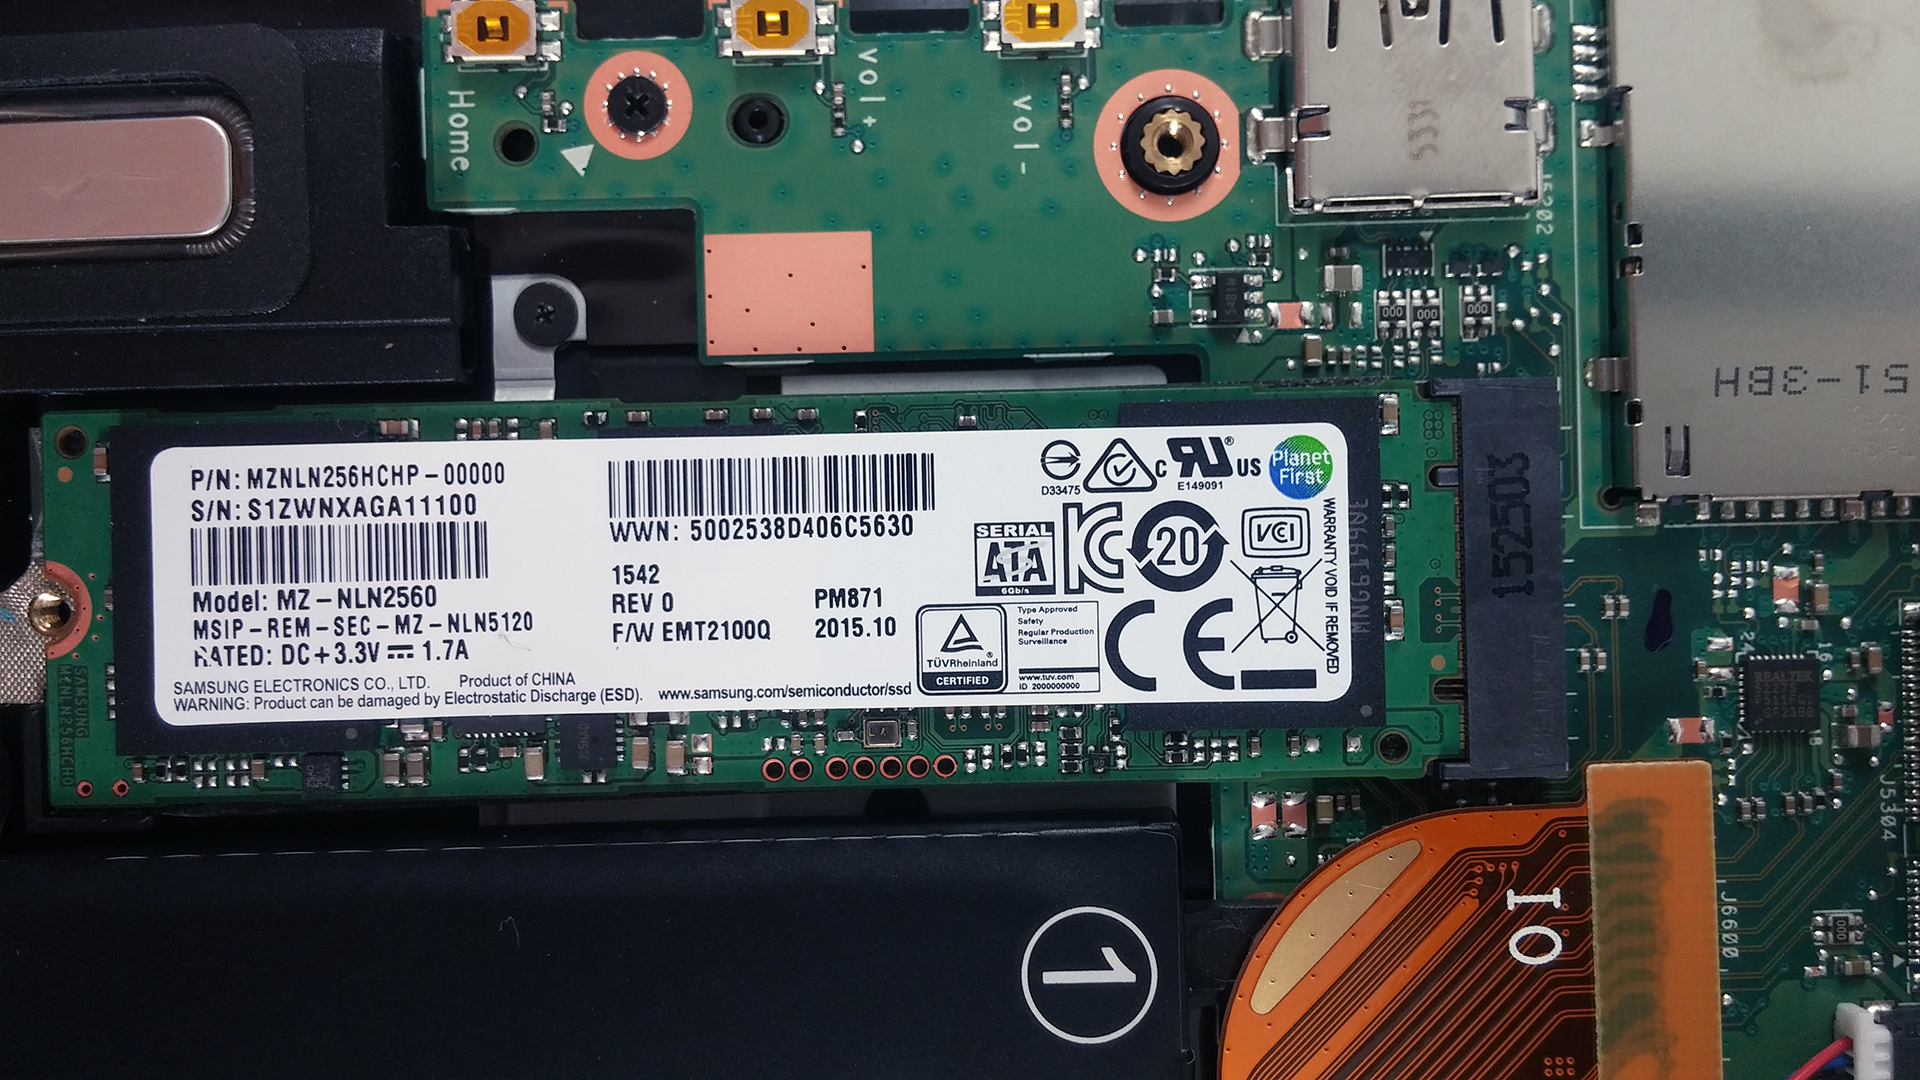
Anyway, we found an OEM version of the standard Samsung M.2 2280 SSD with B&M key inserted in a B-edge key connector, soldered LPDDR3 8GB RAM modules, of course, and a 3655 mAh Toshiba battery rated at 43Wh. We don’t want to jump into any conclusions, but the battery seems a bit small to support a 4K UHD touch screen. We will know for sure in our full review.
Visit Amazon.com for more information about price and availability.


![[June 2026] Best-Selling Laptop Brands on Amazon Global – Apple’s Unrivaled Dominance in Units and Revenue](https://laptopmedia.com/wp-content/uploads/2026/07/GLOBAL-Best-Brands-400x225.jpg)
![[June 2026] Amazon Global: Top 10 Best-Selling Laptops – Apple’s New MacBook Neo Storms to #1, Reshaping the Market with Affordability](https://laptopmedia.com/wp-content/uploads/2026/07/Best-Selling-Laptops-GLOBAL-Top-10-400x225.jpg)
![[June 2026] Amazon Global: Top 10 Best-Selling Gaming Laptops – Acer’s Nitro V 16S AI Dominates Sales, While ASUS Leads Overall Revenue](https://laptopmedia.com/wp-content/uploads/2026/07/Best-Selling-Gaming-Laptops-GLOBAL-Top-10-400x225.jpg)
![[June 2026] Global Ranking of Best-Selling Laptop GPUs on Amazon – NVIDIA RTX 5060 is the Top-Selling Dedicated GPU](https://laptopmedia.com/wp-content/uploads/2026/07/Best-Selling-GPUs-GLOBAL-Top-10-400x225.jpg)
![[June 2026] Global Ranking of Best-Selling Laptop CPUs on Amazon – Apple M5 Dominates, AMD Ryzen 7 260 Gets Solid Premium Share](https://laptopmedia.com/wp-content/uploads/2026/07/Best-Selling-CPUs-GLOBAL-Top-10-400x225.jpg)

just curious but are there screws under the foot pads as well?
I really hope you can help me, dude.
I having huge difficulties getting the backplate off, in order to upgrade the storage.
There are a bunch of clips on the back side of the laptop, nearer to the touch pad, that i feel are going to snap off. Could you possibly upload a video or give some further instruction on how you get that backplate off? I don’t wanna damage anything!
Does the M.2 slot support PCie?
No it does not. You can only use SATA SSD there.
Where is Touchpad module?
Popped it open like a champ using your suggestions–thanks! Now…I see the heat sink, battery, ram, but where is the hard drive?
Any chance the CPU is upgradable with this model (i.e. i5 up to i7)?
Is there anyway I can access the keyboard from the inside. A couple of my keys stopped working
Hello Dion…..I have a Toshiba 4K Ultra HD Edition / P55W-C5208-4K / PSPVJU-00S02S. My “r/R” key stopped working….I tried many things but then finally pulled off the key top and gently messed with the contacts inside (from the top of the keyboard). I tried what I could, cleaned it with rubbing alcohol and gently put it back together…..didn’t quite fix it, but opened it up again, messed a bit more and put the cap back on. Works FINE now. Good Luck.
The external power button itself does not work, when taken apart I can physically press the small round power button on the inside and the power comes on. What pieces all go into making that button function?