How to open HP OMEN 16 (16-ap0000) – disassembly and upgrade options

Before you start: Shut the laptop down completely, disconnect the charger and all peripherals, and hold the power button for a few seconds to discharge residual power. Work on a clean, non-conductive surface and, if possible, use an anti-static wrist strap.
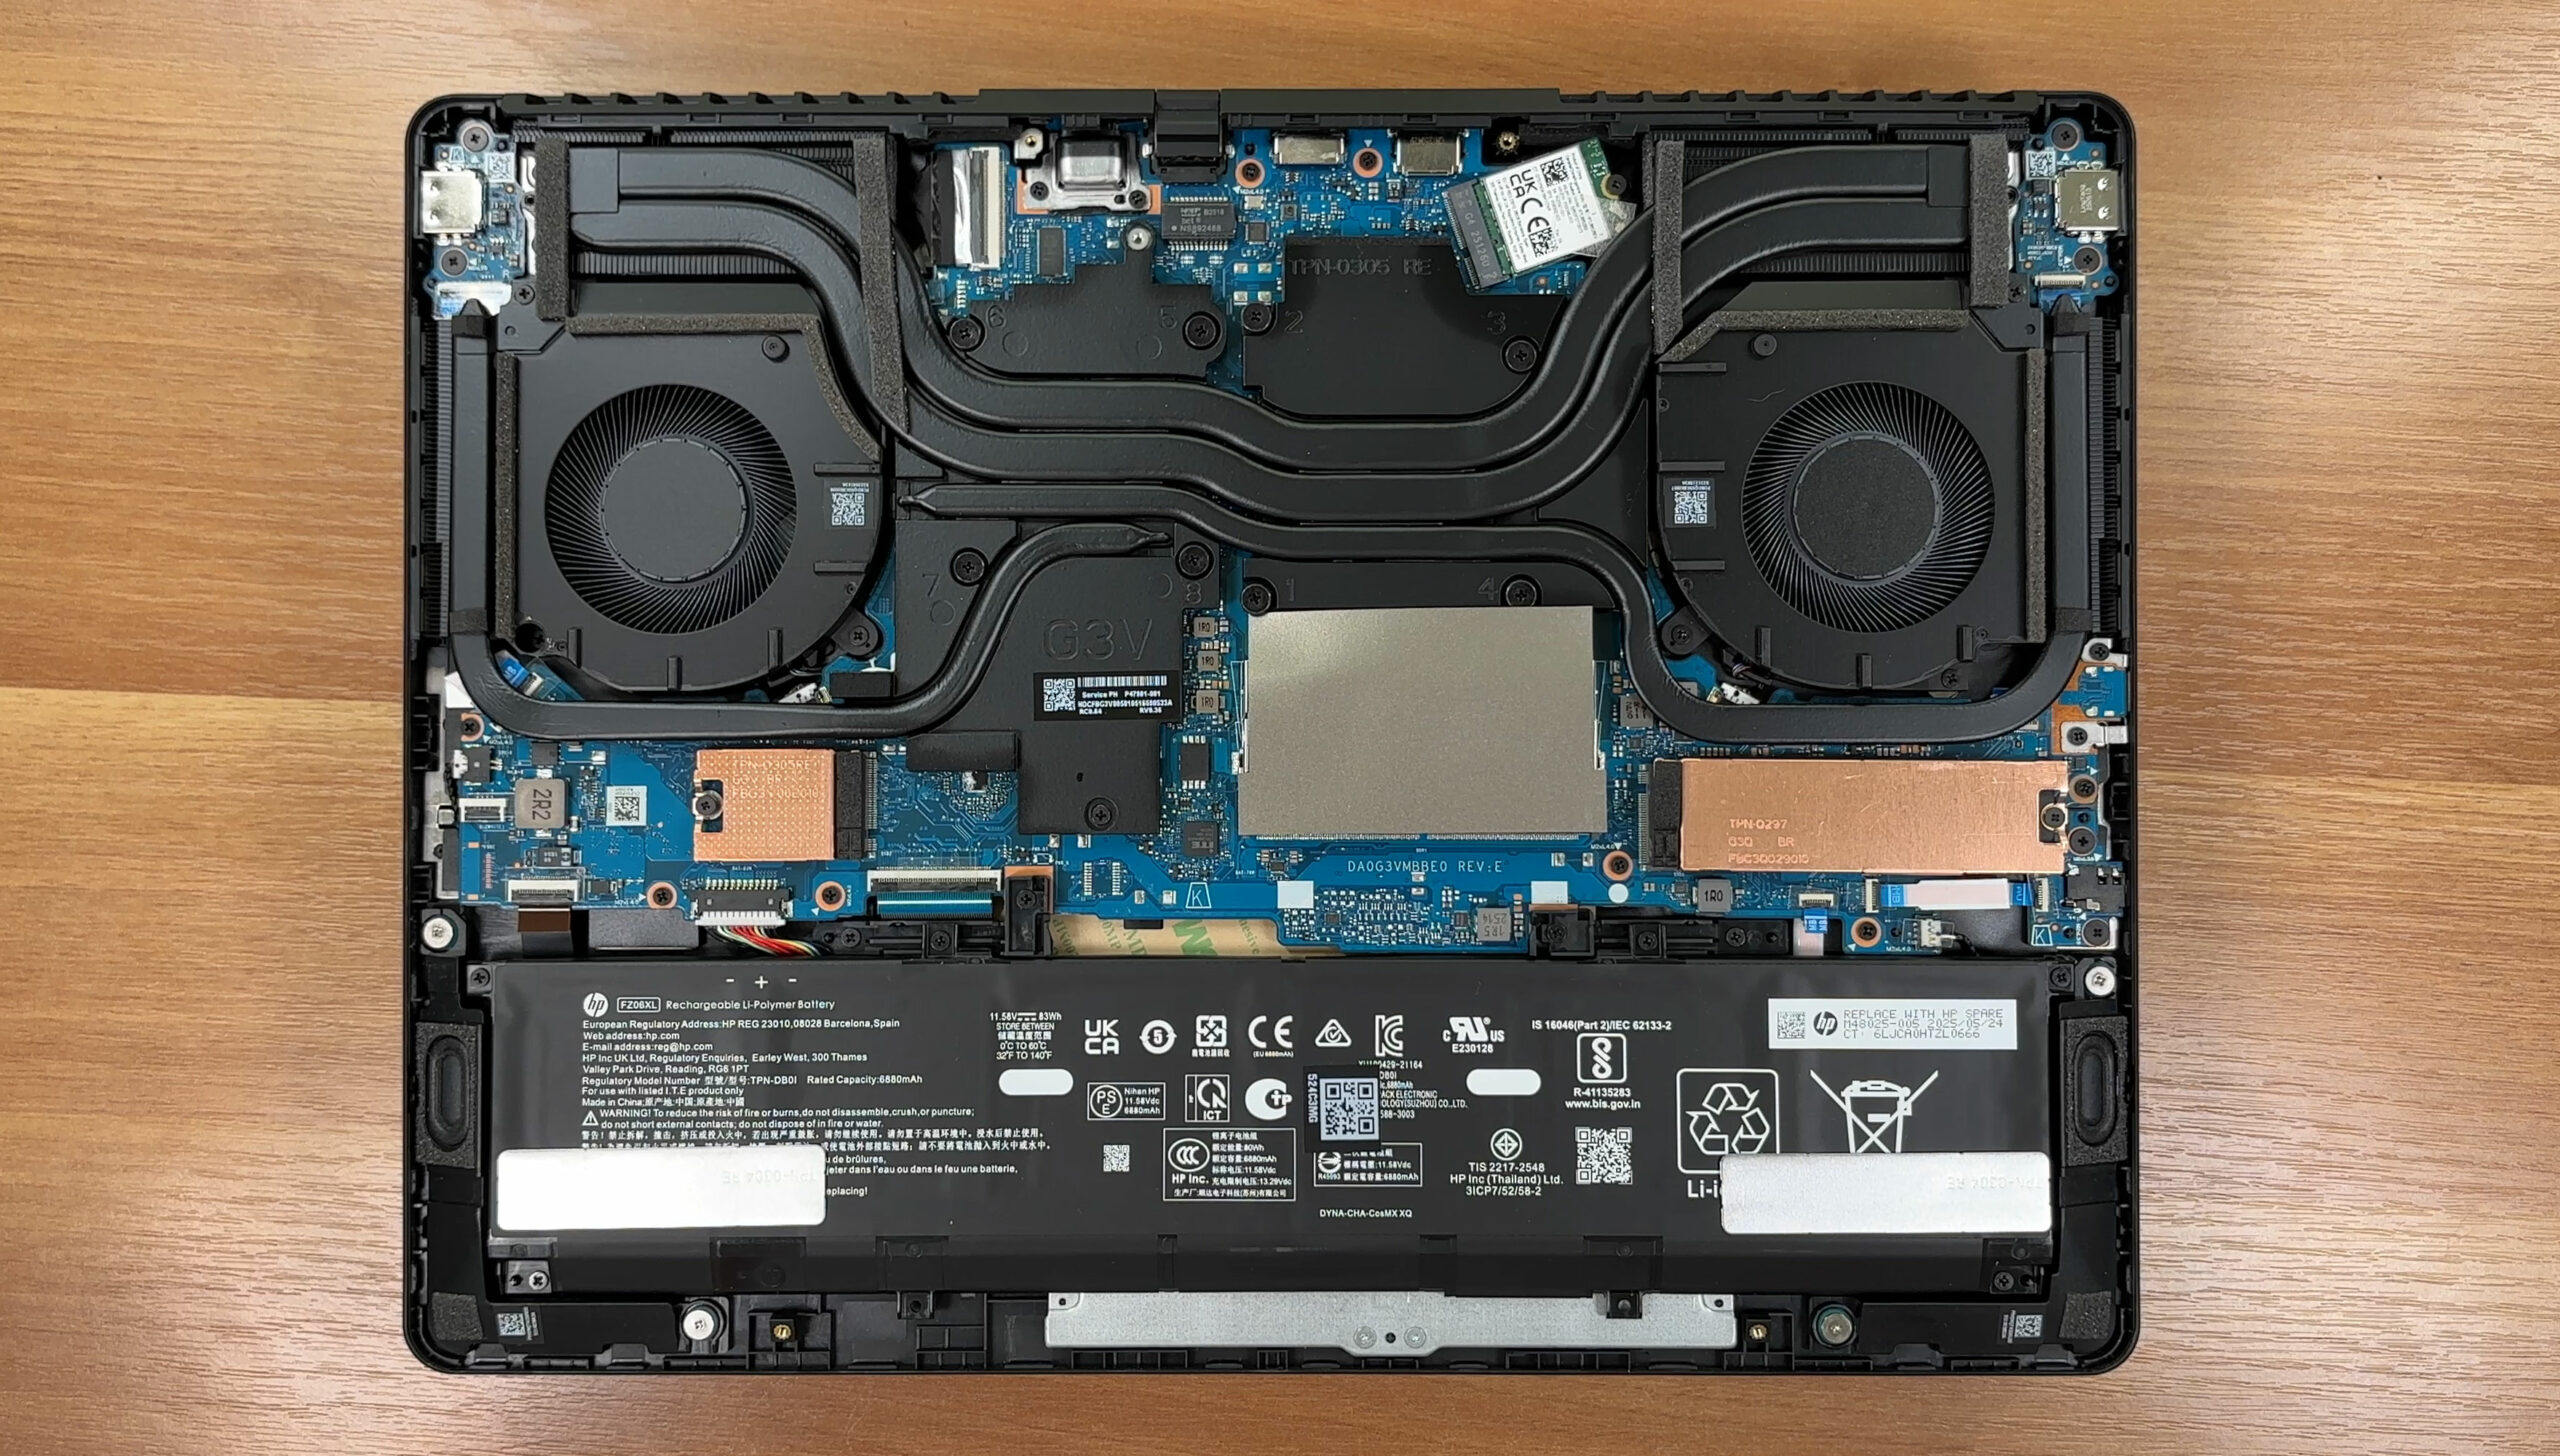
Opening the bottom panel
- Place the laptop upside down with the rear vents facing away from you.
- Undo the six Phillips/JIS screws that secure the bottom panel. Most of them are captive and will stay attached to the plate when loosened.
- Insert a thin plastic pry tool between the bottom panel and the chassis near one of the side edges.
- Gently twist the tool to release the first clip, then slide along the perimeter to unlatch the remaining clips on the sides and front.
- Finish by releasing the clips near the rear hinge area. Once all clips are free, lift the bottom panel away and set it aside.
Caution: Do not use metal tools for prying, and avoid bending the panel excessively to prevent cracking or deforming it.
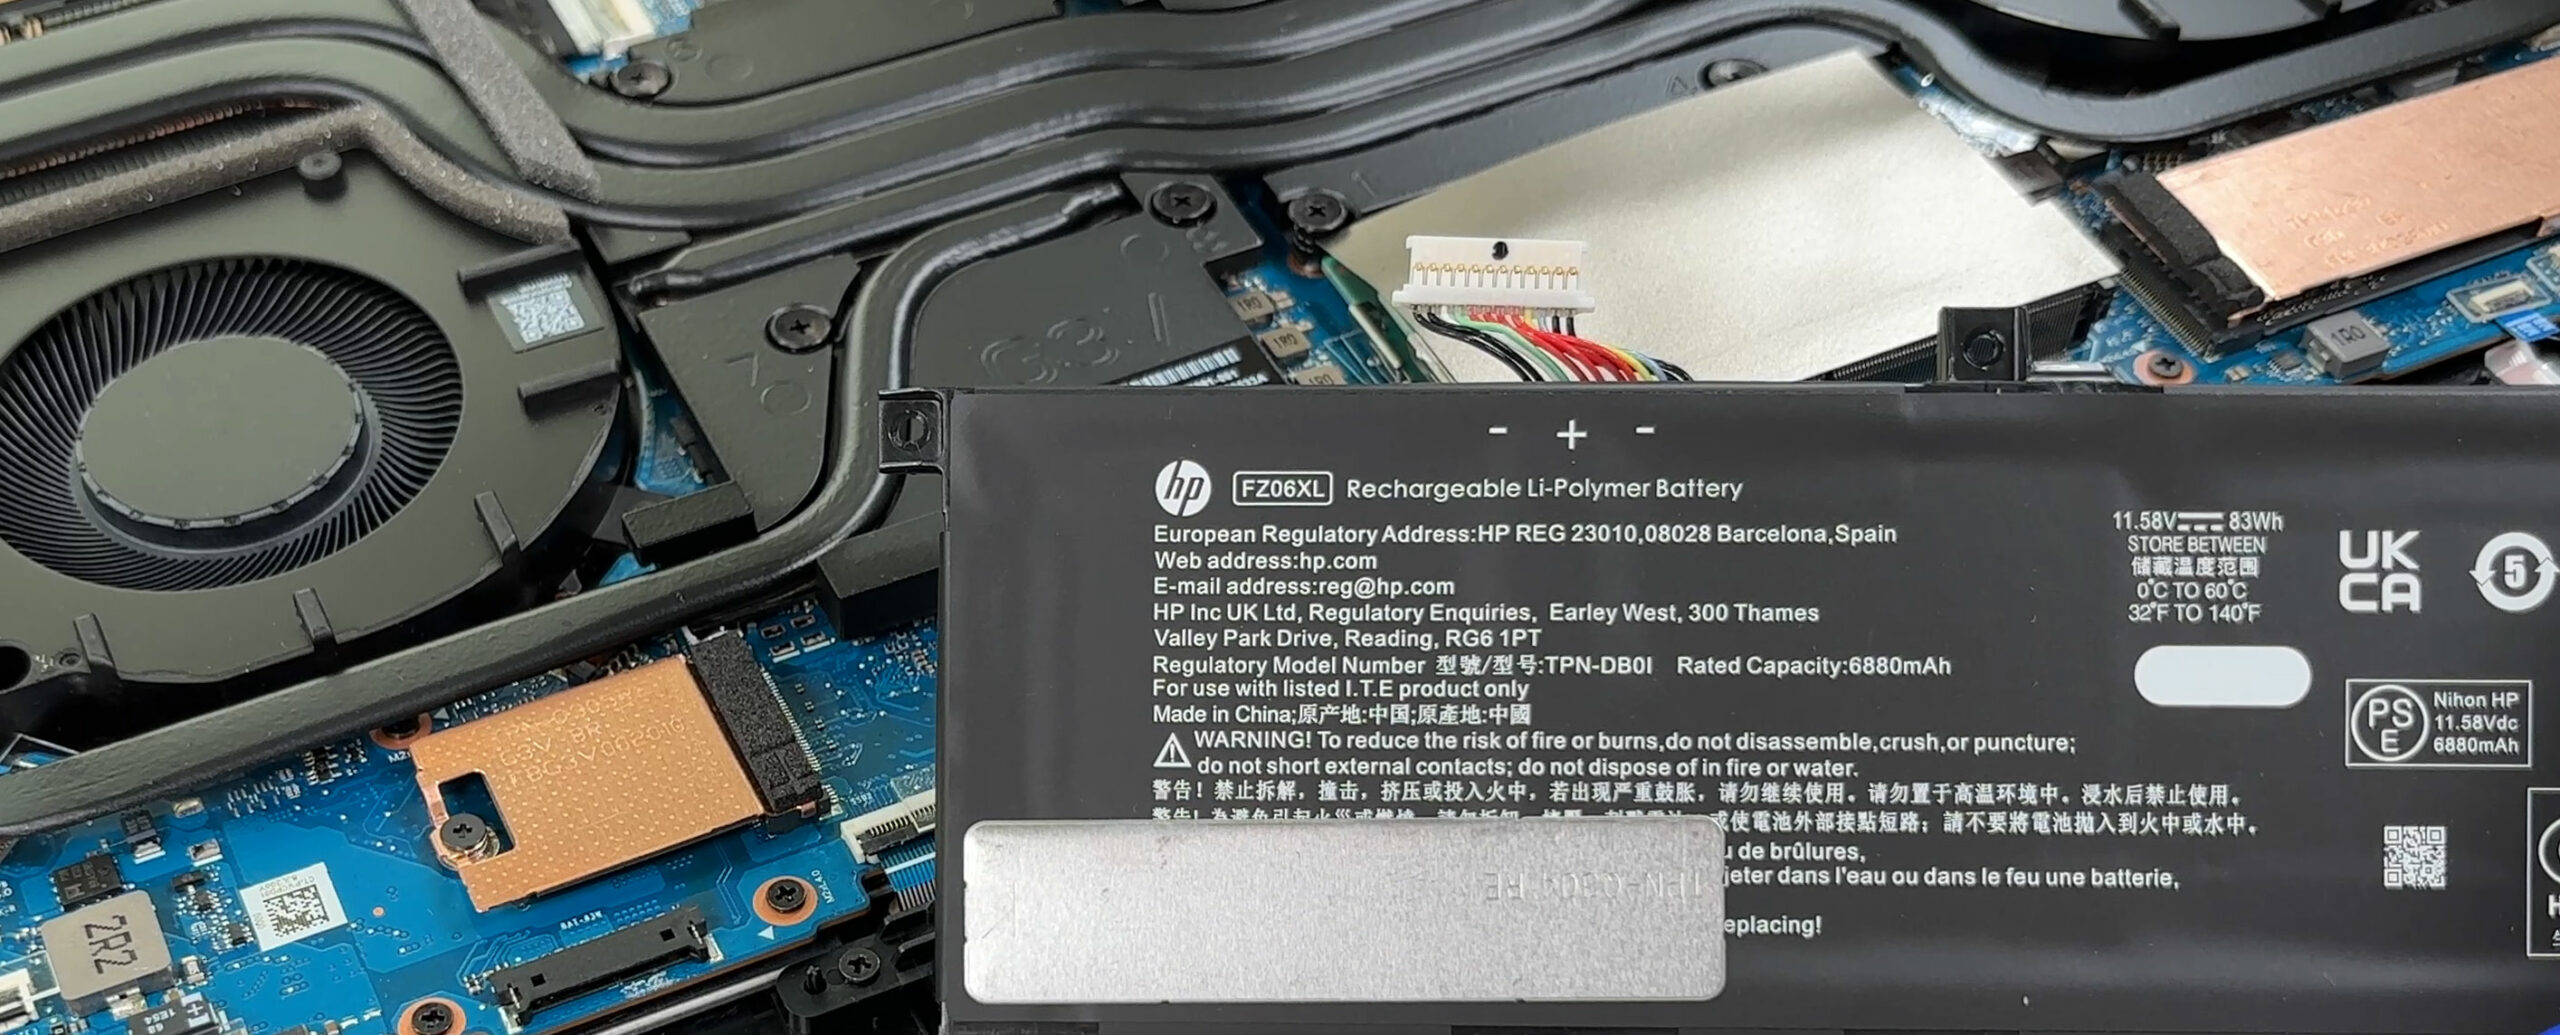
Battery removal
- Locate the battery pack along the front edge of the chassis.
- Before working on any other components, disconnect the battery by pulling the board connector straight out of its socket—grip it by the plastic housing, not the cables.
- Undo the six Phillips-head screws that secure the battery to the chassis.
- Lift the battery evenly from its bay, making sure you don’t snag any speaker or Wi-Fi antenna cables routed nearby.
- When reinstalling, place the battery back in position, tighten all six screws, and reconnect the battery cable firmly.
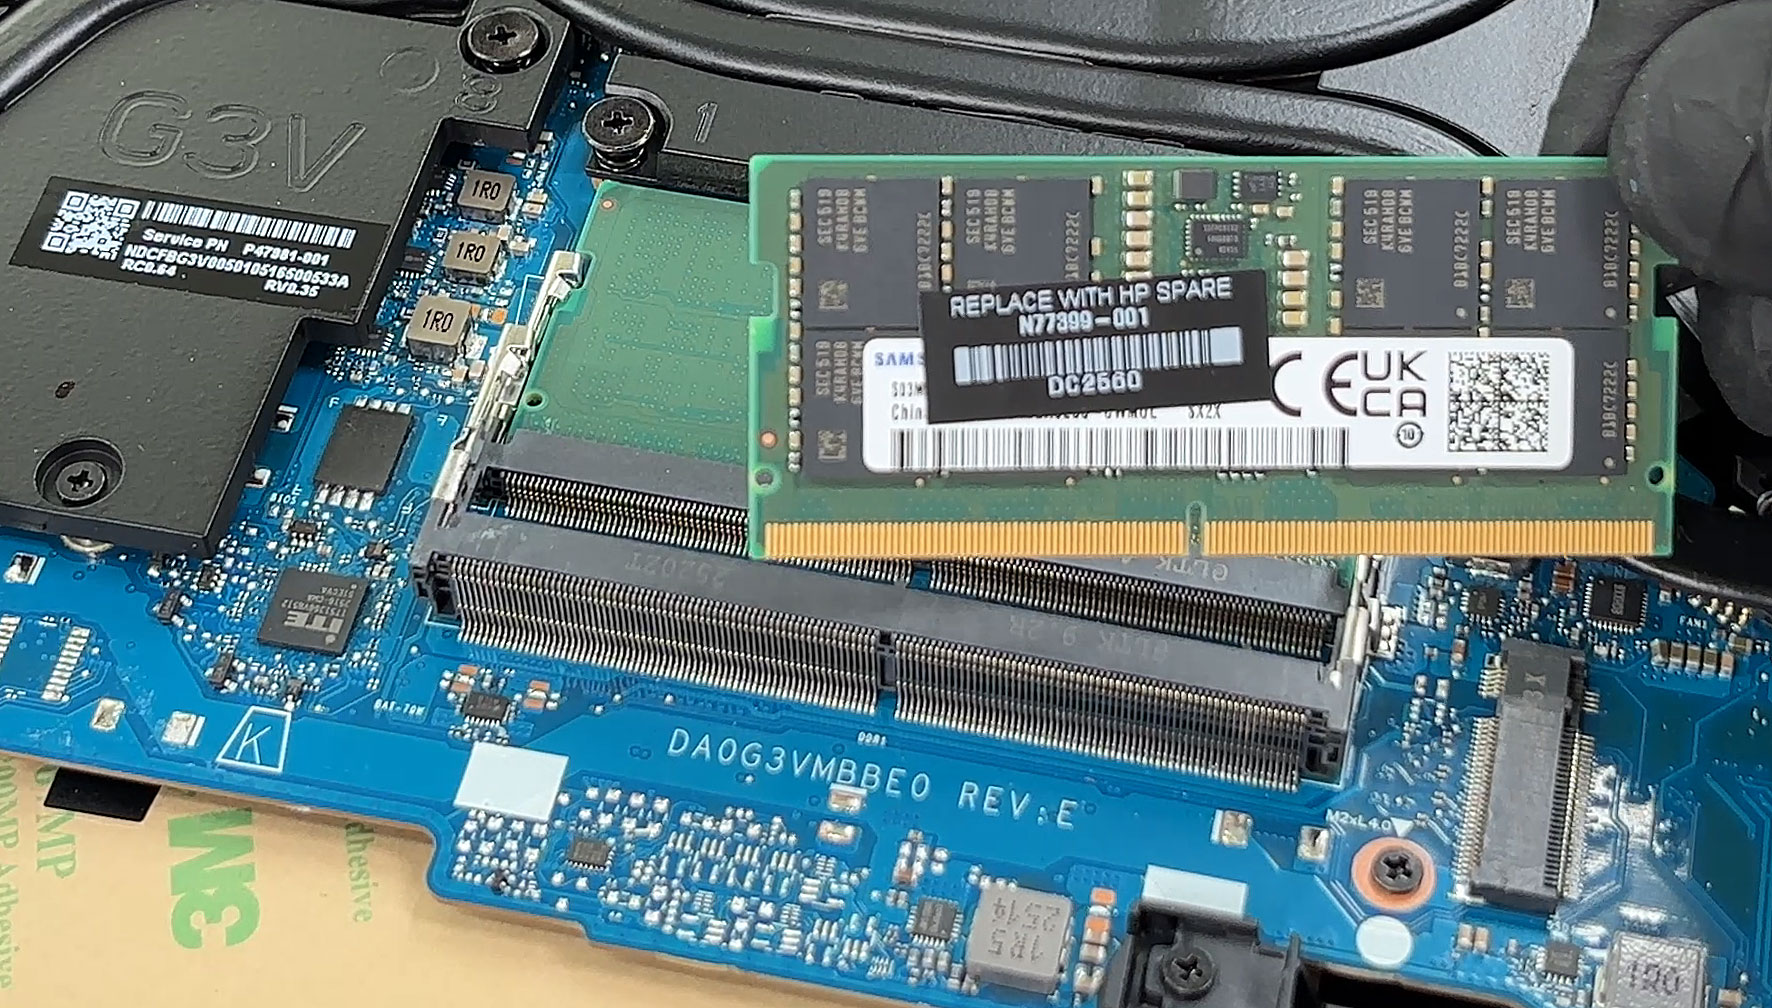
Memory (RAM) upgrade options
- The HP OMEN 16 uses two standard DDR5 SODIMM slots for system memory, located under light shielding tape near the center of the motherboard.
- Carefully peel back the shielding tape to expose the memory slots. Try not to stretch or tear it so it can be re-applied during reassembly.
- HP officially supports up to 32GB of RAM in dual-channel mode. Our unit is equipped with Samsung modules using HP spare part labeling.
- To remove a module, push both side retention clips outward until the SODIMM pops up at an angle, then slide it straight out of the slot.
- Insert the new DDR5 SODIMM at the same angle, push it fully into the connector, then press it down until the side clips click into place and the module sits flat.
- Reposition the shielding tape over the memory area, ensuring it adheres properly and does not interfere with nearby components.
You can buy DDR5 RAM modules here: Buy from Amazon.com (#CommissionsEarned)
Storage upgrade options
- This laptop provides two M.2 PCIe 4.0 x4 slots: one for 2280-length SSDs and one for 2230-sized drives.
- In our configuration, the primary bay is populated with a Samsung PM9C1b 2TB SSD. The secondary 2230 slot is open and topped by a metal shield with a thermal pad on the inside.
- To access an SSD, remove the screw that secures its metal cover (if present) and lift the shield away, taking care not to damage the thermal pad.
- Undo the single screw that holds the SSD in place. The drive will spring up at a shallow angle.
- Slide the SSD straight out of the connector. To install a new drive, insert it at the same angle, push it fully into the socket, then press it down and secure it with the screw.
- Reinstall any metal shields so that their thermal pads make firm contact with the top of the SSD.
You can buy 2280 SSDs here: Buy from Amazon.com (#CommissionsEarned)
Hint: Consider reviewing our Top M.2 SSDs Performance Rankings to select the best storage solution for your needs.
Wireless card and I/O daughterboard
- The wireless module is an M.2 card (e.g. Intel Killer Wi-Fi 7 BE1750x in some configurations) located near one of the fan assemblies.
- To remove it, gently lift the “Main” and “Aux” antenna connectors straight up from their sockets.
- Undo the single screw that secures the Wi-Fi card. The module will tilt upward; slide it out of the M.2 slot.
- Install the replacement card by inserting it at an angle, pressing it down, and securing it with the screw, then reconnect the antenna leads to their corresponding terminals.
- A small I/O daughterboard hosting a USB-C port is located at a rear corner and connected via a ribbon cable. If replacement is needed, carefully unlock the ribbon latch, disconnect the cable, remove the board screws, and swap the module.
Cooling system and maintenance
- The cooling solution consists of two fans and multiple heat pipes feeding fin stacks on the sides and rear. Foam seals guide airflow across the fins and over the VRM and memory plates.
- For regular cleaning, ensure the battery is disconnected. Hold each fan in place with a finger to prevent overspinning and use short bursts of compressed air to blow dust out through the exhaust vents.
- Inspect the foam seals and metal shrouds over the CPU, GPU, VRMs, and memory, making sure they are seated properly and not folded or displaced.
- If a fan needs replacement, disconnect its cable from the motherboard, undo its mounting screws, lift the fan out, and install the new unit in the same orientation before reconnecting the cable.
Reassembly tips
- Before closing the laptop, verify that the battery is reconnected, all SODIMMs and SSDs are fully seated and screwed down, and all cables (fans, speakers, Wi-Fi, daughterboards) are connected.
- Place the bottom panel back on the chassis, aligning all edges and port cutouts.
- Press gently around the perimeter until every clip snaps back into place.
- Retighten the six bottom screws. Do not overtighten to avoid stripping the threads.
- Power on the laptop and check that the system boots normally and detects any new RAM or storage in BIOS/Windows.
More info: Depending on the configuration, the HP OMEN 16 (16-ap0000) comes with either a 70Wh or 83Wh (FZ06XL, 11.58V) battery and SSD options ranging from 512GB to 2TB, with some AMD Ryzen AI models offering dual-drive setups from the factory. In all cases, you retain access to two SODIMM slots, two PCIe 4.0 M.2 bays (2280 + 2230), a replaceable Wi-Fi card, and a robust dual-fan cooling system that is straightforward to service.
HP OMEN 16 (16-ap0000, 2025) in-depth review
The HP OMEN 16 (16-ap0000) isn't the flashiest or most premium-feeling gaming laptop on the block, but it might just be the smartest. Instead of chasing the highest possible benchmark scores for a few fleeting seconds, HP has engineered a machine that prioritizes what truly matters for long, enjoyable gaming sessions: cool, quiet, and incredibly stable performance.The result is a thermal masterpiece that runs with a composure that many of its hotter, louder rivals can only dream of. However, this laser focus on the core gaming experience comes with one very significant and very common [...]
Pros
- Exceptional thermal management keeps the system cool, quiet, and stable
- Excellent and consistent gaming performance with no throttling
- Great upgradeability with two RAM and two M.2 slots
- PWM-free display is great for eye comfort
- Thoughtful port layout with rear-facing connections
- Physical privacy shutter for the webcam
Cons
- Base model display has very poor color coverage (53% sRGB)
- Half-height up and down arrow keys
- One of the two M.2 slots is the smaller 2230 format


![[May 2026] Amazon Global: Top 10 Best-Selling Gaming Laptops – Budget-Friendly ASUS TUF Gaming A15 Dominates the Market](https://laptopmedia.com/wp-content/uploads/2026/06/Best-Selling-Gaming-Laptops-GLOBAL-Top-10-400x225.jpg)
![[May 2026] Amazon Global: Top 10 Best-Selling Laptops – Apple’s Affordable ‘MacBook Neo’ Takes the Crown Amidst Strong Air and Pro Sales](https://laptopmedia.com/wp-content/uploads/2026/06/Best-Selling-Laptops-GLOBAL-Top-10-400x225.jpg)
![[May 2026] Best-Selling Laptop Brands on Amazon Global – Apple Dominates in Units and Revenue](https://laptopmedia.com/wp-content/uploads/2026/06/GLOBAL-Best-Brands-400x225.jpg)