How to open Acer Nitro V 16 (ANV16-71) – disassembly and upgrade options

Opening the Acer Nitro V 16
Hint: Ensure the laptop is powered off and unplugged before starting.
- Undo the 11 Phillips-head screws securing the bottom panel of the laptop.
- Hold the two plastic vents on the rear and pop the back of the panel. For a safer approach, use both hands to pop the exhausts one by one.
- If this method doesn’t release the internal clips, pry the sides and the front with a thin plastic tool to fully detach the bottom panel.
- Carefully remove the panel to access the internals.
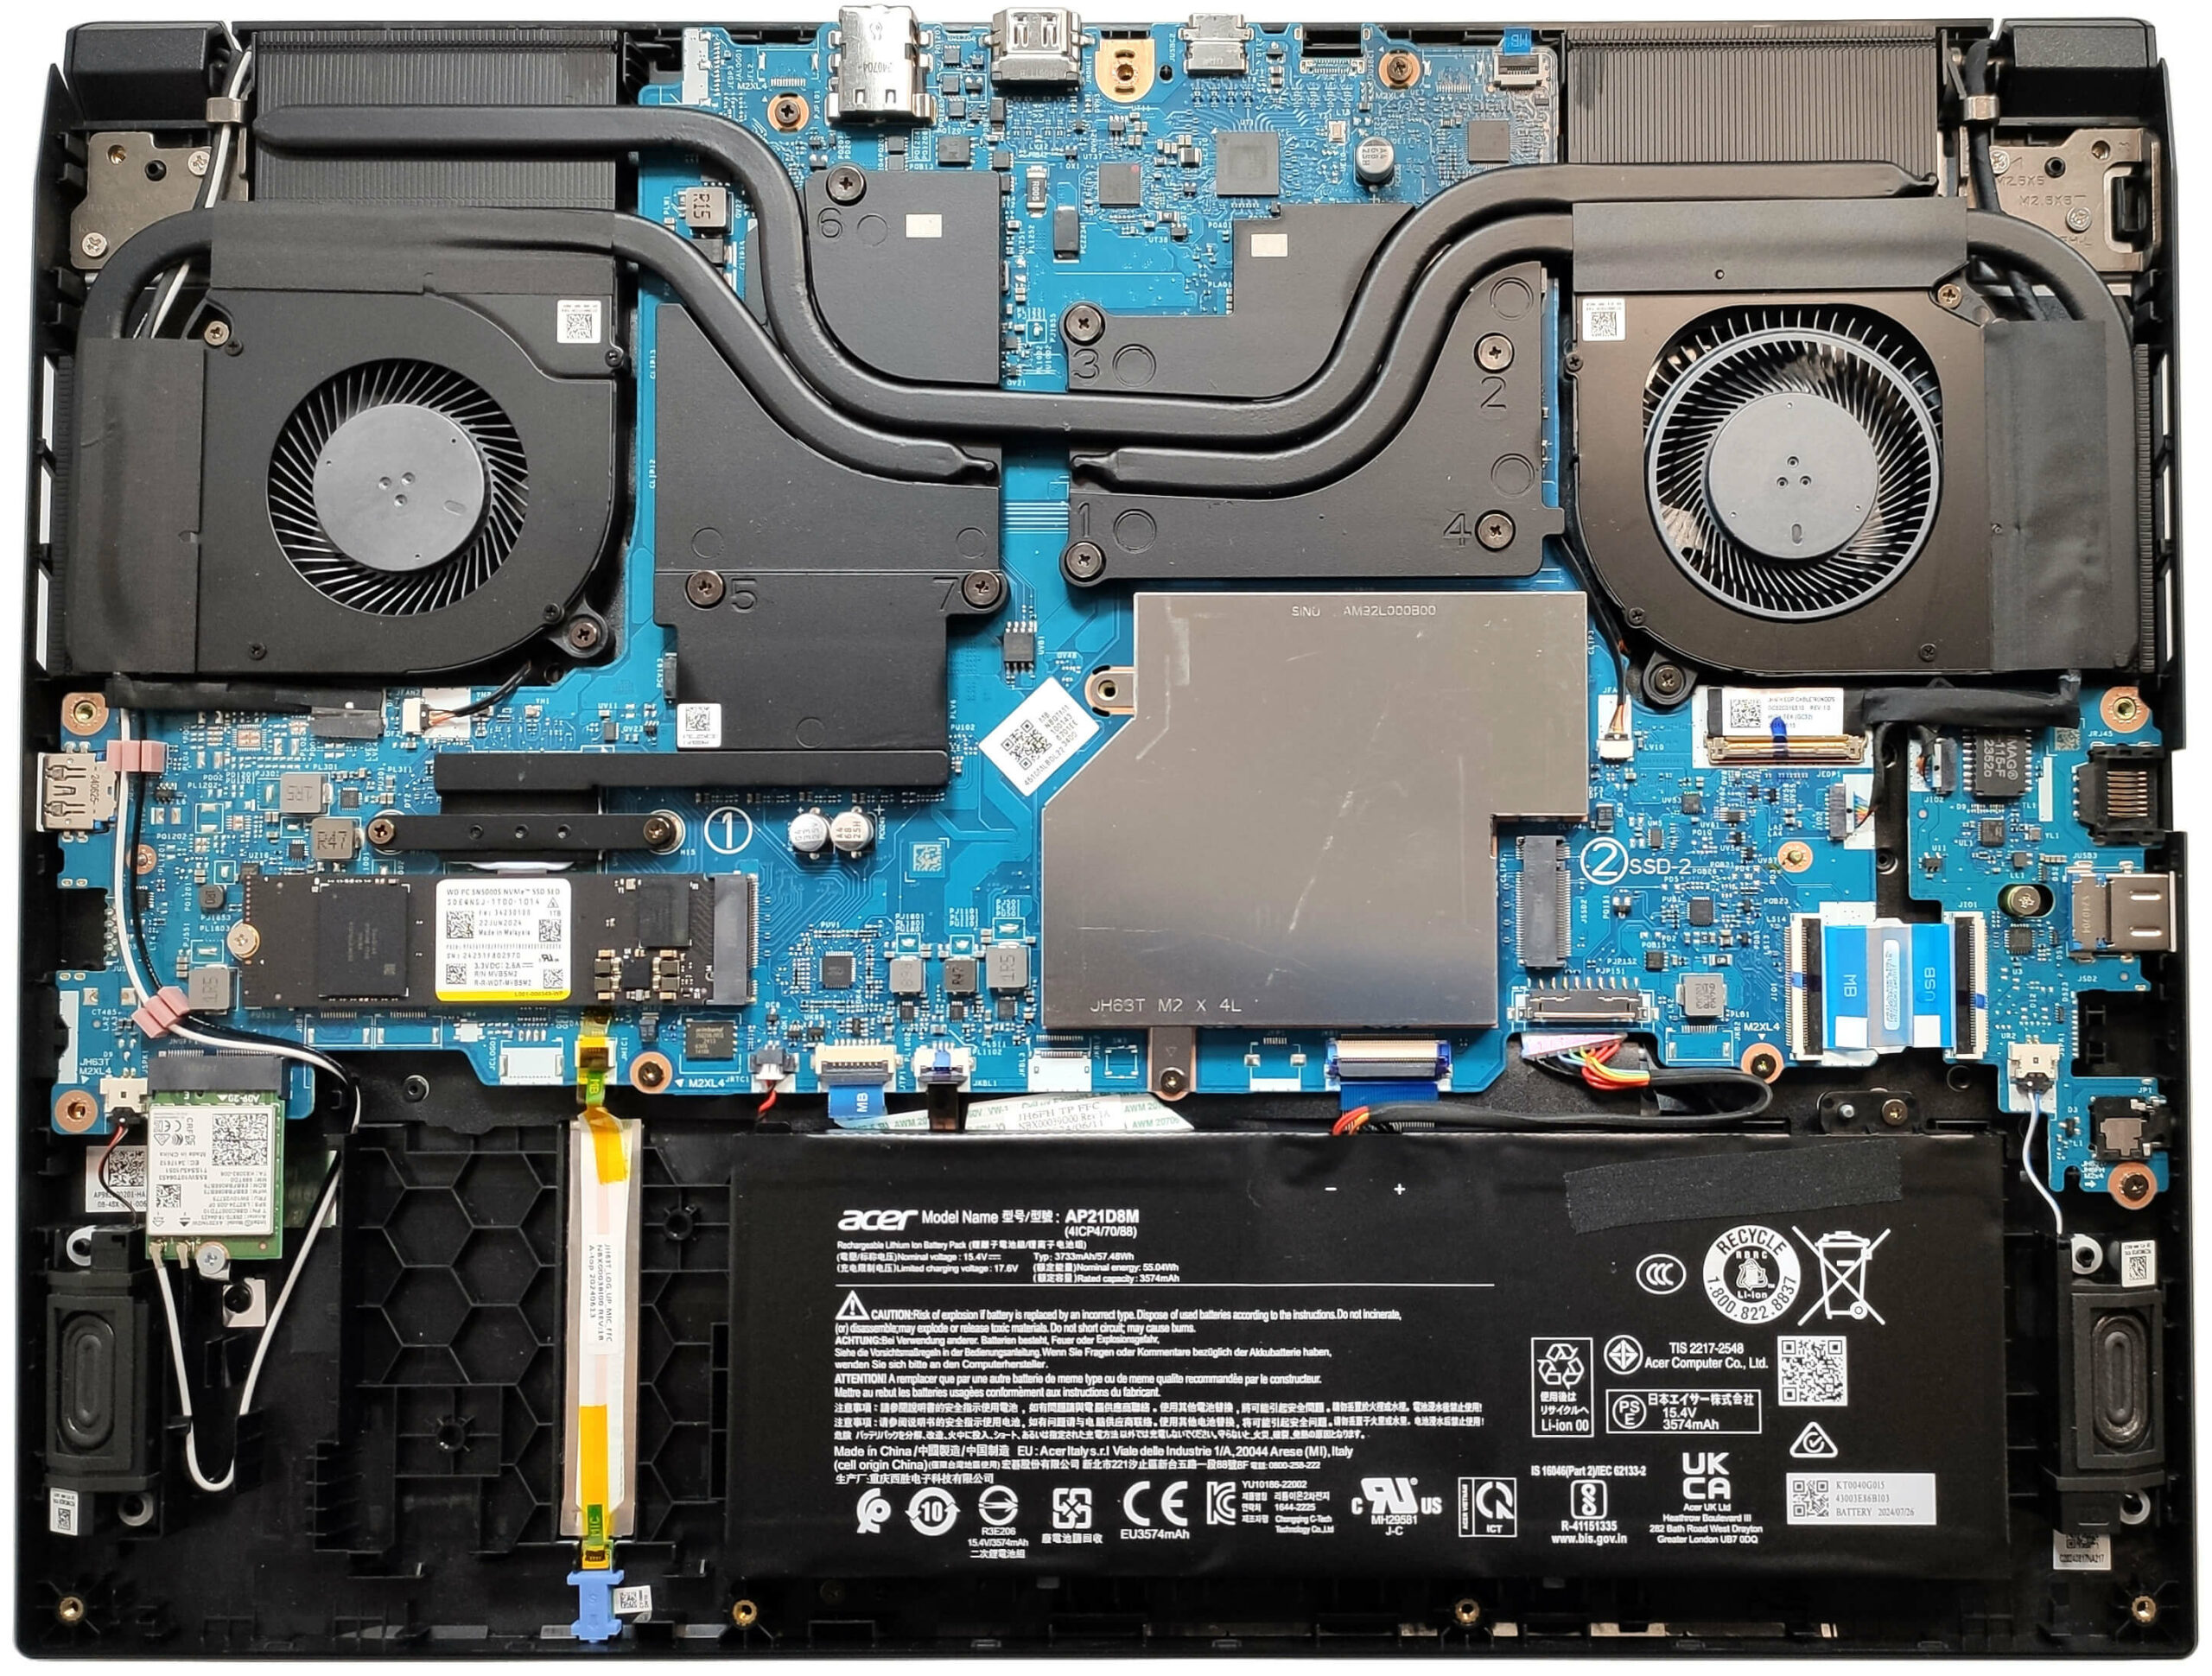
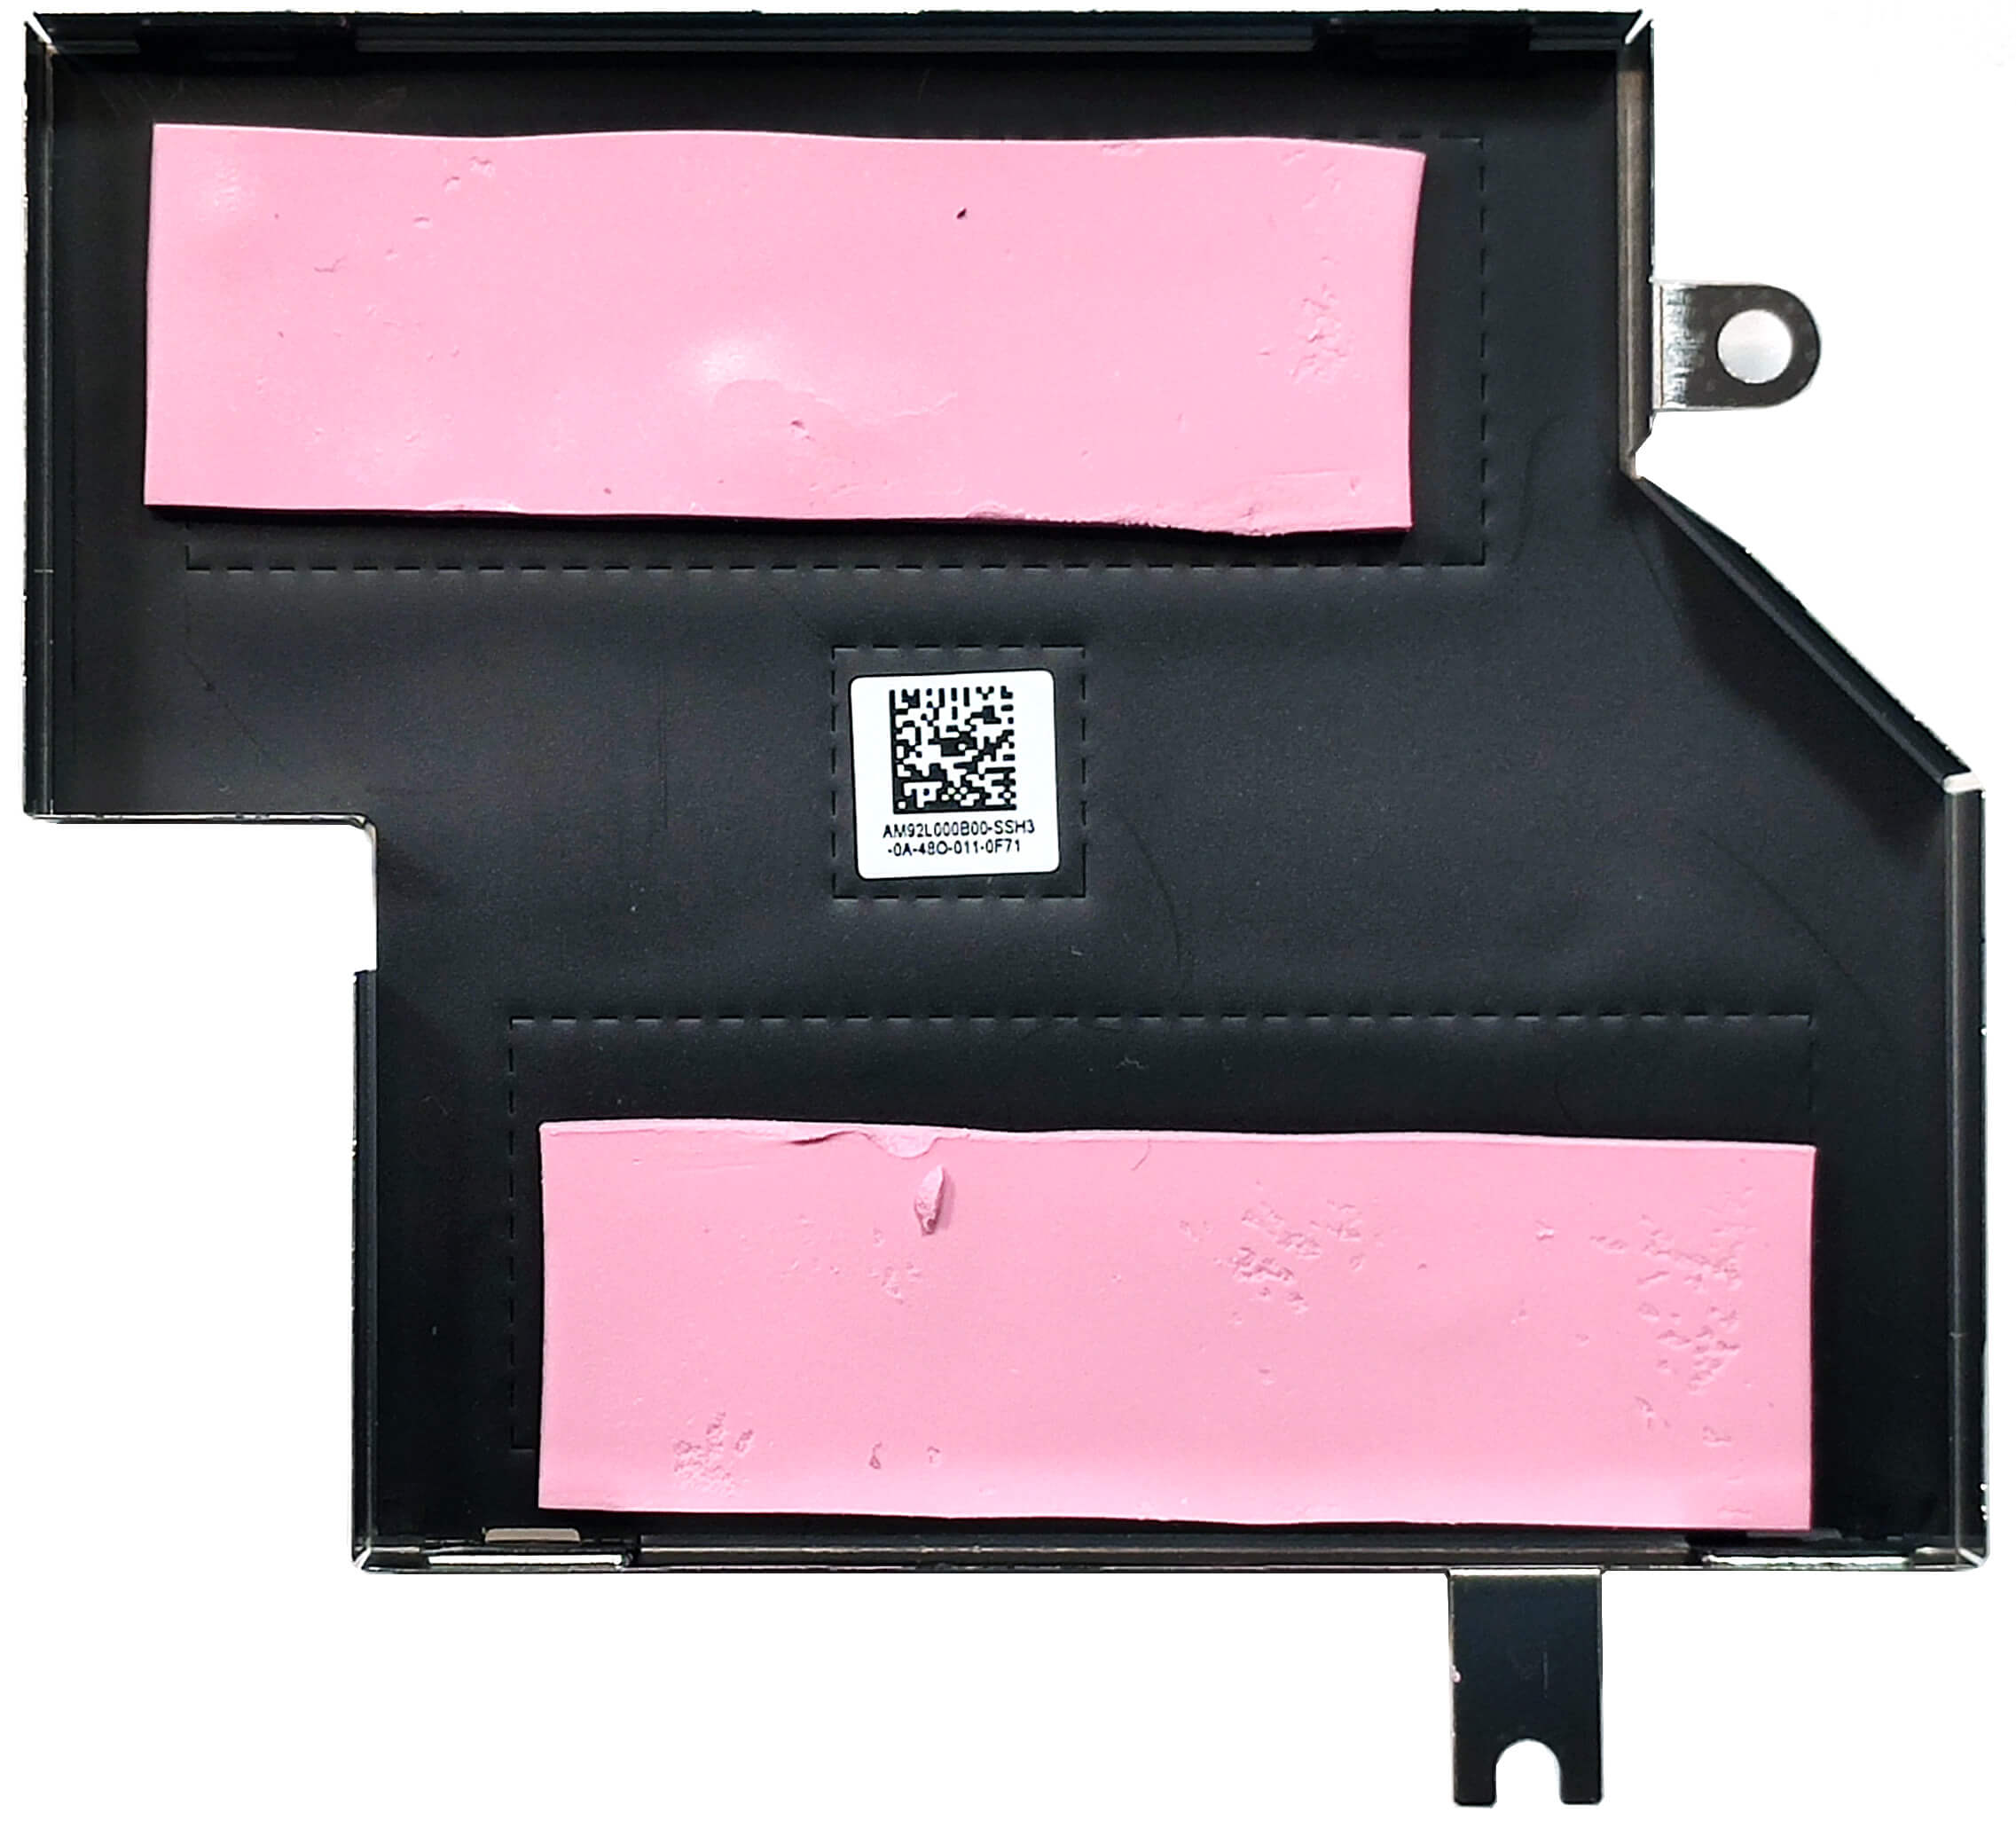
More info: The inside of the bottom plate houses metal plates with thermal pads for the SSD slots and a dust filter for improved airflow.
Battery Removal
Caution: Handle the battery with care to avoid damage or electrical hazards.
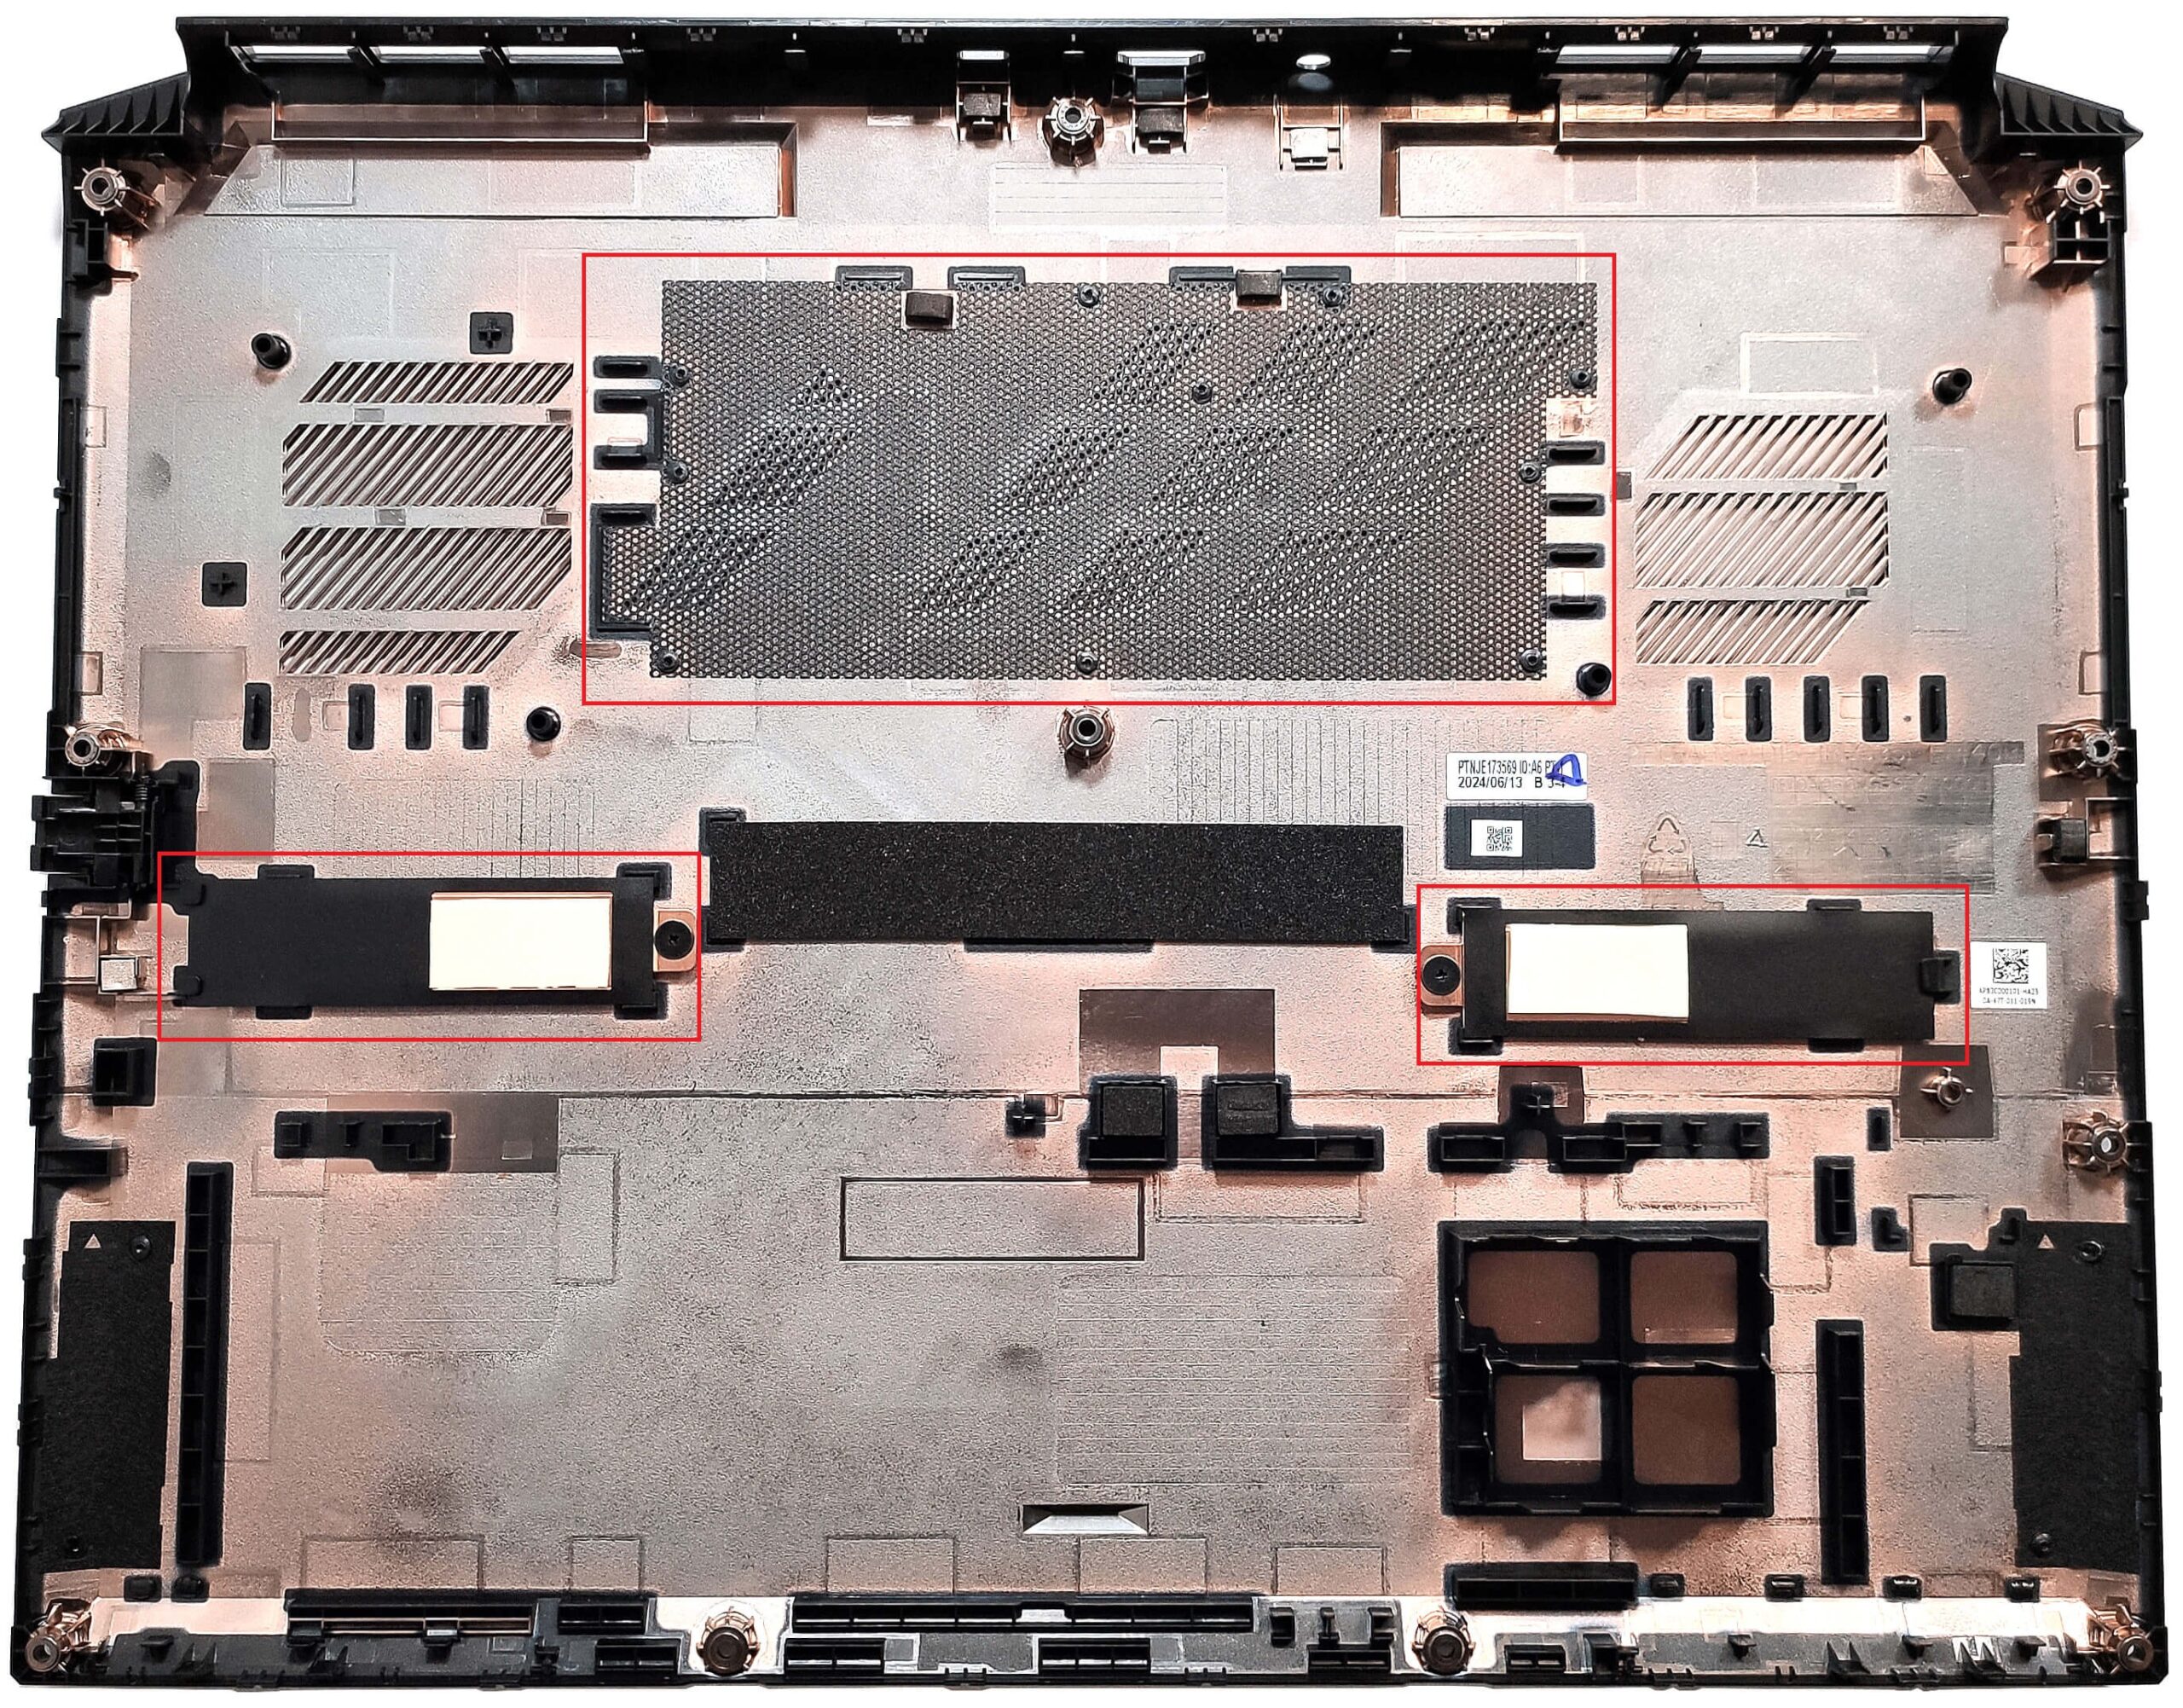
- Disconnect the battery by pulling the connector gently toward the battery.
- Undo the two Phillips-head screws securing the 57Wh battery to the chassis.
- Carefully lift and remove the battery from the laptop.
More info: The 57Wh battery provides approximately 3.5 hours of video playback, suitable for moderate use.
You can find compatible batteries here: Buy from Amazon.com (#CommissionsEarned)
Memory Upgrade
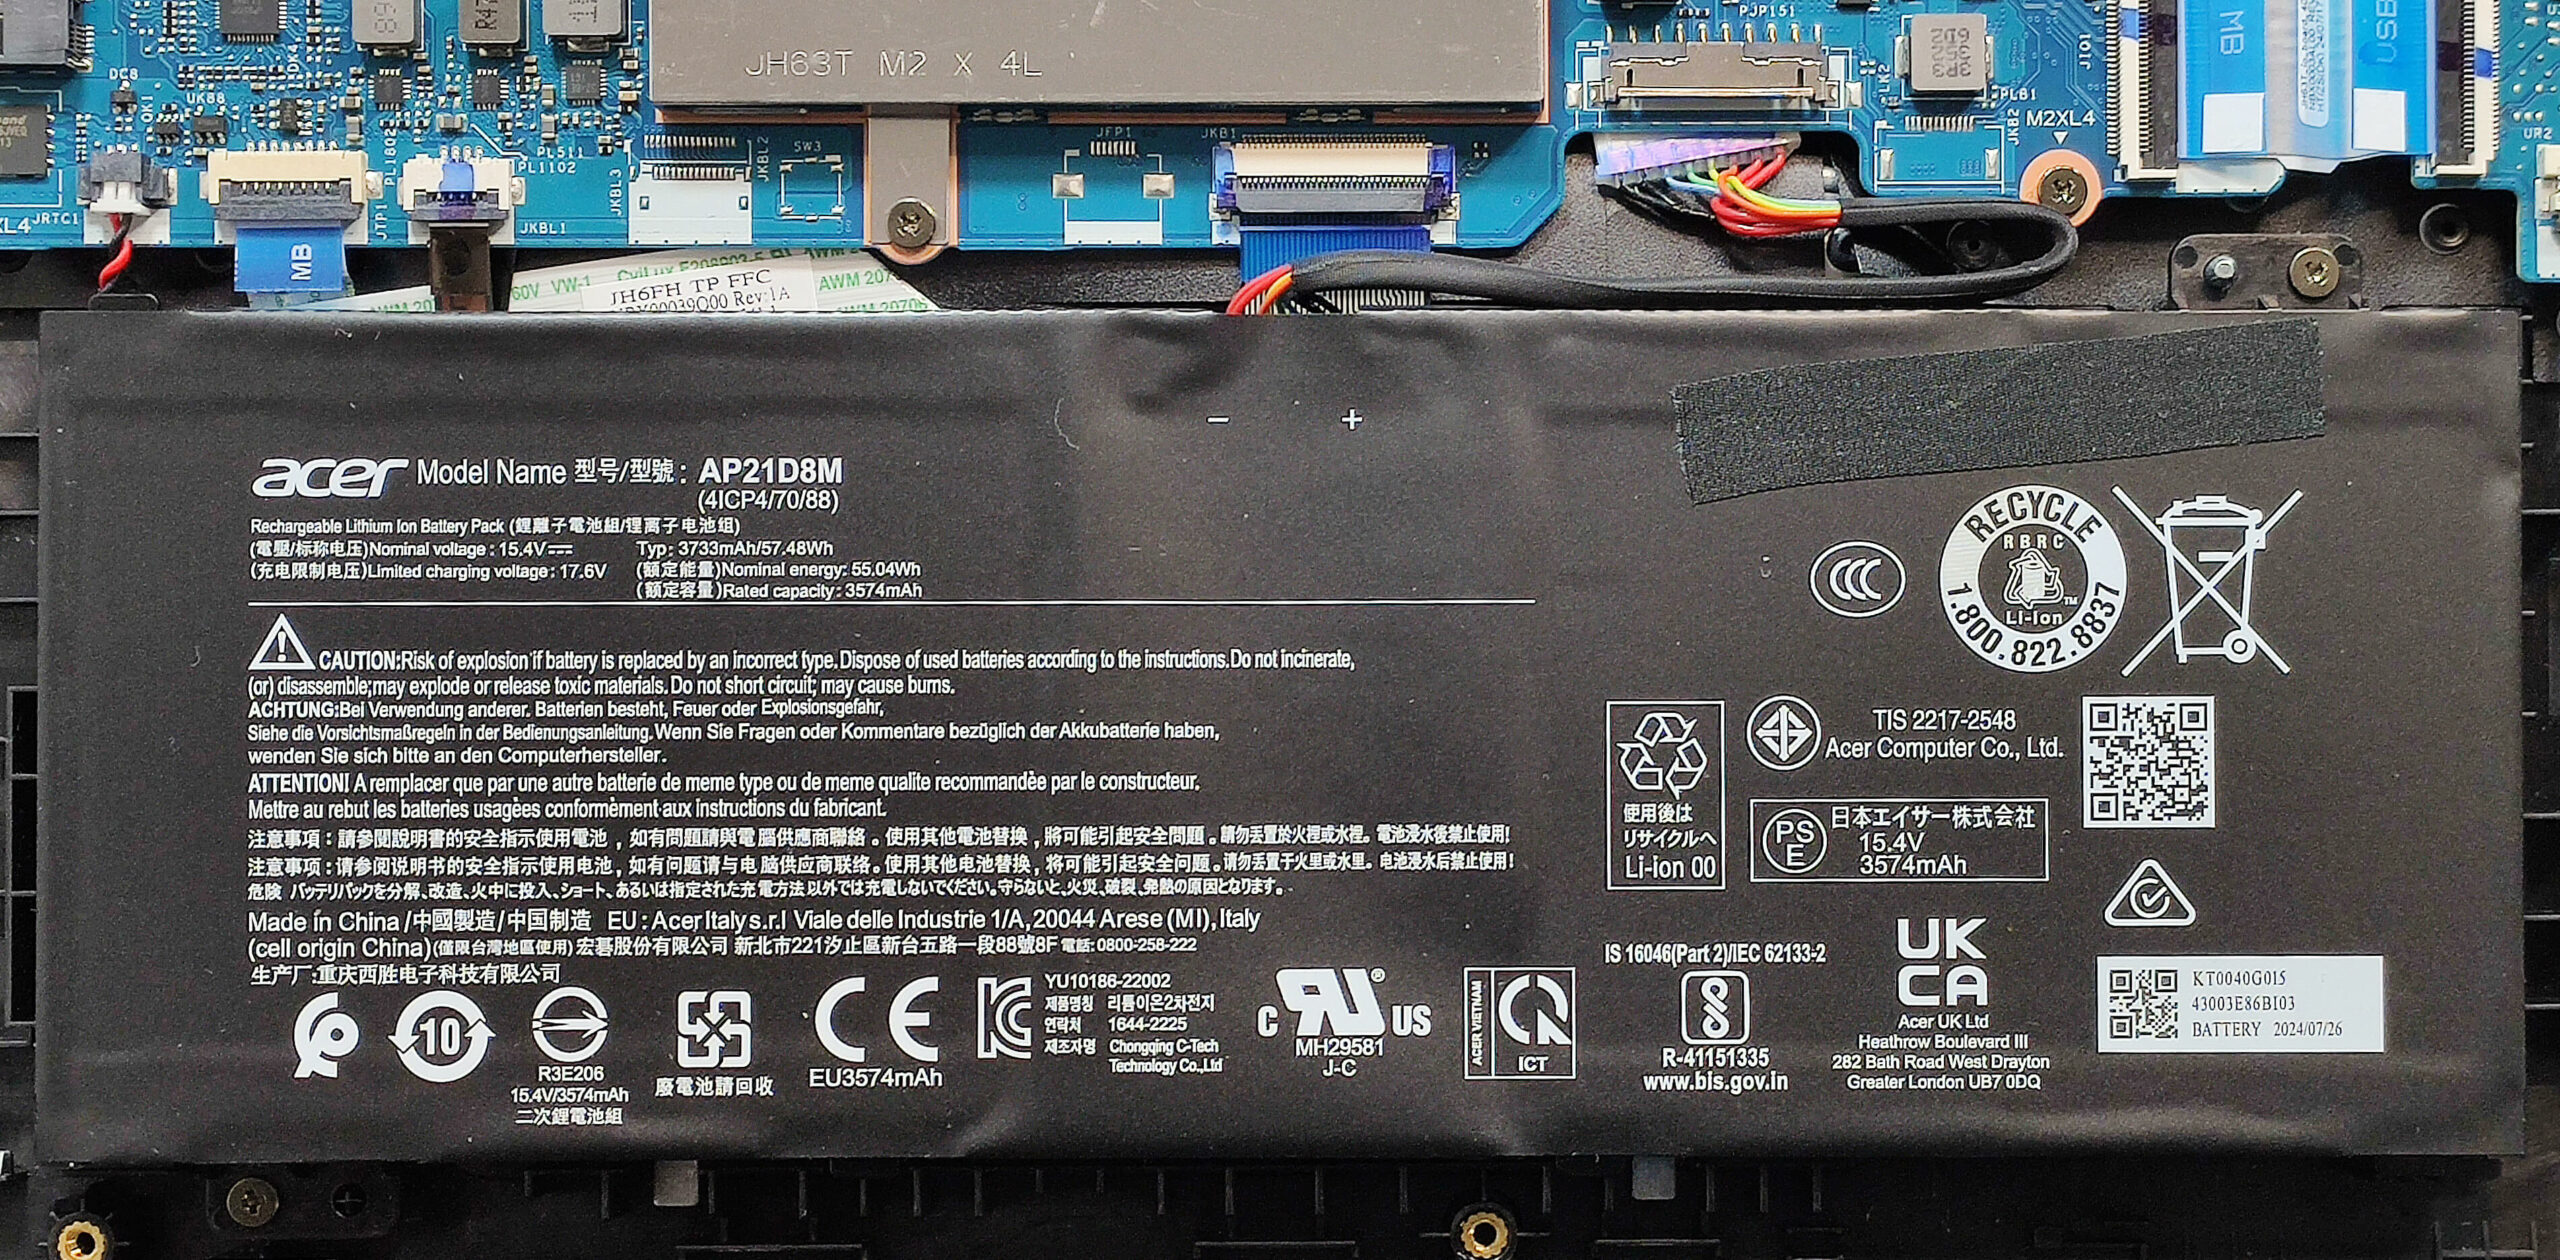
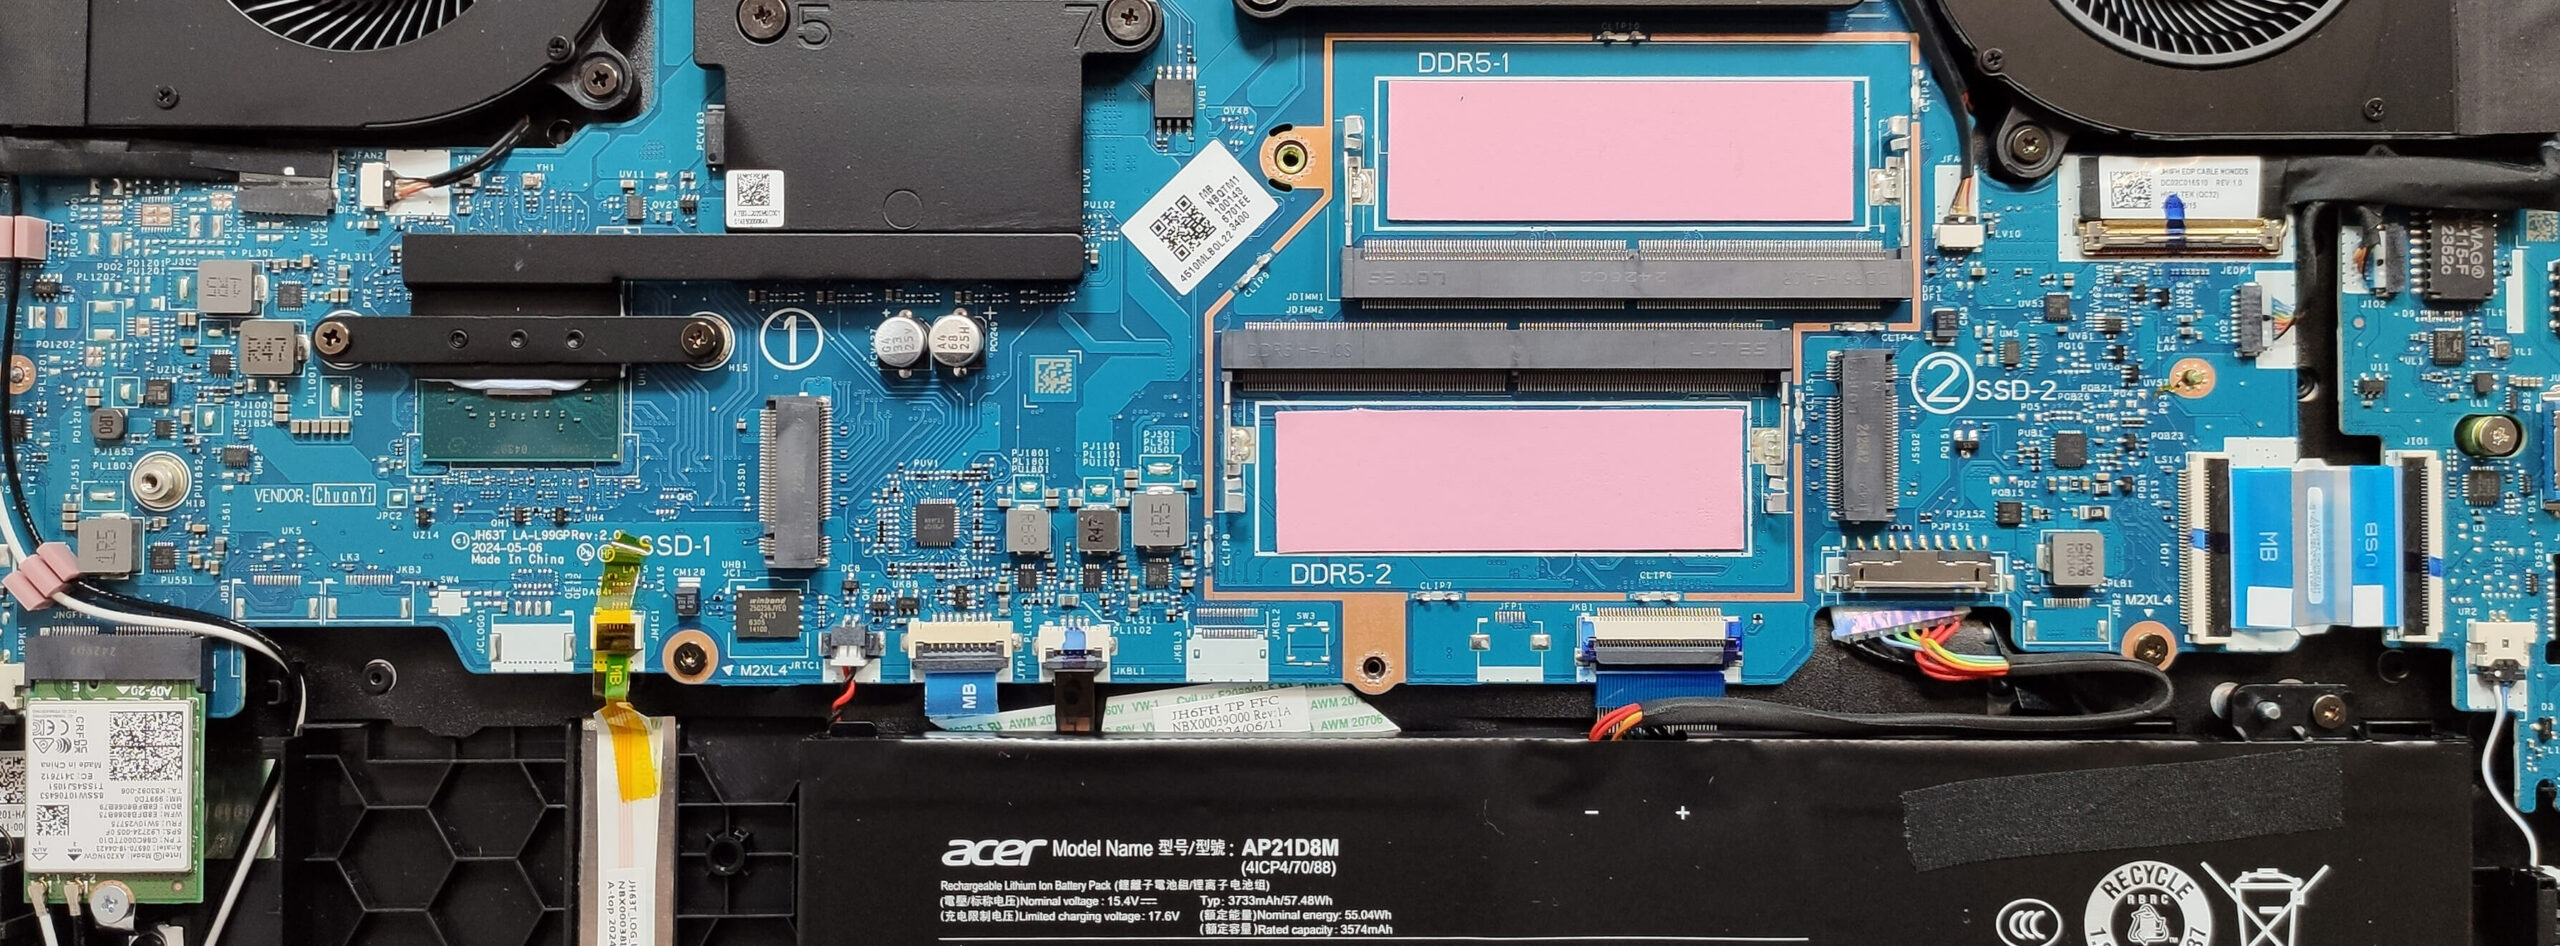
Note: The memory slots are protected by a metal plate with internal thermal pads.
- Remove the single screw securing the metal plate covering the RAM slots.
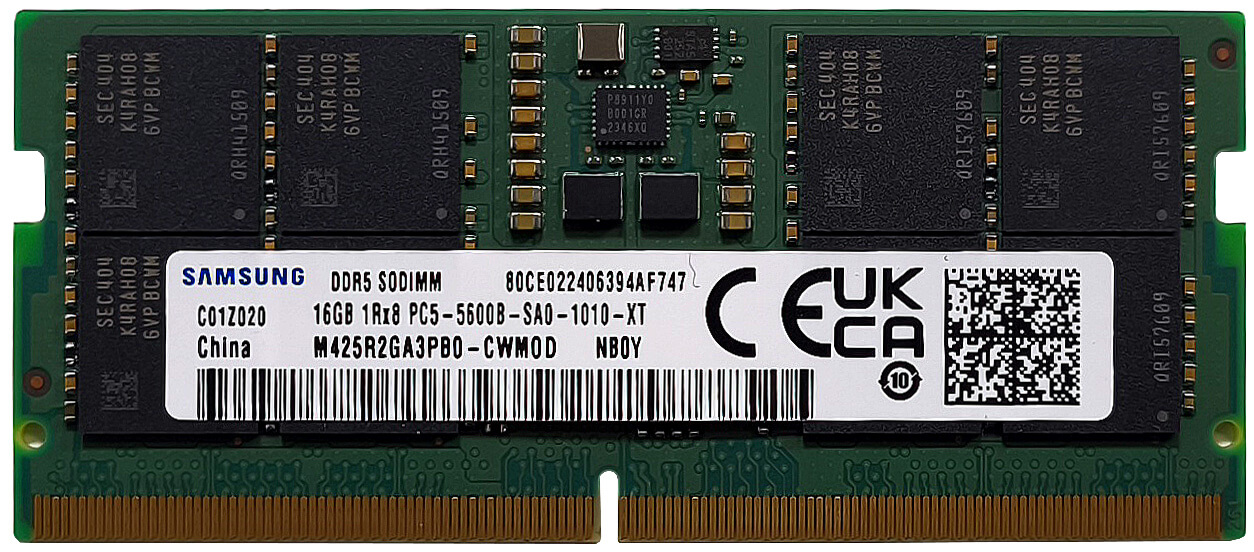
- Lift the plate to reveal the two SODIMM slots, which can hold up to 32GB of DDR5-5600MHz memory in dual-channel mode, as specified by Acer.
- Higher capacities up to 192GB may be supported due to the CPU’s capability.
- Install the RAM modules wrapped in heat shields, ensuring they click securely into place. The modules are cooled by thermal pads on both sides.
More info: Ensure the memory modules are compatible for optimal performance.
You can find compatible RAM here: Buy from Amazon.com (#CommissionsEarned)
Storage Upgrade
Hint: Handle SSD components carefully to avoid damage or data loss.
- Locate the two M.2 slots compatible with 2280 Gen 4 SSDs.
- Each slot is covered with a metal plate secured by screws. Remove the plate to access the slots.
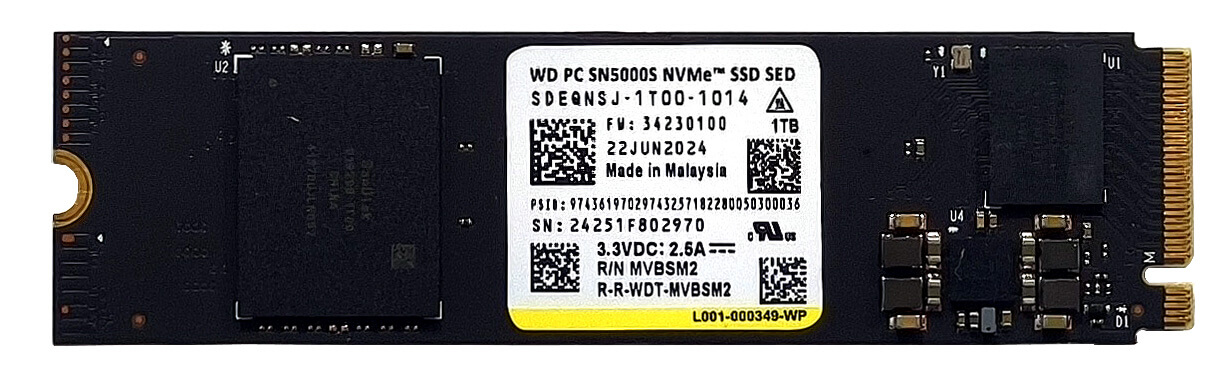
- Install your SSD into the slot at a slight angle, ensuring it is fully seated, and secure it with the screws.
- Replace the metal plate to ensure proper thermal contact with the SSD.
More info: The metal plates include thermal pads to help manage heat and maintain SSD performance.
You can find compatible SSDs here: Buy from Amazon.com (#CommissionsEarned)
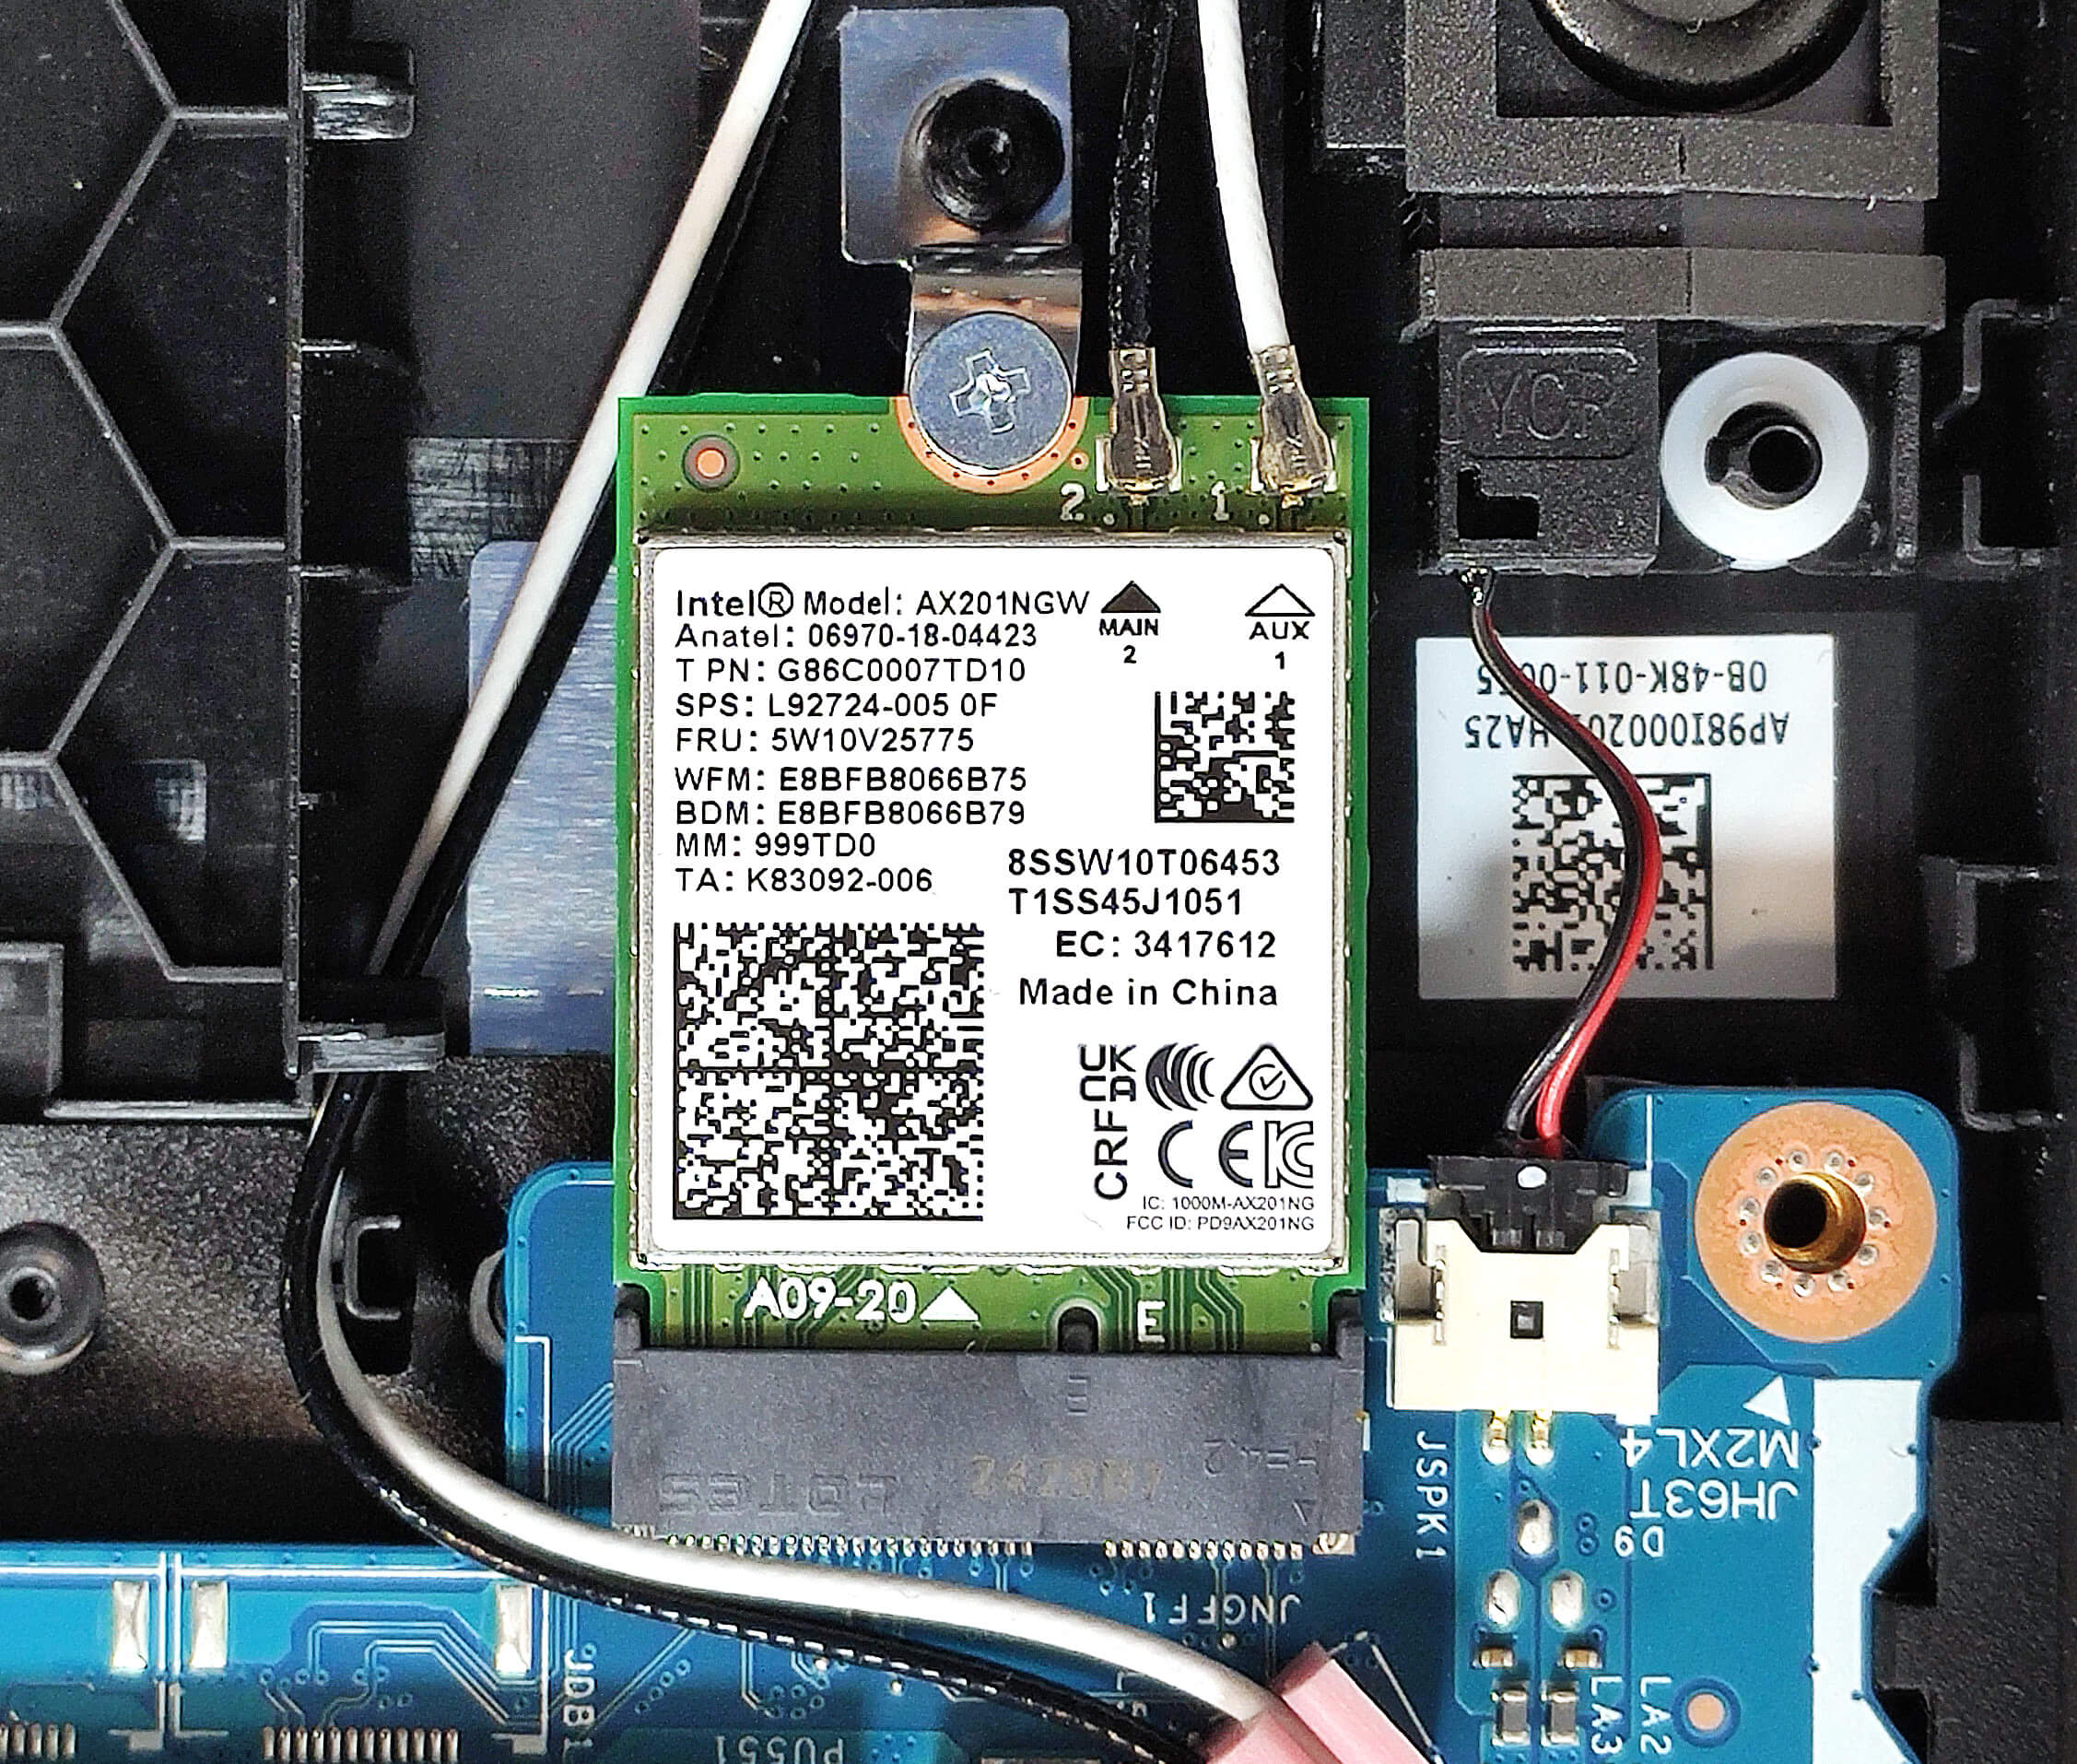
Wi-Fi Card
More Info: The Wi-Fi 6 card is replaceable and it’s positioned on the left of the battery.
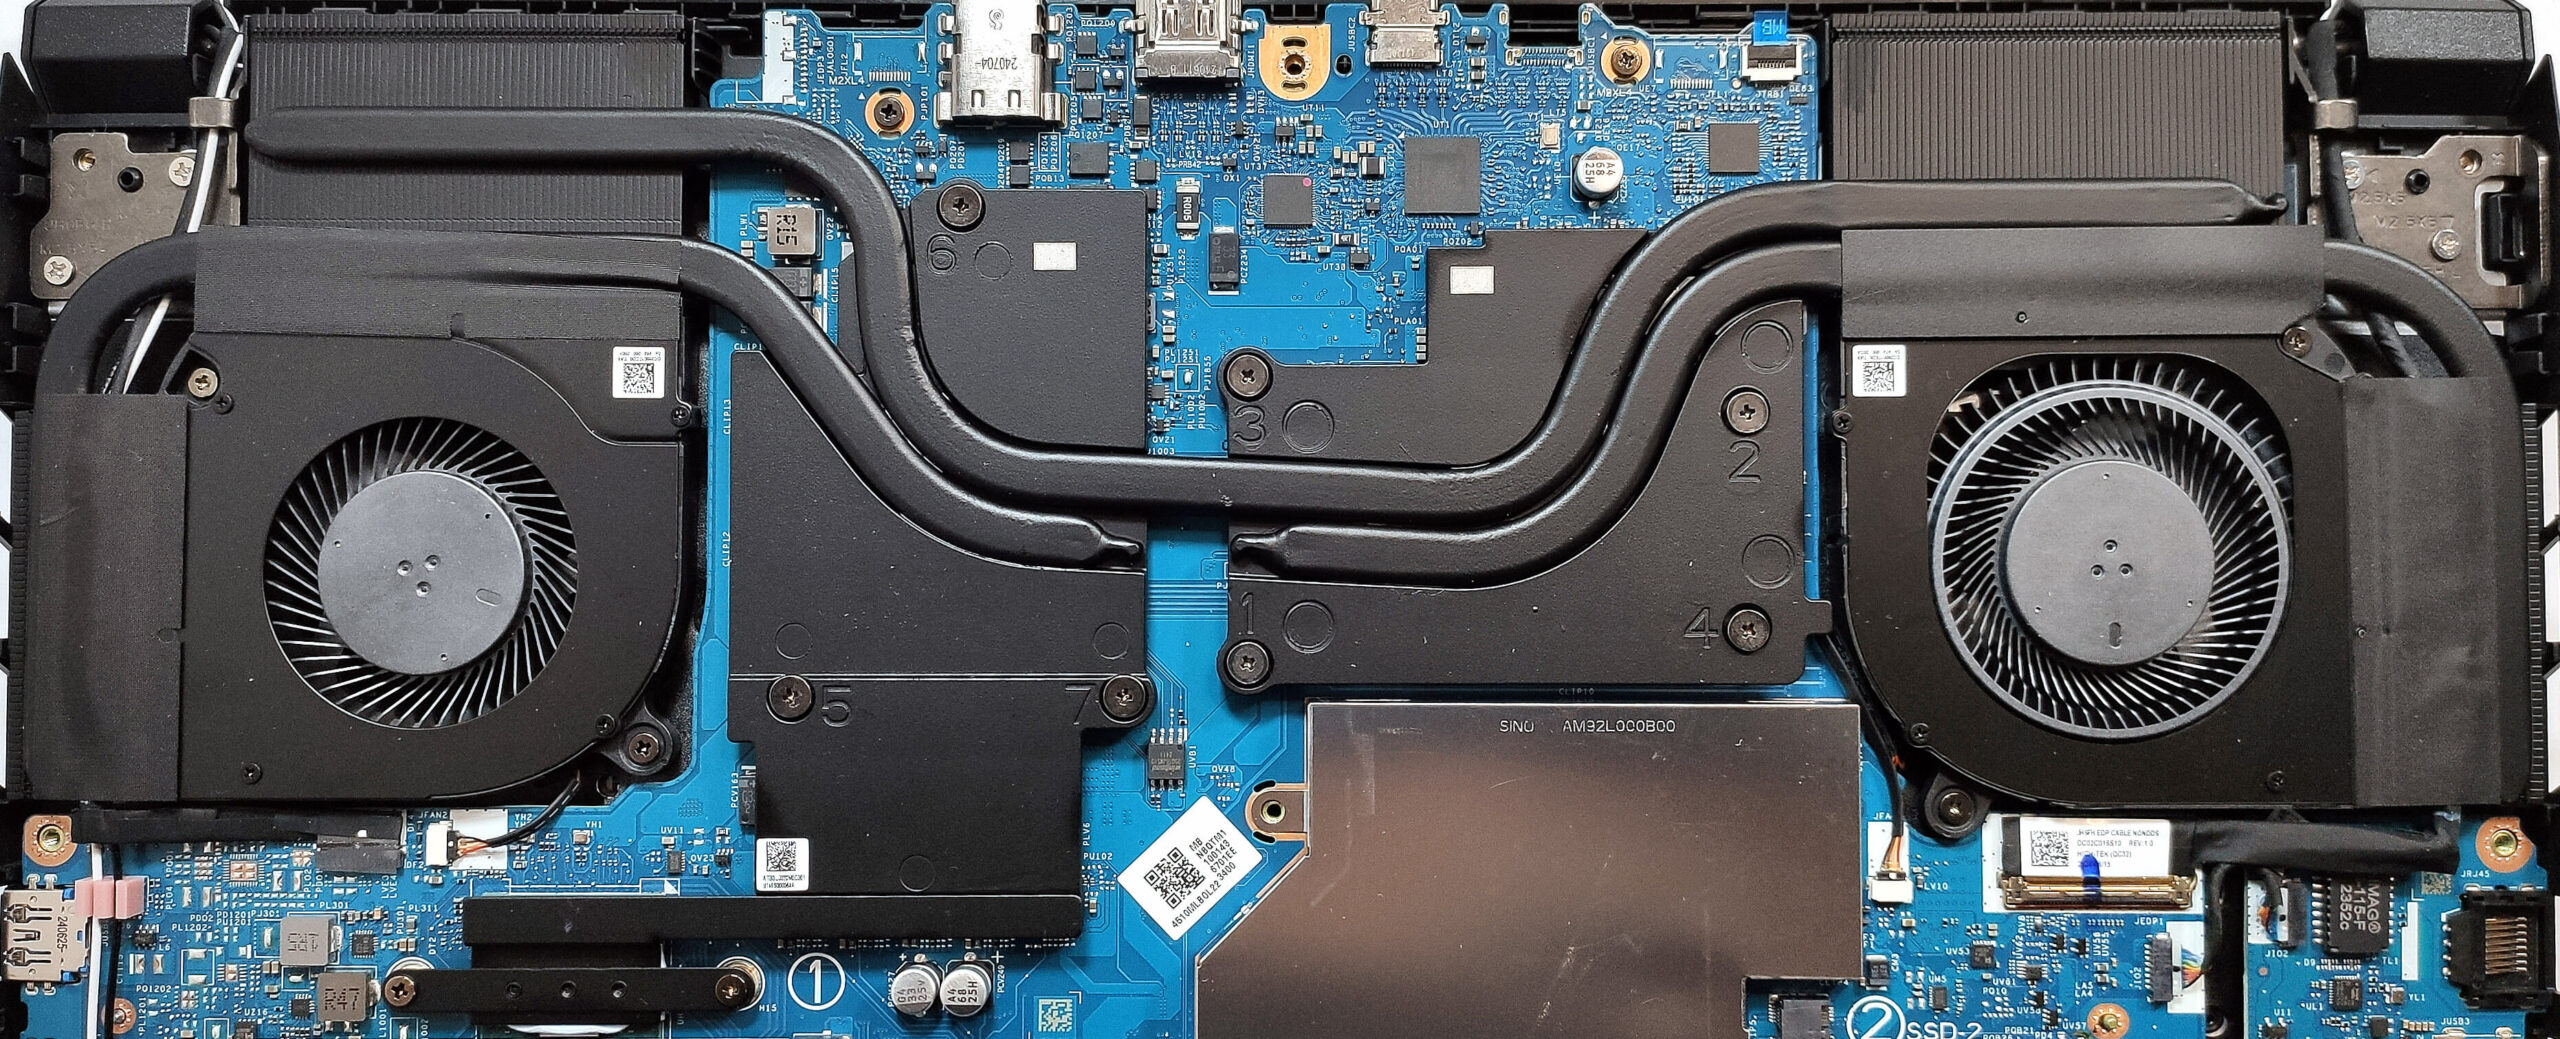
Cooling System Overview
- Two fans of different sizes cool the system, with the larger one dedicated to the GPU.
- The cooling system includes one heat pipe shared between the CPU and GPU, along with one additional heat pipe for each chip.
- Four heat sinks and two large metal plates contribute to heat dissipation, with the left plate also cooling the chipset.
Tip: Regularly inspect and clean the fans and heat pipes to maintain optimal cooling performance.
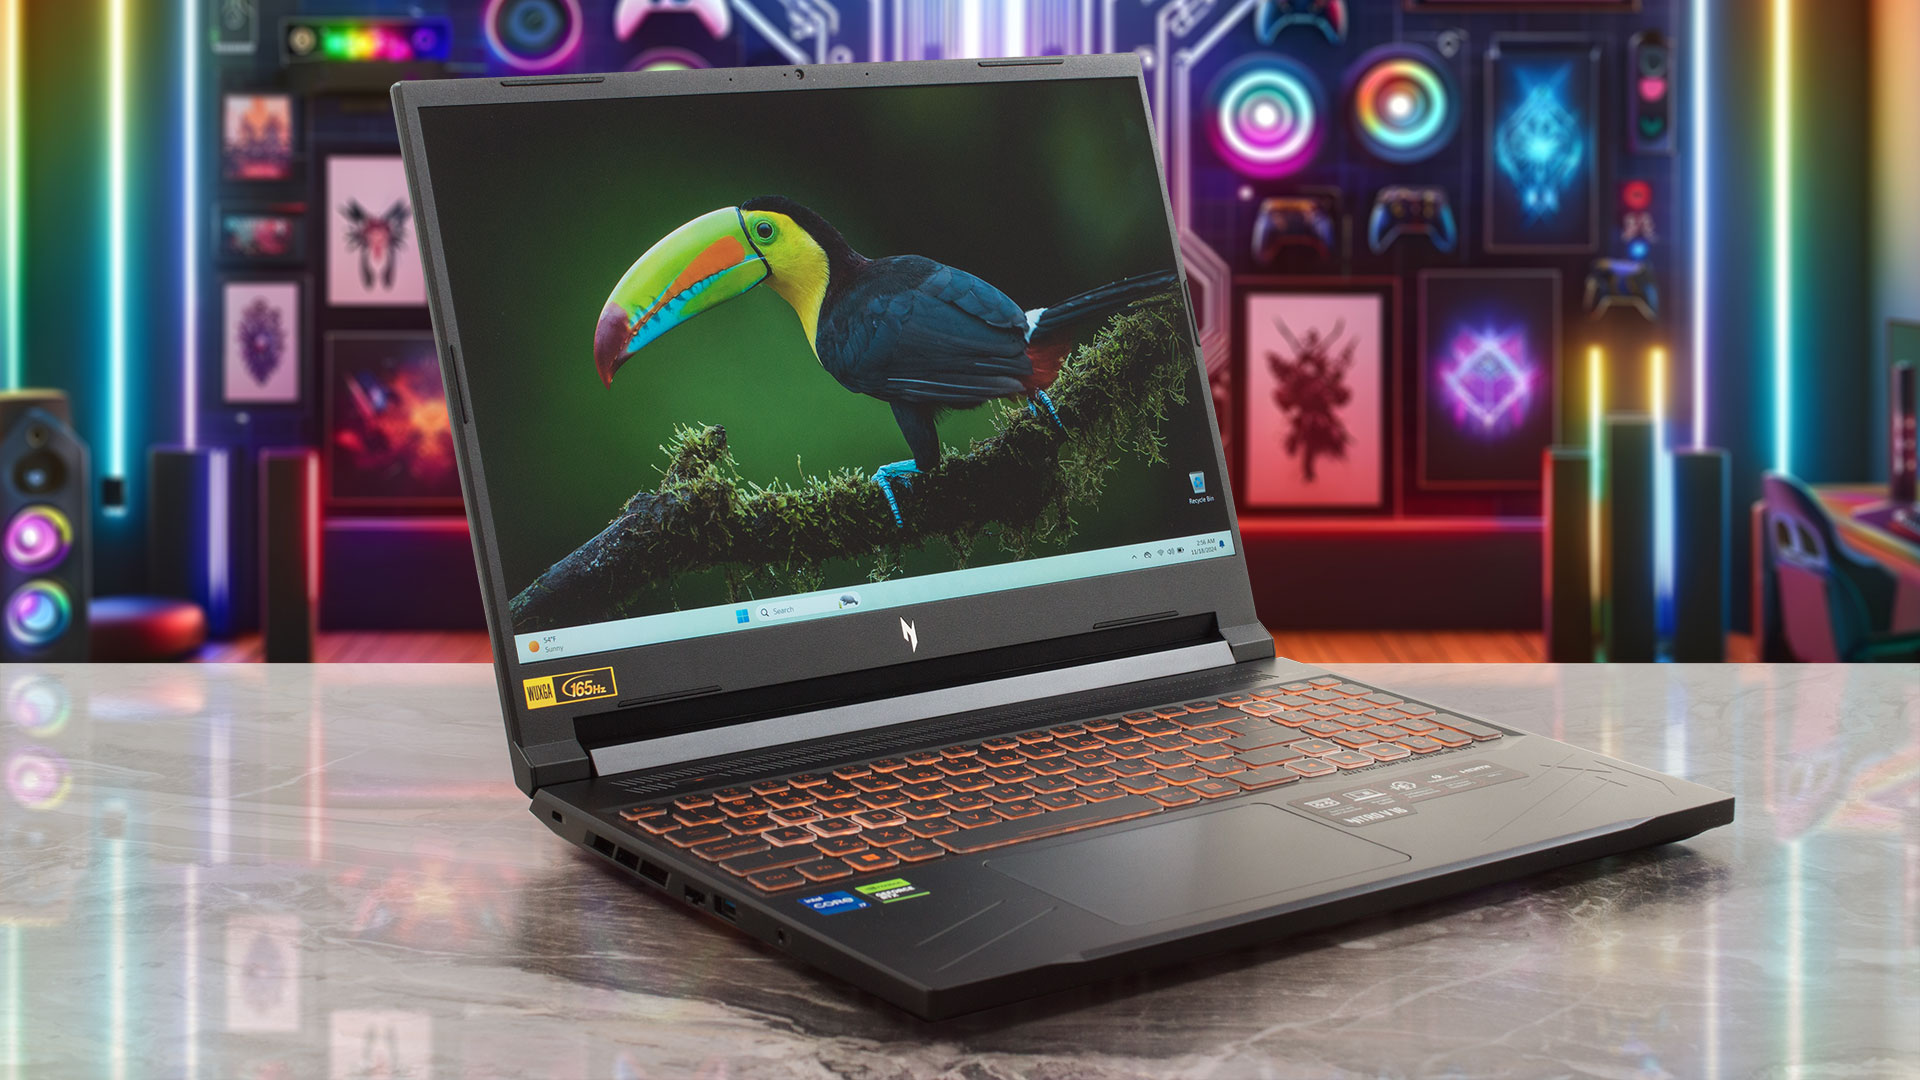
Acer Nitro V 16 (ANV16-71) in-depth review
Acer is trying to conquer the mobile budget gaming segment with its Nitro V series of devices. The ANV16-71 model is positioned higher in the Nitro ranks. It's powered by Intel Raptor Lake-HX Refresh CPUs with a hefty 55W base power limit. Regarding graphics, you can choose from an RTX 3050 with 6GB VRAM or two RTX 4000 GPUs. We decided to buy a laptop with the most powerful processor and graphics card for this Acer series which are the Core i7-14650HX and an 85W GeForce RTX 4060. Despite its affordable price, the laptop offers good upgradability and a decent selection of ports. The manufactu[...]
Pros
- Good overall performance for the class
- PWM-free (AUOD8B1)
- 165Hz refresh rate + wide viewing angles (AUOD8B1)
- MUX switch
- Thunderbolt 4 port + 2.5 Gbps LAN + HDMI 2.1
- Great backlit keyboard
- Solid base
- The CPU sustains ~ 3.20 GHz / 2.60 GHz P and E core clock in short and medium loads
- The GeForce RTX 4060 maintains an 83W power limit and almost 2300 MHz core frequency during gaming
- Pretty good "Performance" preset that offers less aggressive fans and a 70W GPU TGP
- Snappy SSD (WD PC SN5000S SDEQNSJ-1T00-1014)
- 2x SODIMMs + 2x 2280 Gen 4 M.2 slots
- Dedicated thermal pads for the memory and storage drives
- Good sound quality
- Well priced
Cons
- The lid could've been more stable
- Just three USB ports
- The glossy lid is a fingerprint magnet
- Short battery life (~3 hours and a half of videos)
 Author: Dimitar Stalev

![[June 2026] Best-Selling Laptop Brands on Amazon Global – Apple’s Unrivaled Dominance in Units and Revenue](https://laptopmedia.com/wp-content/uploads/2026/07/GLOBAL-Best-Brands-400x225.jpg)
![[June 2026] Amazon Global: Top 10 Best-Selling Laptops – Apple’s New MacBook Neo Storms to #1, Reshaping the Market with Affordability](https://laptopmedia.com/wp-content/uploads/2026/07/Best-Selling-Laptops-GLOBAL-Top-10-400x225.jpg)
![[June 2026] Amazon Global: Top 10 Best-Selling Gaming Laptops – Acer’s Nitro V 16S AI Dominates Sales, While ASUS Leads Overall Revenue](https://laptopmedia.com/wp-content/uploads/2026/07/Best-Selling-Gaming-Laptops-GLOBAL-Top-10-400x225.jpg)
![[June 2026] Global Ranking of Best-Selling Laptop GPUs on Amazon – NVIDIA RTX 5060 is the Top-Selling Dedicated GPU](https://laptopmedia.com/wp-content/uploads/2026/07/Best-Selling-GPUs-GLOBAL-Top-10-400x225.jpg)
![[June 2026] Global Ranking of Best-Selling Laptop CPUs on Amazon – Apple M5 Dominates, AMD Ryzen 7 260 Gets Solid Premium Share](https://laptopmedia.com/wp-content/uploads/2026/07/Best-Selling-CPUs-GLOBAL-Top-10-400x225.jpg)