How to open Acer Nitro V 17 AI (ANV17-41) – disassembly and upgrade options

Before you start: Shut the laptop down, unplug the charger and all peripherals, and hold the power button for a few seconds to discharge residual power. Work on a clean, non-conductive surface and, if possible, use an anti-static wrist strap.
Opening the bottom panel
- Place the laptop upside down with the rear vents facing away from you.
- Undo the ten Phillips-head (cross-head) screws that secure the bottom panel. All screws are the same length, which simplifies reassembly.
- Insert a thin plastic pry tool between the chassis and the bottom panel near one of the edges.
- Gently twist the tool to release the first clip and then work your way around the perimeter to unlatch all remaining clips.
- Once the clips are released, lift the bottom panel away and set it aside.
Caution: Use only plastic tools around the vents and edges to avoid scratching or deforming the panel.
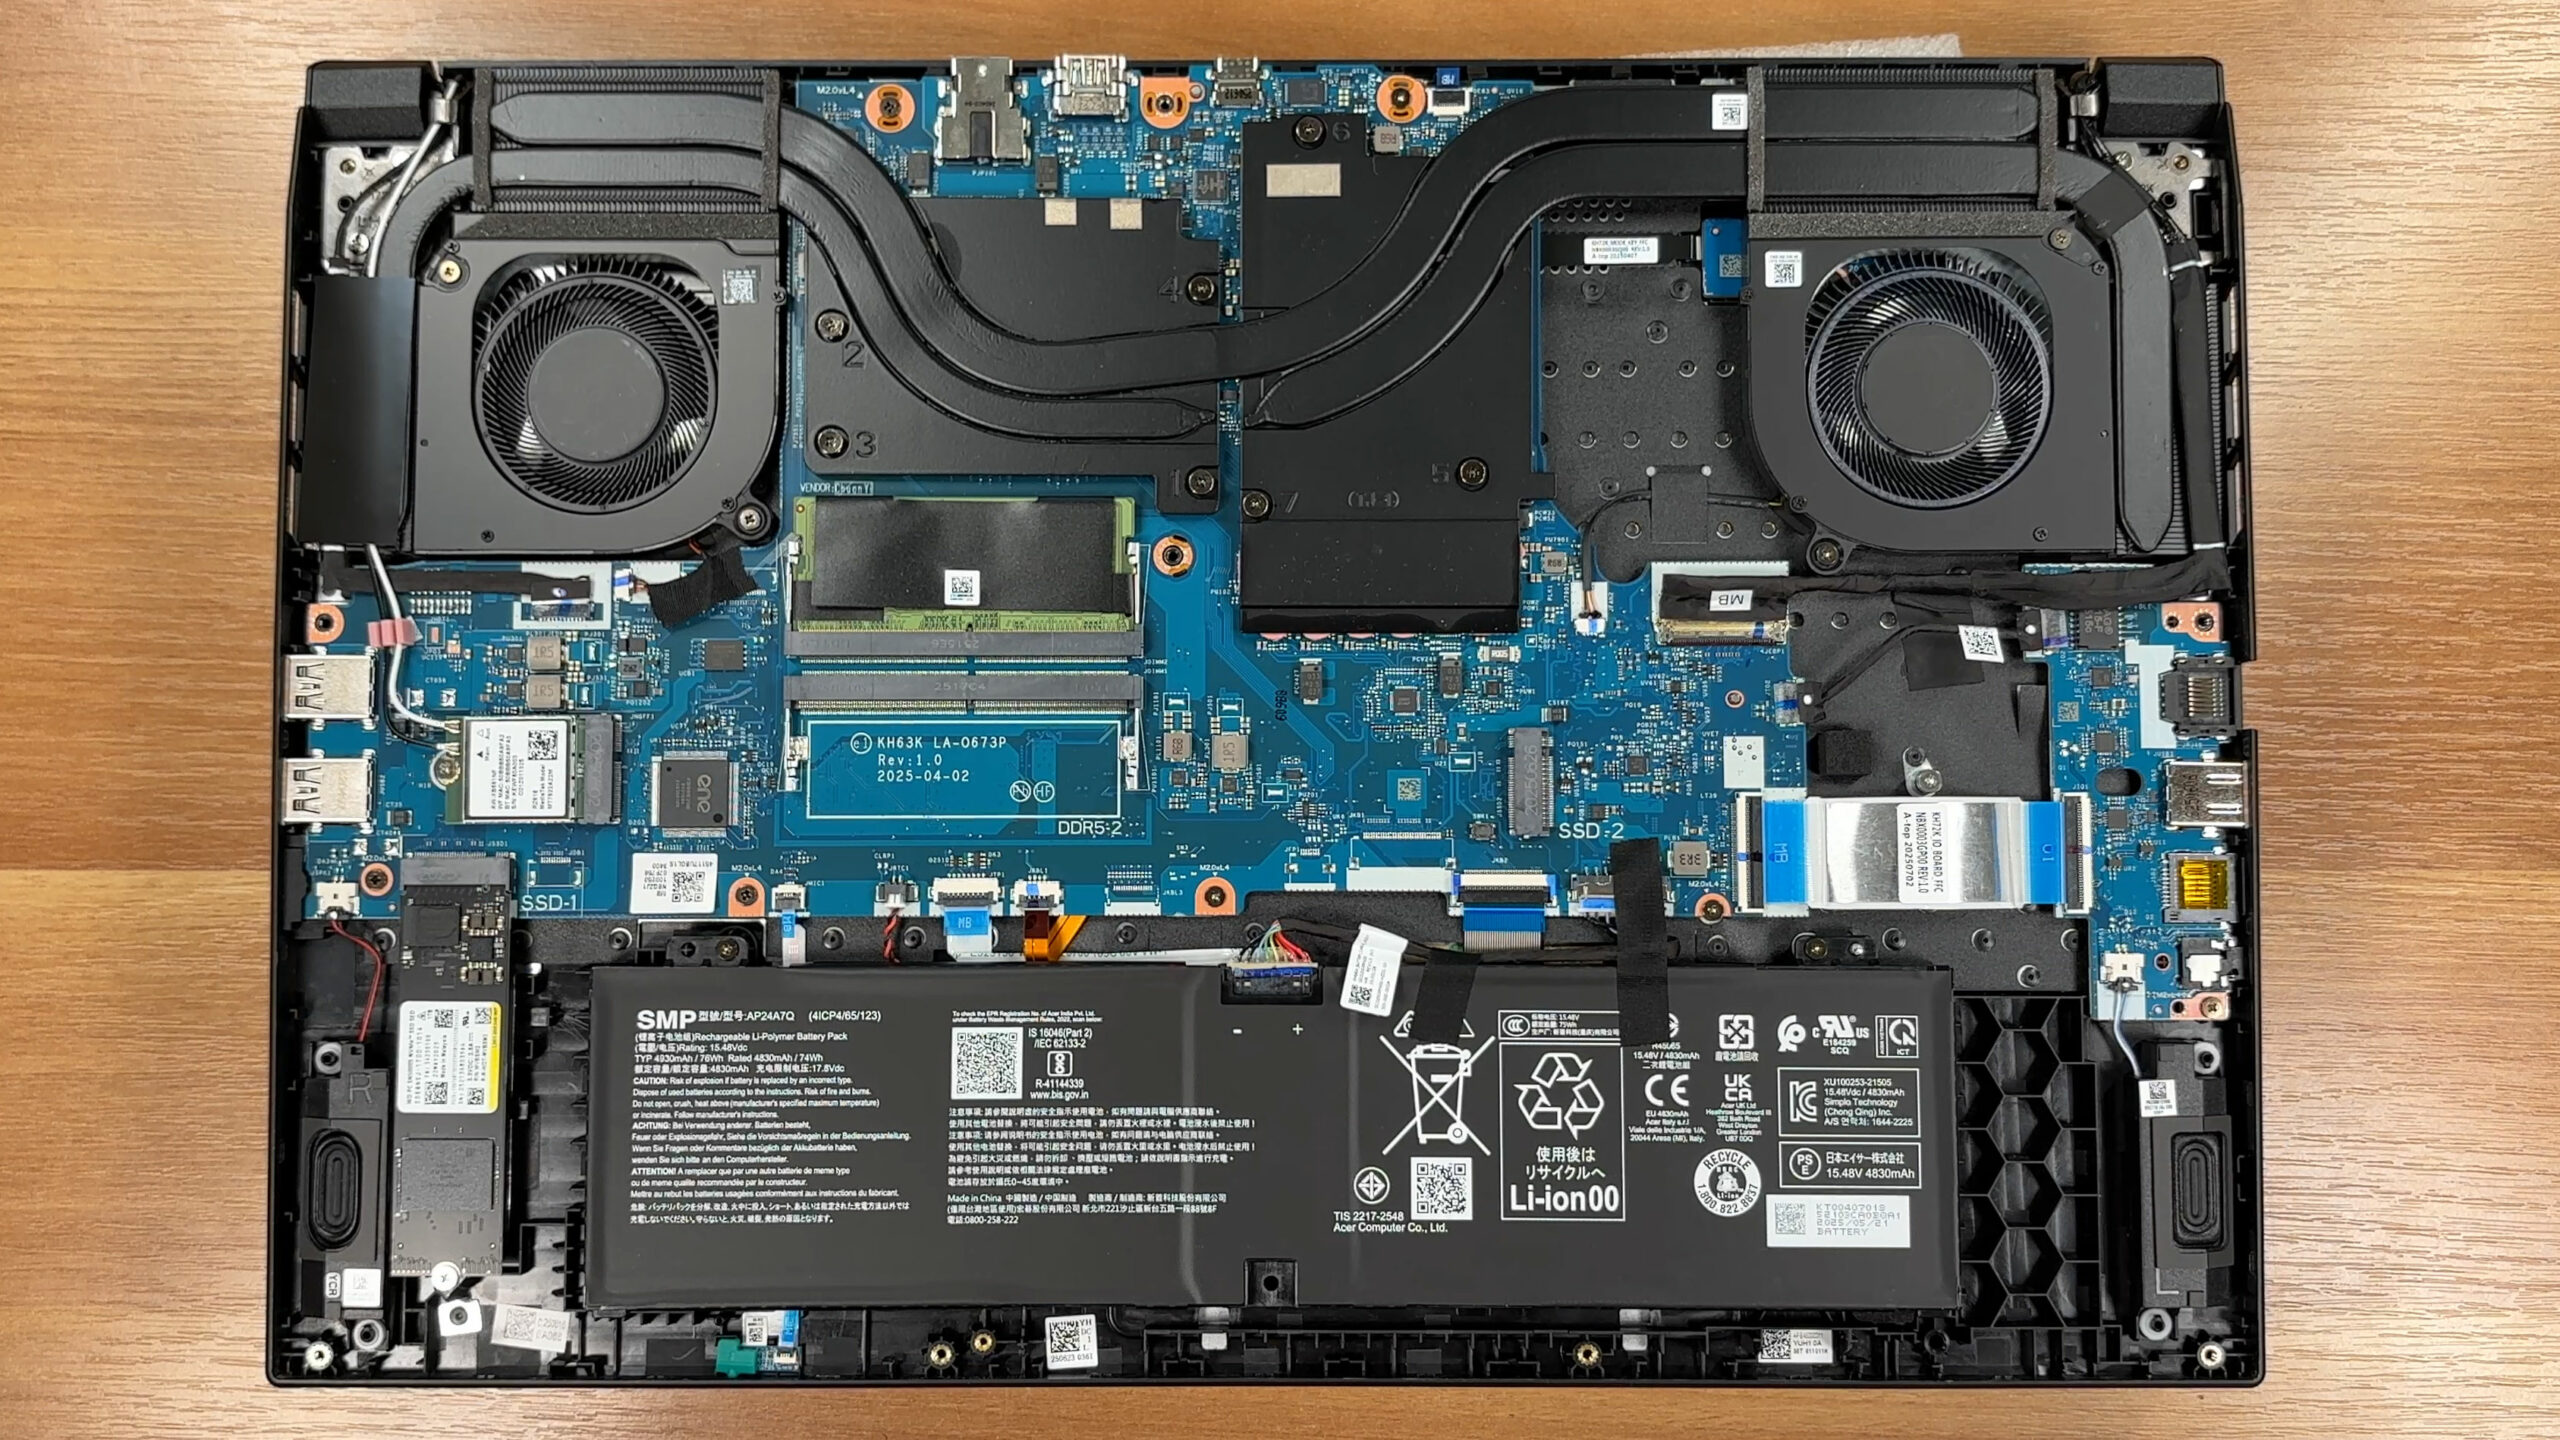
Battery removal and replacement
- Locate the battery pack along the front edge of the chassis. This is an SMP unit, model AP24A7Q, with a typical capacity of 76Wh (74Wh rated).
- Find the battery cable and gently pull the connector straight out of its socket on the motherboard to cut power to the system.
- Undo the two Phillips-head screws that secure the battery to the chassis.
- Lift the battery out of its bay, taking care not to snag nearby speaker or Wi-Fi antenna cables.
- To install a replacement, align the new pack in the tray, reinstall the two screws, and firmly reconnect the battery cable so it is fully seated.
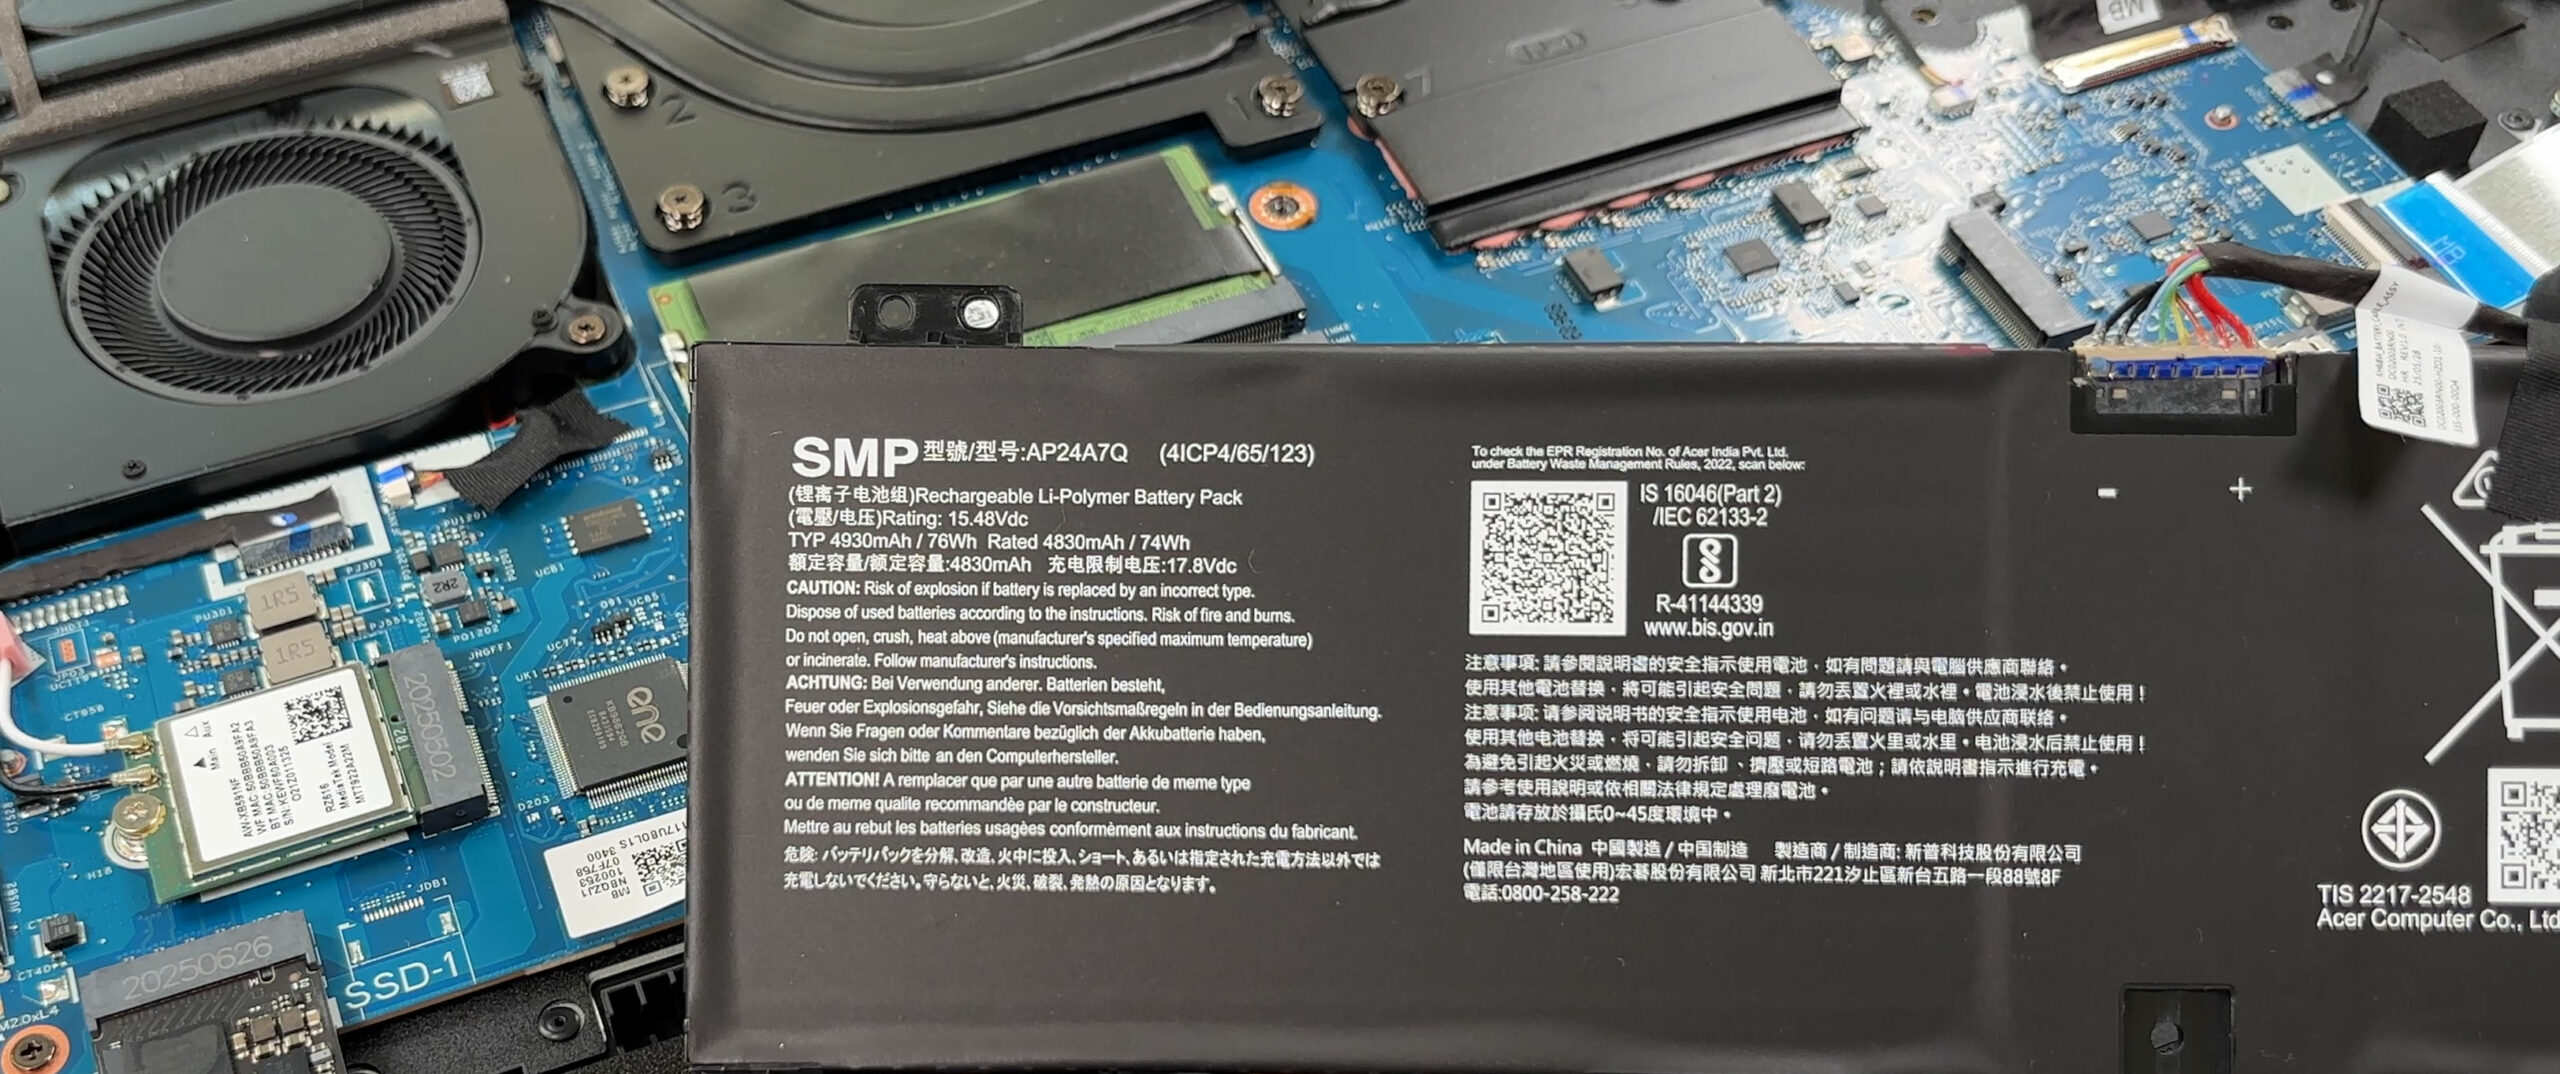
Memory (RAM) upgrade options
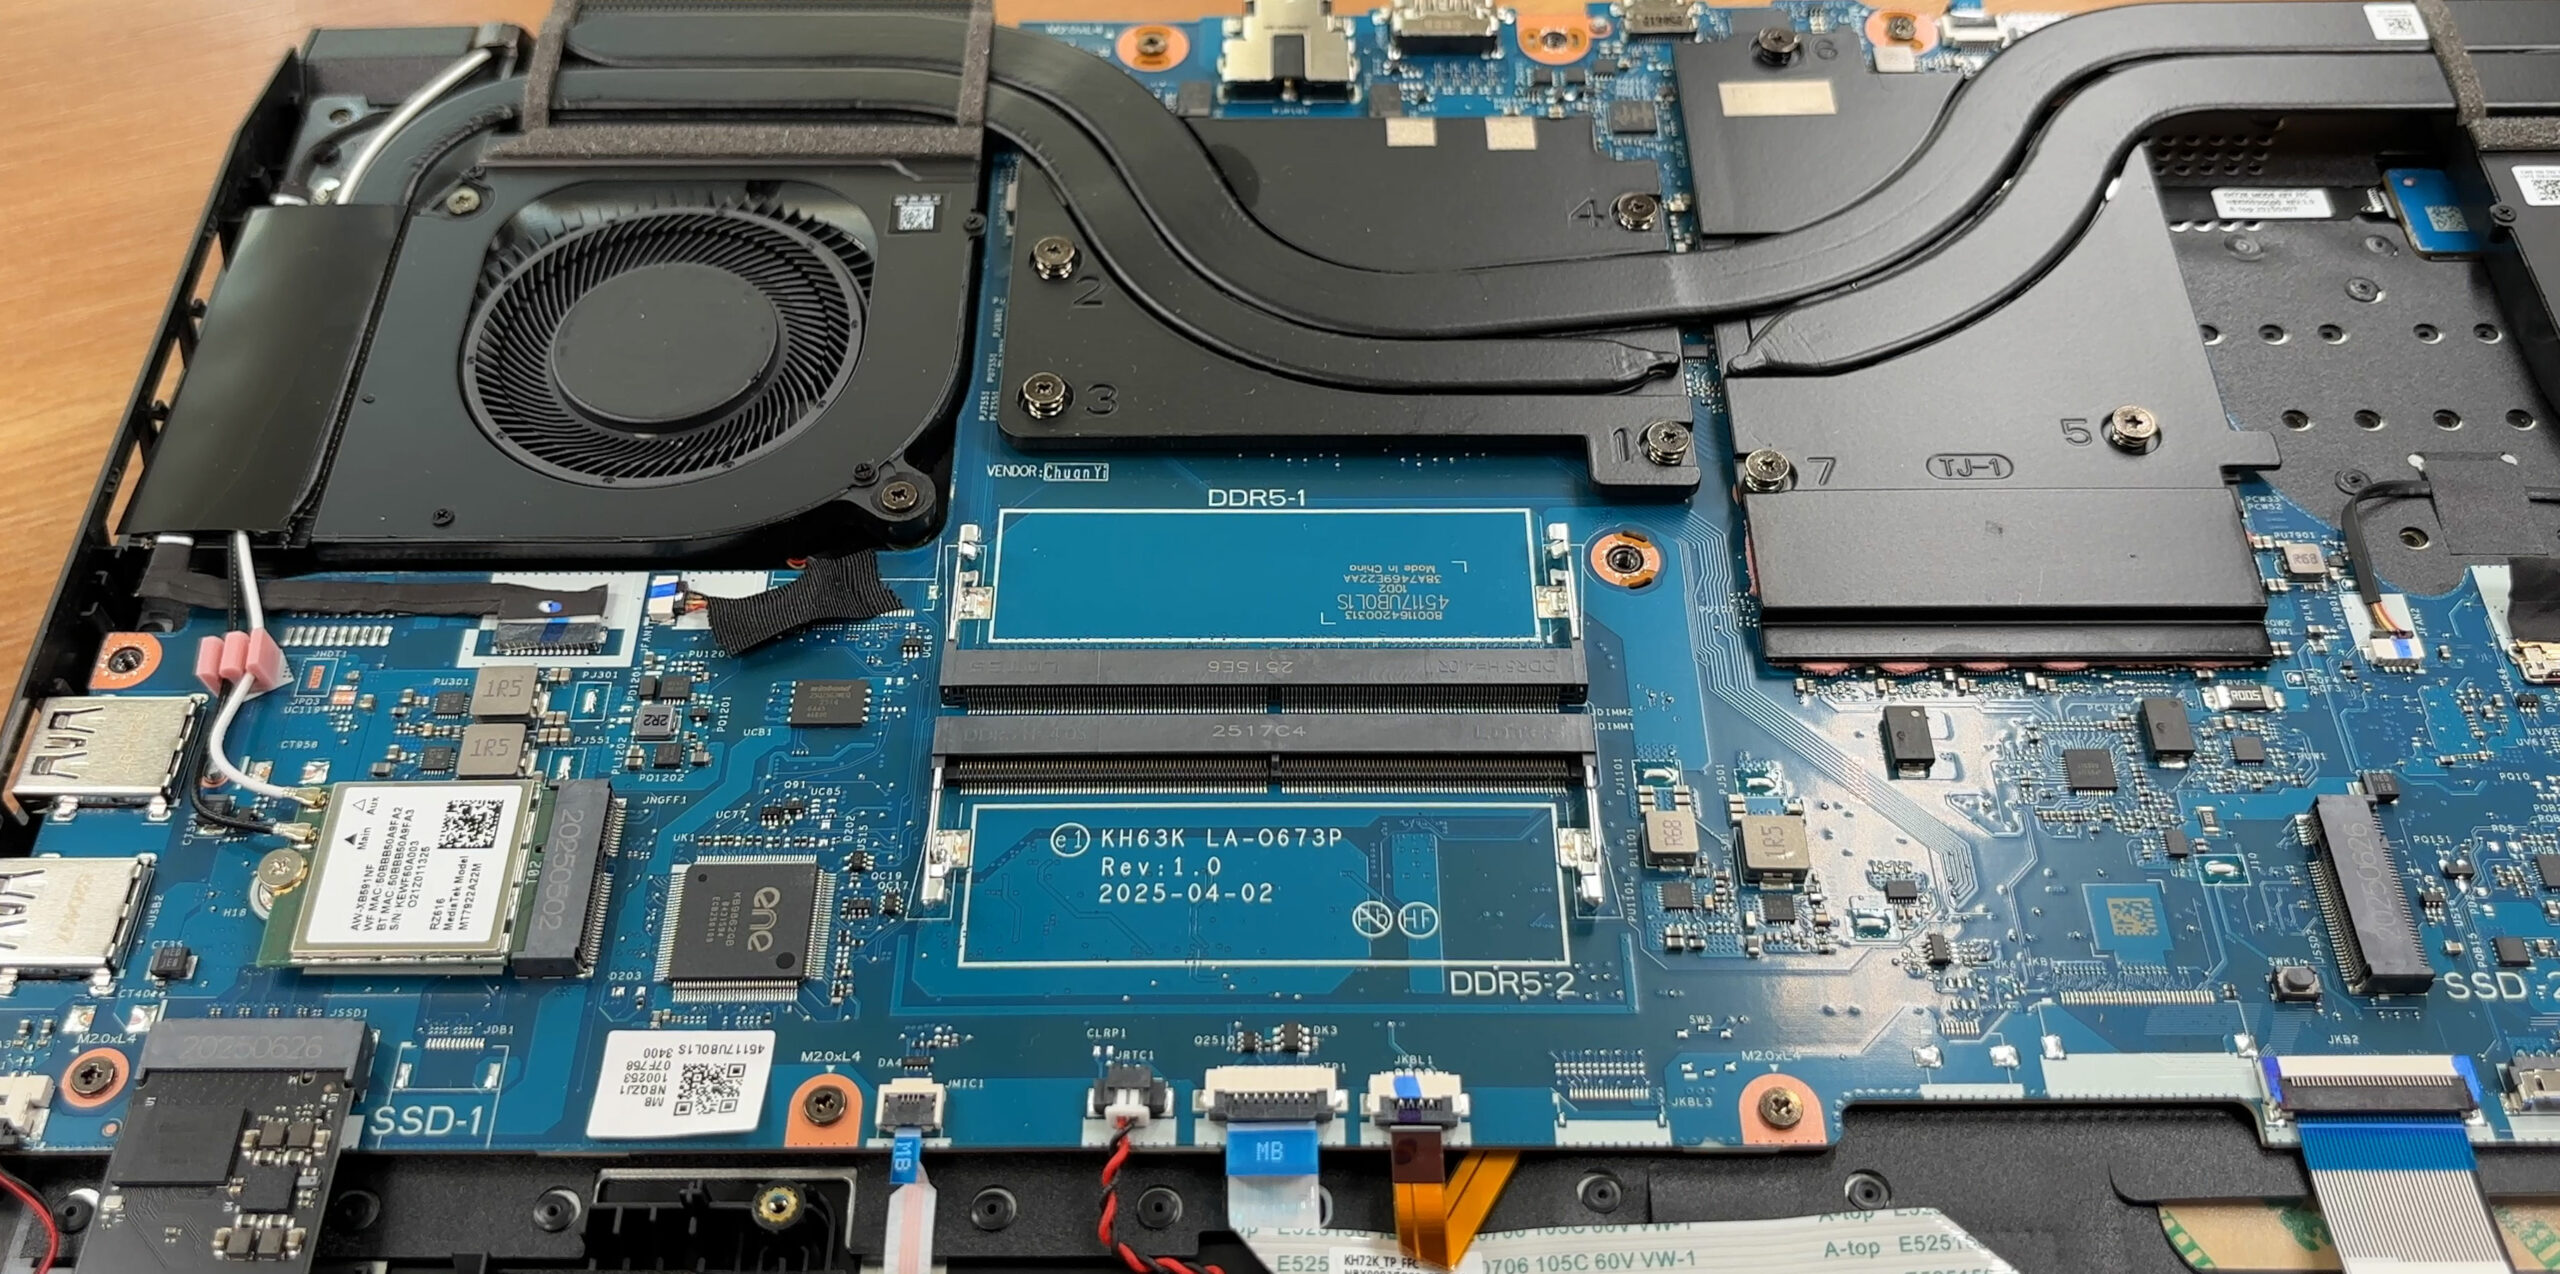
- Locate the two DDR5 SO-DIMM slots in the central area of the motherboard. One slot is populated from the factory, and the second is free for upgrades.
- If present, gently peel back any thin metallic shielding over the module. This foil also acts as EMI/RFI screening, so keep it for re-use.
- To remove a memory module, push the two metal retaining clips on the sides outward. The SODIMM will spring up at an angle.
- Slide the module straight out of the slot.
- The platform supports dual-channel DDR5 memory up to 5600MT/s, so you can install a second module that matches the capacity and speed of the original, or replace both sticks with a higher-capacity kit.
- To install new RAM, align the notch in the module with the key in the slot, insert it at an angle, then press it down until both side clips lock into place.
- Reposition the metallic shield so it lies flat over the memory modules if your unit has one.
You can buy DDR5 RAM modules here: Buy from Amazon.com (#CommissionsEarned)
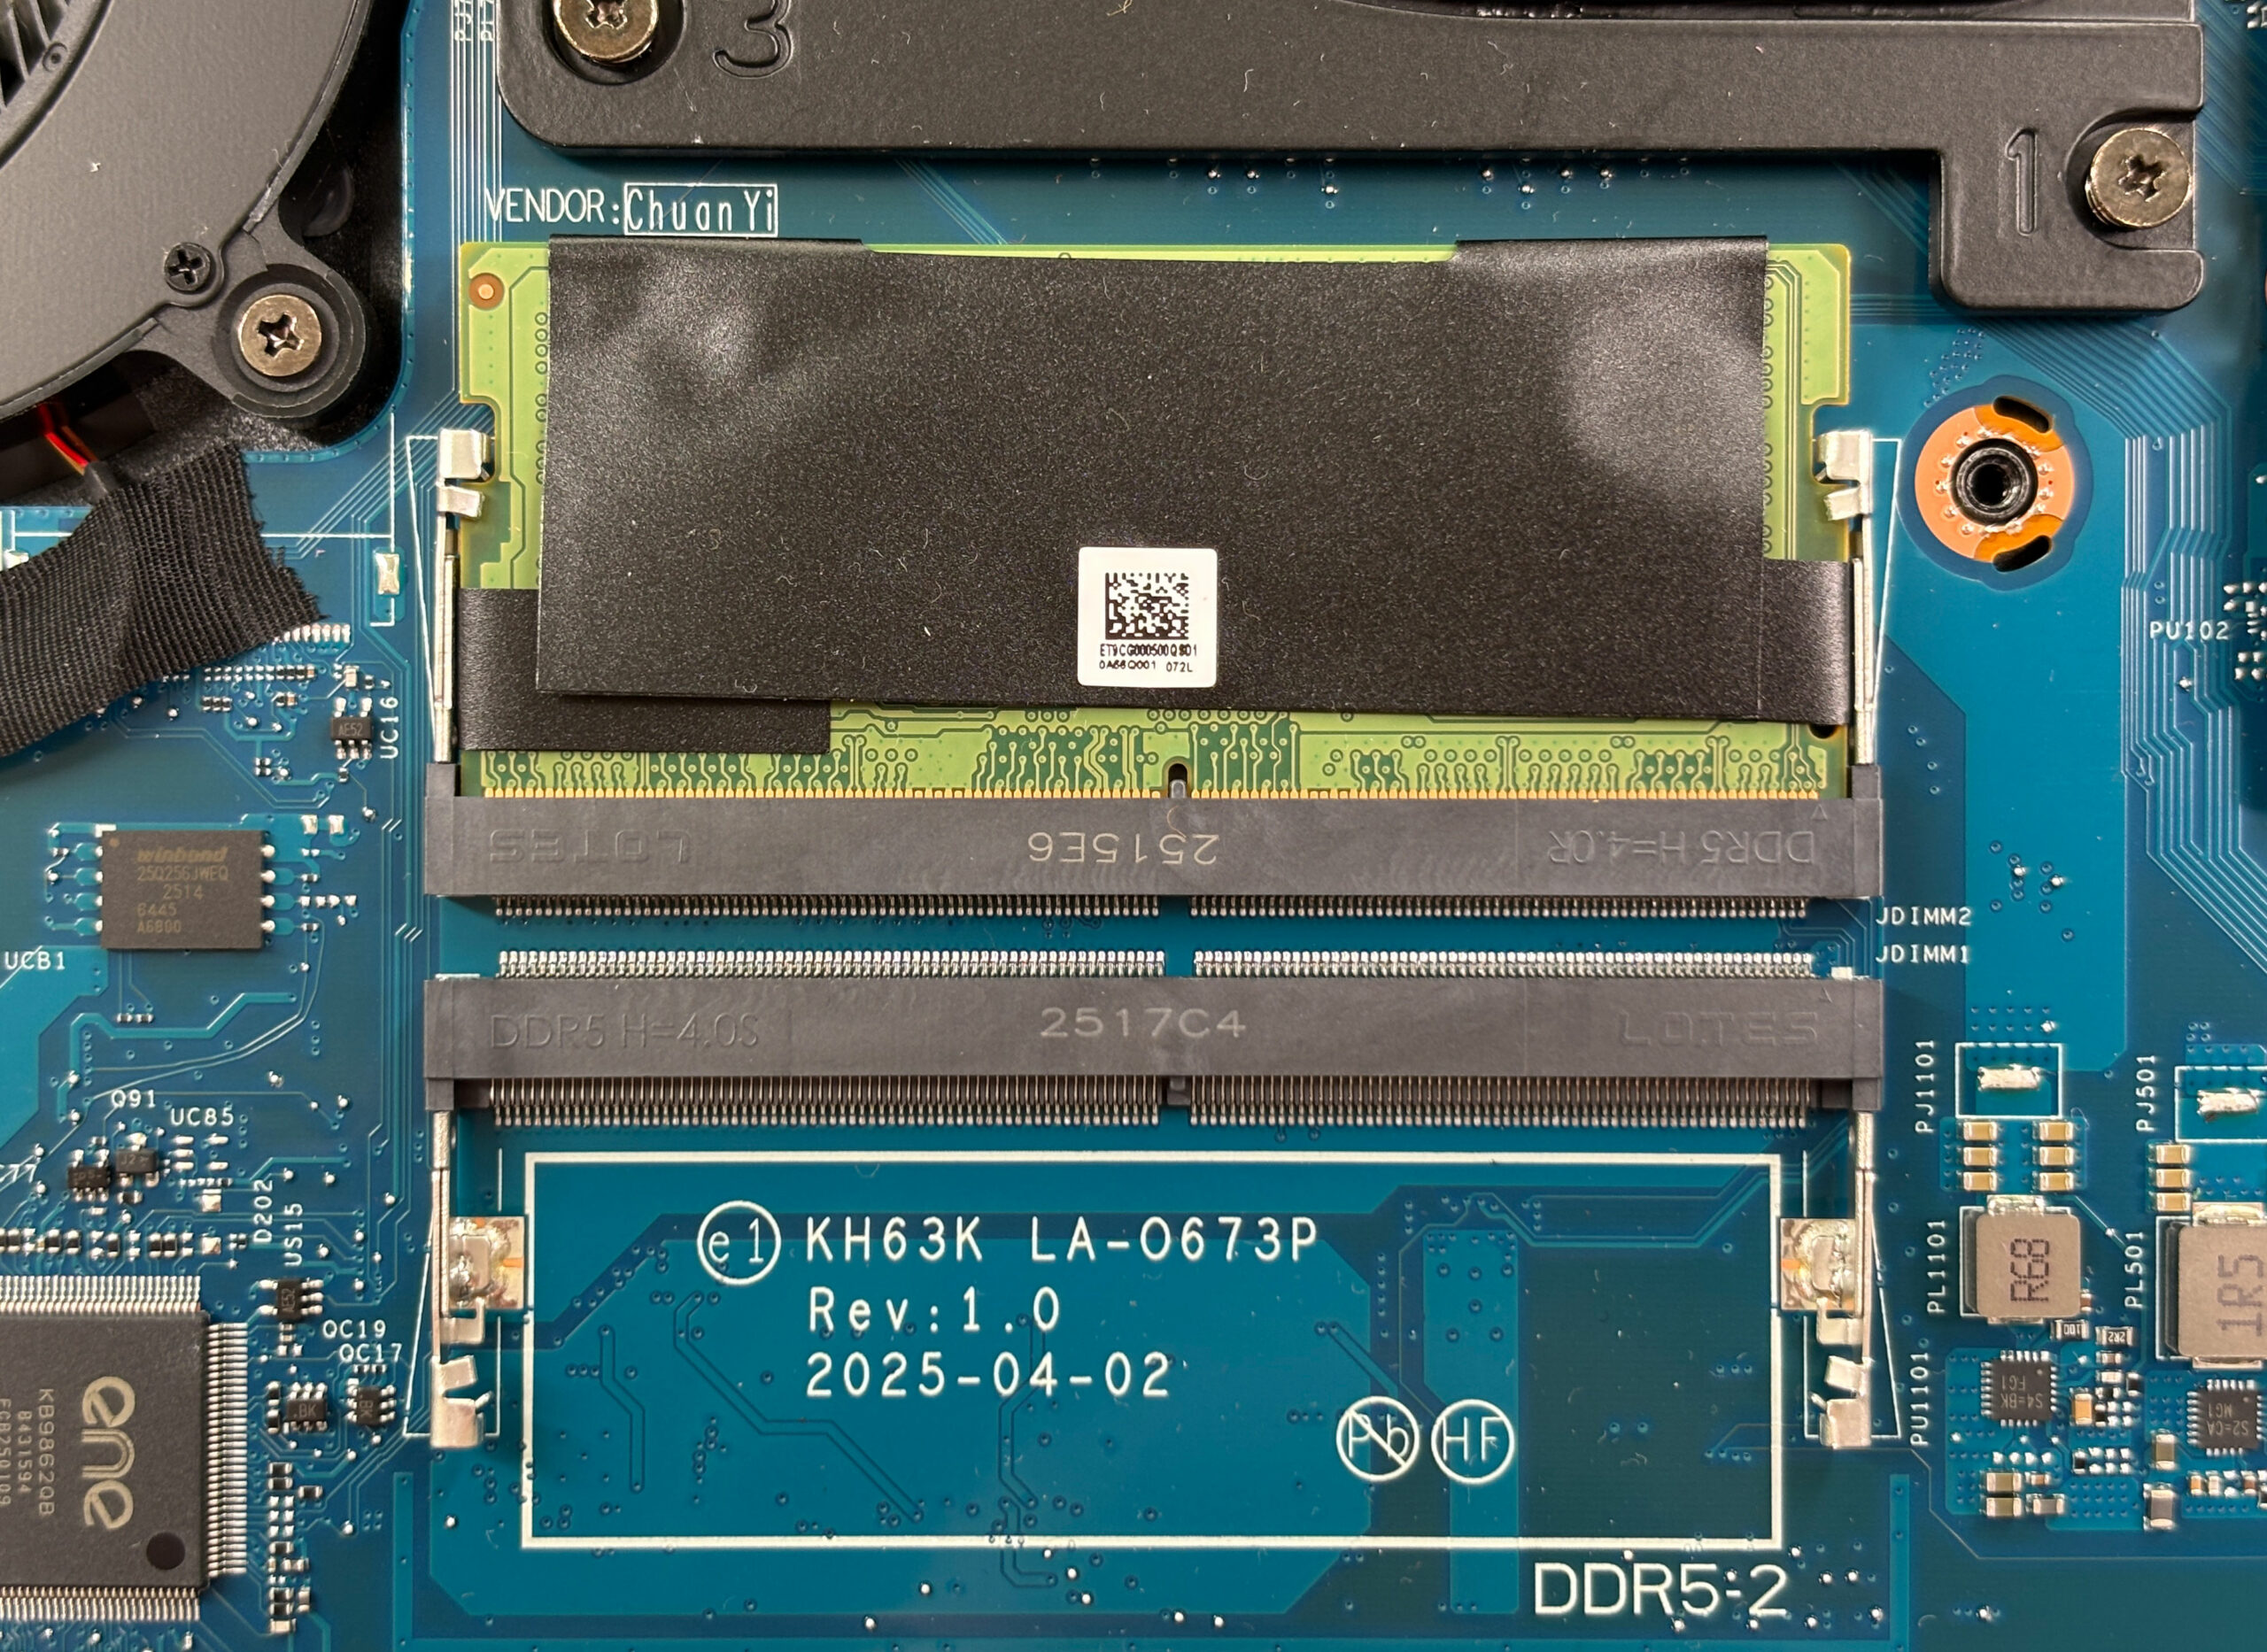
Storage upgrade options
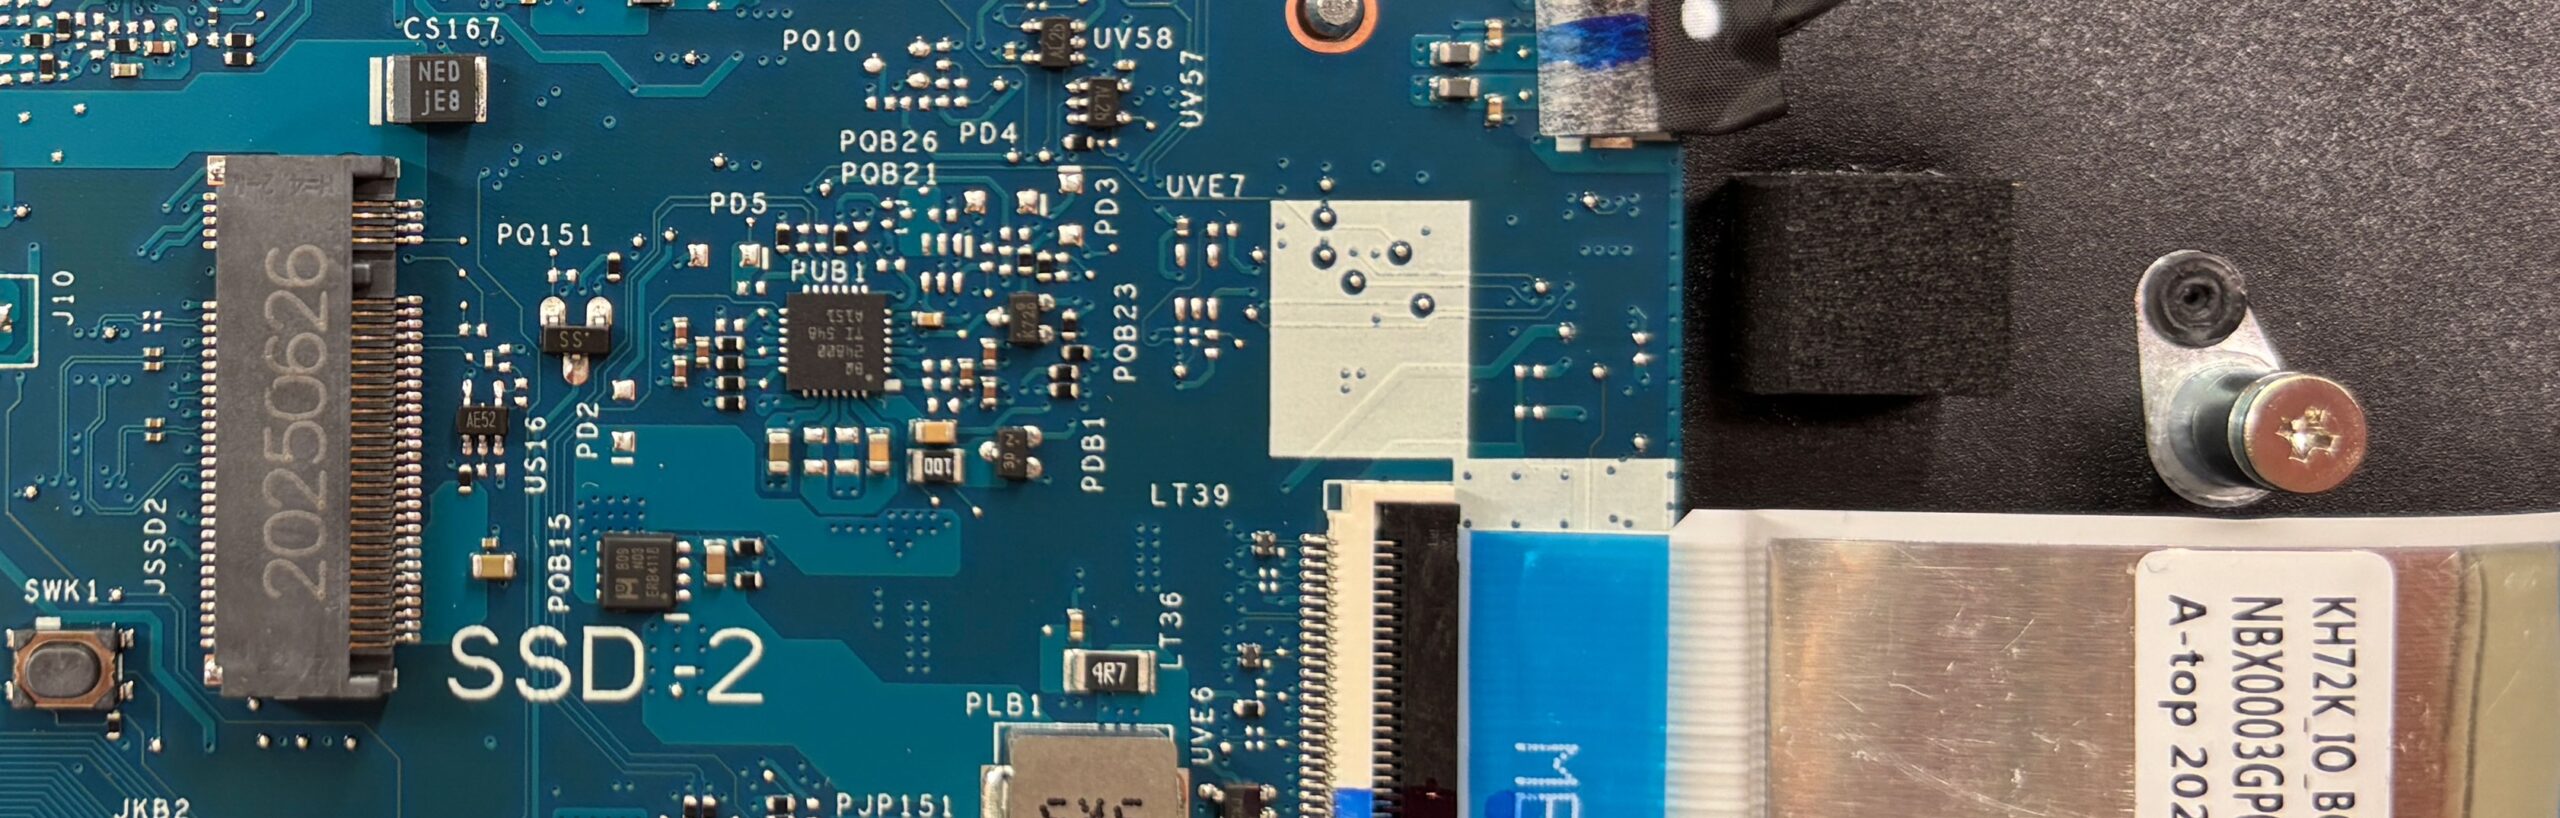
- The Nitro V 17 AI offers two M.2 2280 PCIe 4.0 slots for NVMe SSDs:
- Primary slot: Populated in our sample with a 1TB Western Digital PC SN5000S drive.
- Secondary slot: Located on the opposite side of the board and empty from the factory, ready for a second SSD.
- To upgrade or replace the SSD in the primary slot:
- Remove any EMI or thermal label covering the drive by gently peeling it back.
- Undo the SSD’s mounting screw; the drive will lift at a slight angle.
- Slide the SSD out of the connector.
- Insert the new 2280 PCIe 4.0 NVMe SSD at the same angle, push it down, and secure it with the screw.
- Reapply the EMI/thermal label so it makes full contact with the SSD’s surface.
- To use the secondary M.2 slot:
- Locate the empty 2280 slot on the other side of the board.
- Align your SSD with the connector, insert it at an angle, press it down, and fix it with the mounting screw.
- If your configuration includes a thermal pad for this slot, ensure it contacts the top of the SSD or the bottom cover for better heat spreading.
Hint: Consider reviewing our Top M.2 SSDs Performance Rankings to select the best storage solution for your needs.
You can buy PCIe 4.0 NVMe SSDs here: Buy from Amazon.com (#CommissionsEarned)
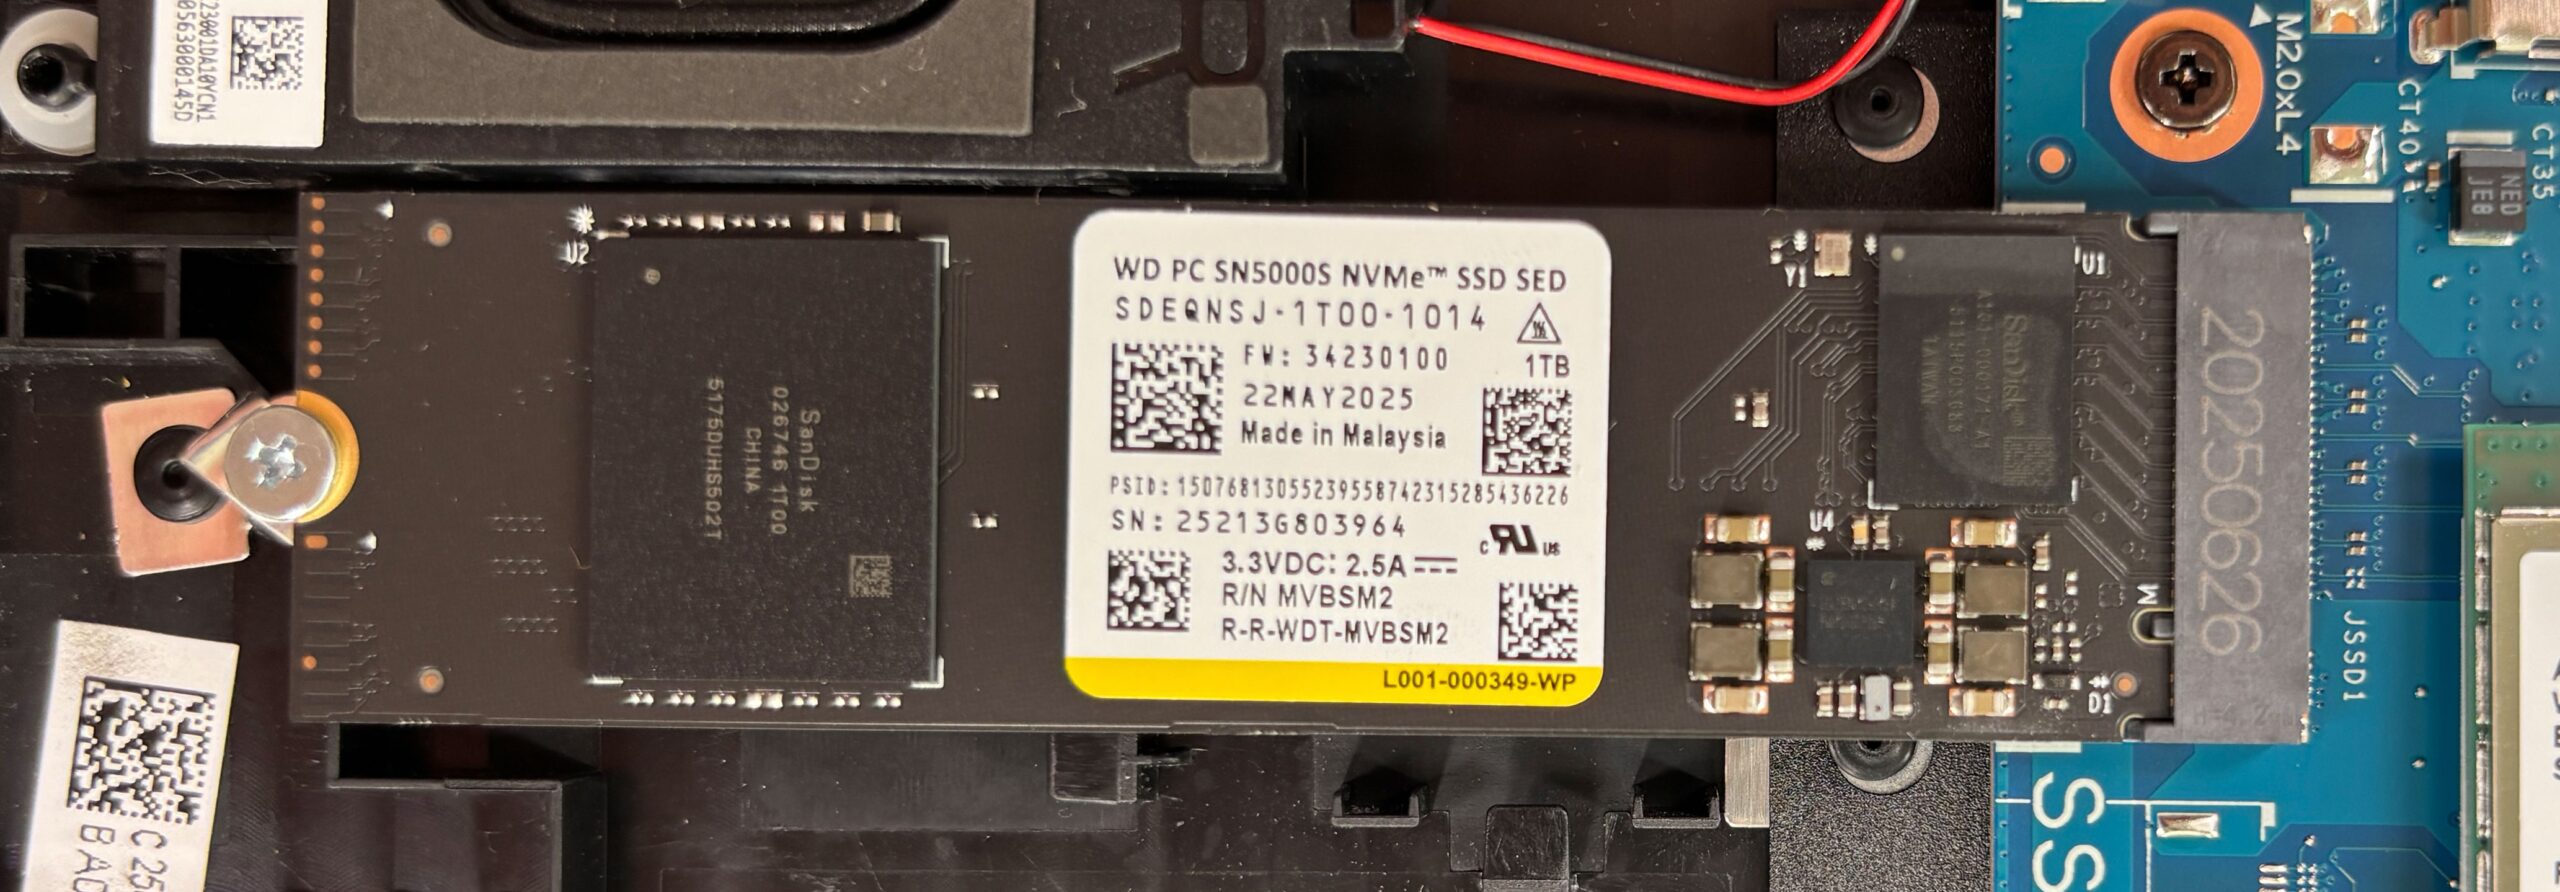
Wireless card and other serviceable components
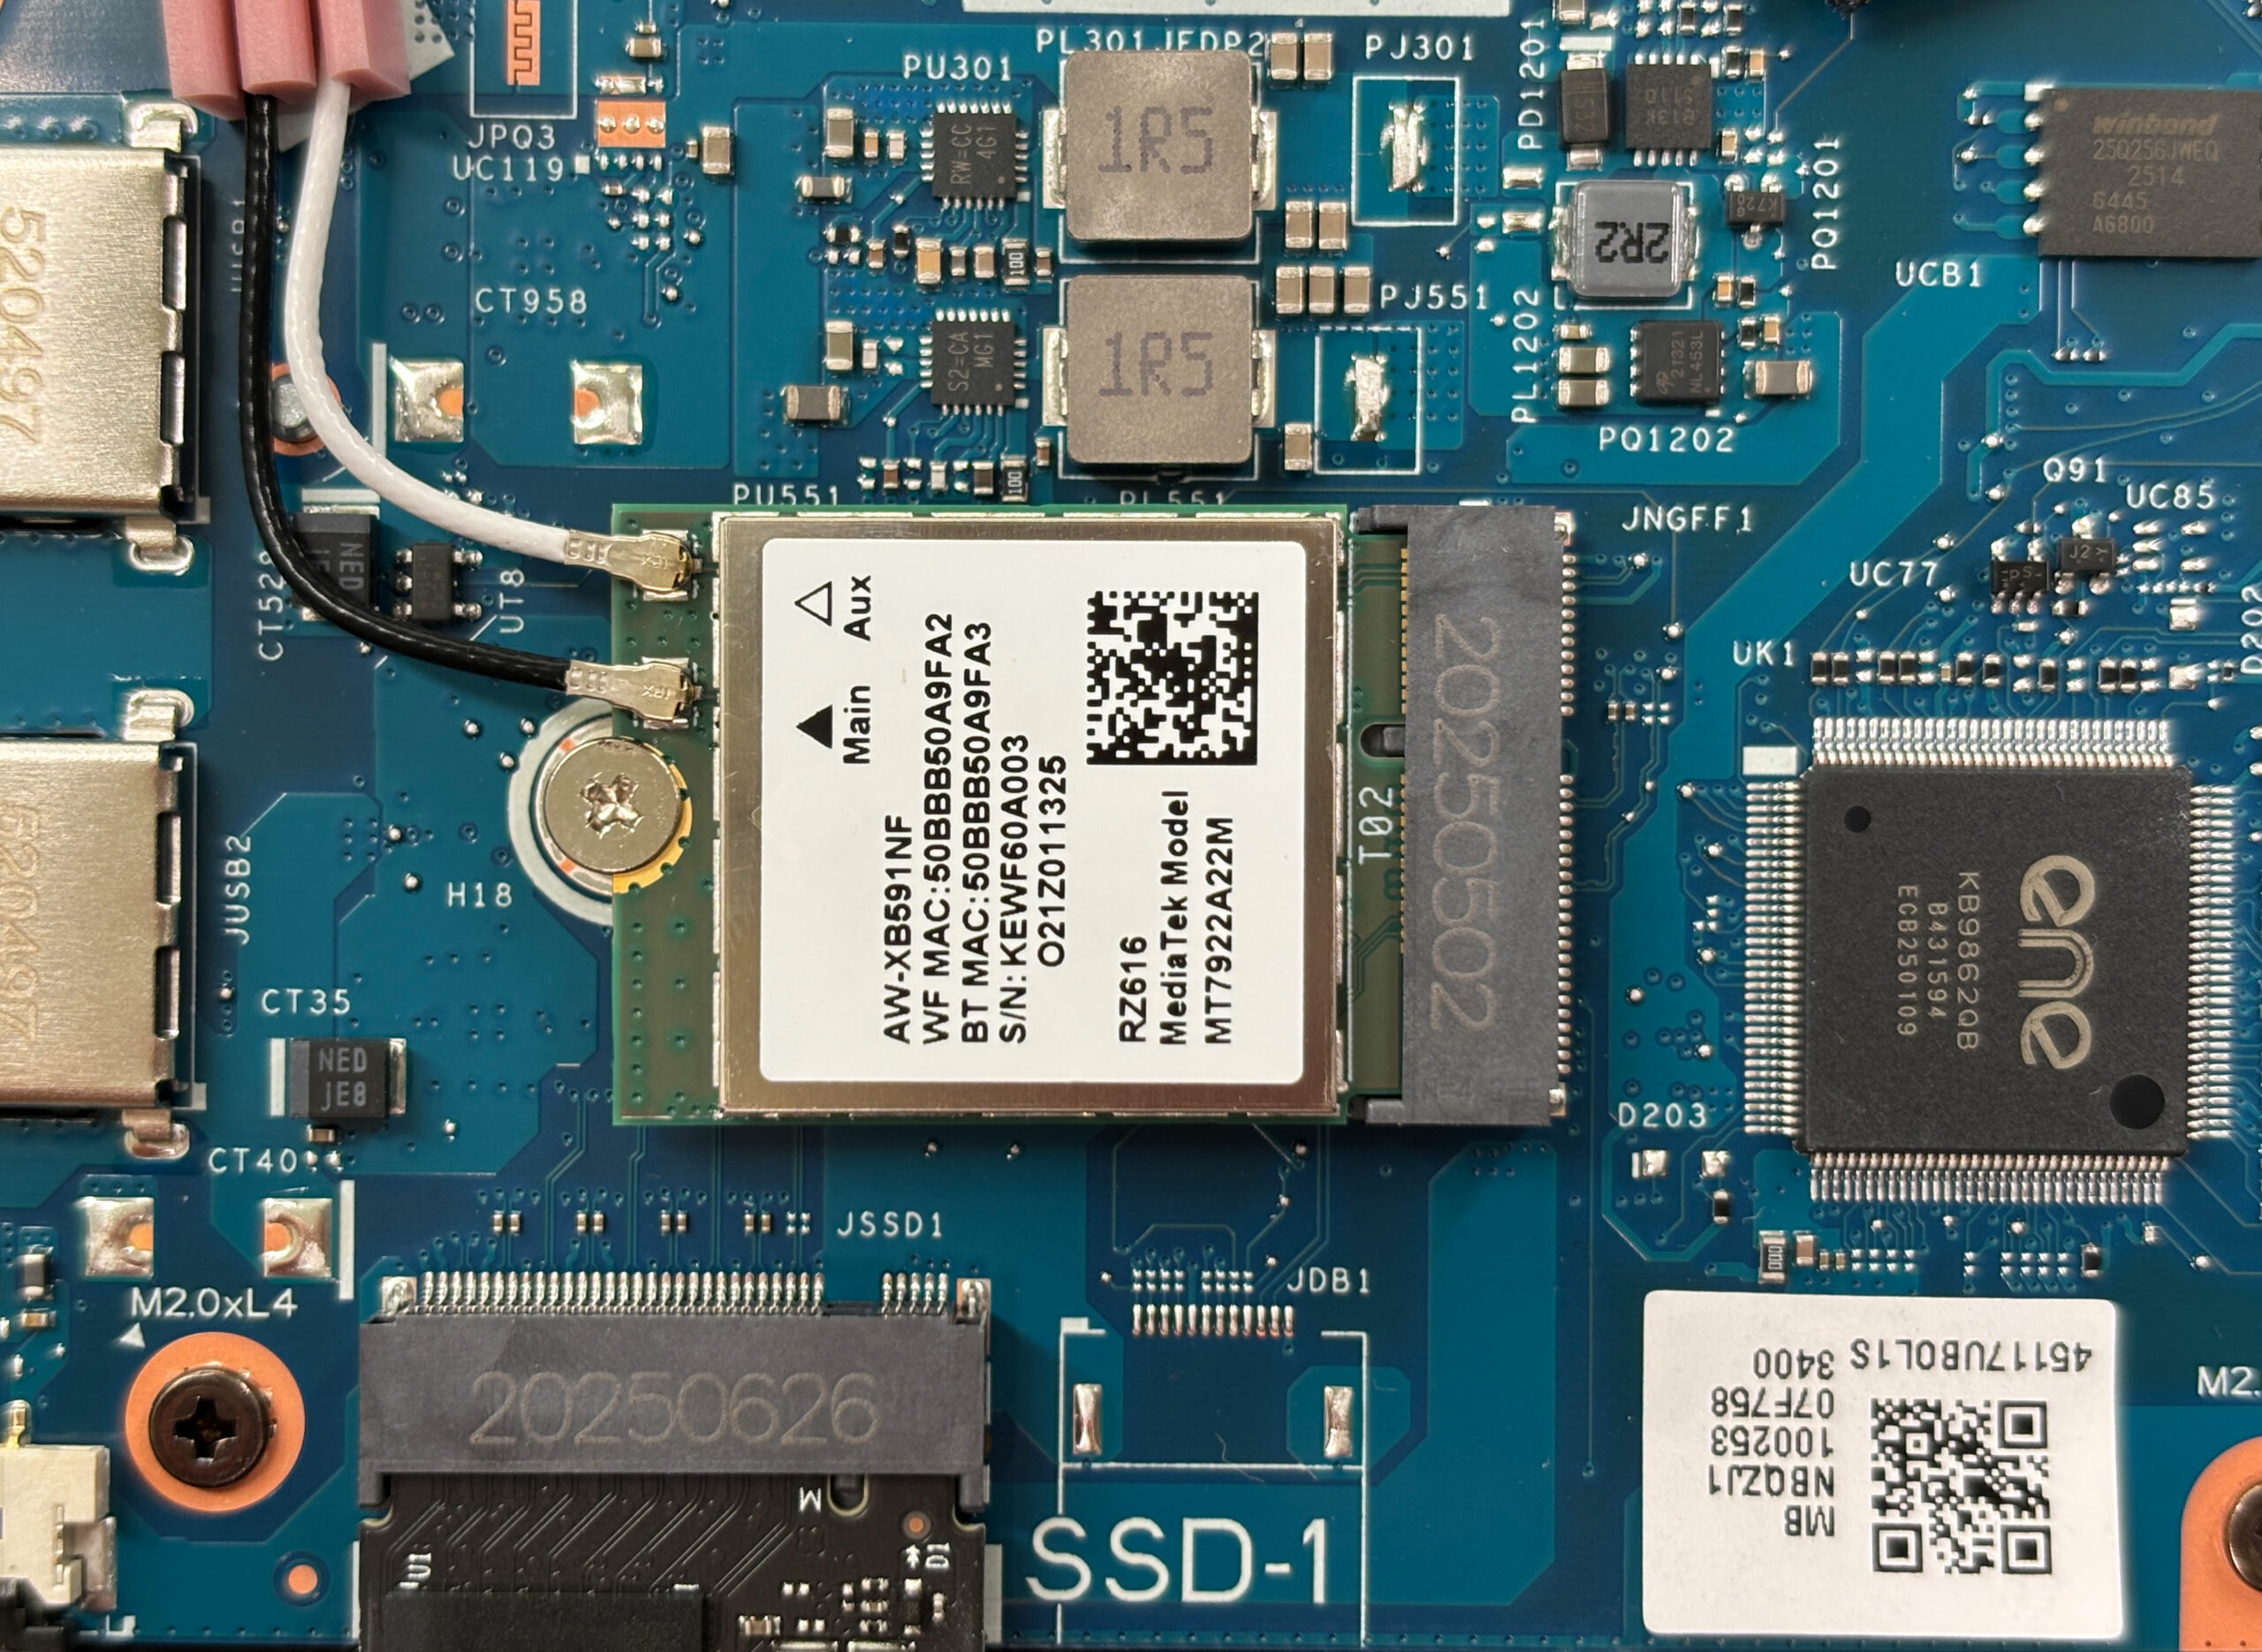
- The wireless card is a replaceable MediaTek RZ616 Wi-Fi 6E module in M.2 2230 format. It also provides Bluetooth connectivity.
- To replace it, gently lift the two antenna connectors (Main and Aux) straight up using a plastic tool.
- Undo the single screw securing the card and slide the module out of its slot.
- Install the new M.2 2230 Wi-Fi card by inserting it at an angle, pressing it down, and securing it with the screw.
- Reconnect the antennas by pressing them straight onto their respective posts until they click into place.
- Other easily accessible parts include both speakers at the bottom, the touchpad subframe, and the CMOS coin-cell battery on a short lead. All are held by standard screws or simple connectors, making future replacements or repairs straightforward.
Cooling system and maintenance
- The cooling solution uses two fans and several shared heatpipes that span the CPU and discrete GPU, with metal plates over the memory and power components.
- For routine cleaning:
- Disconnect the battery first to avoid accidental shorts.
- Hold each fan in place with a finger or a plastic tool and apply short bursts of compressed air through the rear and side vents to clear dust from the fin stacks.
- Visually inspect the foam seals and plates around the VRMs and memory to ensure they remain correctly seated.
- Advanced servicing, such as repasting the CPU and GPU, is possible once the heatsink assembly is removed, but should only be attempted if you are comfortable working with thermal paste and have appropriate materials on hand.
More info: The CPU and discrete GPU are soldered to the motherboard, and there is no 2.5-inch drive bay. Practical upgrades focus on the two DDR5 SO-DIMM slots, the two PCIe 4.0 M.2 slots, the replaceable Wi-Fi card, and the screwed-in battery.
Reassembly tips
- Before reinstalling the bottom panel, double-check that:
- The battery connector is firmly seated.
- RAM modules are locked in place and any shields or foils are reapplied.
- All SSDs are secured with their screws and any thermal pads or shields are correctly positioned.
- The Wi-Fi card is screwed down and antennas are properly attached.
- Fan and speaker connectors are plugged in.
- Position the bottom cover over the chassis and press gently around the edges until all clips snap back into place.
- Reinstall the ten screws and tighten them evenly. Do not overtighten.
- Power on the laptop and enter the BIOS or operating system to verify that the new memory and storage are detected and that fans operate normally.
Summary: You can also reach several other serviceable parts: both speakers at the bottom, the touchpad subframe, and the CMOS coin-cell on a short lead, which makes future maintenance more convenient. Acer Nitro V 17 AI scores well for maintenance, with quick access and clear paths to expand memory and storage while keeping routine service simple.
Acer Nitro V 17 AI (ANV17-41) in-depth review
The 17-inch gaming laptop market is a battleground of power versus portability, and the Acer Nitro V 17 AI (ANV17-41) enters the fray with a refreshing strategy: balance. Instead of chasing aggressive aesthetics or unsustainable performance peaks, Acer has delivered a machine that prioritizes stability, display quality, and a surprisingly refined design. With a stunning QHD screen and a robust cooling system, it aims to be the dependable daily driver for gamers who want a big-screen experience without the typical gaming laptop flash. But in a segment crowded with powerful rivals, does this[...]

Pros
- Excellent 165Hz QHD display with 96% DCI-P3 coverage
- Great thermal management keeps the system cool and stable
- Fantastic upgradeability with two RAM and two M.2 slots
- PWM-free screen is great for eye comfort
- Versatile connectivity including a USB4 port
- Refined, understated design with solid build quality
Cons
- Conservative GPU power limits result in lower peak performance
- No physical privacy shutter or biometric login options
- Battery life is average compared to class leaders
 Author: Dimitar Stalev

![[August 2026] Amazon USA: Top 10 Best-Selling Laptops – Apple MacBook Neo Dominates the Market with Massive Unit Sales!](https://laptopmedia.com/wp-content/uploads/2026/09/Best-Selling-Laptops-COM-Top-10-400x225.jpg)
![[August 2026] Amazon USA: Top 10 Best-Selling Gaming Laptops – ASUS ROG Strix G16 Dominates the Market with Massive Unit Sales](https://laptopmedia.com/wp-content/uploads/2026/09/Best-Selling-Gaming-Laptops-COM-Top-10-400x225.jpg)
![[July 2026] Amazon Global: Top 10 Best-Selling Laptops – Apple MacBook Neo Dominates the Charts as Budget and Premium Notebooks Split the Market](https://laptopmedia.com/wp-content/uploads/2026/08/Best-Selling-Laptops-GLOBAL-Top-10-400x225.jpg)
![[July 2026] Amazon Global: Top 10 Best-Selling Gaming Laptops – ASUS ROG Strix G16 Dominates the Global Market with Record-Breaking Unit Sales](https://laptopmedia.com/wp-content/uploads/2026/08/Best-Selling-Gaming-Laptops-GLOBAL-Top-10-400x225.jpg)
![[July 2026] Global Ranking of Best-Selling Laptop GPUs on Amazon – RTX 5060 Dominate Premium, Intel Still Rules Budget](https://laptopmedia.com/wp-content/uploads/2026/08/Best-Selling-GPUs-GLOBAL-Top-10-400x225.jpg)