How to open ASUS Zenbook 14 OLED UM3406 – disassembly and upgrade options
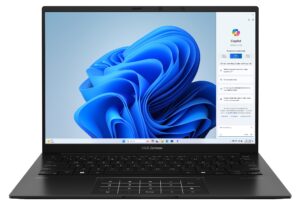
Opening the Device
Hint: Ensure the laptop is powered off and disconnected from any power source before starting.
- Undo the seven Torx-head screws on the bottom panel of the laptop. Note that the bottom screws are not captive.
- Use a lever tool to pop the two zones behind the hinges.
- Fully pop the rear panel using a thin plastic tool.
- Pry the sides and the front of the laptop to fully remove the back cover.
- Be cautious when prying to avoid snapping the internal clips.
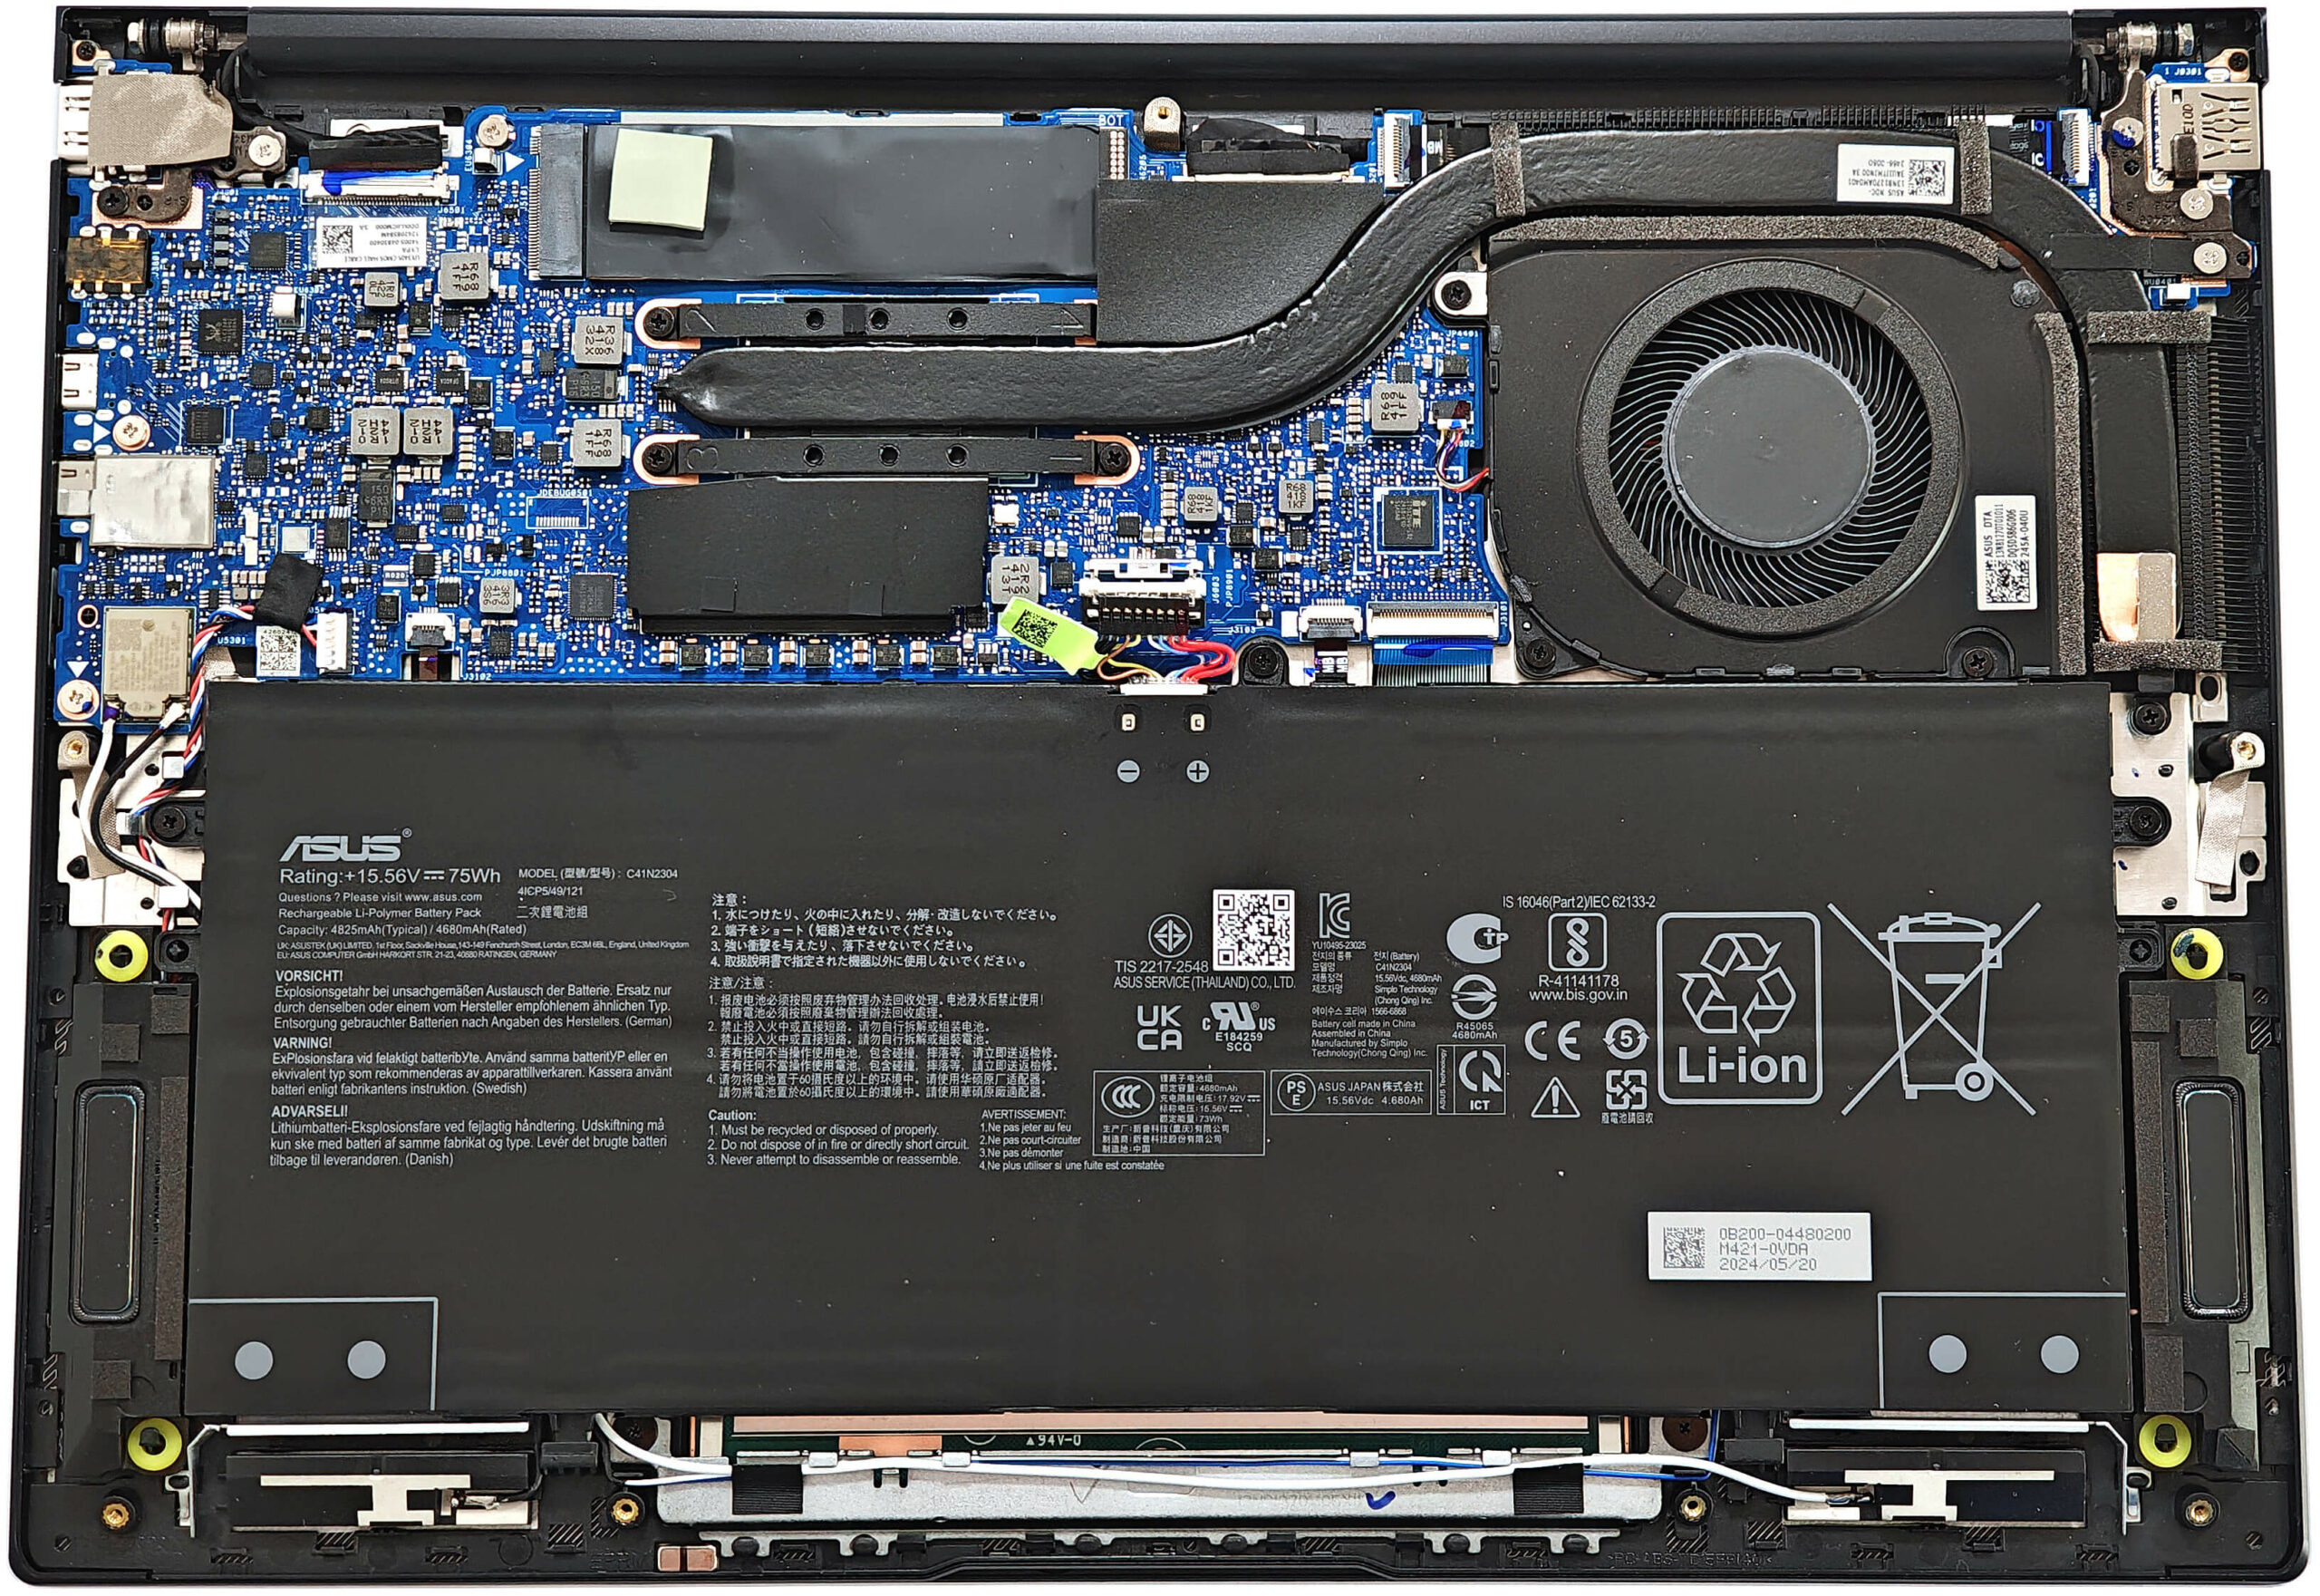
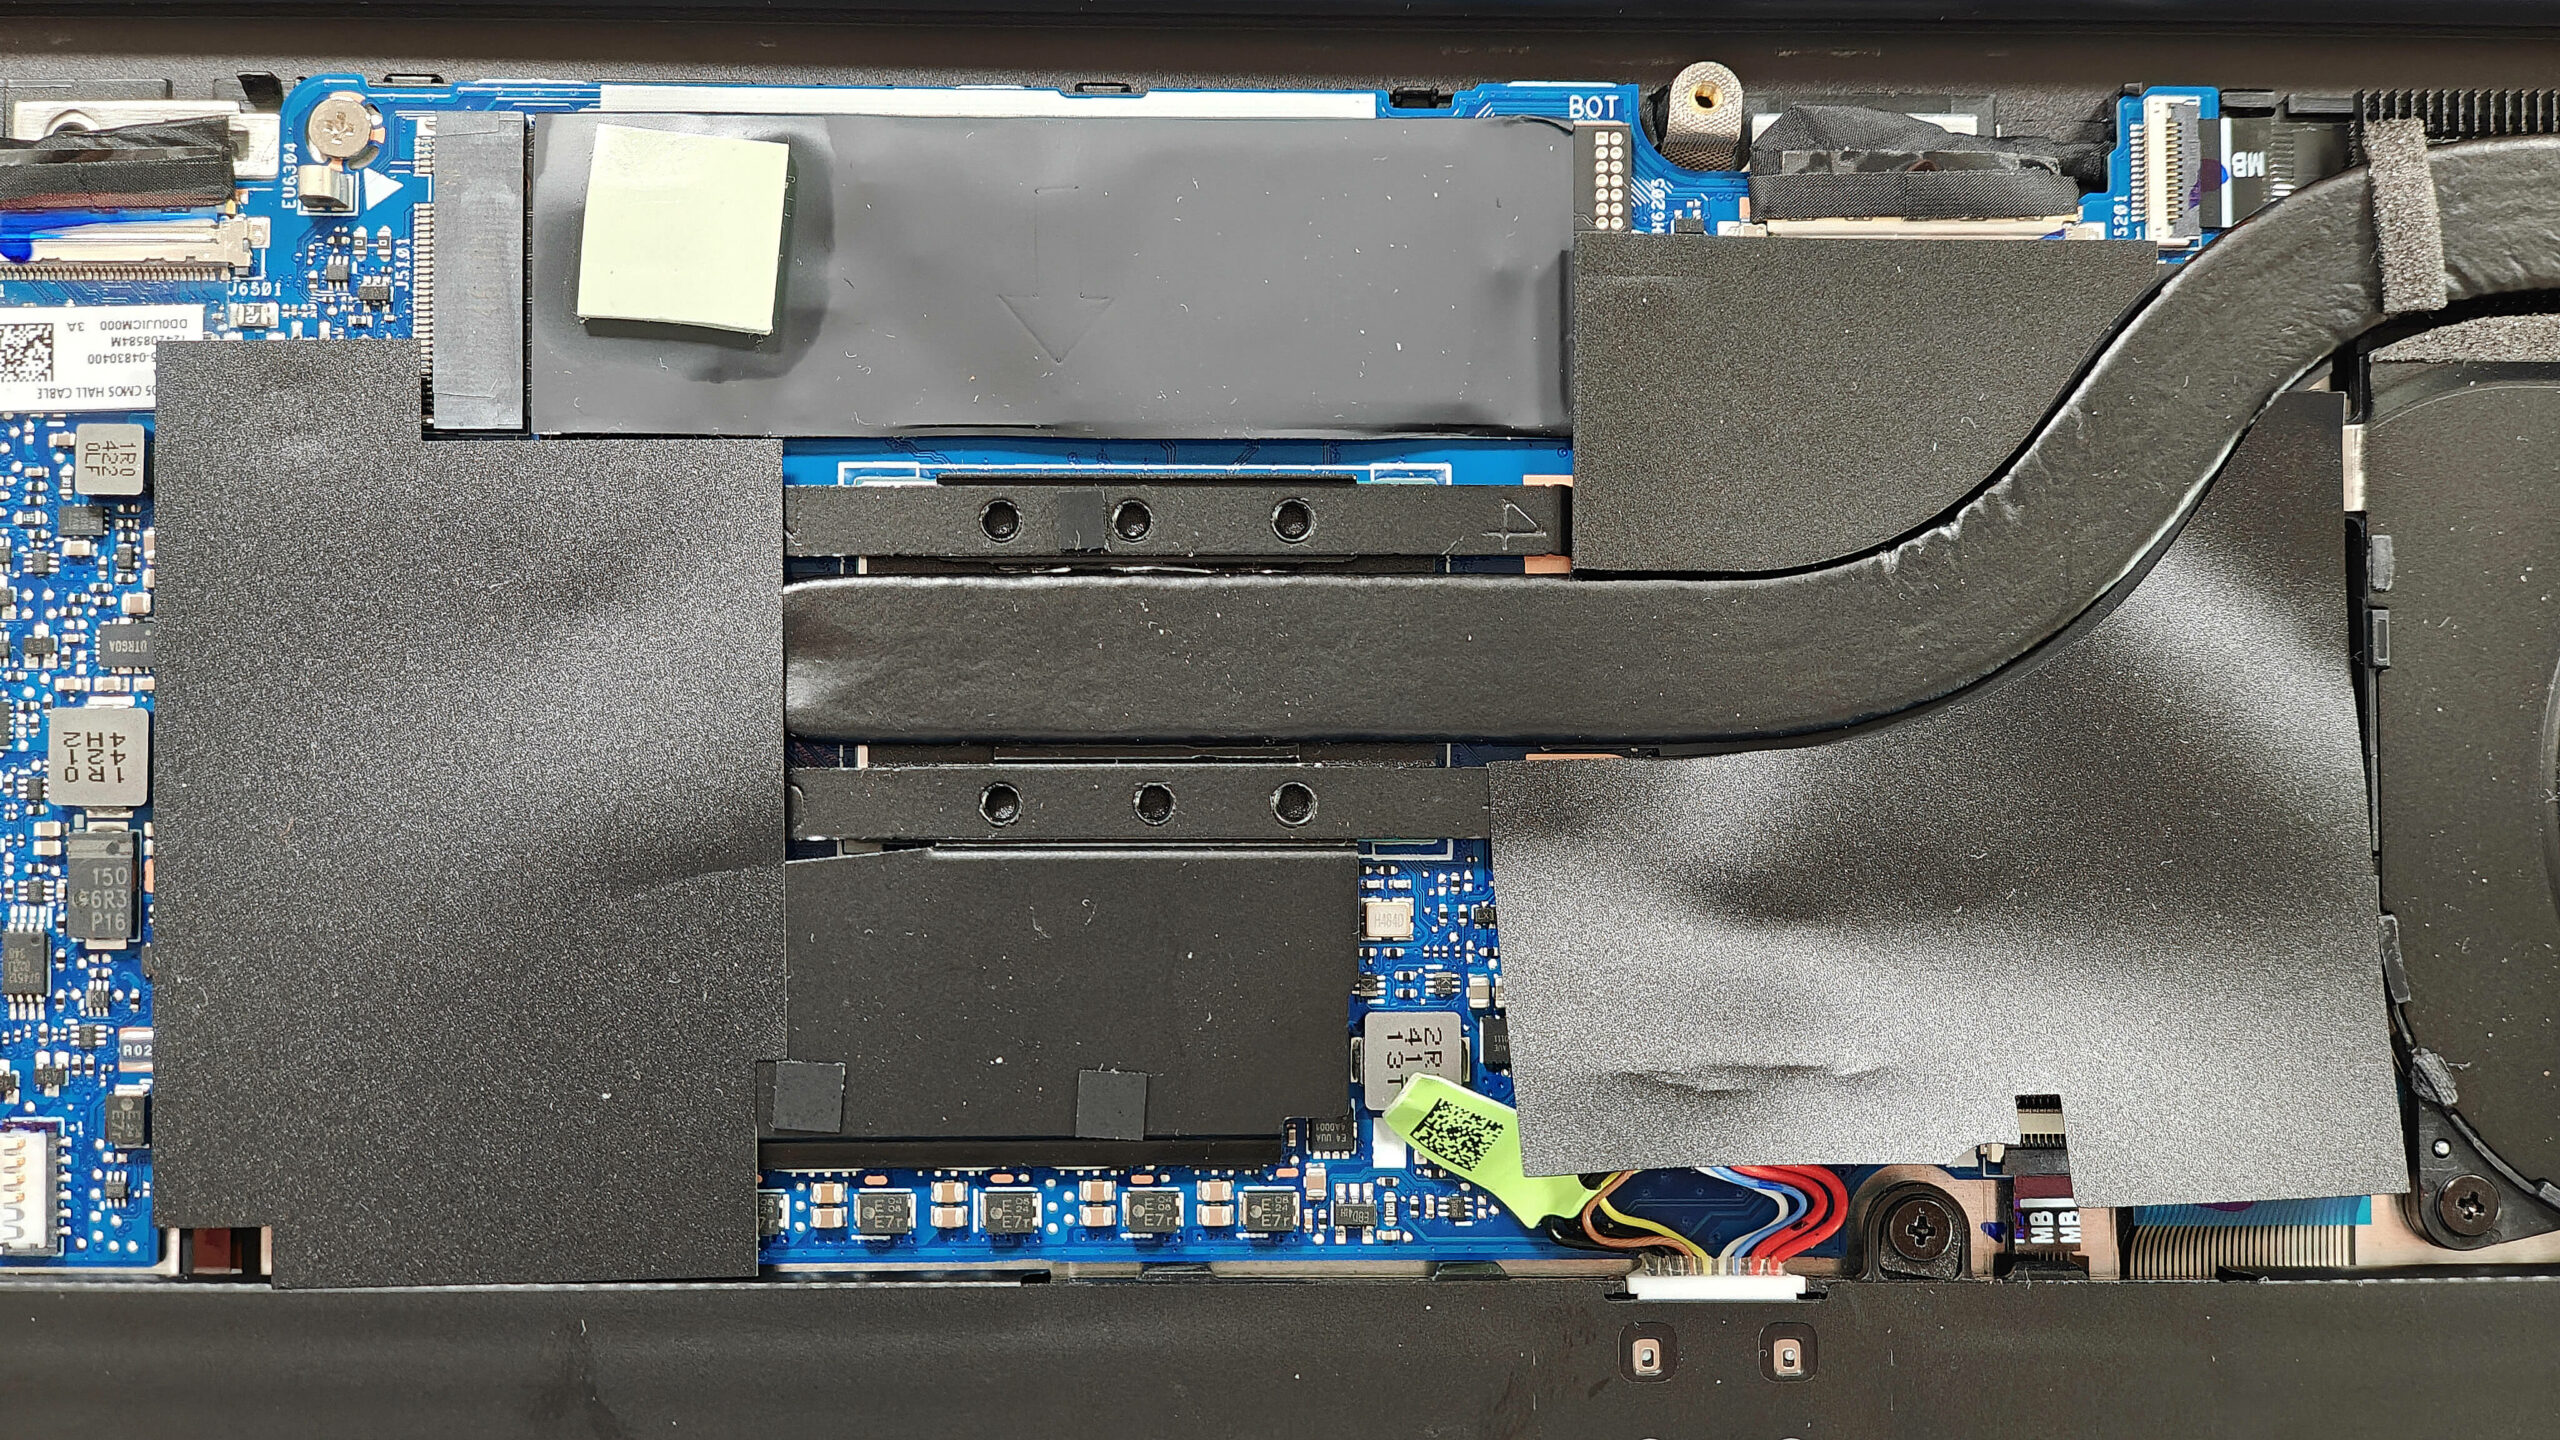
More info: The inside of the bottom plate features a large cooling pad for the WWAN slot, enhancing thermal management and supporting optional 5G or 4G LTE connectivity.
Battery Removal
Caution: Handle the battery with care to avoid damage or injury. Wear gloves to prevent short circuits.
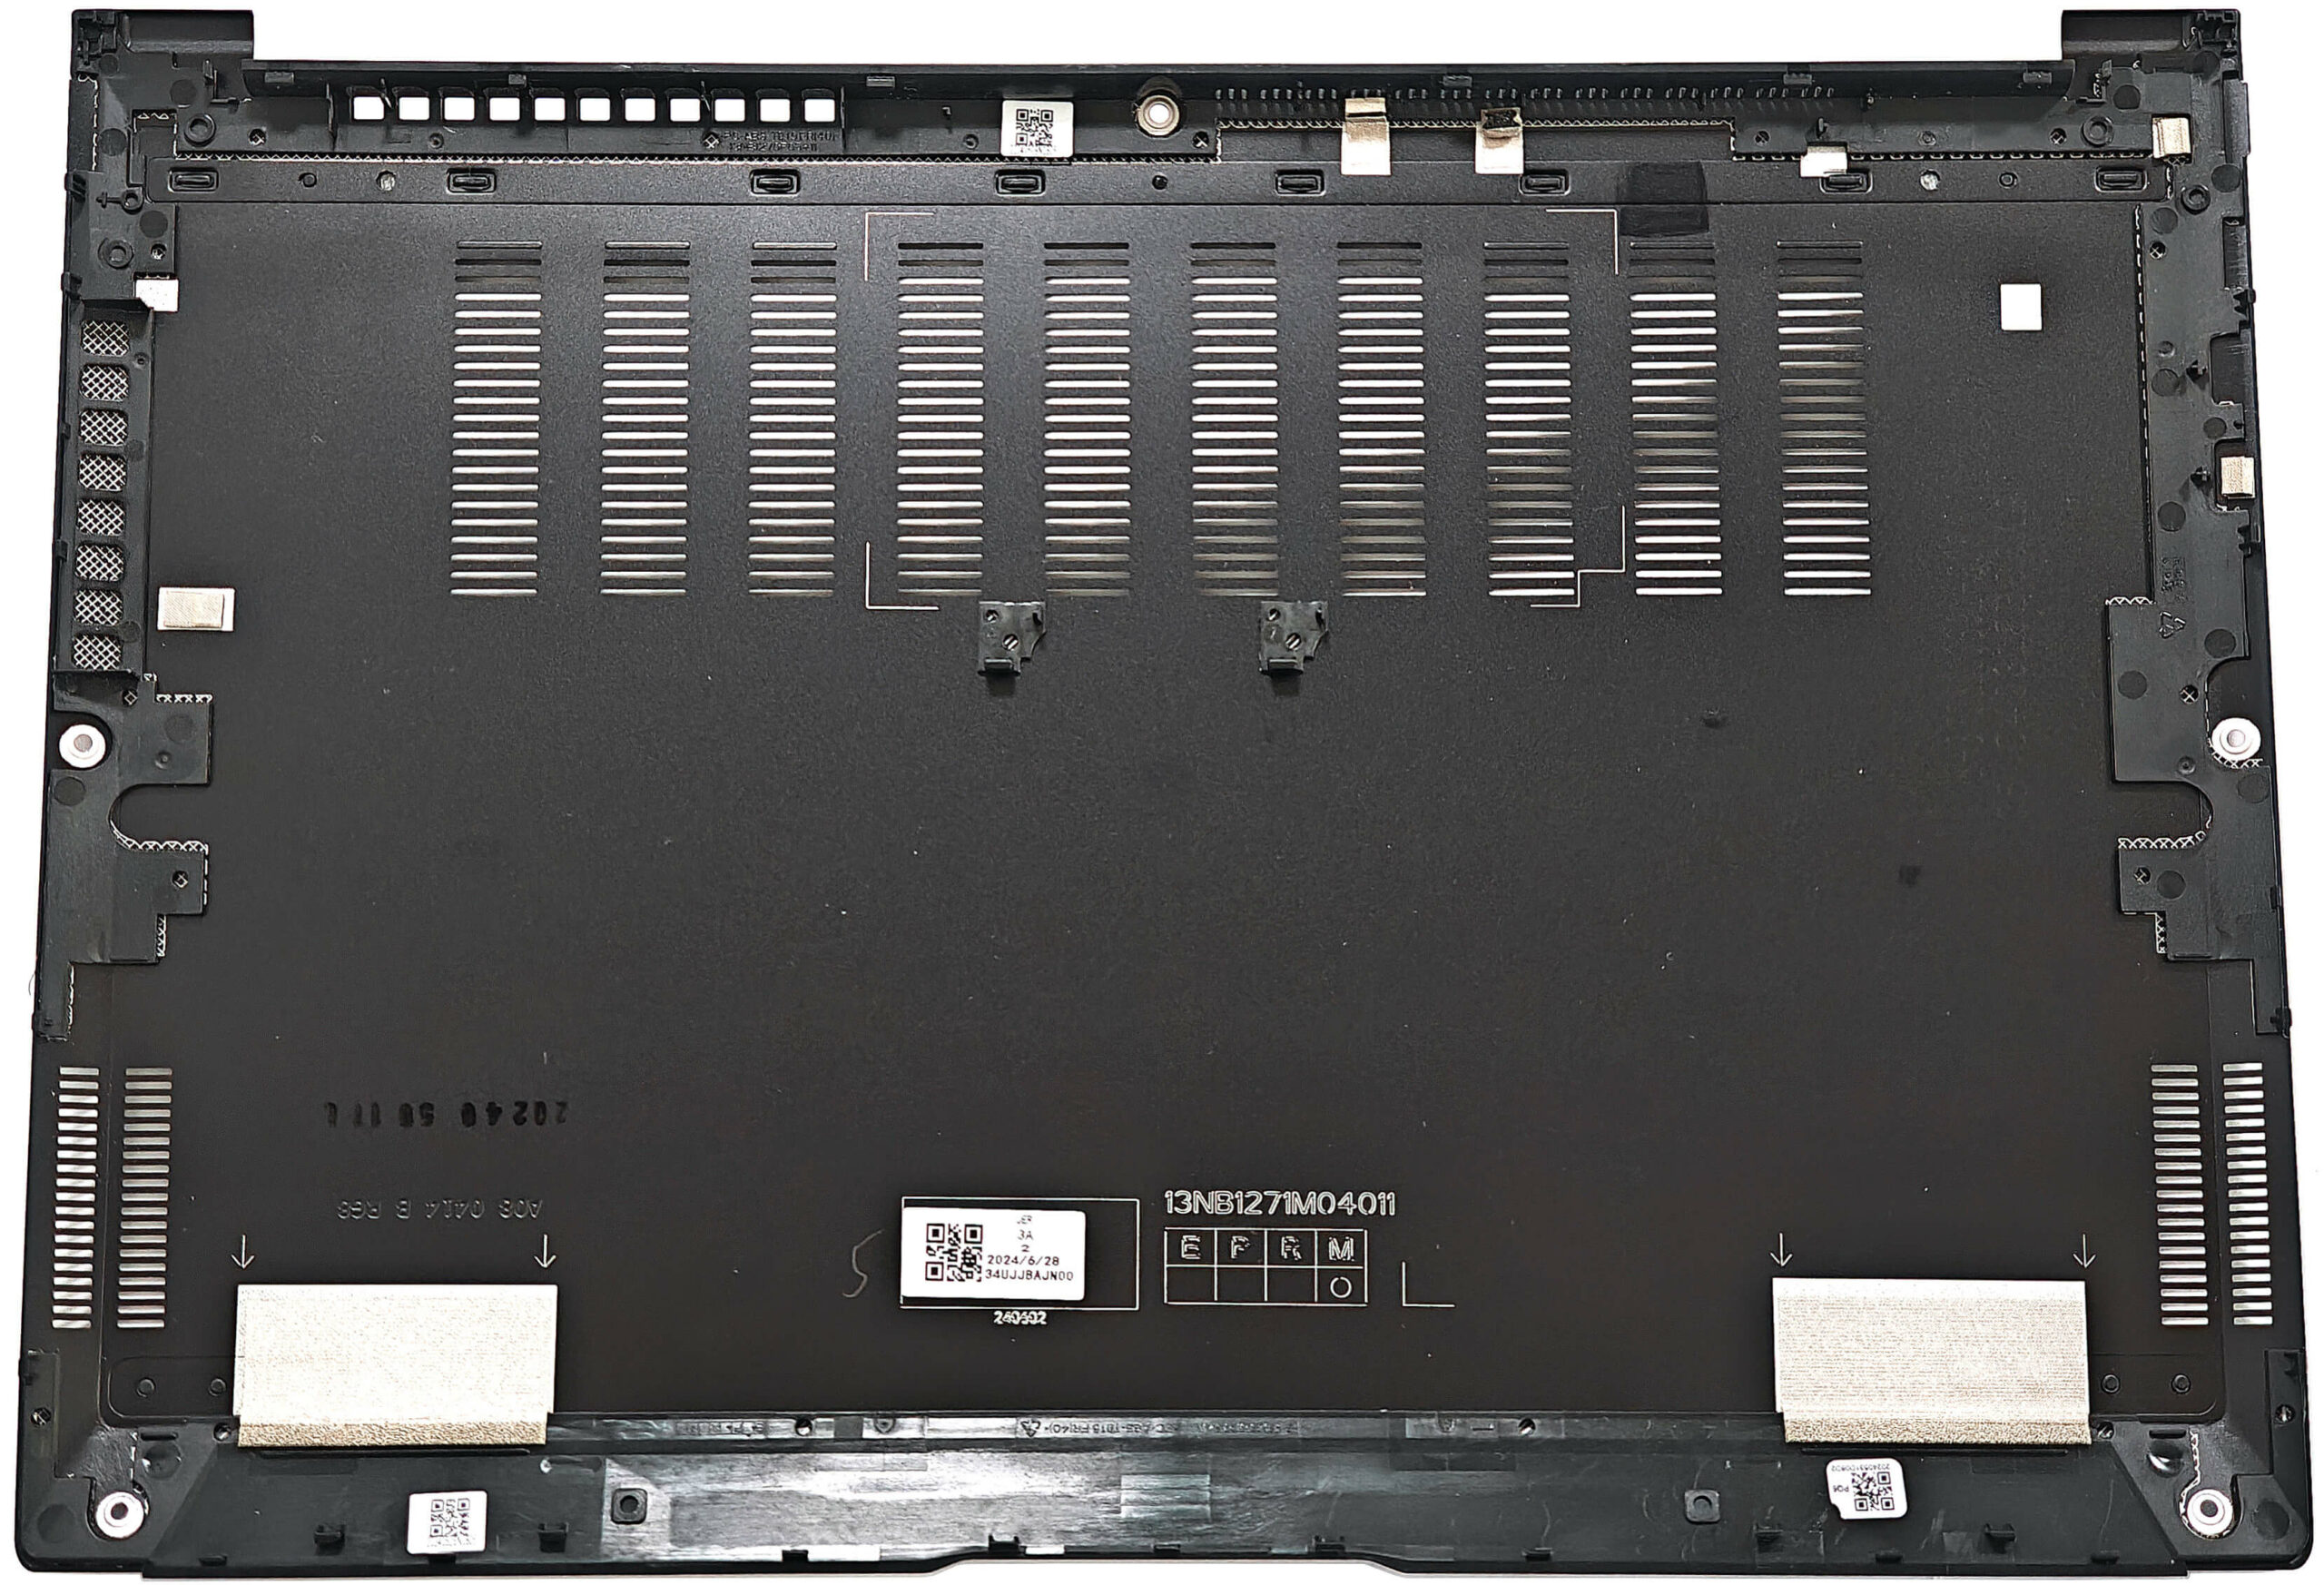
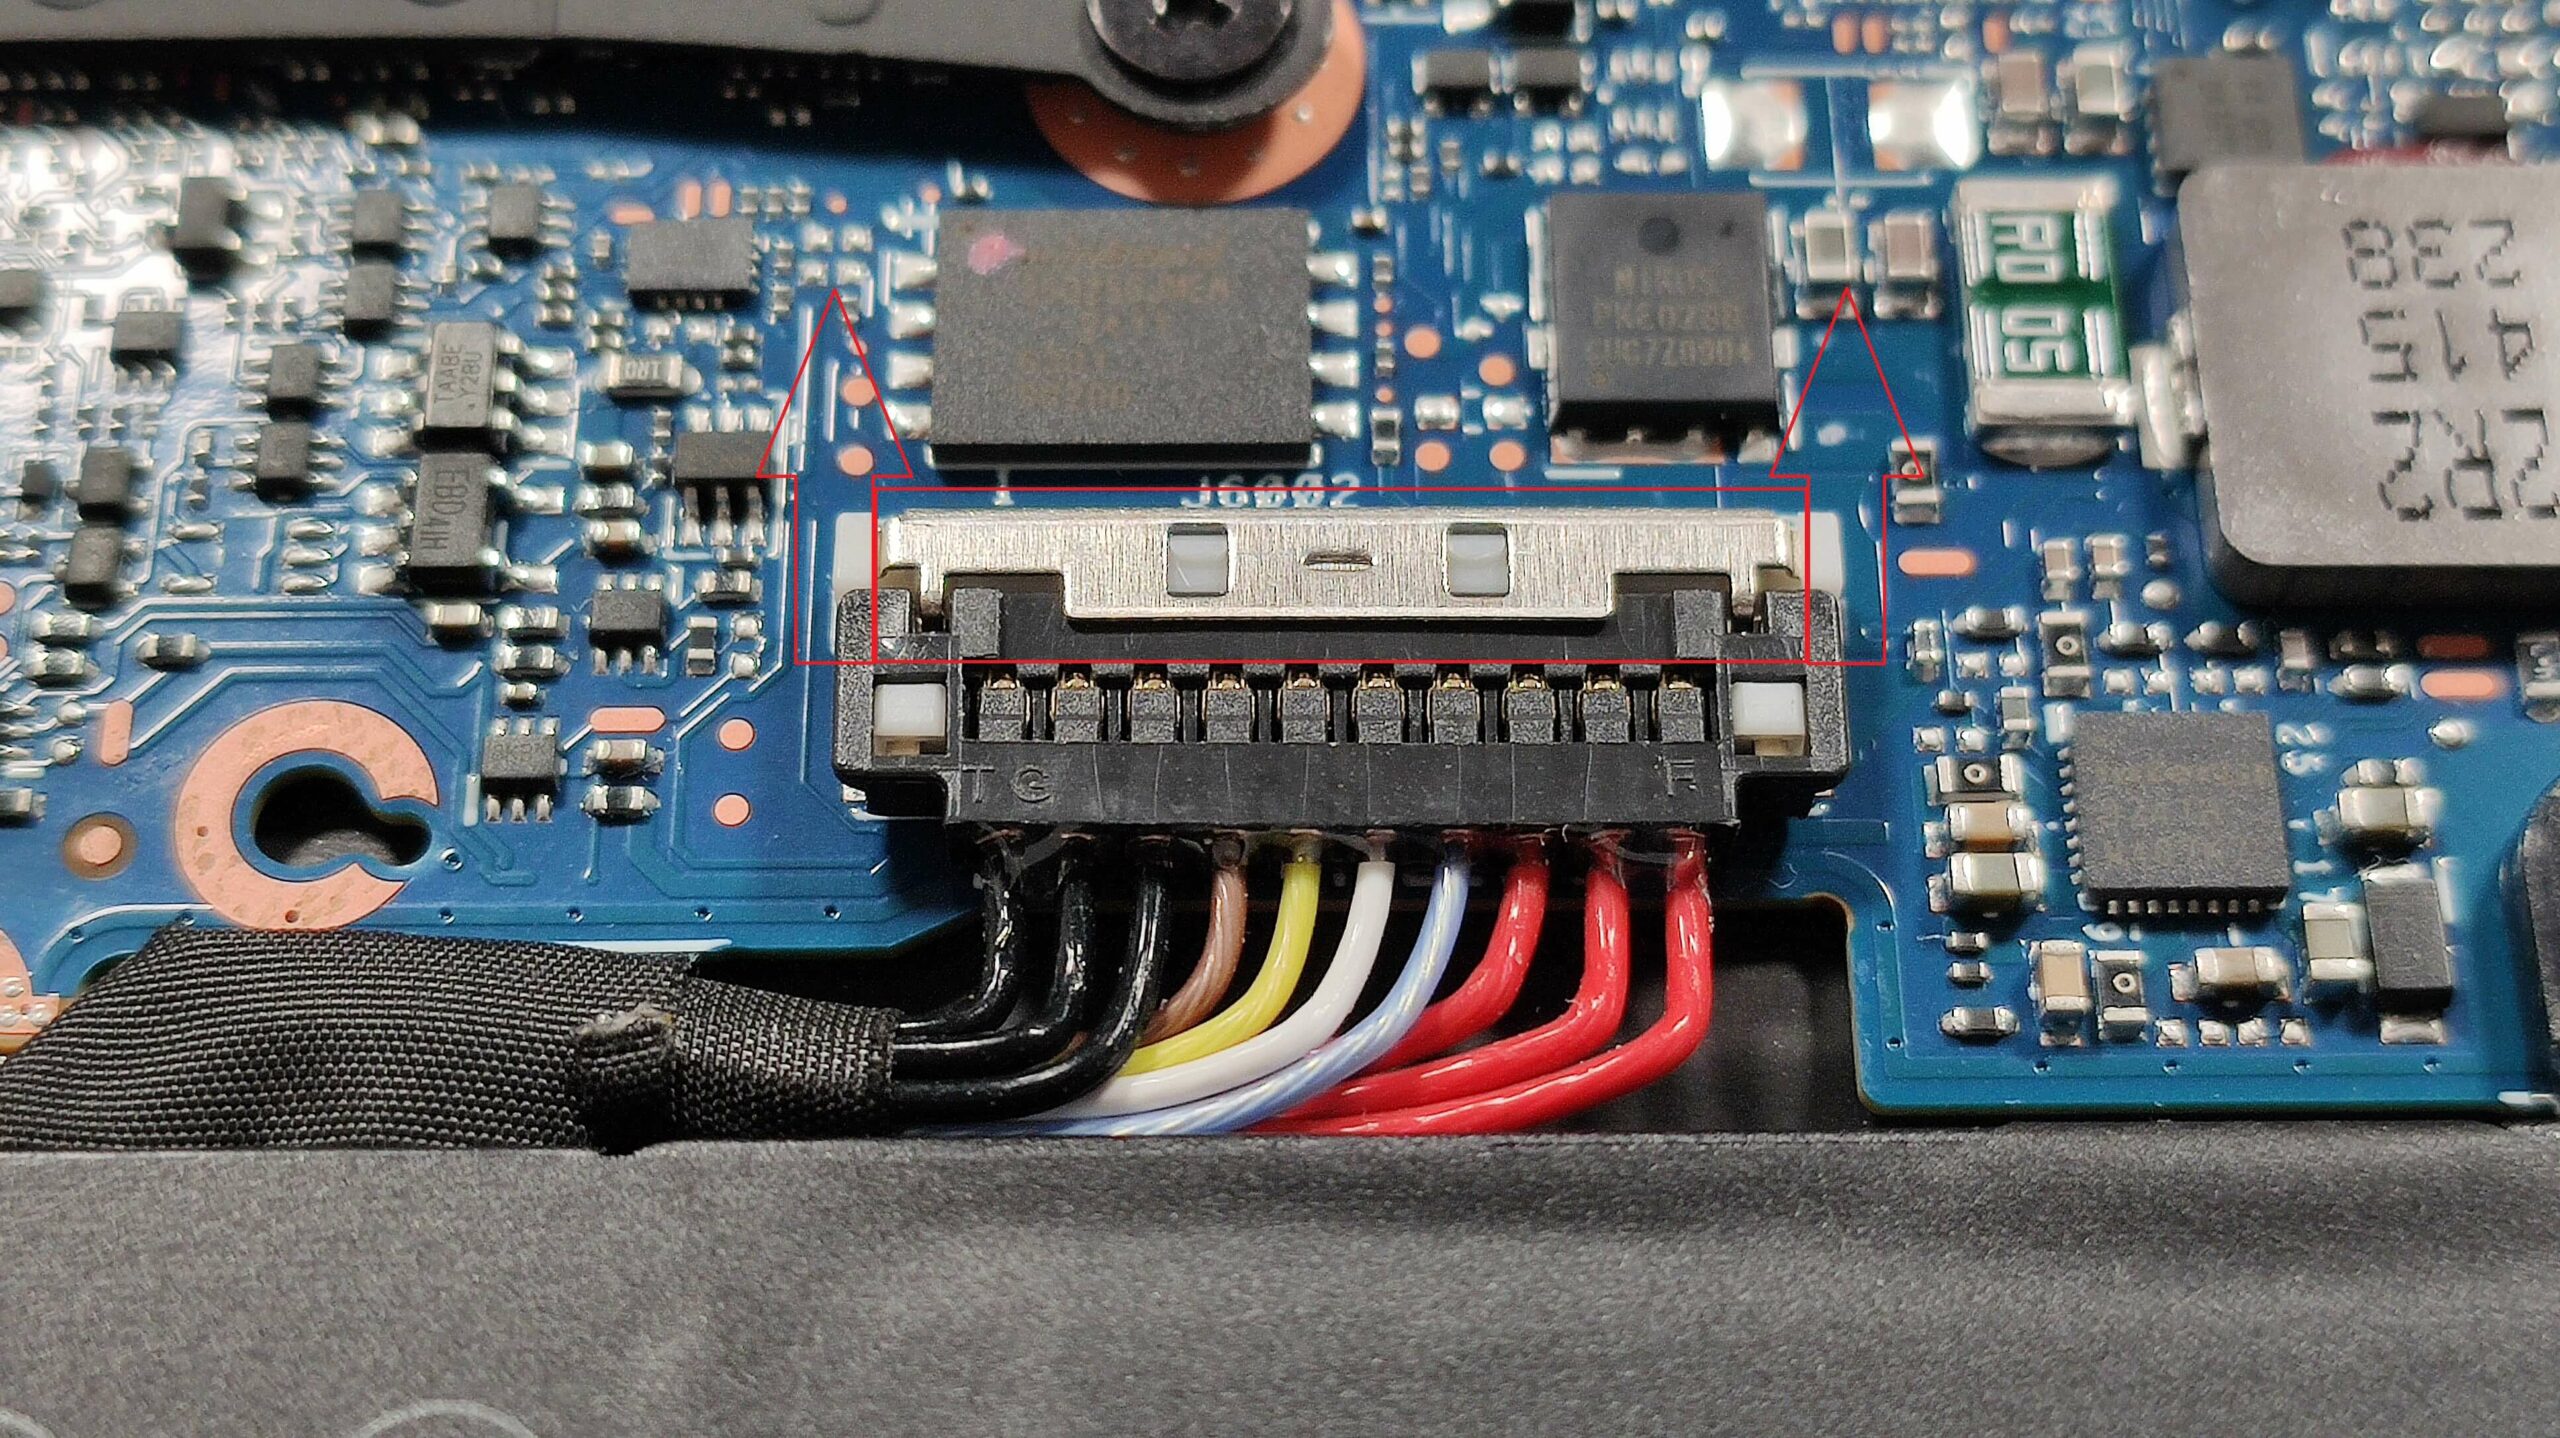
- Slide up the small metal shroud on the top side that covers the battery connector.
- Unplug the battery connector from the motherboard by pulling it to the left with a plastic tool.
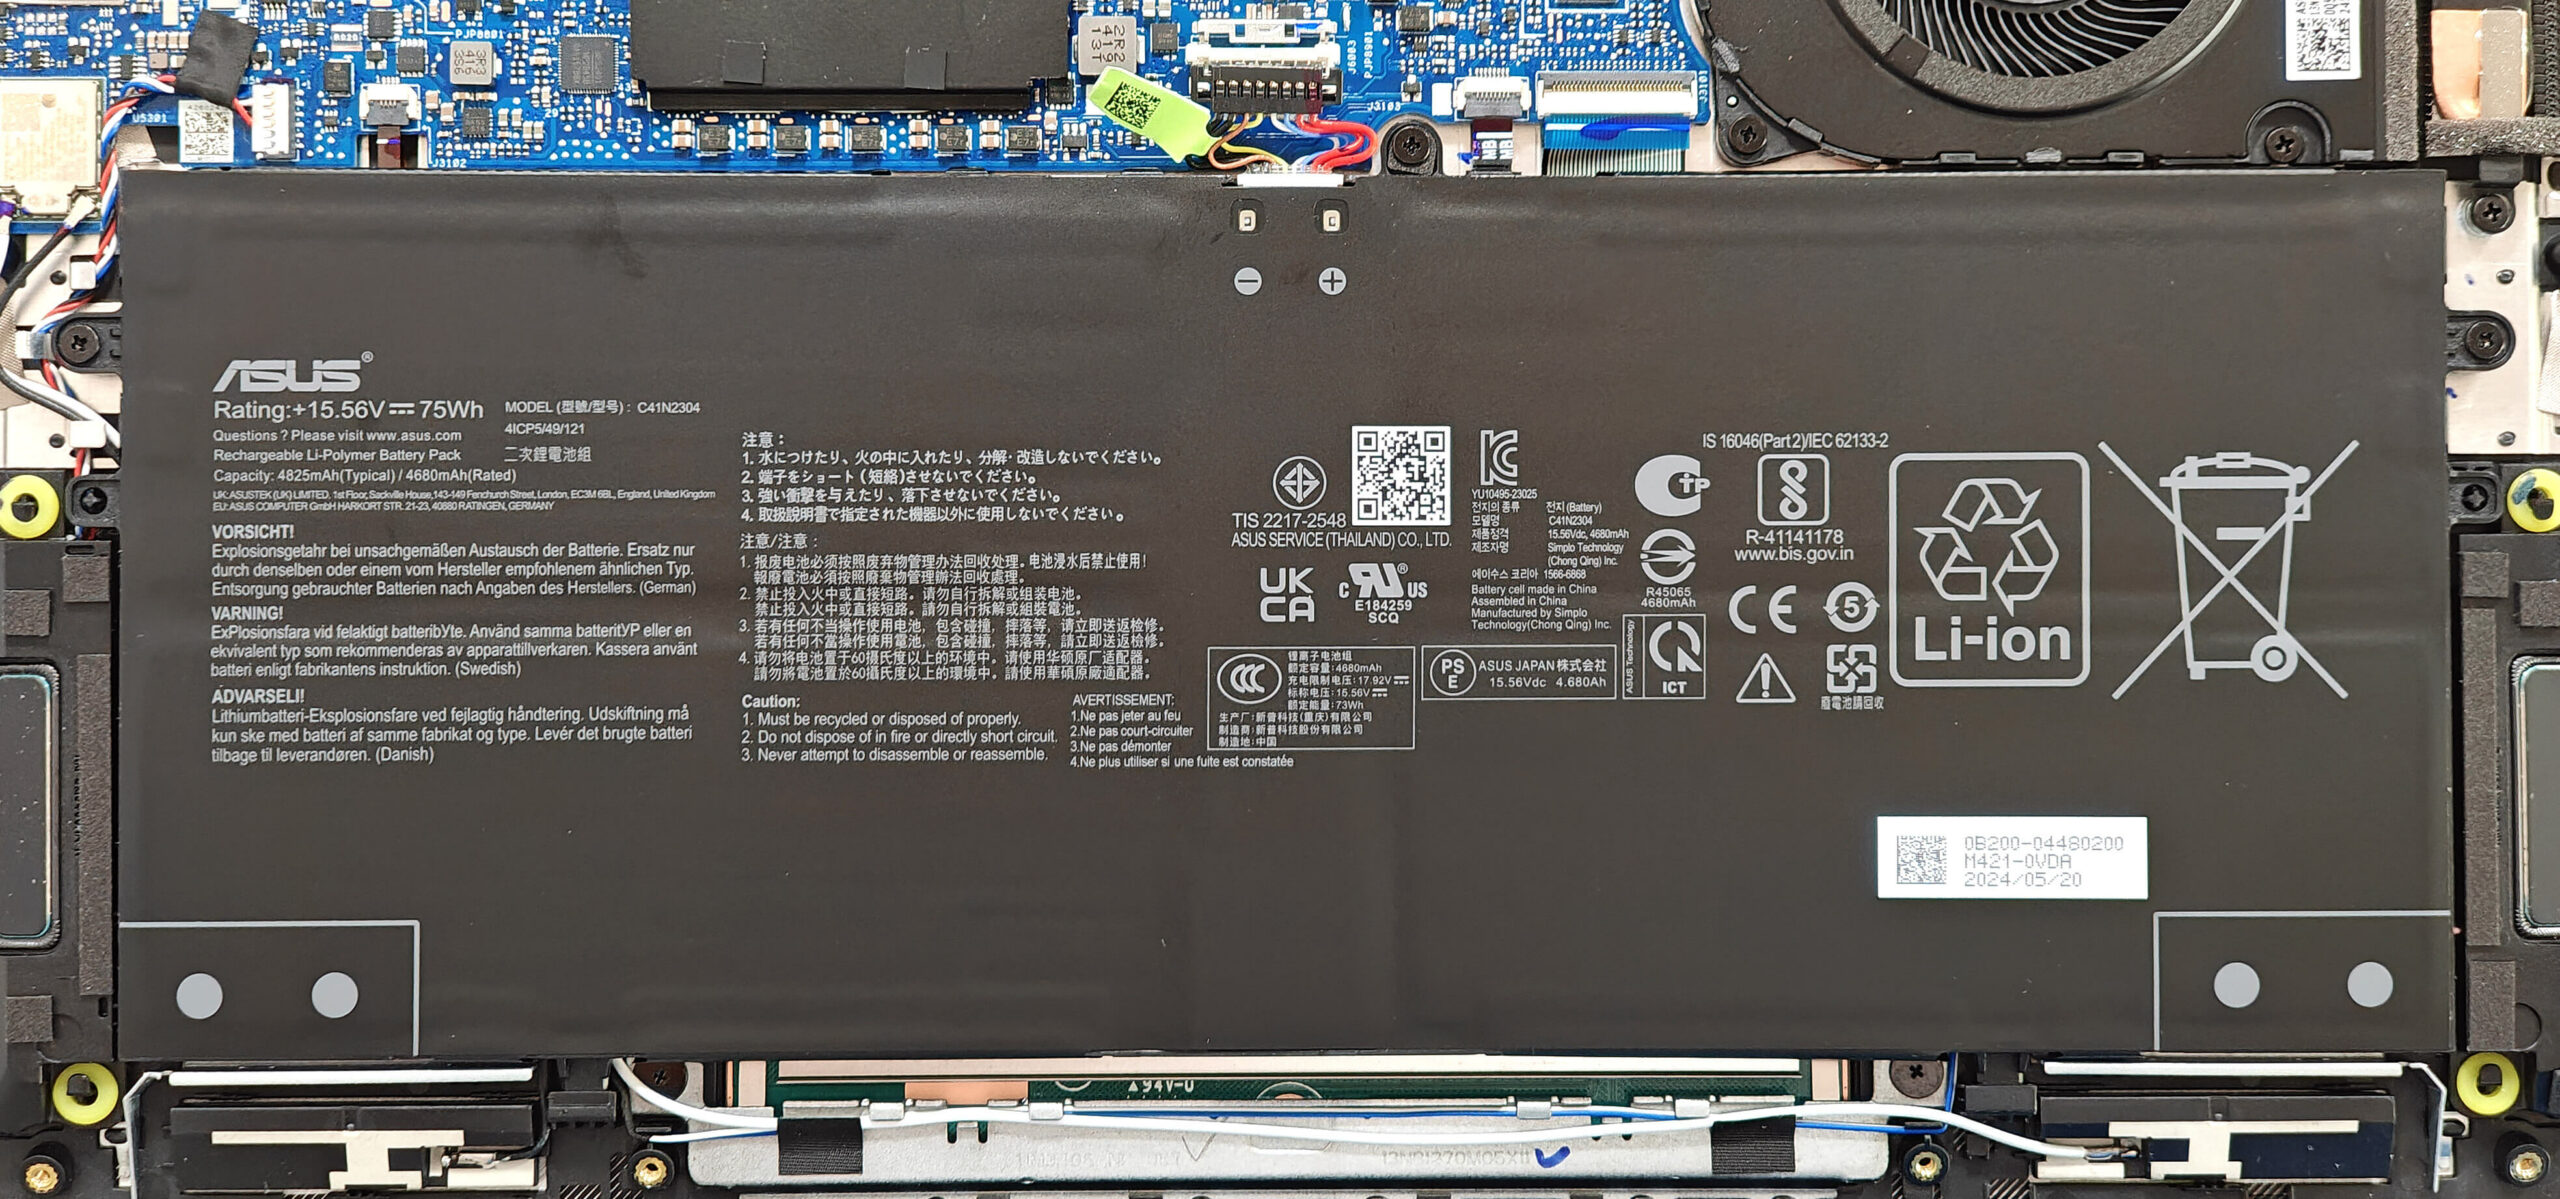
- Undo the three Phillips-head screws that secure the 75Wh battery unit to the chassis.
- Carefully detach the battery unit from the laptop.
More info: The laptop is equipped with a 75Wh battery, providing approximately 19 and a half hours of video playback. This impressive battery life was achieved with the “Battery Saver” preset activated in the Windows “Power & Battery” menu and the “Standard” fan profile applied in the MyASUS app.
You can buy compatible batteries here: Buy from Amazon.com (#CommissionsEarned)
Memory Upgrade
Note: The memory is soldered and not user-upgradable.
More info: This laptop comes with up to 32GB of LPDDR5x-7467MHz memory in dual-channel mode, providing ample performance for normal home or office tasks. Although the CPU can support up to 96GB, the memory is soldered and cannot be upgraded beyond the factory-installed capacity.
Storage Upgrade
Hint: Handle the SSD with care to avoid any data loss or damage during installation.
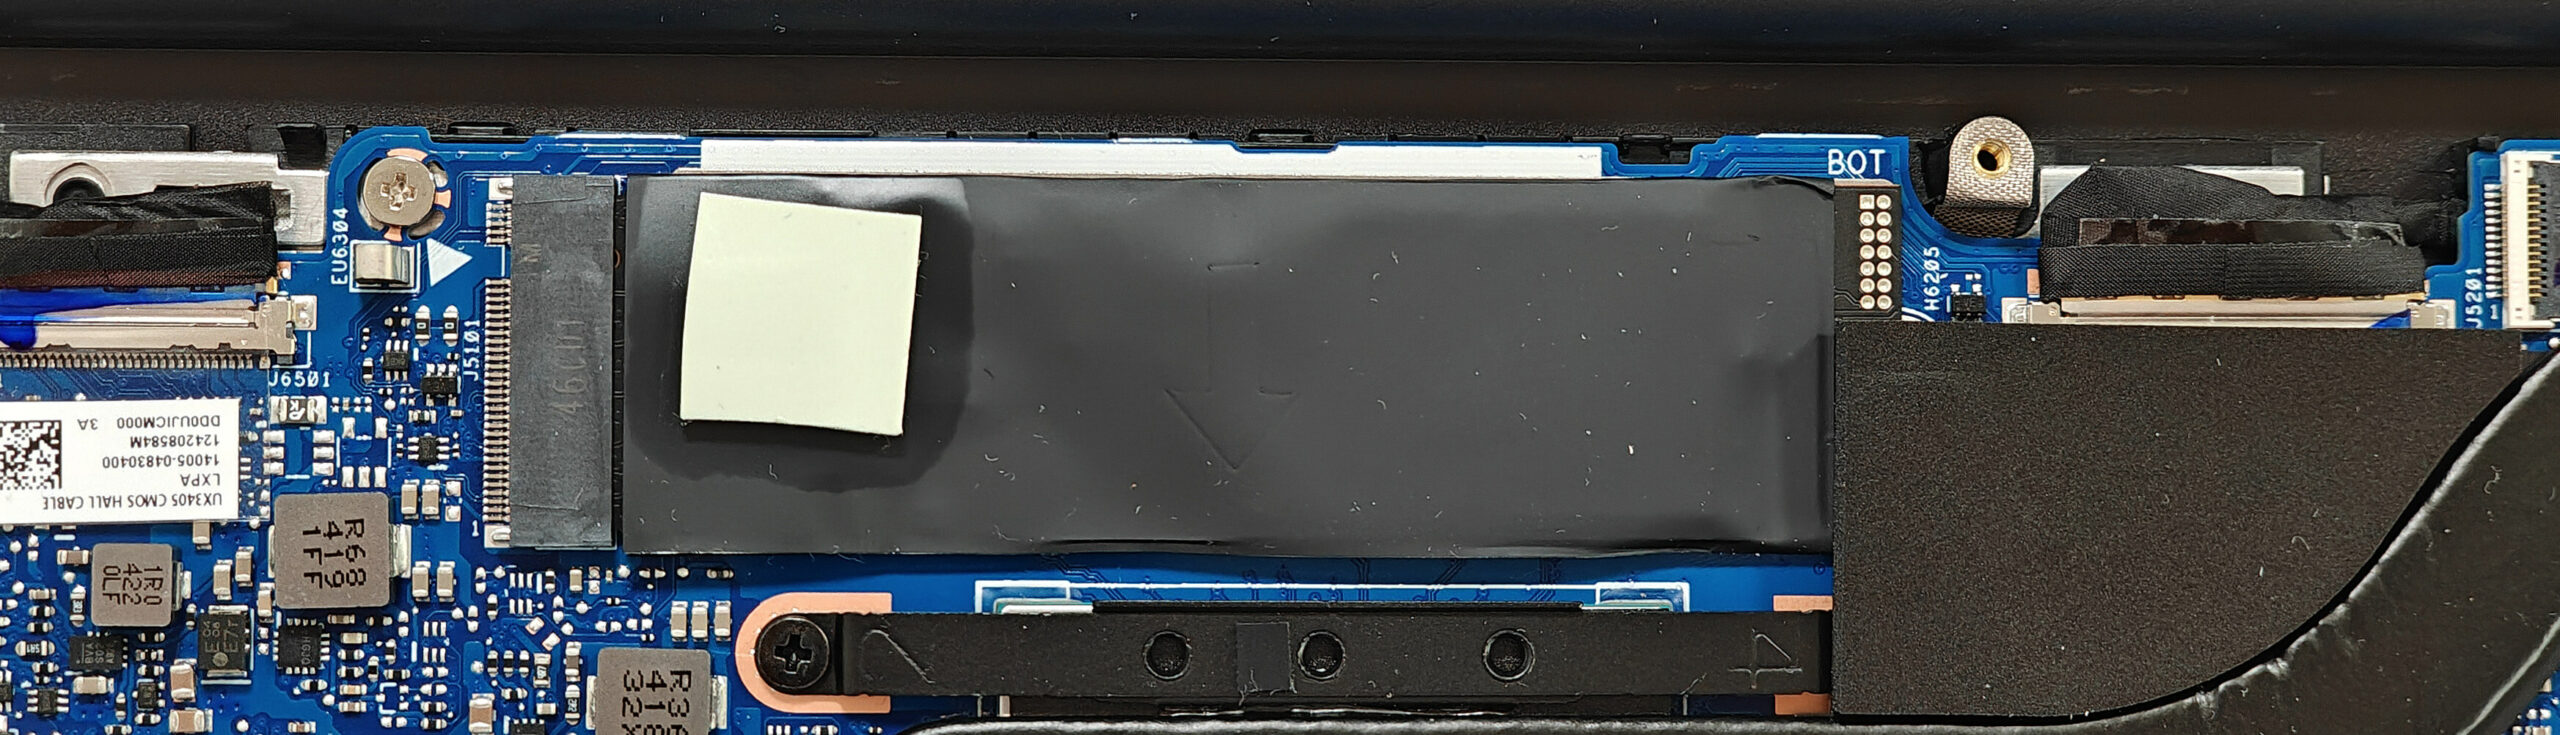
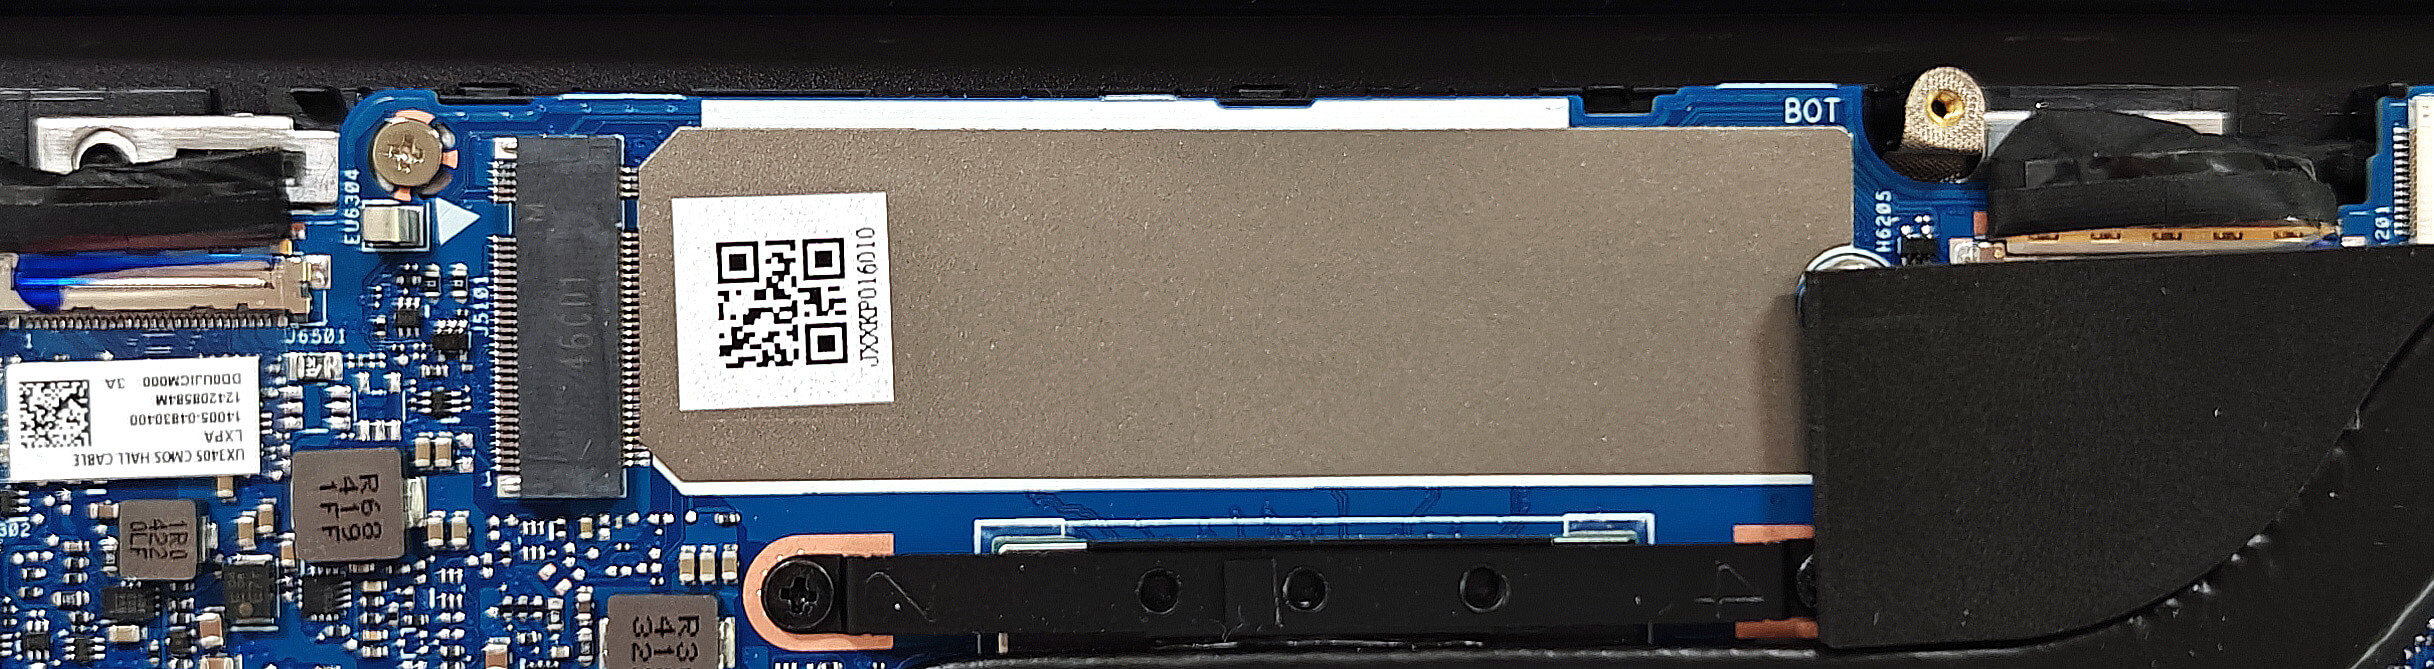
- Locate the single M.2 slot compatible with 2280 Gen 4 SSDs.
- Remove the metal shield covering the SSD by undoing the single Phillips-head screw.
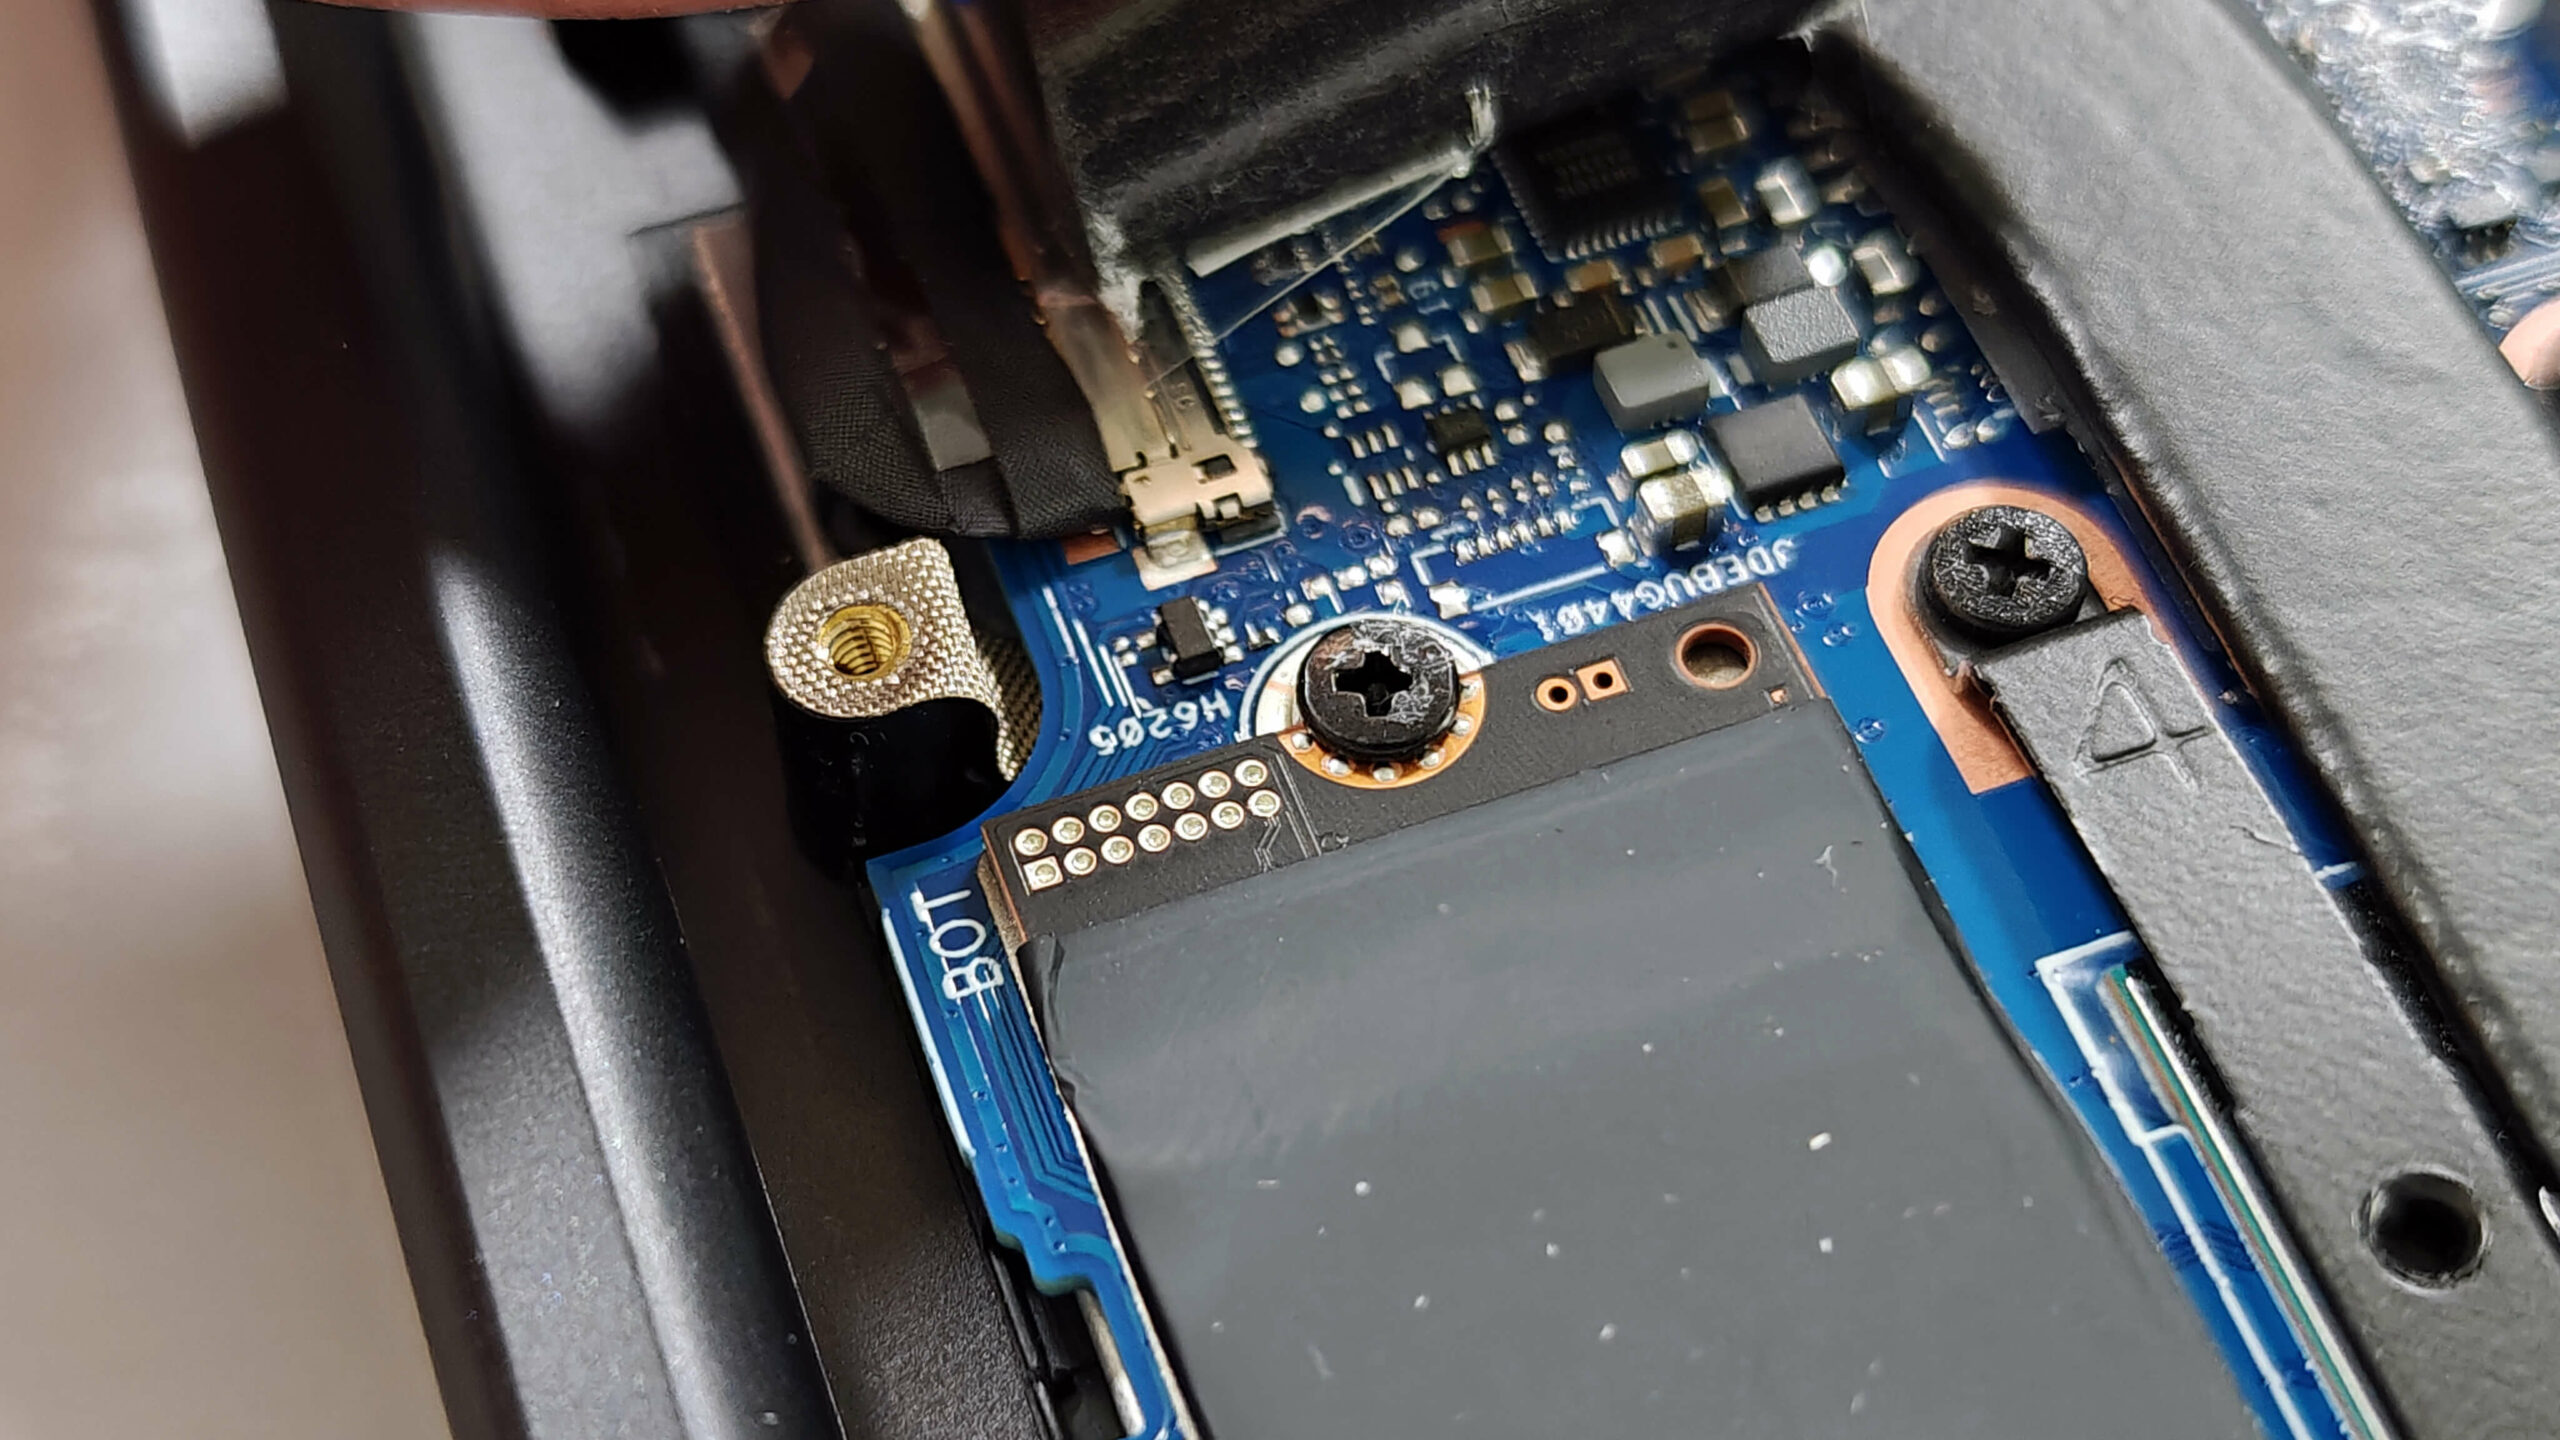
- Lift the rubber element on the right to access the screw.
- Undo the single screw that holds the SSD unit fixed to the base.
- Slide the metal shield to the left and lift it away from the chassis.
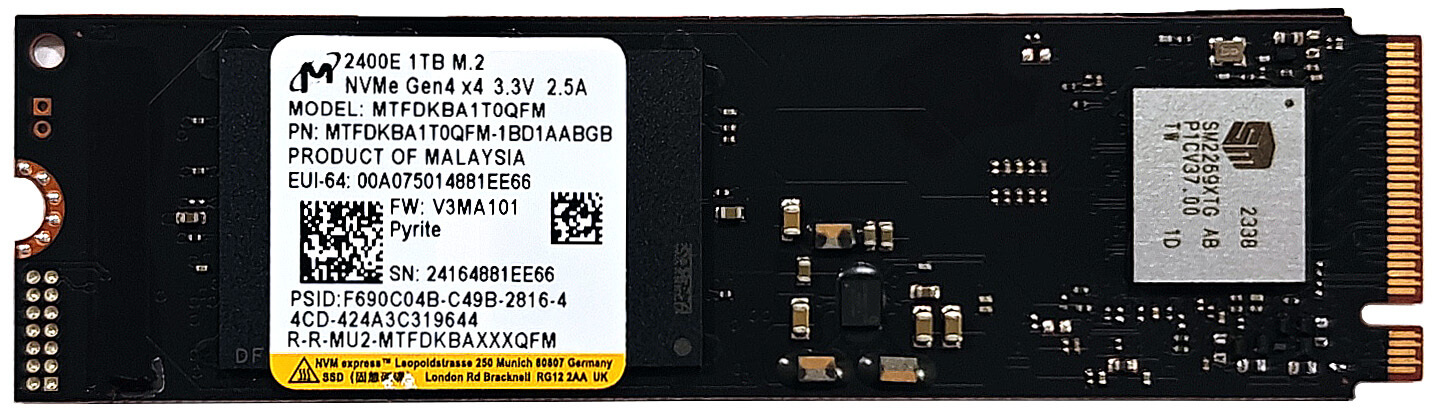
- Insert the new Gen 4 M.2 SSD into the slot and secure it with the screw.
More info: The laptop includes one M.2 slot compatible with 2280 Gen 4 SSDs. The preinstalled NVMe SSD is covered with a heat shield and cooled by a small thermal pad on top. Although the cooling pad below the preinstalled NVMe isn’t optimally placed, it can be easily fixed.
Hint: Don’t forget to check out our Top M.2 SSDs Performance Rankings for insights on the best storage options available.
You can buy compatible SSDs here: Buy from Amazon.com (#CommissionsEarned)
Wi-Fi Card
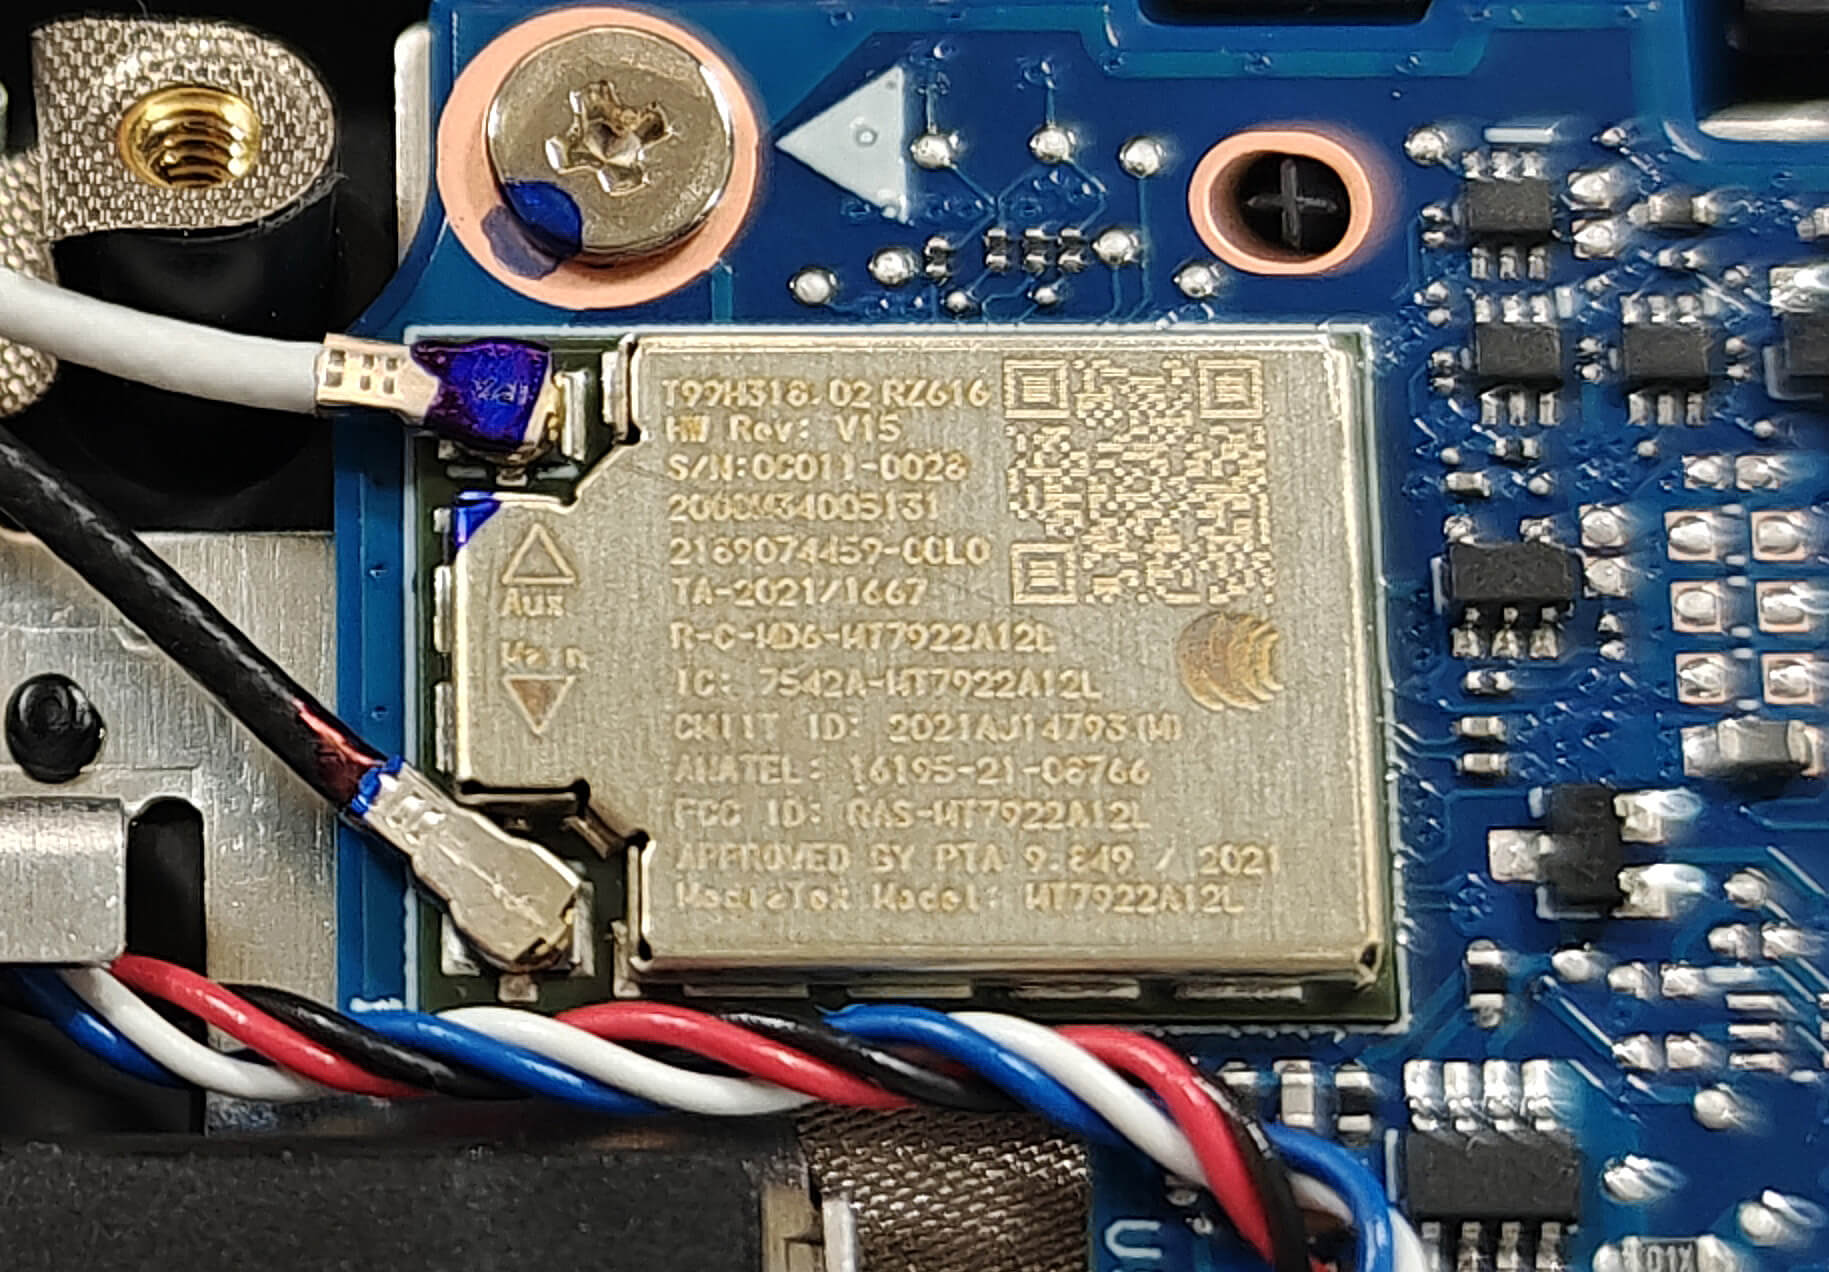
More Info: The Wi-Fi card is also soldered and it’s placed close to the top left corner of the battery.
Cooling System Overview
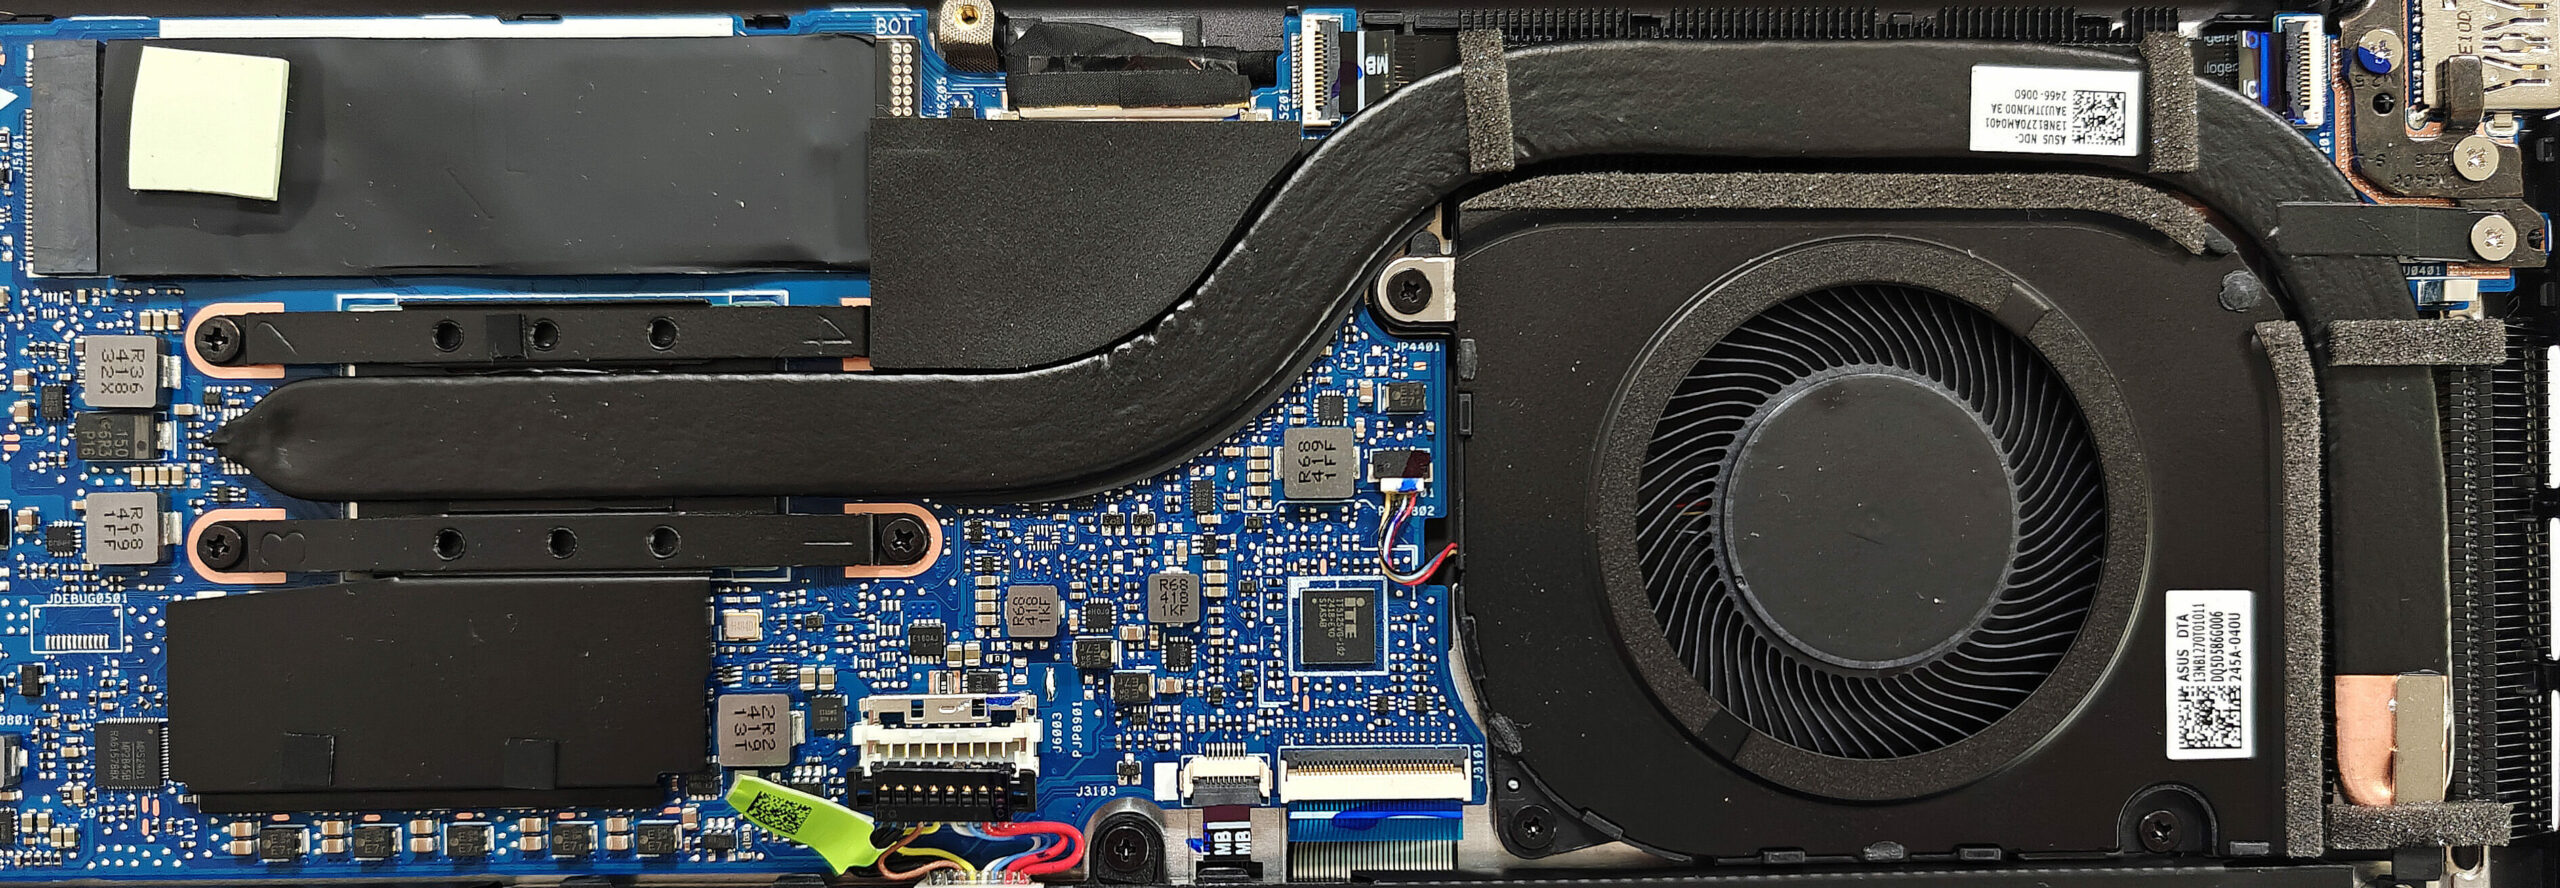
More info: The cooling system is modest, comprising a large fan, two long heat pipes, a top-mounted heat sink, and a heat spreader to ensure effective thermal management.
- Inspect the large fan to ensure it is free of dust and debris.
- Check the single long heat pipe for any signs of wear or damage.
- Verify that the two heat sinks are properly seated and unobstructed.
- Ensure that the heat spreader is securely in place to maintain optimal cooling performance.
ASUS Zenbook 14 OLED (UM3406) in-depth review
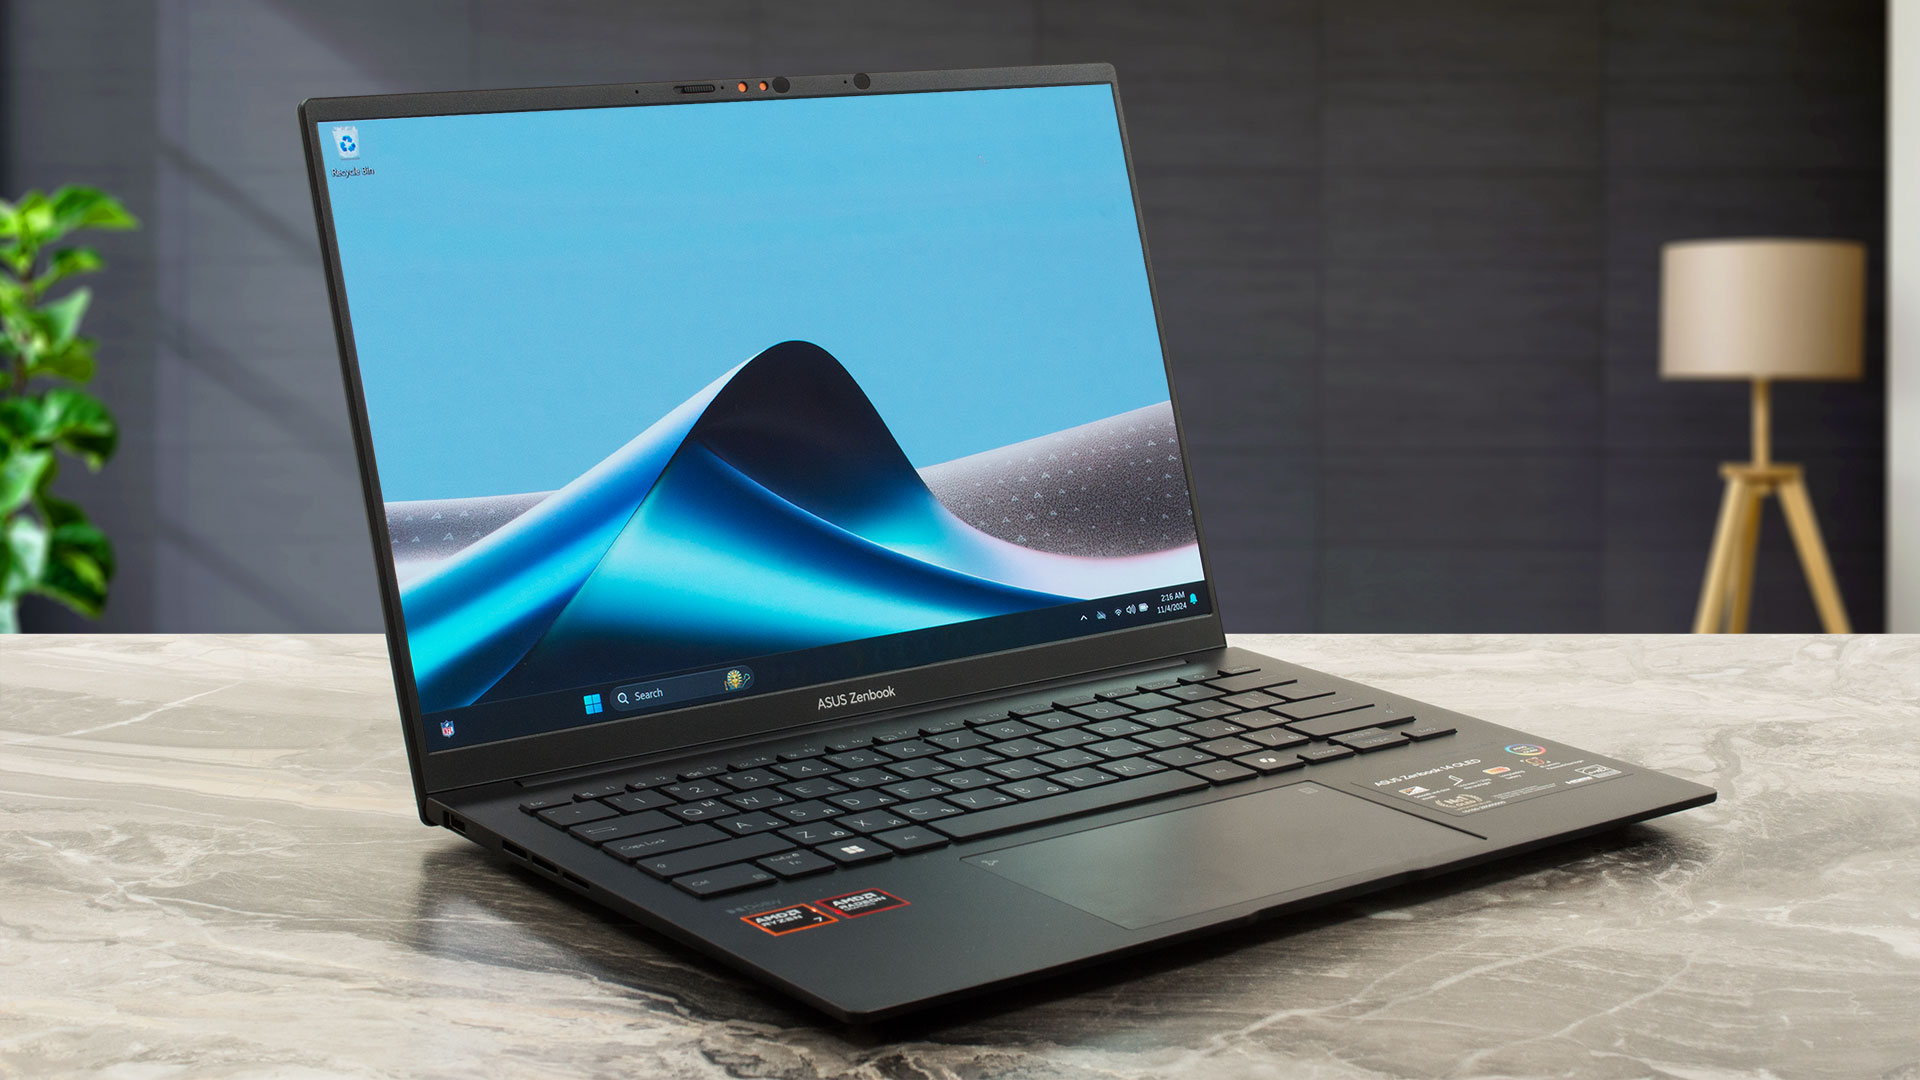
What about a 28W AMD Zen 4 CPU fitted in a light 14-inch device? Yep, the Zenbook 14 OLED UM3406 has the powerful AMD Ryzen 7 8840HS under the bonnet alongside the Radeon 780M. The latter is pretty snappy for an iGPU and thanks to it, you can play CS2 on Medium details with around 152 FPS on average which is a respectable result for integrated graphics.Perhaps this laptop could look familiar to some of you. That's because it's the AMD version of the Team Blue Zenbook 14 OLED (UX3405) that we have already tested. This means a thin notebook with good input devices and limited upgradability b[...]
Pros
- Great OLED display with 100% sRGB and DCI-P3 coverage (SDC41A0)
- Infinite contrast ratio (SDC41A0)
- 650 nits in HDR and 382 nits max brightness in SDR mode (SDC41A0)
- Superb color accuracy (SDC41A0)
- Light and thin (1.20 - 1.28 kg / 14.9 mm)
- Quality Harman Kardon-certified speakers
- Comfortable quiet keyboard
- Big and smooth touchpad
- Virtual ASUS NumberPad 2.0 (option)
- 1080p IR Web camera
- Very good overall CPU and iGPU performance given the thin profile
- Up to 32GB of soldered LPDDR5x RAM
- Very long battery life (~ 19 hours of videos)
- The AMD Ryzen 7 8840HS can maintain 3.93 GHz in short loads
- Metal build
- 2x Type-C + 1x Type-A ports
Cons
- The CPU clock drops down below the official base frequency in long loads
- Only one M.2 slot + soldered memory
- Lacks Thunderbolt 4 support
- QLC SSD
- Fingerprint magnet
 Author: Dimitar Stalev

![[June 2026] Best-Selling Laptop Brands on Amazon Global – Apple’s Unrivaled Dominance in Units and Revenue](https://laptopmedia.com/wp-content/uploads/2026/07/GLOBAL-Best-Brands-400x225.jpg)
![[June 2026] Amazon Global: Top 10 Best-Selling Laptops – Apple’s New MacBook Neo Storms to #1, Reshaping the Market with Affordability](https://laptopmedia.com/wp-content/uploads/2026/07/Best-Selling-Laptops-GLOBAL-Top-10-400x225.jpg)
![[June 2026] Amazon Global: Top 10 Best-Selling Gaming Laptops – Acer’s Nitro V 16S AI Dominates Sales, While ASUS Leads Overall Revenue](https://laptopmedia.com/wp-content/uploads/2026/07/Best-Selling-Gaming-Laptops-GLOBAL-Top-10-400x225.jpg)
![[June 2026] Global Ranking of Best-Selling Laptop GPUs on Amazon – NVIDIA RTX 5060 is the Top-Selling Dedicated GPU](https://laptopmedia.com/wp-content/uploads/2026/07/Best-Selling-GPUs-GLOBAL-Top-10-400x225.jpg)
![[June 2026] Global Ranking of Best-Selling Laptop CPUs on Amazon – Apple M5 Dominates, AMD Ryzen 7 260 Gets Solid Premium Share](https://laptopmedia.com/wp-content/uploads/2026/07/Best-Selling-CPUs-GLOBAL-Top-10-400x225.jpg)