How to open Lenovo Legion 9i (18″, Gen 10) – disassembly and upgrade options
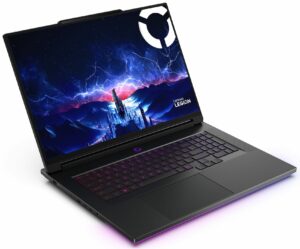
Before you start: Power the laptop off, unplug the charger and peripherals, and hold the power button for a few seconds to discharge residual power. Work on a clean, non-conductive surface and use ESD protection if available.
Opening the bottom panel
- Place the laptop upside down on a soft surface to avoid scratching the lid.
- Remove all bottom-cover screws (lengths can differ, so keep track of where each one came from).
- Insert a thin plastic pry tool between the bottom panel and the chassis near an edge and release the first clip.
- Work your way around the perimeter, popping the remaining clips one by one.
- Lift the bottom cover away and set it aside.
Caution: Use plastic tools only. Metal picks can dent the panel and damage the finish.
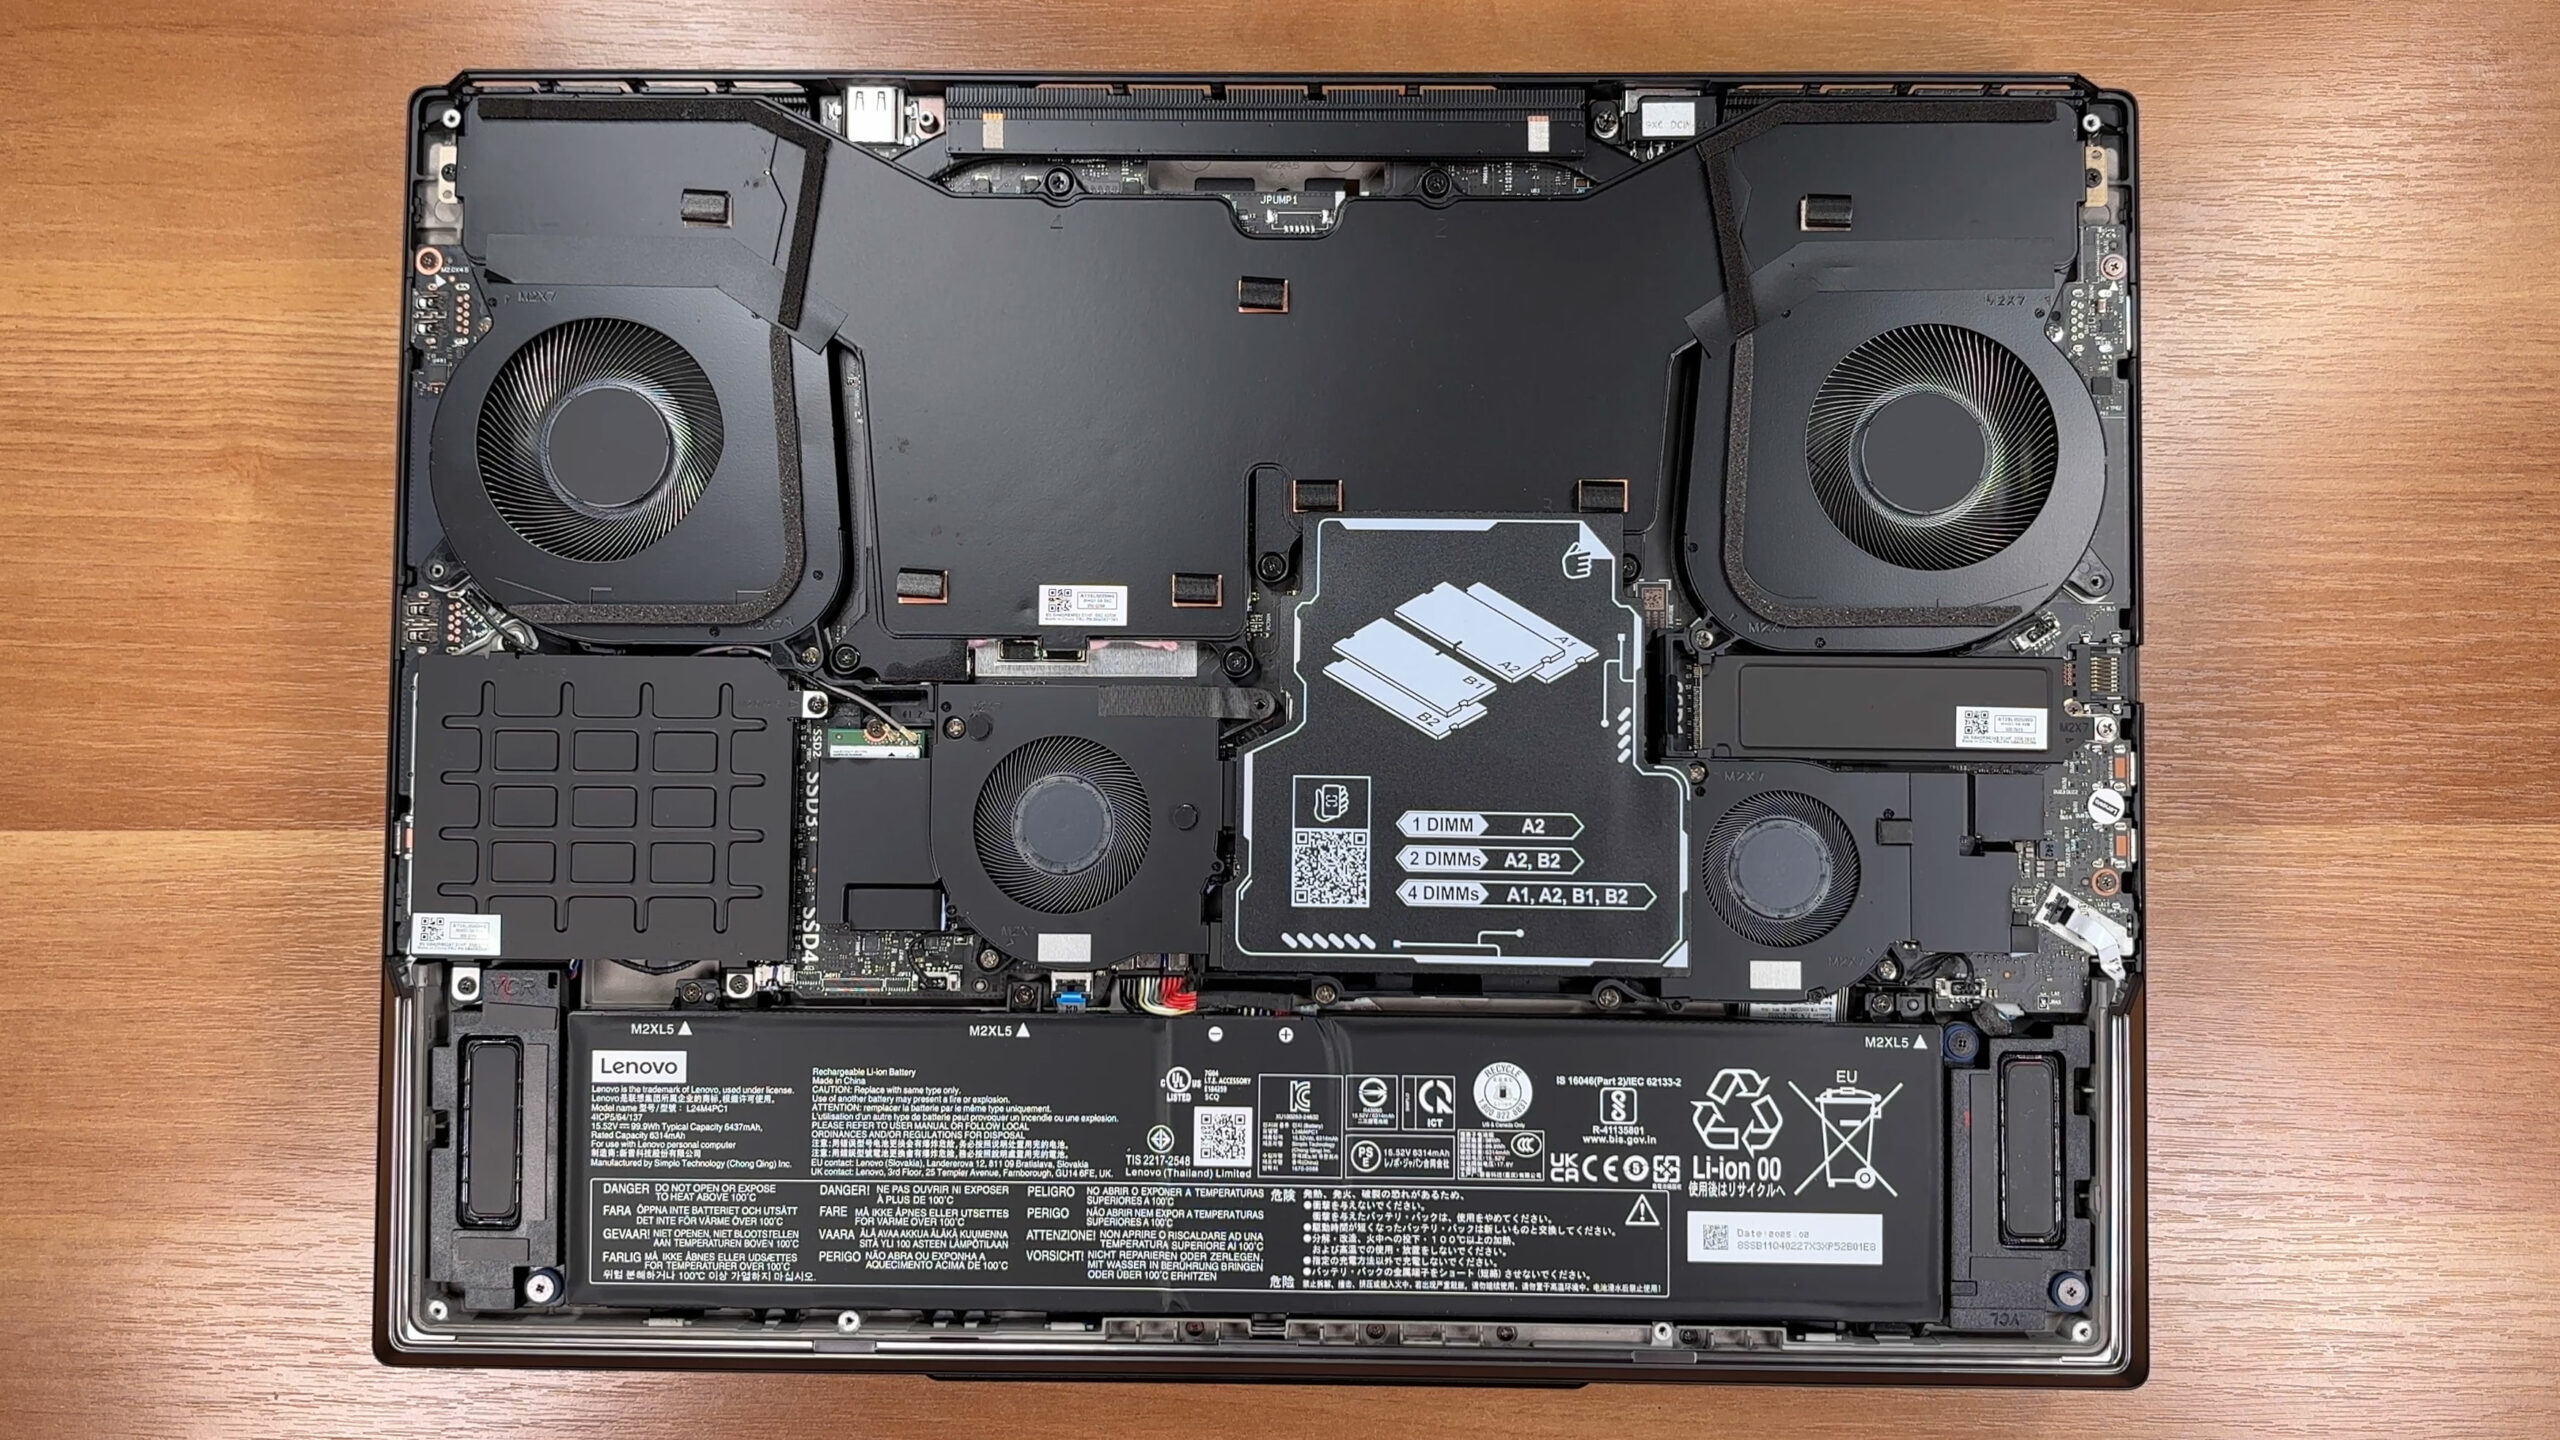
Internal layout overview
- Inside, the platform is built around airflow: large fan housings and a full-width shroud dominate the upper half.
- Service points for memory and storage are clearly grouped and easy to identify once the cover is off.
- As always, disconnect the battery before touching memory, SSDs, or wireless modules.
Cooling system and routine cleaning
- The thermal design is built for sustained loads, using a multi-fan setup and a large vapor-chamber-style assembly that spans the CPU and GPU area.
- Additional plates and thermal pads cover supporting components such as VRMs, VRAM zones, and storage heatsinks.
- For dust maintenance, disconnect the battery first, then use short bursts of compressed air through the fin stacks while gently holding the fan blades to prevent overspin.
- If you ever lift the main cooling assembly, treat it as an advanced job: you must preserve pad placement, thickness, and contact points to avoid hotspots after reassembly.
Battery removal and replacement
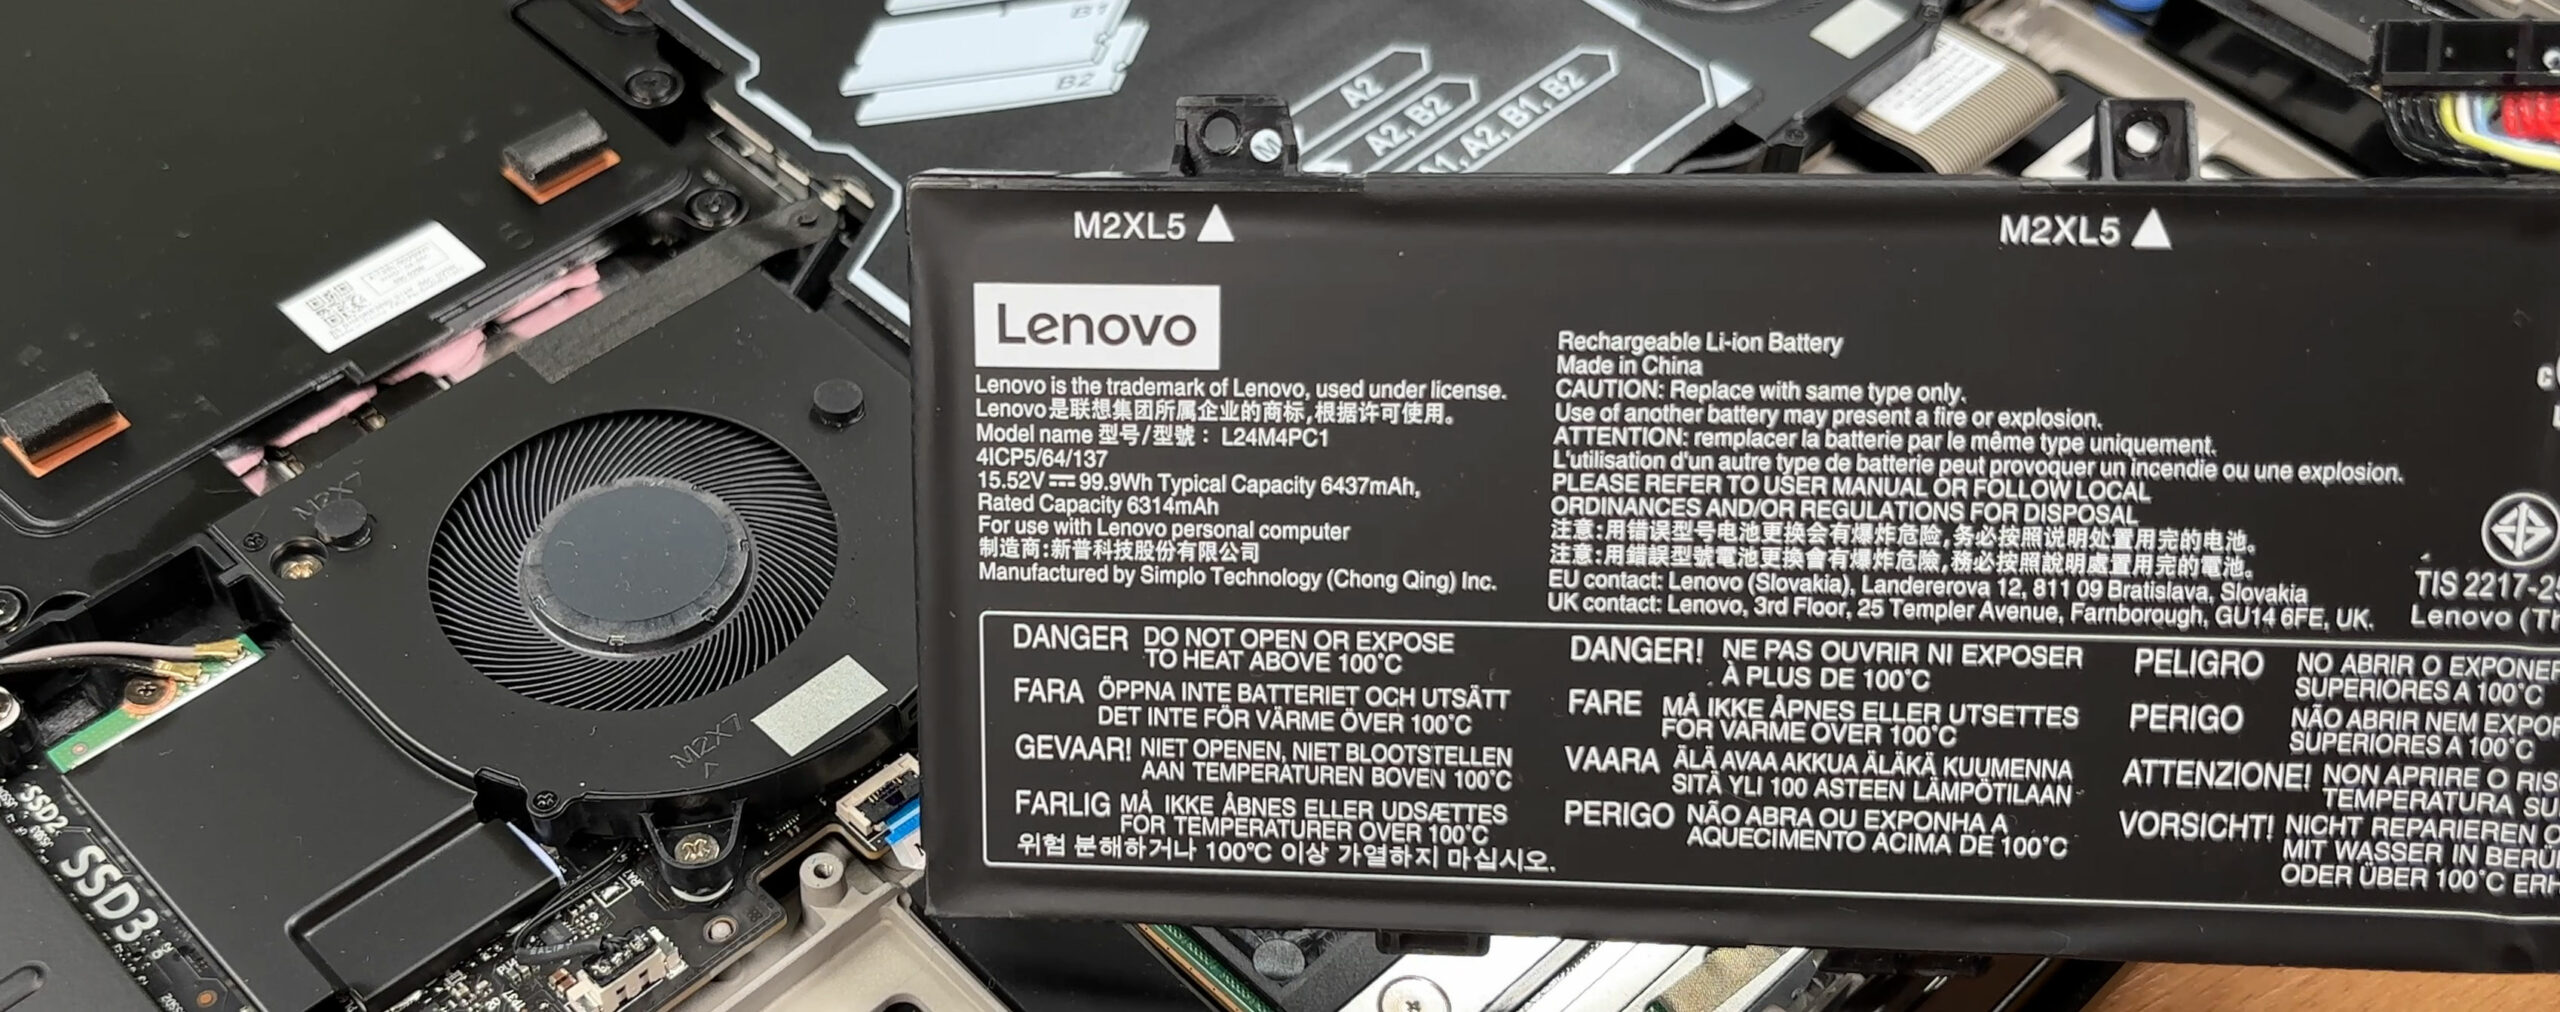
- Locate the 99.9Wh battery pack along the front edge of the chassis.
- Disconnect the battery cable from the motherboard by pulling the connector straight out of its socket (no twisting).
- Undo the battery’s mounting screws.
- Lift the battery out of the tray.
- Reinstall by placing the pack back in position, tightening the screws evenly, and reconnecting the cable firmly.
Lenovo markets very fast charging on this class of machine, but exact charge percentages and timings depend on the charger, power profile, and region-specific configuration.
Memory upgrade
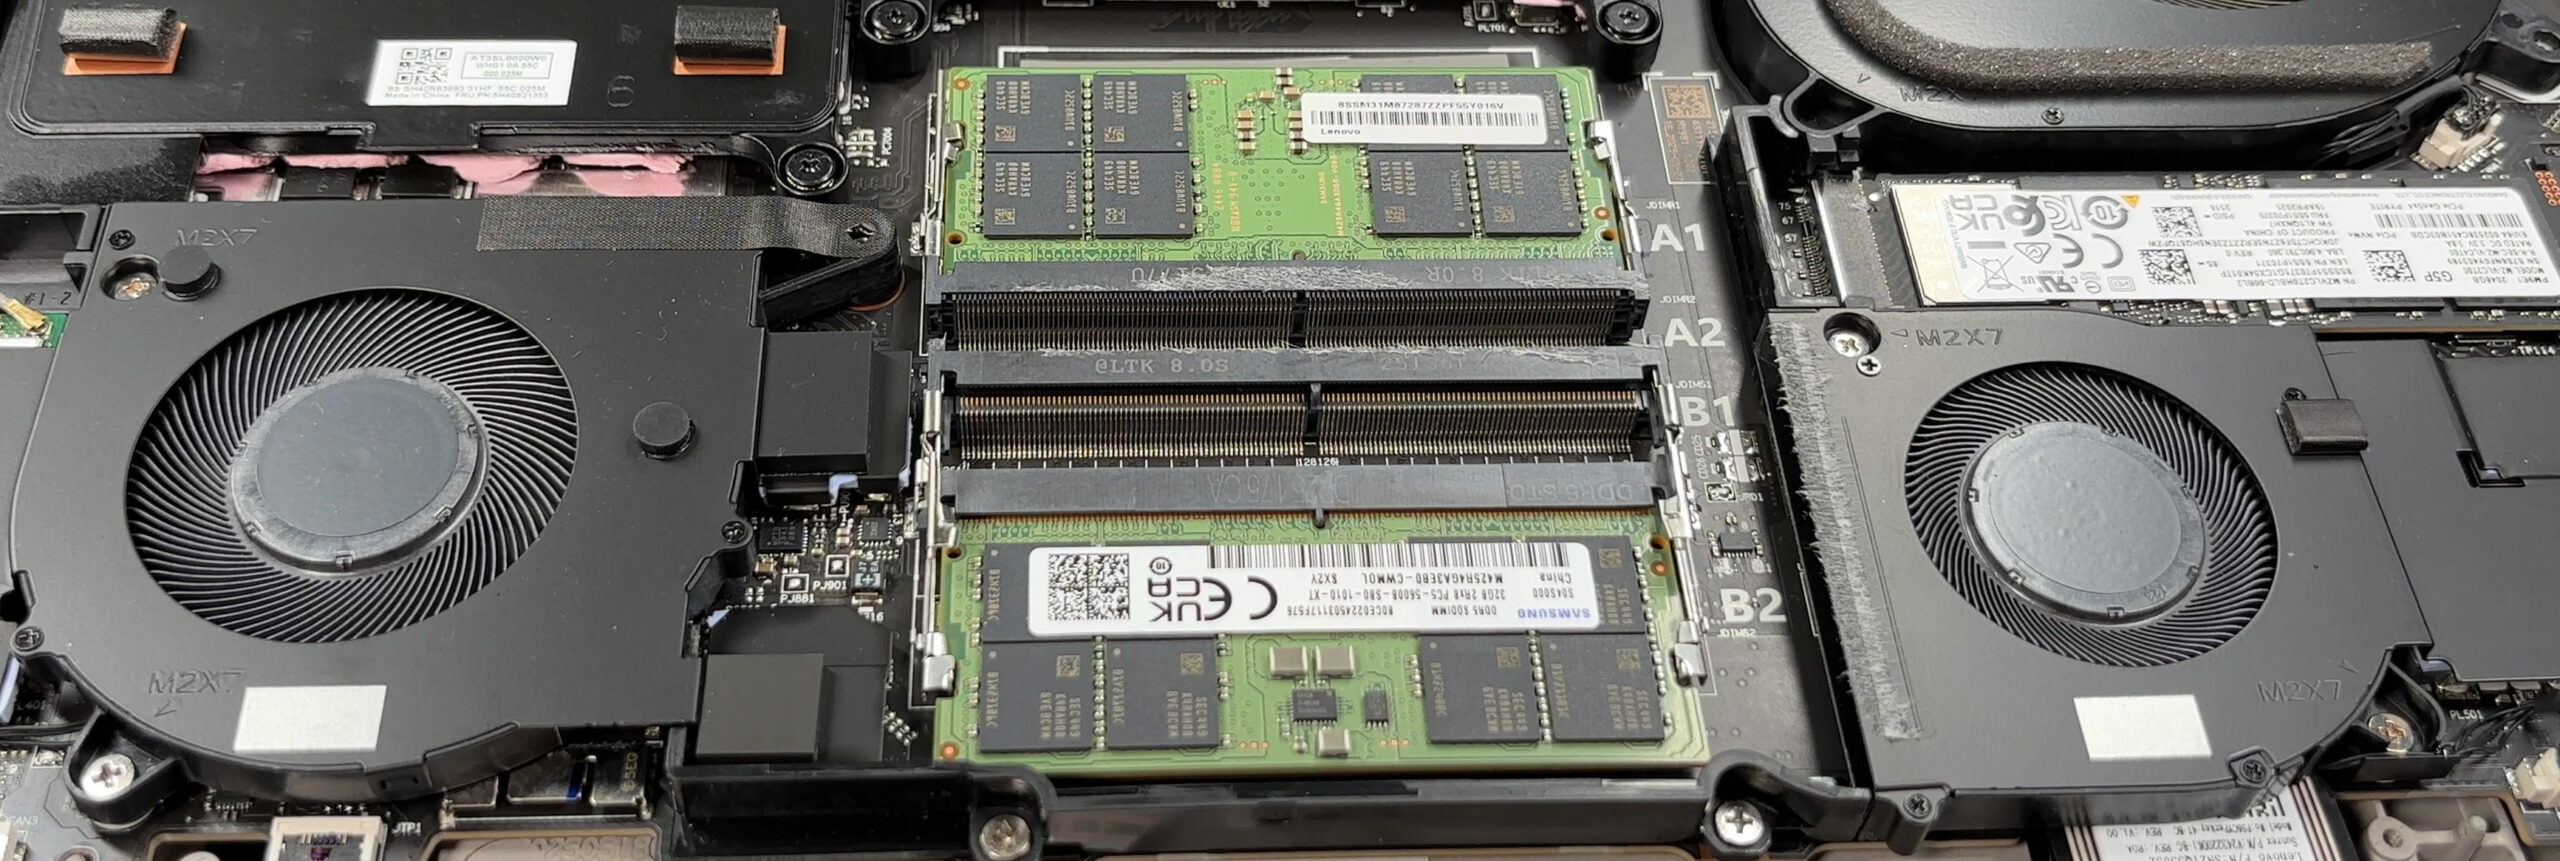
- This platform uses socketed DDR5 memory with four SO-DIMM slots, arranged across two memory channels (two slots per channel).
- Lenovo lists support up to 192GB, and the slot priority for two-module setups is usually printed on the internal labeling (commonly A2/B2 first).
- Our configuration arrived with 64GB installed as 2x32GB modules, leaving two slots available for expansion.
- To upgrade, spread the side clips of the target slot, pull the module out at an angle, then insert the new SO-DIMM at the same angle and press it down until both clips lock.
- For best performance, use matched modules and populate the preferred slots first to ensure dual-channel operation.
Storage upgrade
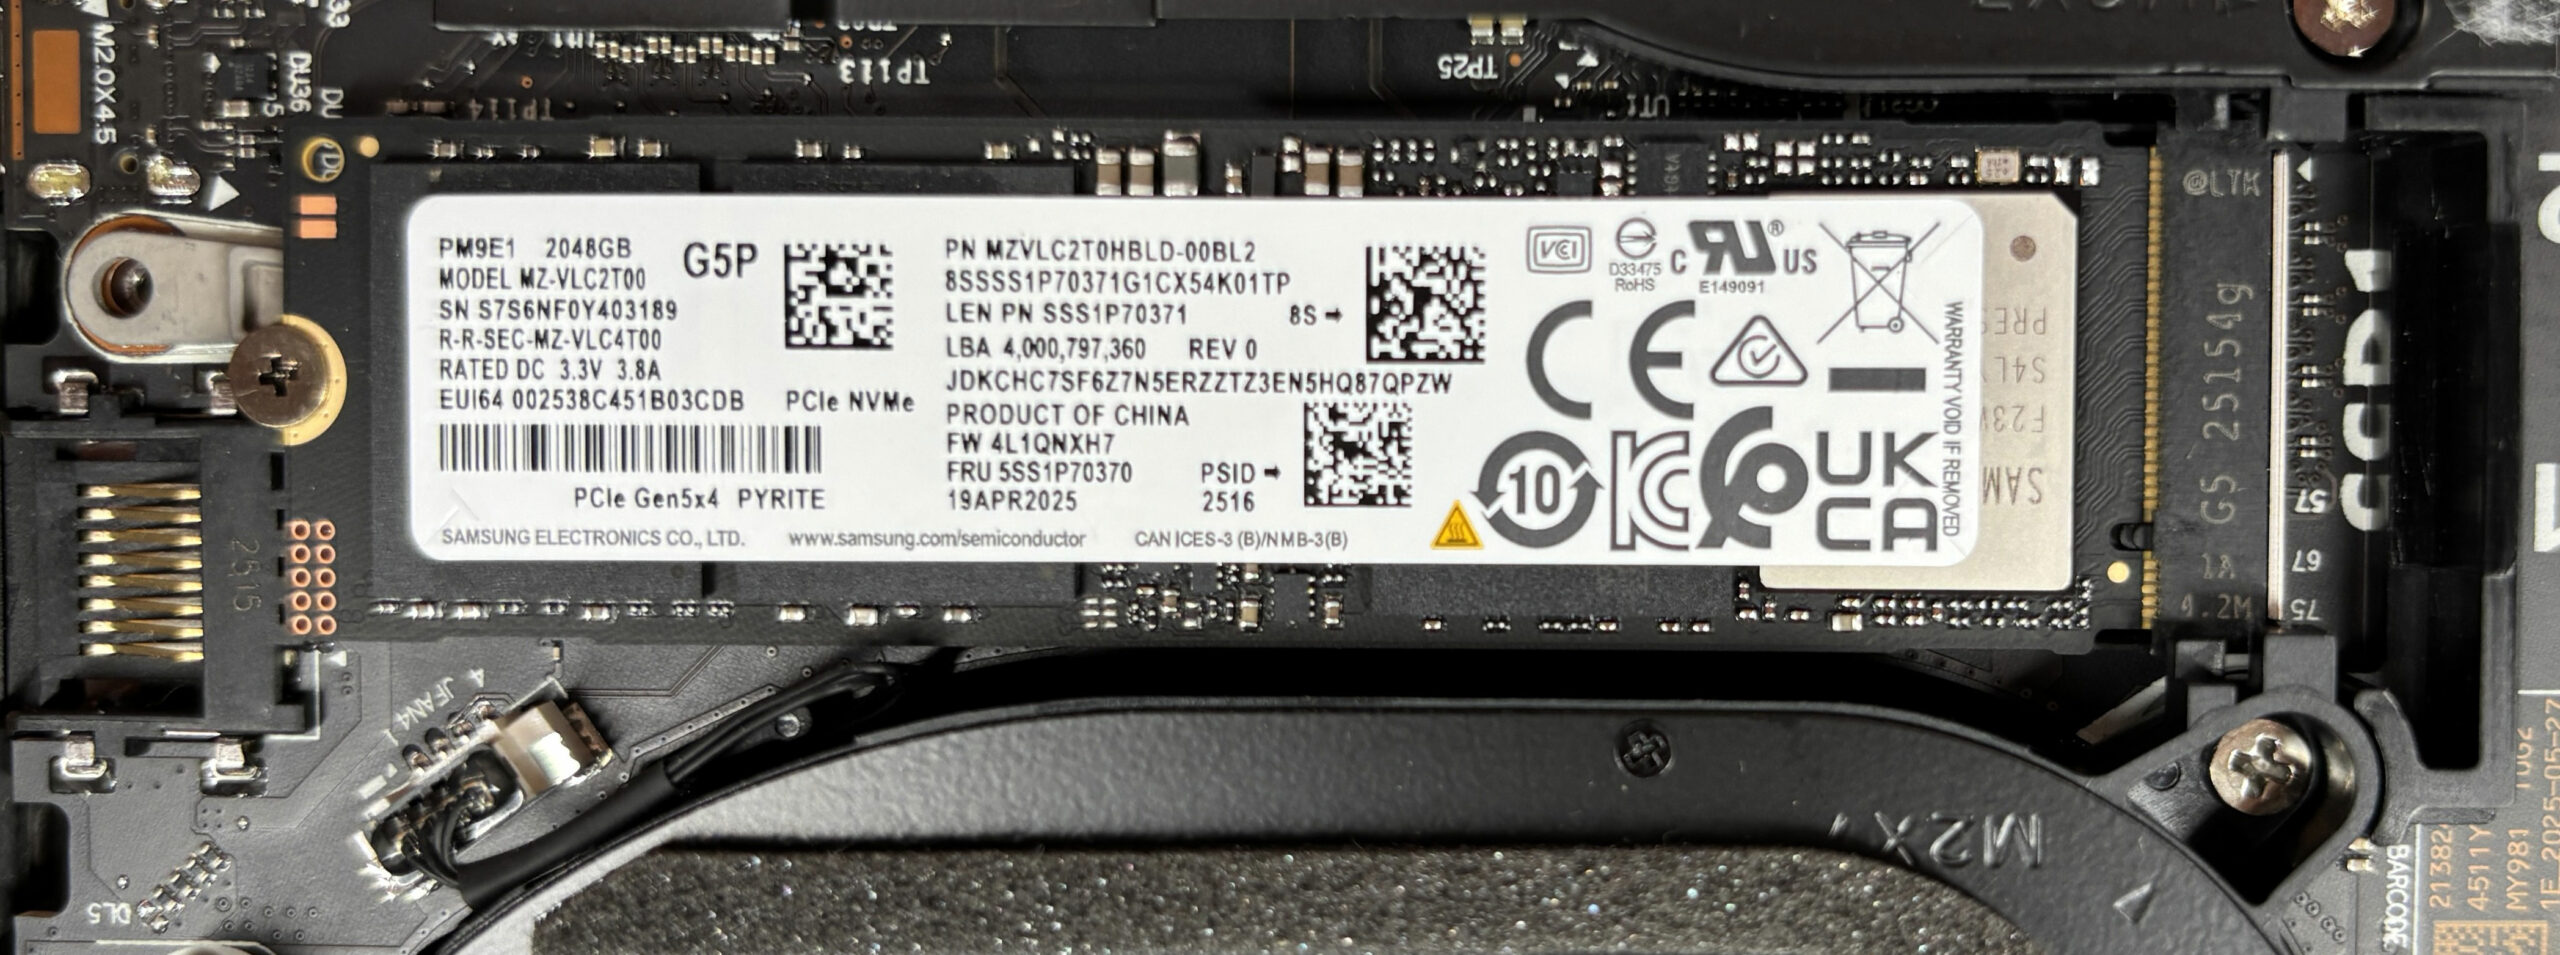
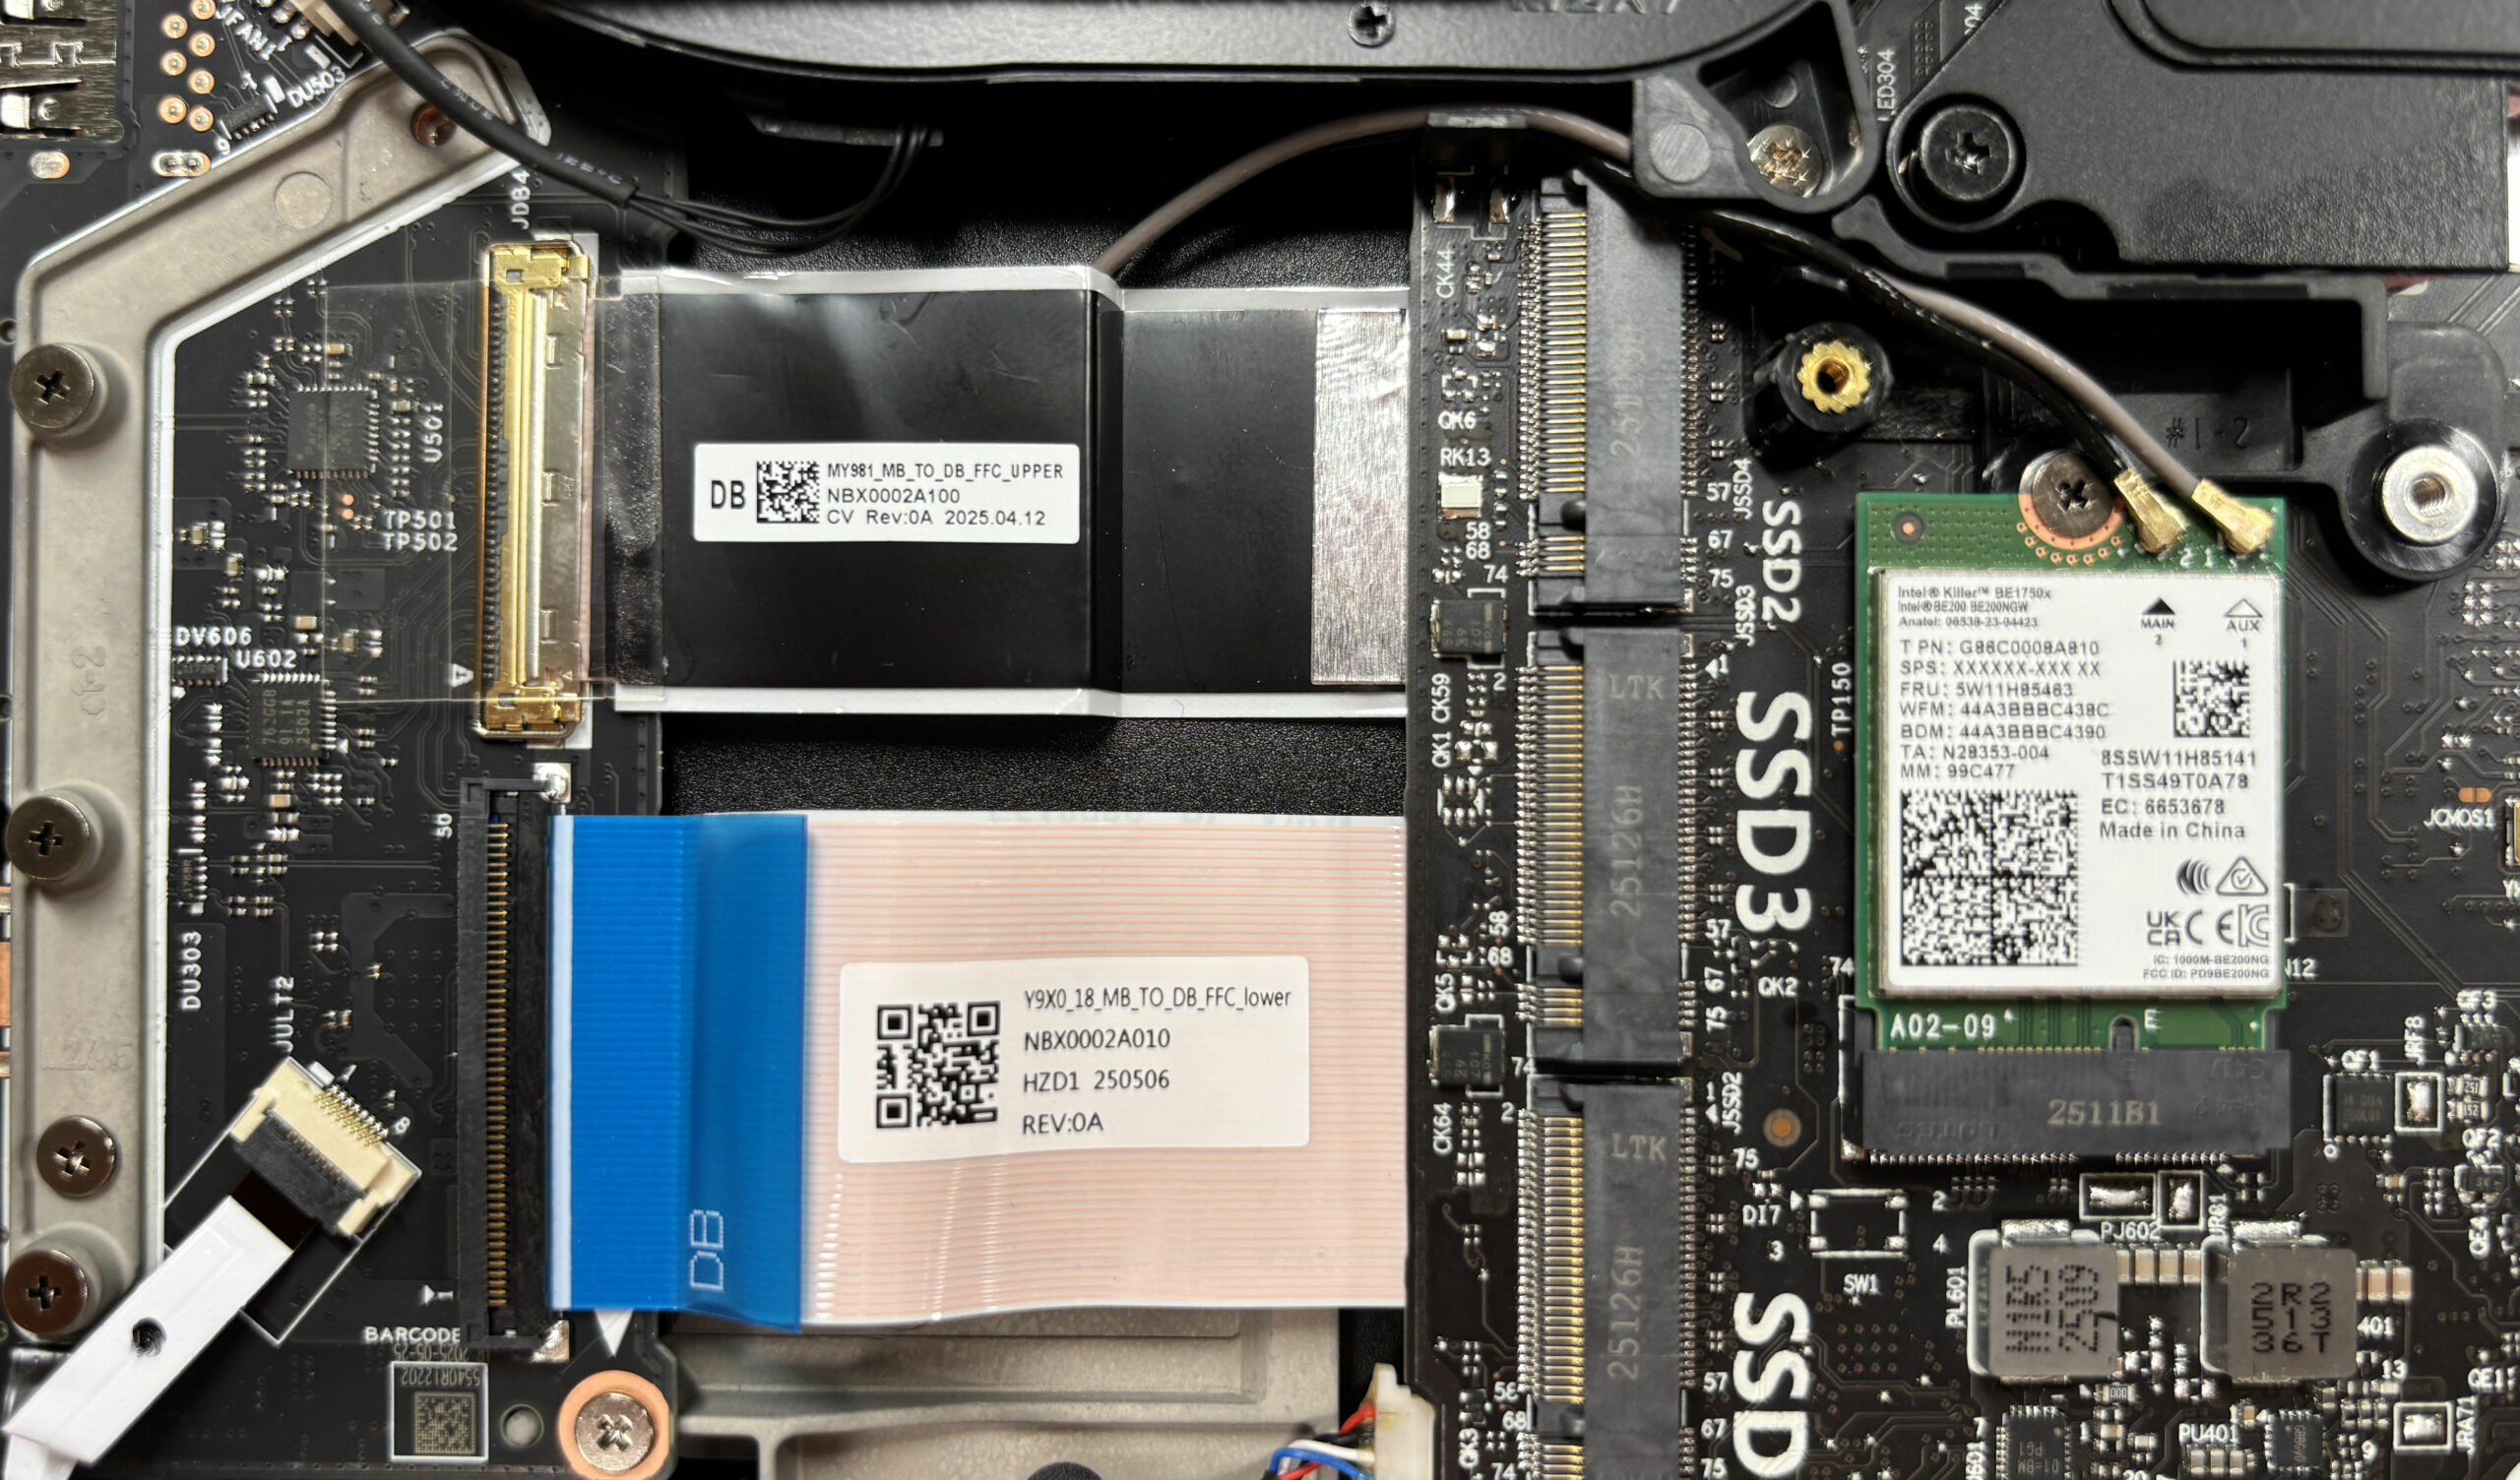
- Storage expansion is extensive: Lenovo’s documentation for this platform lists up to four M.2 2280 slots, typically one PCIe 5.0 x4 bay and three PCIe 4.0 x4 bays (availability can vary by SKU/region).
- Heatsinks and thermal pads cover the SSD area; keep them in place and re-seat them carefully after any upgrade to reduce the risk of thermal throttling.
- To replace or add an SSD, remove the heatsink/cover for the target slot, undo the SSD retainer screw, slide the drive out, then insert the new NVMe SSD and secure it with the screw.
- Reinstall the heatsink so the thermal pad makes full contact with the SSD controller and chips.
- RAID support is available on many Legion 9i configurations; if you plan a RAID array, set your strategy before installing Windows to avoid data migration headaches later.
Hint: Consider reviewing our Top M.2 SSDs Performance Rankings to select the best storage solution for your needs.
You can buy PCIe Gen4 NVMe SSDs here: Buy from Amazon.com (#CommissionsEarned)
You can buy PCIe Gen5 NVMe SSDs here: Buy from Amazon.com (#CommissionsEarned)
Wireless card (Wi-Fi) upgrade
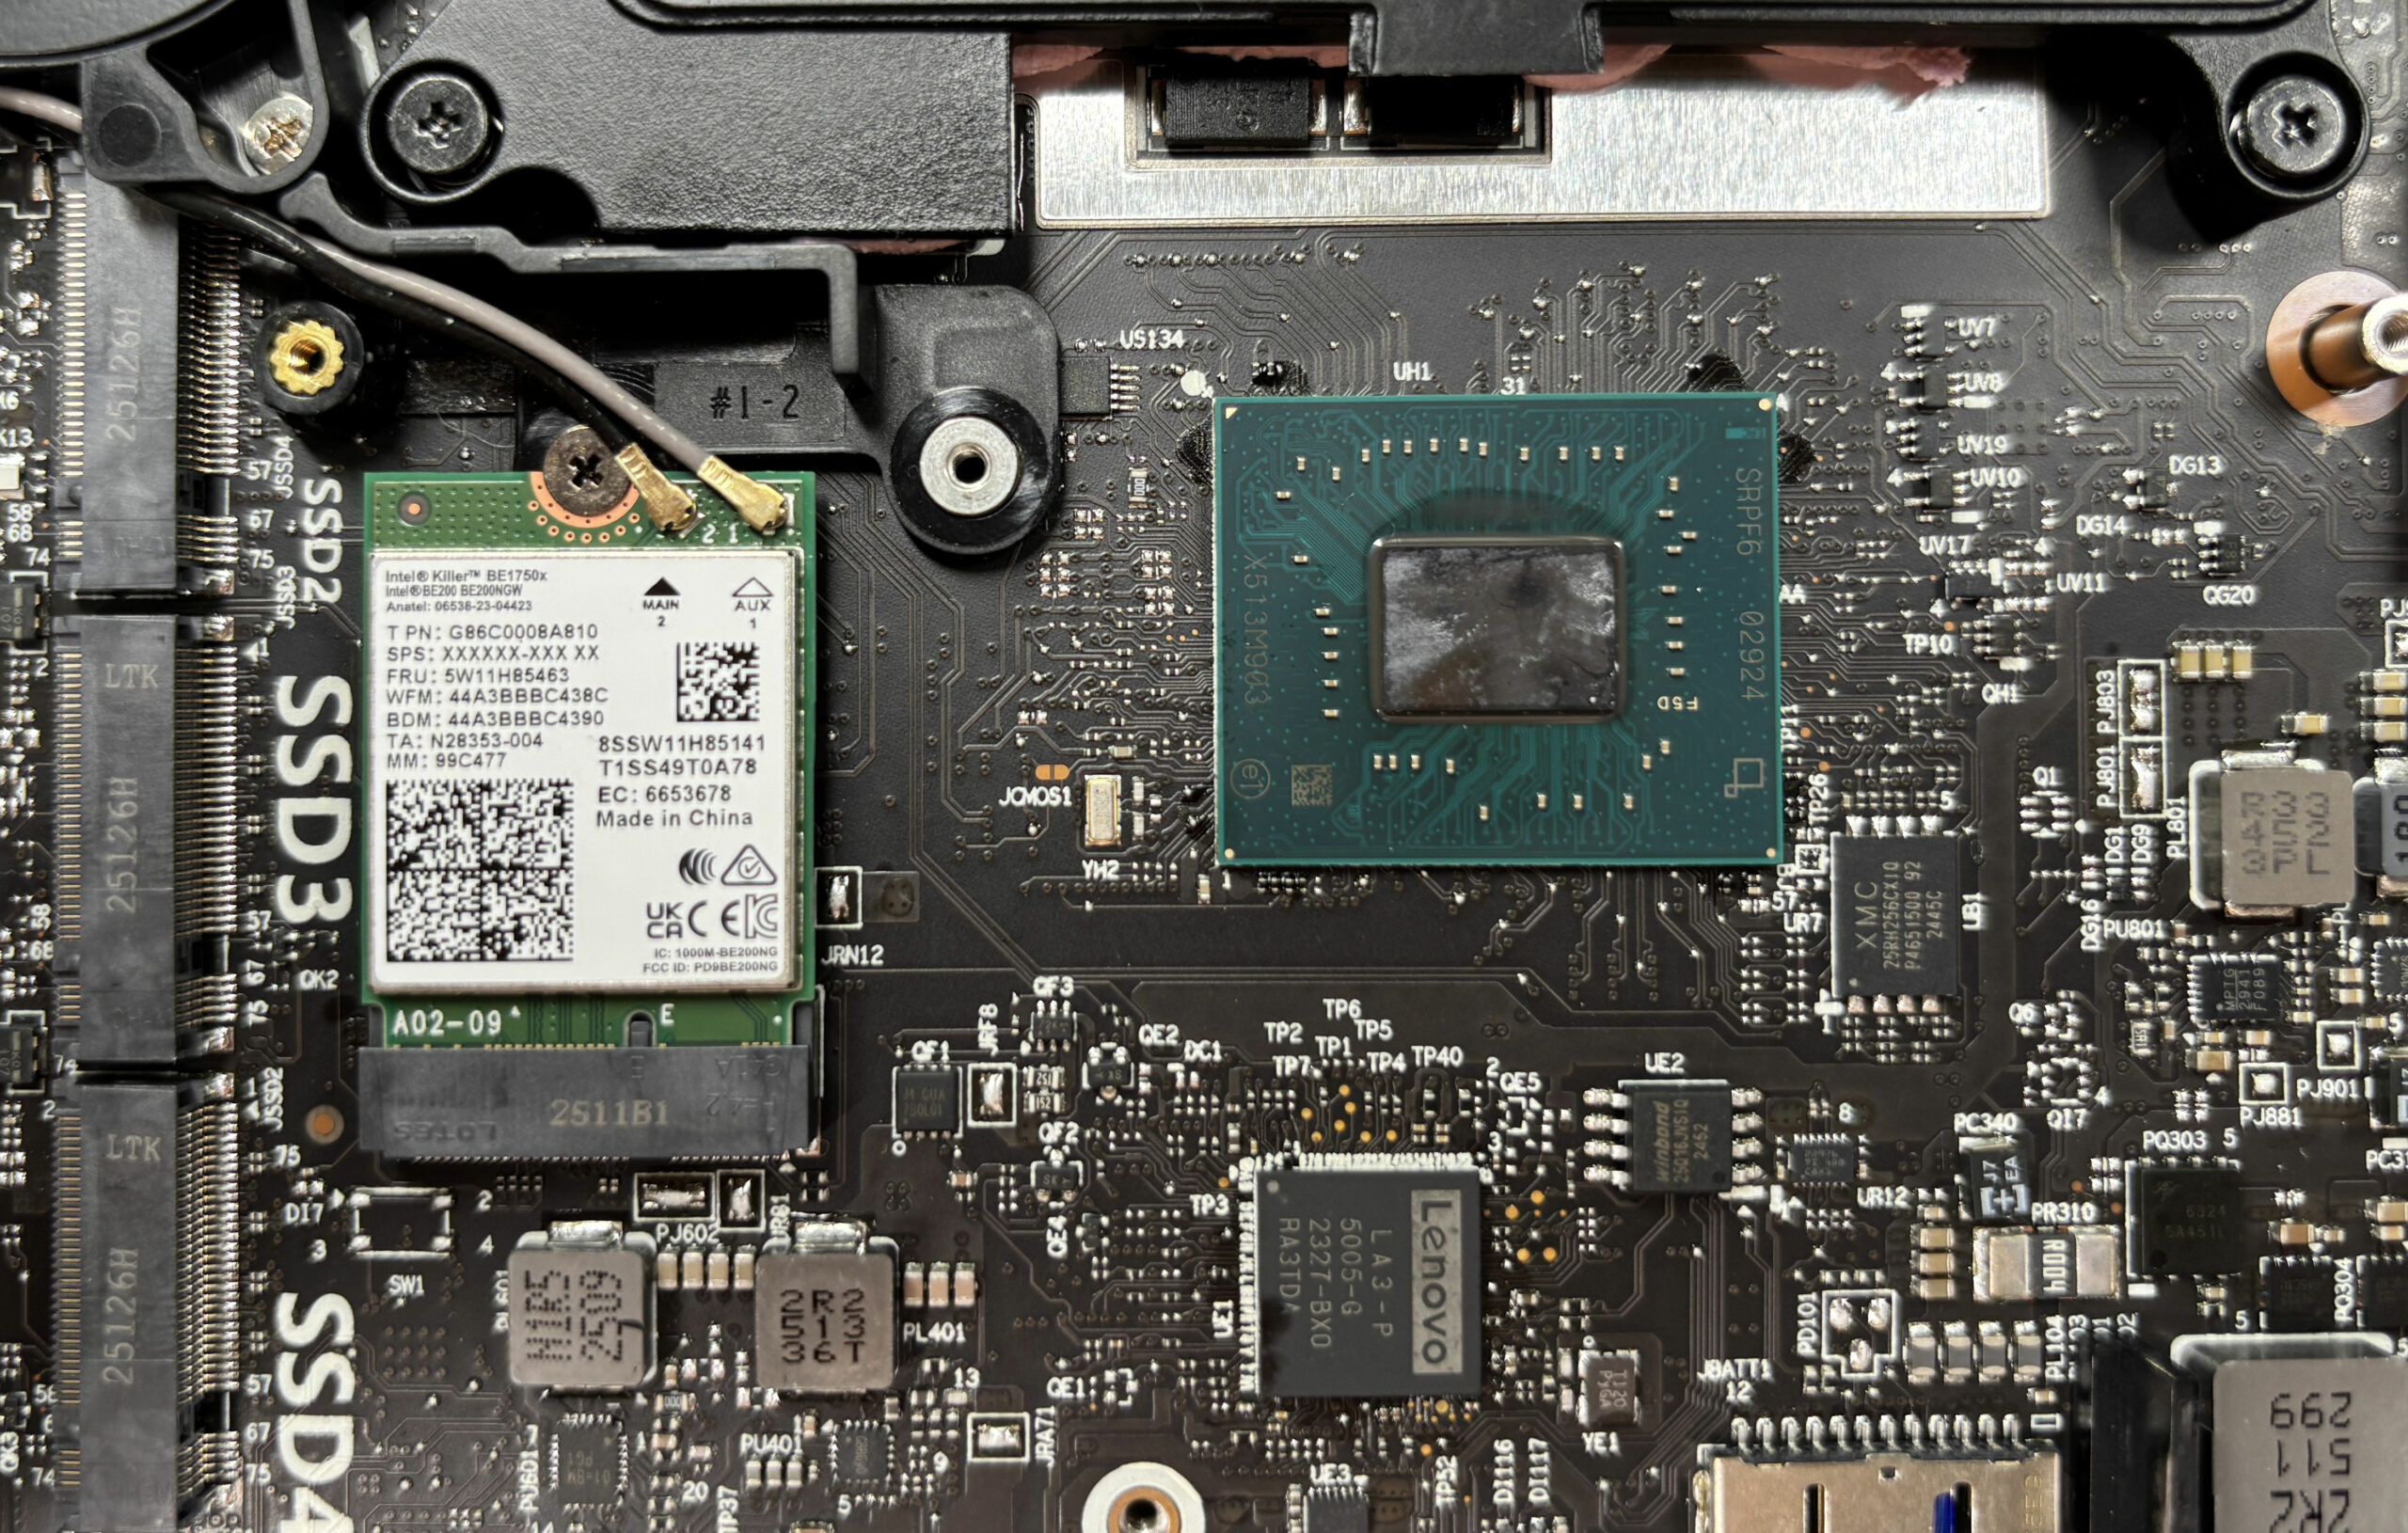
- Wireless is handled by a replaceable M.2 module (our unit uses an Intel Killer Wi-Fi 7 BE1750x with Bluetooth 5.4).
- To replace it, disconnect the two antenna leads by lifting them straight up from their posts (do not pull on the cables).
- Undo the single retaining screw and slide the card out at an angle.
- Insert the replacement card, secure it with the screw, then press the antennas straight down until they click into place.
Other serviceable parts
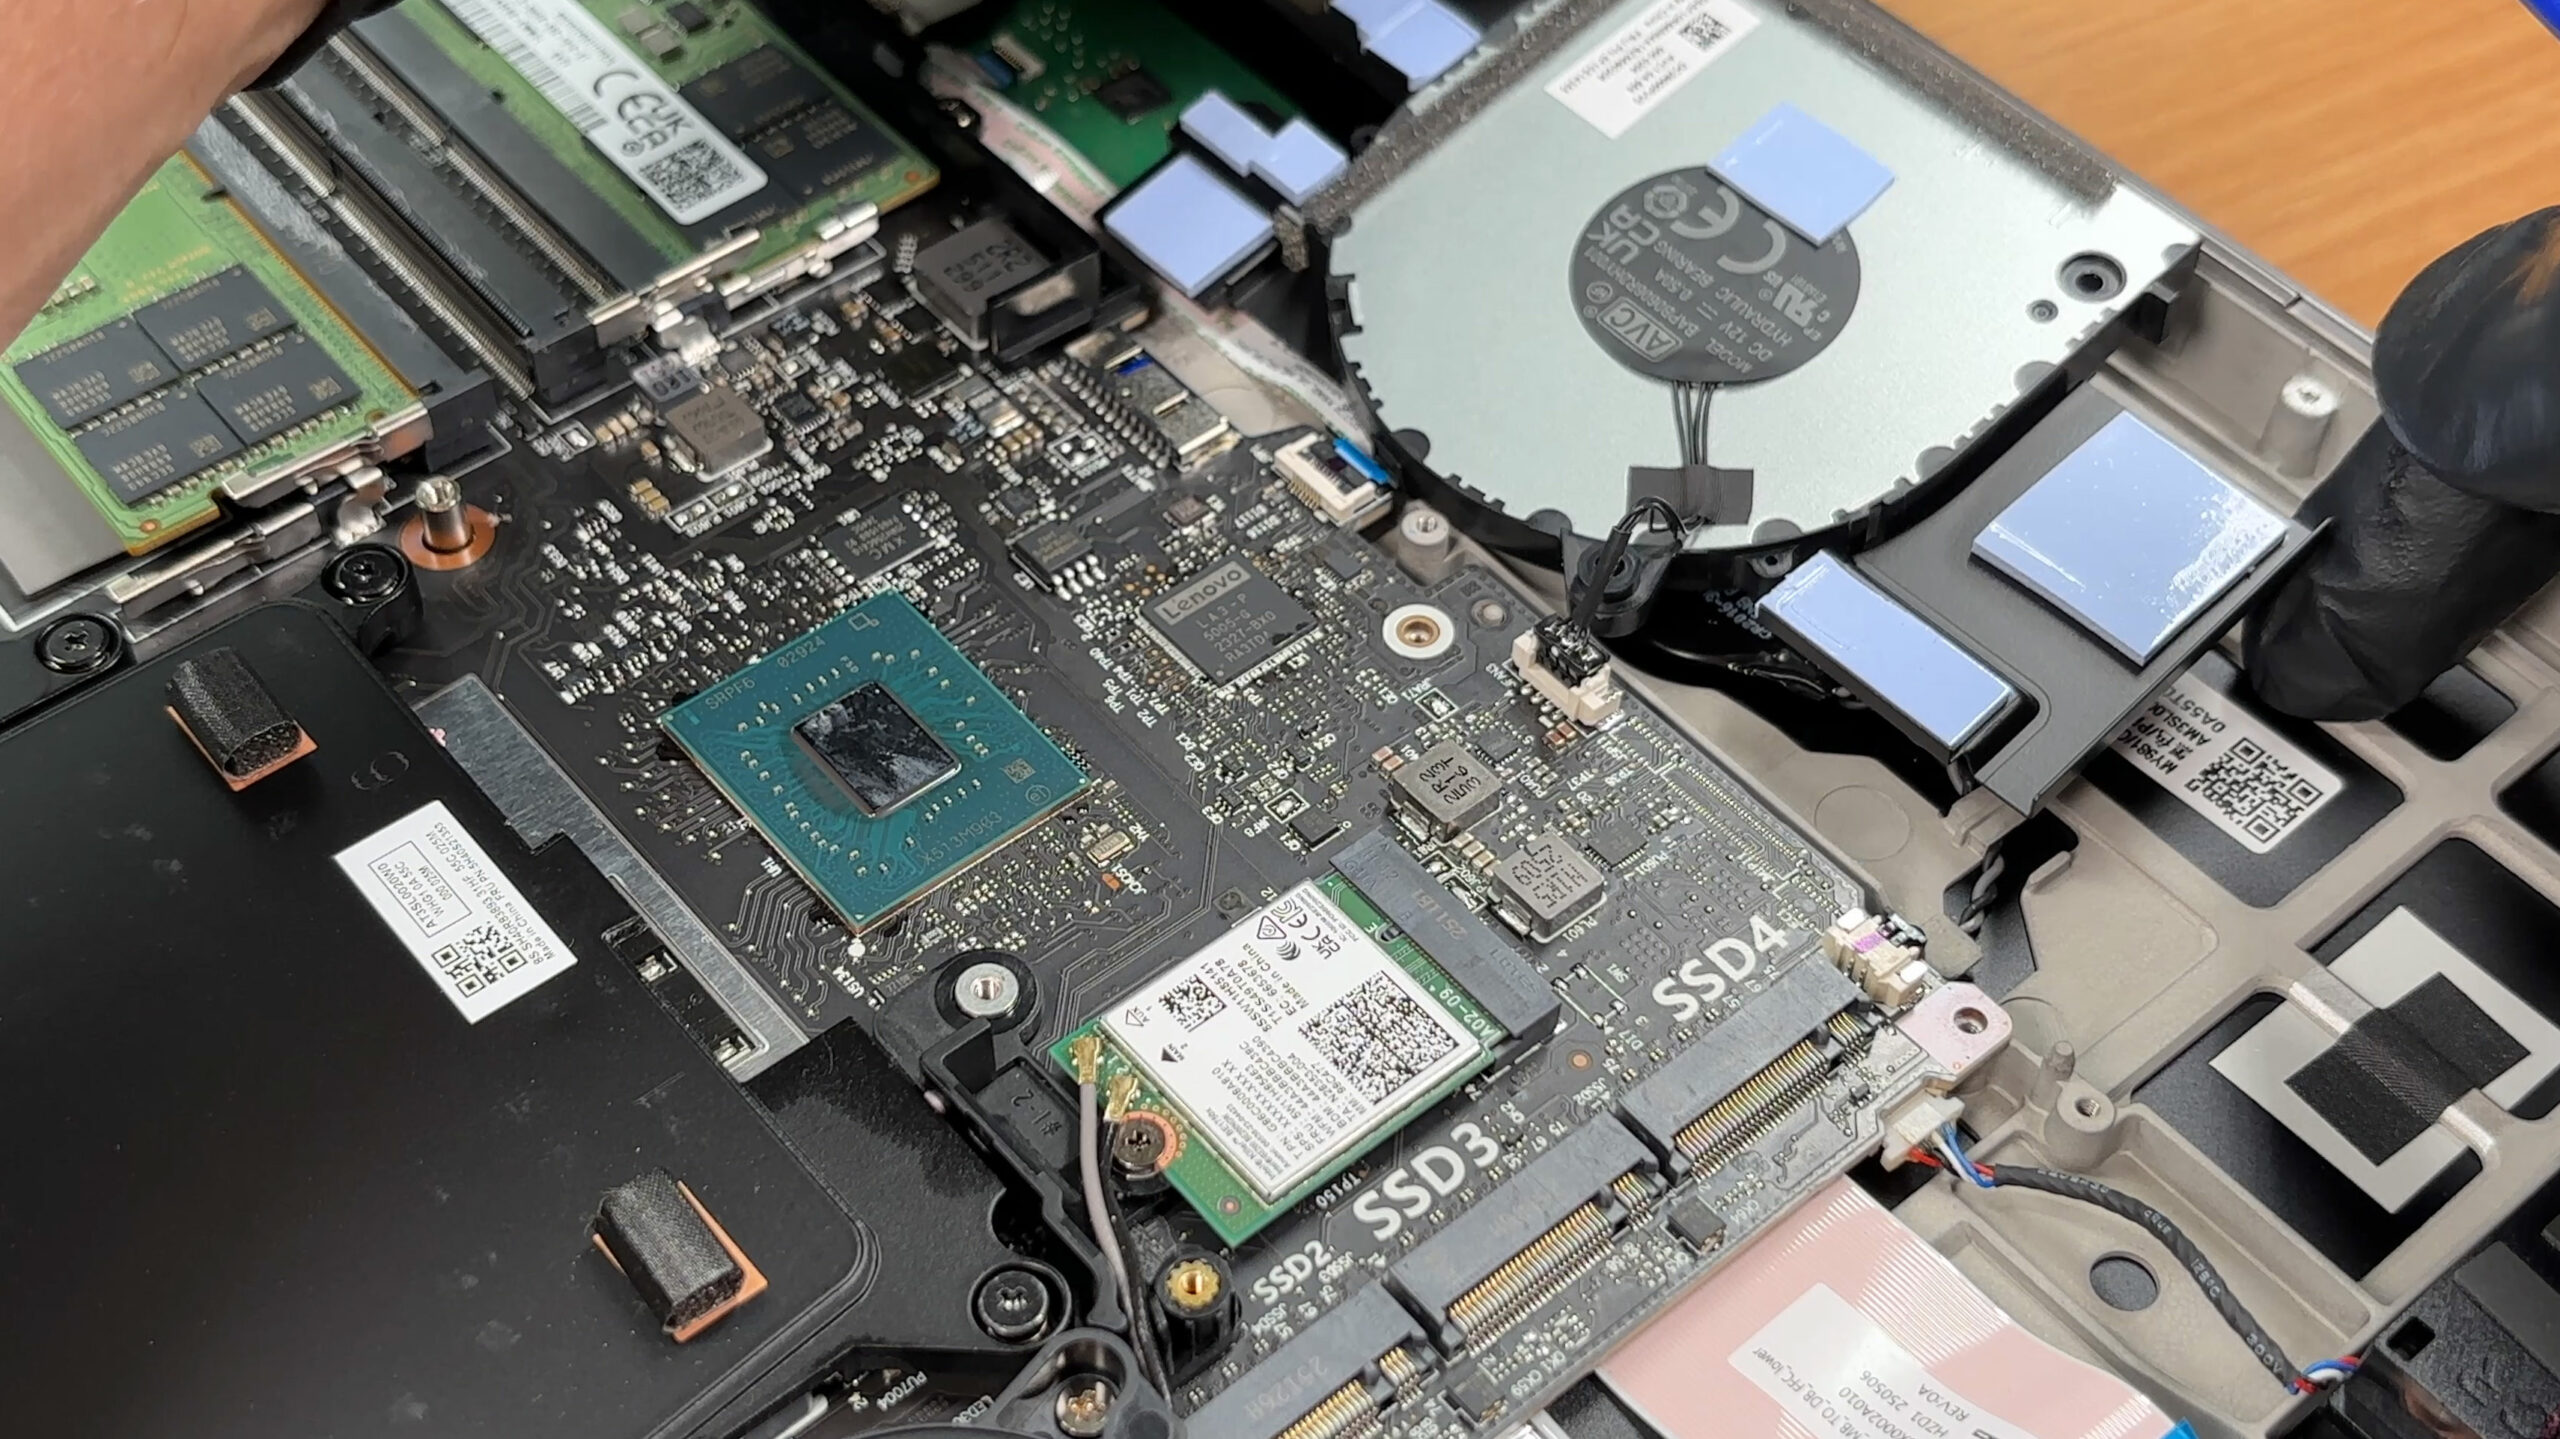
- The fan modules are screw-mounted and can be removed for cleaning or replacement without motherboard-level work.
- The bottom cover uses standard fasteners and clips, so repeat maintenance (cleaning, SSD/RAM upgrades) is realistic for enthusiasts.
- CPU, GPU, and VRAM remain board-level components and are not intended to be user-replaced.
Reassembly checklist
- Confirm that all SSD covers/heatsinks are seated flat and thermal pads are aligned.
- Make sure the RAM modules are fully latched and the slot order matches the platform’s preferred population guide.
- Reconnect the Wi-Fi antennas (Main/Aux) securely and route the cables as originally placed.
- Reconnect the battery last, then reinstall the bottom panel by pressing around the edges until all clips engage.
- Reinstall the screws, tightening them evenly, and verify SSD/RAM detection in BIOS after first boot.
Lenovo Legion 9i (18", Gen 10) in-depth review
The Lenovo Legion 9i (18", Gen 10) isn't just a laptop; it's a flex. From its mesmerizing forged carbon lid to its staggering spec sheet featuring an RTX 5090 and Thunderbolt 5, this machine is designed to dominate every conversation and every benchmark. It represents the absolute pinnacle of Lenovo's engineering, cramming workstation-level upgradeability, including four RAM slots and four SSD bays, into a chassis that feels more like a luxury hypercar than a computer. But does this opulent display of technology translate into a superior gaming experience, or is it just expensive overkill?[...]

Pros
- Stunning forged carbon design and rock-solid build quality
- Unrivaled upgradeability with 4x RAM slots and 4x M.2 slots (1x Gen5)
- Incredible GPU performance with excellent cooling
- Future-proof connectivity with dual Thunderbolt 5 ports and Wi-Fi 7
- Excellent keyboard and massive trackpad
- Color-accurate display suitable for professional work
Cons
- CPU runs extremely hot under sustained heavy load
- Display contrast is mediocre compared to OLED/MiniLED rivals
- Large and heavy footprint limits portability
 Author: Dimitar Stalev

![[June 2026] Best-Selling Laptop Brands on Amazon Global – Apple’s Unrivaled Dominance in Units and Revenue](https://laptopmedia.com/wp-content/uploads/2026/07/GLOBAL-Best-Brands-400x225.jpg)
![[June 2026] Amazon Global: Top 10 Best-Selling Laptops – Apple’s New MacBook Neo Storms to #1, Reshaping the Market with Affordability](https://laptopmedia.com/wp-content/uploads/2026/07/Best-Selling-Laptops-GLOBAL-Top-10-400x225.jpg)
![[June 2026] Amazon Global: Top 10 Best-Selling Gaming Laptops – Acer’s Nitro V 16S AI Dominates Sales, While ASUS Leads Overall Revenue](https://laptopmedia.com/wp-content/uploads/2026/07/Best-Selling-Gaming-Laptops-GLOBAL-Top-10-400x225.jpg)
![[June 2026] Global Ranking of Best-Selling Laptop GPUs on Amazon – NVIDIA RTX 5060 is the Top-Selling Dedicated GPU](https://laptopmedia.com/wp-content/uploads/2026/07/Best-Selling-GPUs-GLOBAL-Top-10-400x225.jpg)
![[June 2026] Global Ranking of Best-Selling Laptop CPUs on Amazon – Apple M5 Dominates, AMD Ryzen 7 260 Gets Solid Premium Share](https://laptopmedia.com/wp-content/uploads/2026/07/Best-Selling-CPUs-GLOBAL-Top-10-400x225.jpg)