Inside HP Elite Dragonfly G1 – disassembly and upgrade options
The Elite Dragonfly G1 is one elegant piece of technology. Thanks to its magnesium chassis, it weighs less than a kilo, and its 360-degree hinge and the HP Pen you’ll find inside the box, make it a perfect choice for designers.
Check out all HP Elite Dragonfly G1 prices and configurations in our Specs System or read more in our In-Depth review.
1. Remove the bottom plate
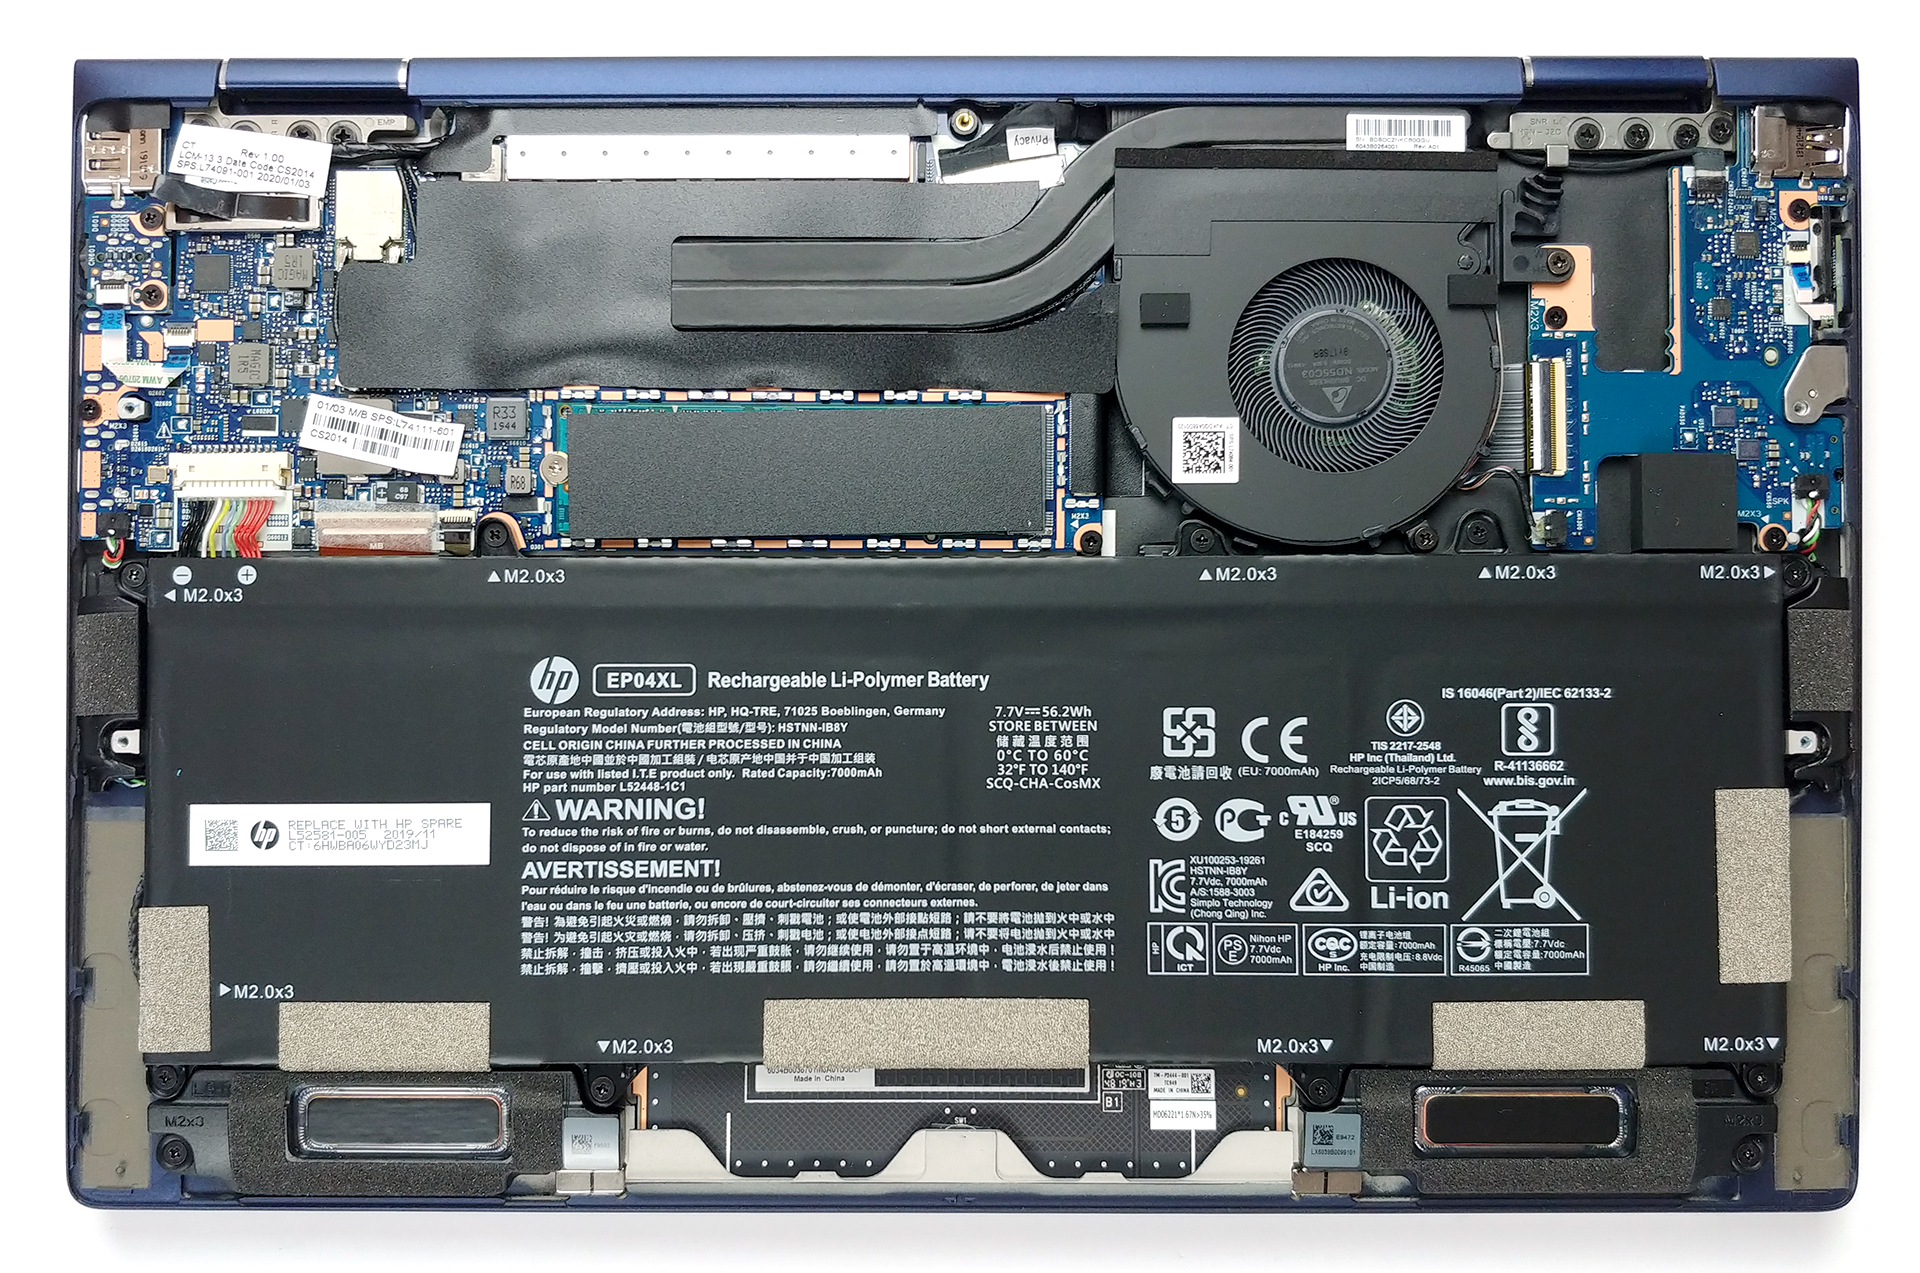
HP has taken care you have the easiest time opening the Elite Dragonfly G1 by yourself. There are only five Torx-head screws that hold the bottom plate in place, and after you remove them, you just need to pop it away with a plastic pry tool.
2. Battery
For a teeny tiny device, this one is equipped with a pretty beefy battery. Remember to unplug it from the motherboard when you start removing stuff from the laptop. Additionally, if you want to remove the battery, itself, you have to unscrew 9 Phillips-head screws.

3. Memory and storage
Sadly you won’t be able to upgrade the memory on this model, as all the chips are soldered to the motherboard. The maximum amount you can get is 16GB of LPDDR3 working in dual-channel mode and at 2133 MHz. On the positive side, there is an M.2 slot that supports super-fast PCIe x4 NVMe drives.

4. Cooling system
Its cooling solution comprises two heat pipes and a single fan. Similarly to Dell, HP has gone for a dual heat pipe system, and we expect a good performance and relatively low temperatures on the core.

Check out all HP Elite Dragonfly G1 prices and configurations in our Specs System or read more in our In-Depth review.


![[June 2026] Best-Selling Laptop Brands on Amazon Global – Apple’s Unrivaled Dominance in Units and Revenue](https://laptopmedia.com/wp-content/uploads/2026/07/GLOBAL-Best-Brands-400x225.jpg)
![[June 2026] Amazon Global: Top 10 Best-Selling Laptops – Apple’s New MacBook Neo Storms to #1, Reshaping the Market with Affordability](https://laptopmedia.com/wp-content/uploads/2026/07/Best-Selling-Laptops-GLOBAL-Top-10-400x225.jpg)
![[June 2026] Amazon Global: Top 10 Best-Selling Gaming Laptops – Acer’s Nitro V 16S AI Dominates Sales, While ASUS Leads Overall Revenue](https://laptopmedia.com/wp-content/uploads/2026/07/Best-Selling-Gaming-Laptops-GLOBAL-Top-10-400x225.jpg)
![[June 2026] Global Ranking of Best-Selling Laptop GPUs on Amazon – NVIDIA RTX 5060 is the Top-Selling Dedicated GPU](https://laptopmedia.com/wp-content/uploads/2026/07/Best-Selling-GPUs-GLOBAL-Top-10-400x225.jpg)
![[June 2026] Global Ranking of Best-Selling Laptop CPUs on Amazon – Apple M5 Dominates, AMD Ryzen 7 260 Gets Solid Premium Share](https://laptopmedia.com/wp-content/uploads/2026/07/Best-Selling-CPUs-GLOBAL-Top-10-400x225.jpg)
