Inside MSI GS66 Stealth – disassembly and upgrade options
The GS66 Stealth offers huge improvements over its predecessor. Perhaps the biggest of them is the fact that you can easily upgrade your hardware.
Check out all MSI GS66 Stealth prices and configurations in our Specs System or read more in our In-Depth review.
1. Remove the bottom plate
In order to get inside of this notebook, there are 9 Phillips-head screws you need to undo. Keep in mind that one of them has a Factory seal, which may or may not void your warranty.

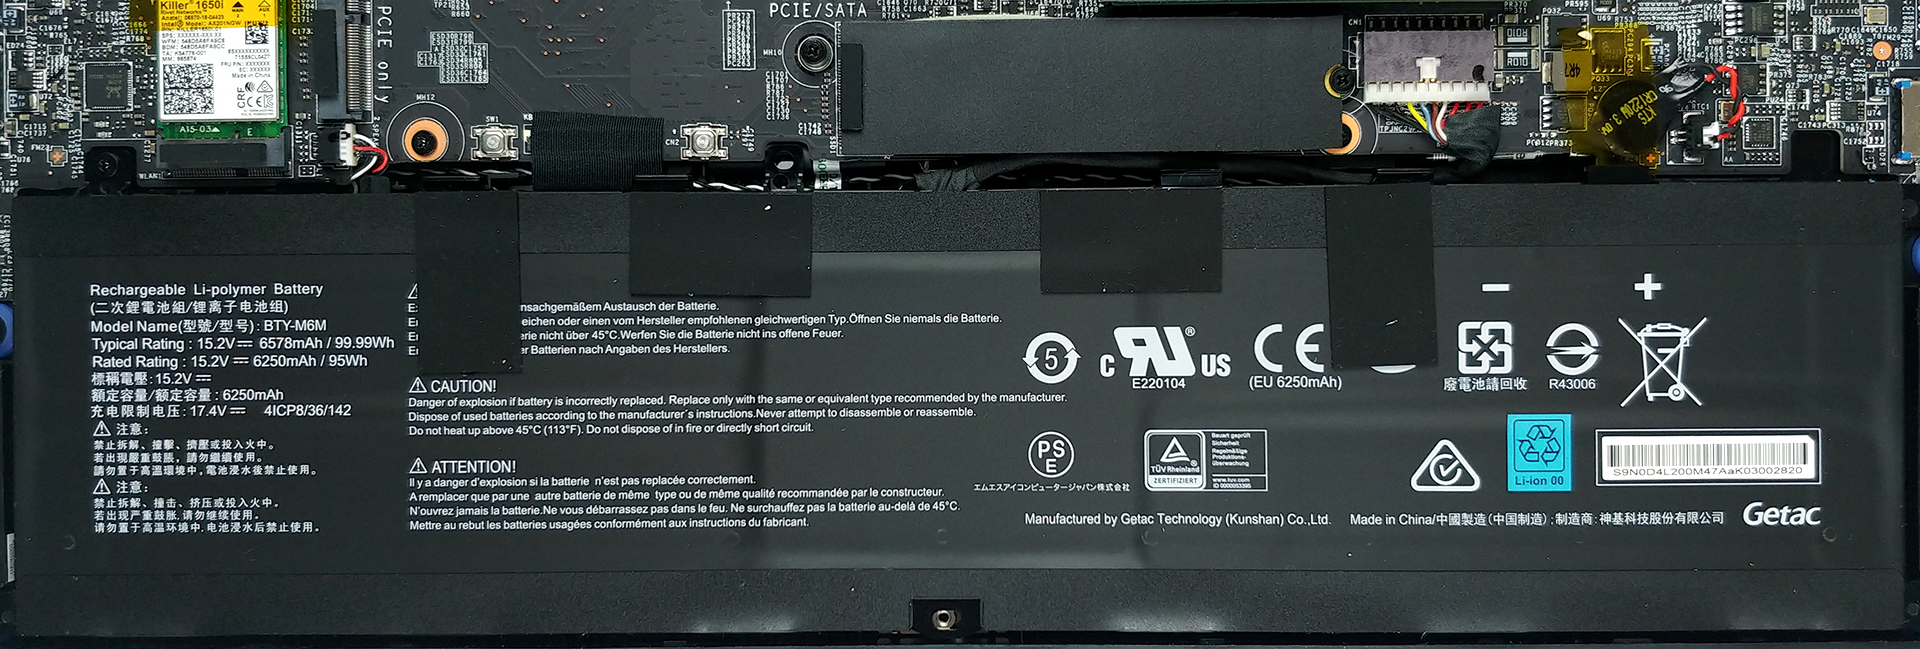
2. Battery
Thankfully, the battery here is huge. Actually, it is the maximum allowed on airplanes – 99.9 Wh.
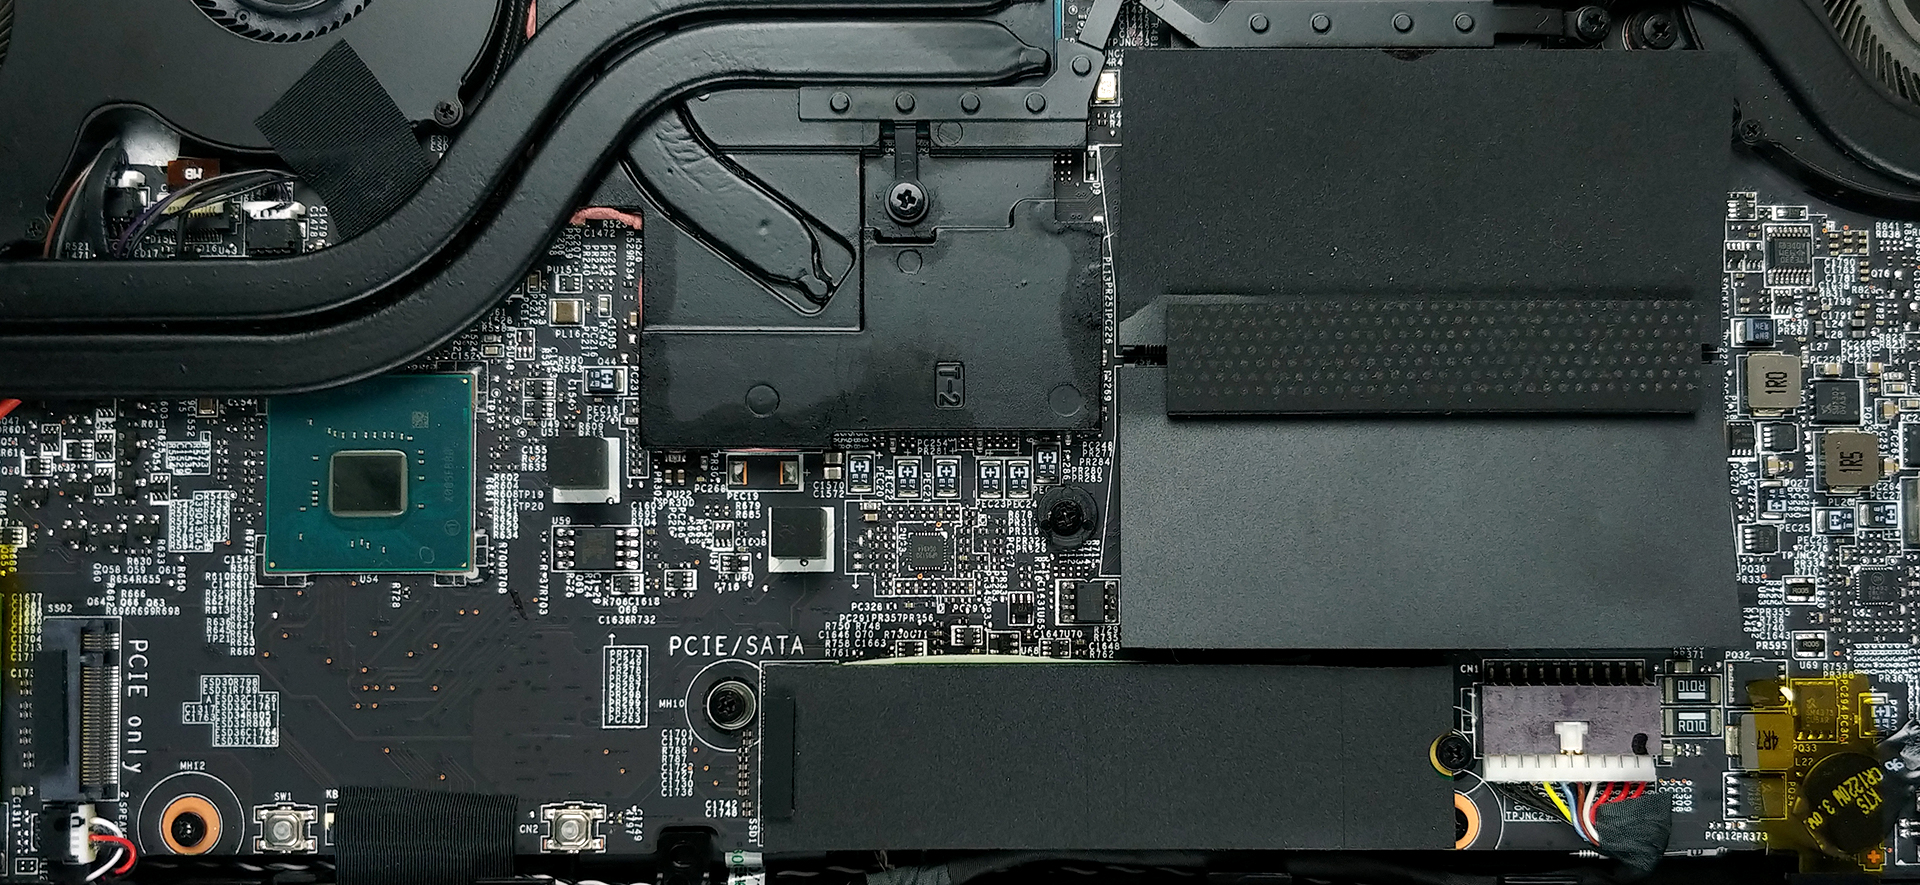
3. Memory and storage
In terms of upgradeability, there are two RAM SODIMM slots, supporting up to 64GB of DDR4 memory. And for storage, you get two M.2 PCIe x4 slots with RAID support, and one of them can fit M.2 SATA drives as well.
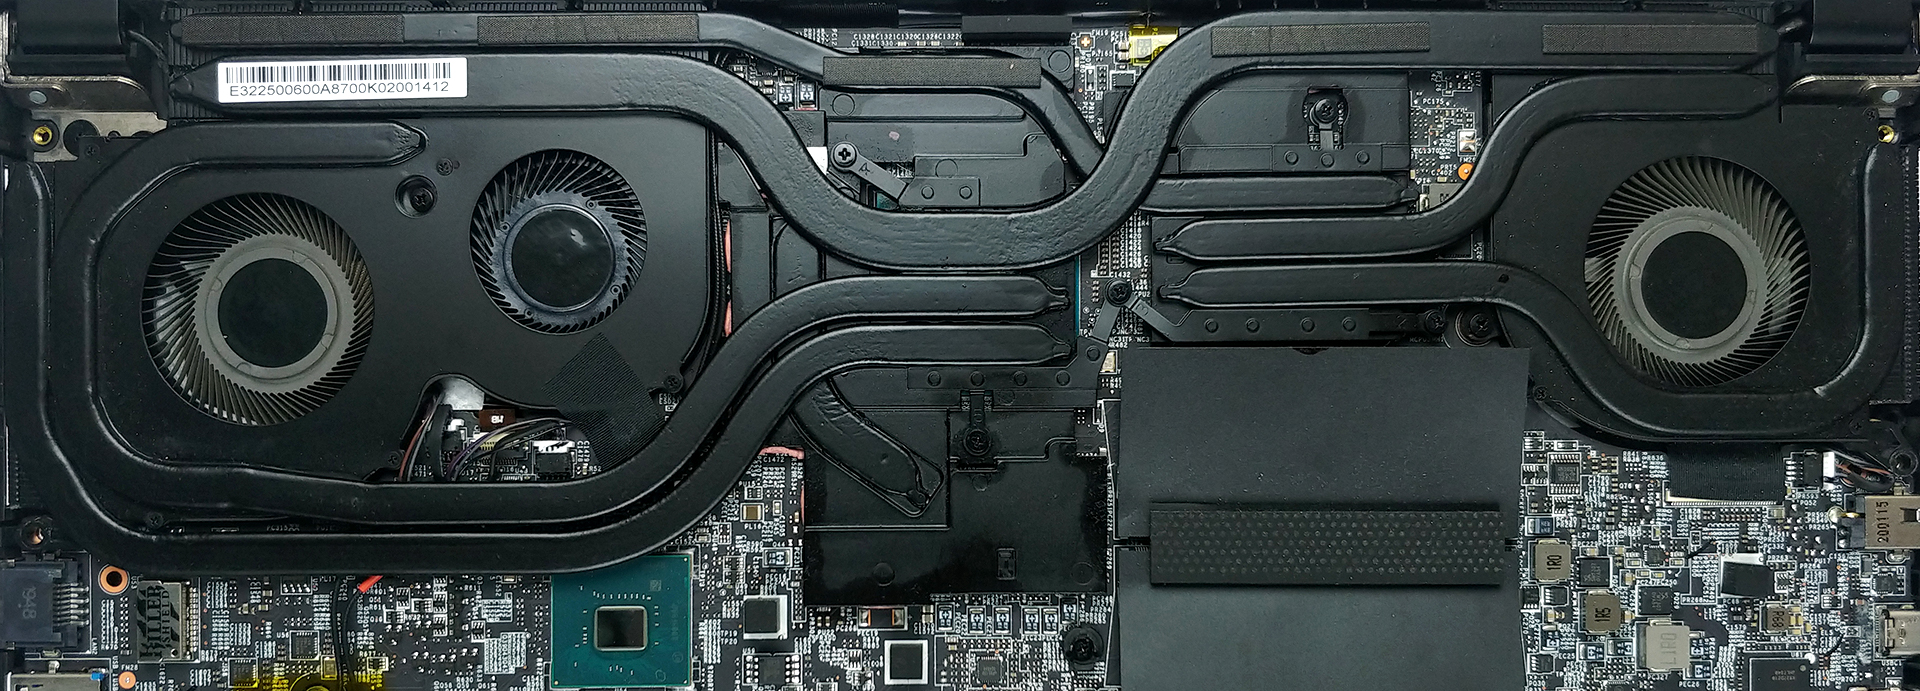
4. Cooling system
Here, we see a huge improvement over last year’s GS65 Stealth. Finally, the motherboard is placed the right side up, so you can see the cooling and upgrade everything you need without the need of removing the entire board. Here, the cooling solution consists of 7 heat pipes. Three of them are cooling only the processor, and three are cooling the GPU. One of the latter is pretty thick and connects to two heat sinks. By the way, the amount of heat sinks here is four, the fans are three, and as you can see, the VRMs and the graphics memory are also cooled by some metal brackets and a heat pipe.
Check out all MSI GS66 Stealth prices and configurations in our Specs System or read more in our In-Depth review.


![[June 2026] Best-Selling Laptop Brands on Amazon Global – Apple’s Unrivaled Dominance in Units and Revenue](https://laptopmedia.com/wp-content/uploads/2026/07/GLOBAL-Best-Brands-400x225.jpg)
![[June 2026] Amazon Global: Top 10 Best-Selling Laptops – Apple’s New MacBook Neo Storms to #1, Reshaping the Market with Affordability](https://laptopmedia.com/wp-content/uploads/2026/07/Best-Selling-Laptops-GLOBAL-Top-10-400x225.jpg)
![[June 2026] Amazon Global: Top 10 Best-Selling Gaming Laptops – Acer’s Nitro V 16S AI Dominates Sales, While ASUS Leads Overall Revenue](https://laptopmedia.com/wp-content/uploads/2026/07/Best-Selling-Gaming-Laptops-GLOBAL-Top-10-400x225.jpg)
![[June 2026] Global Ranking of Best-Selling Laptop GPUs on Amazon – NVIDIA RTX 5060 is the Top-Selling Dedicated GPU](https://laptopmedia.com/wp-content/uploads/2026/07/Best-Selling-GPUs-GLOBAL-Top-10-400x225.jpg)
![[June 2026] Global Ranking of Best-Selling Laptop CPUs on Amazon – Apple M5 Dominates, AMD Ryzen 7 260 Gets Solid Premium Share](https://laptopmedia.com/wp-content/uploads/2026/07/Best-Selling-CPUs-GLOBAL-Top-10-400x225.jpg)
