Inside Acer Aspire F5 / F15 – disassembly, upgrade guide and internal photos
Acer launched its latest mainstream line, Aspire F5, which represents an attempt at offering some high-end build quality for around $500. It’s also known as Aspire F15 (mostly in the USA) and Aspire F5 in the EU, but what’s more important is that the machine features some good specs at an affordable price. For the purposes of our review we chose the configuration with Core i5-6200U, GeForce 940M and 8GB of RAM, but before we dig into the performance tests, let’s check out how the new F5 looks on the inside and what upgrade options it has.
All of the available Acer Aspire F5 / F15 configurations and their prices can be found here:
http://amzn.to/1WPoisA
1. Removing the bottom
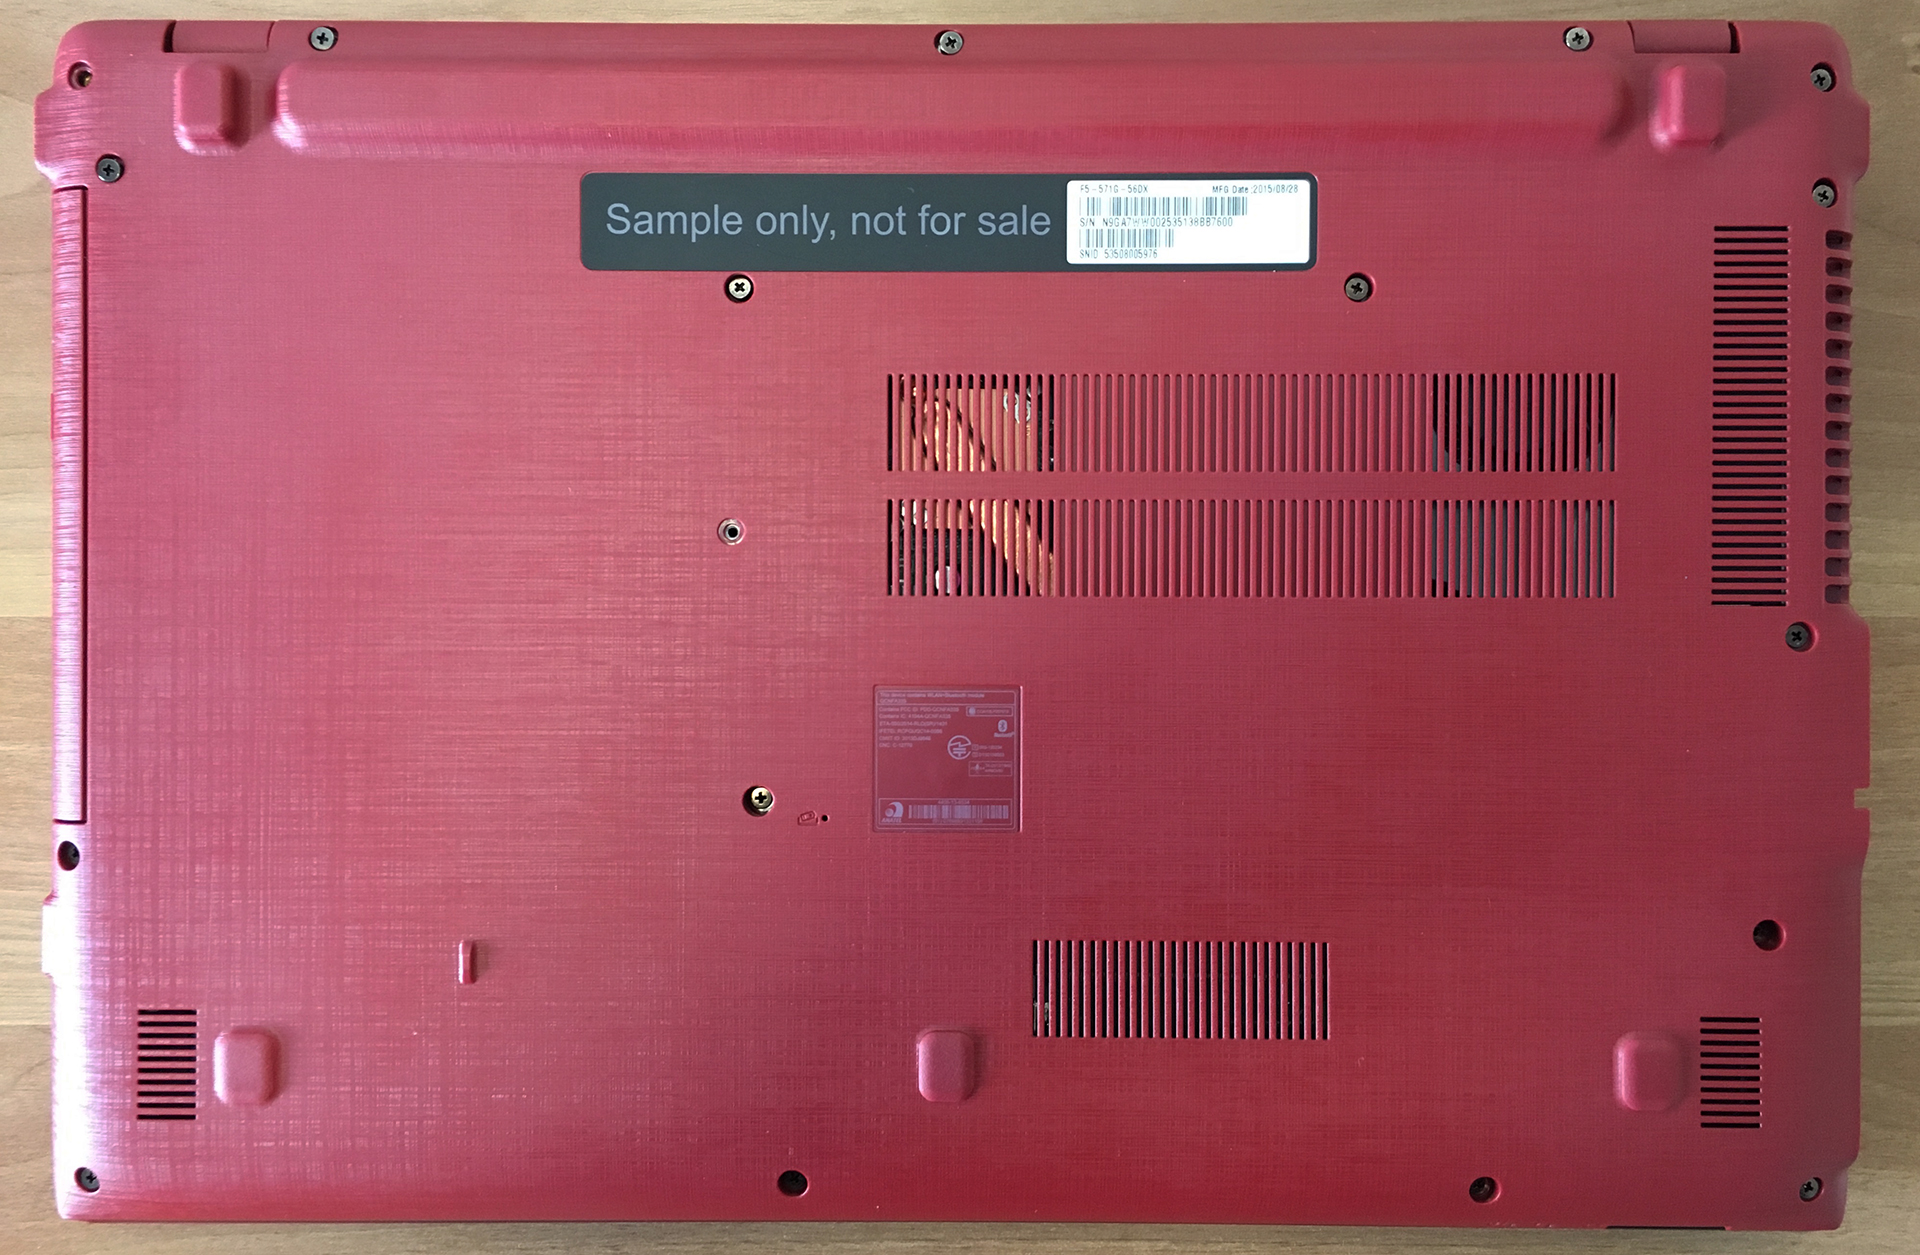
Removing the bottom is not difficult, but you should be careful. First, remove all of the screws – there are 21, but 3 of them are hidden below the DVD tray, so after you remove the visible eighteen, slide out the DVD and you’ll see the rest.
Now you have to be careful – lift the bottom lid a little, but go slowly and take your time not to tear the memory card slot cable. Remove the cable connector from its socket gently and you can proceed to step 2.


2. Get access to everything you may need
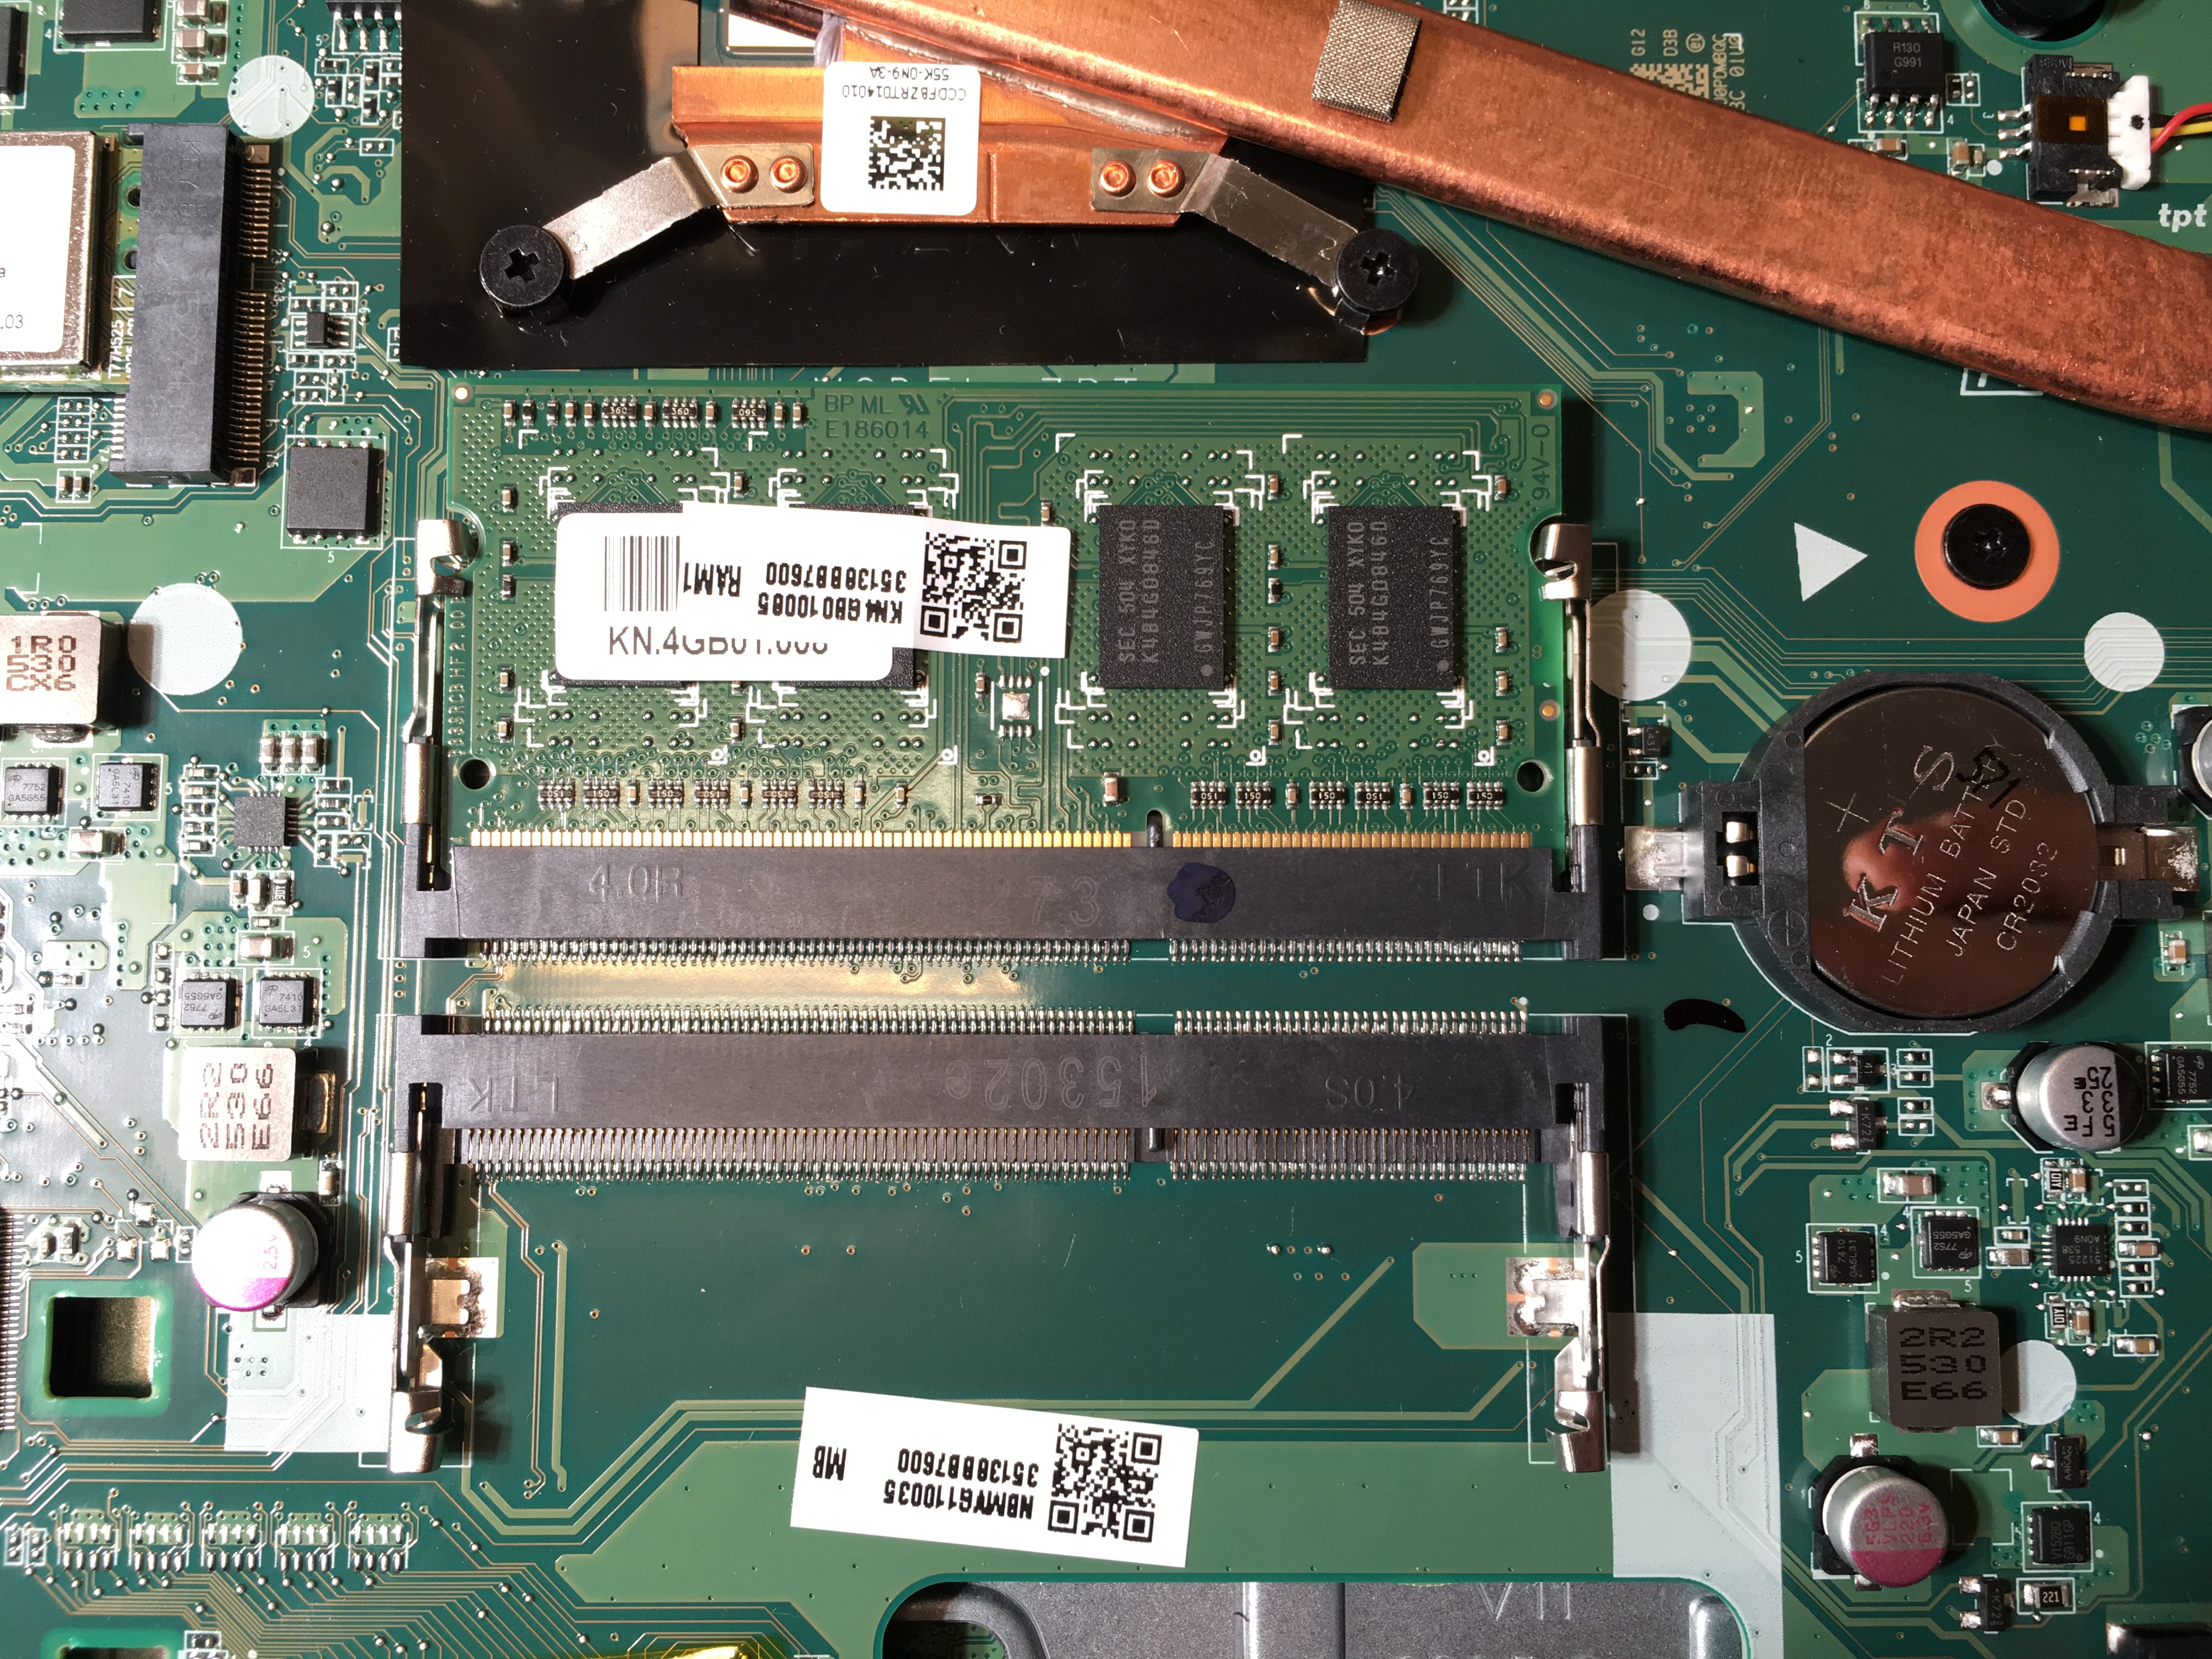
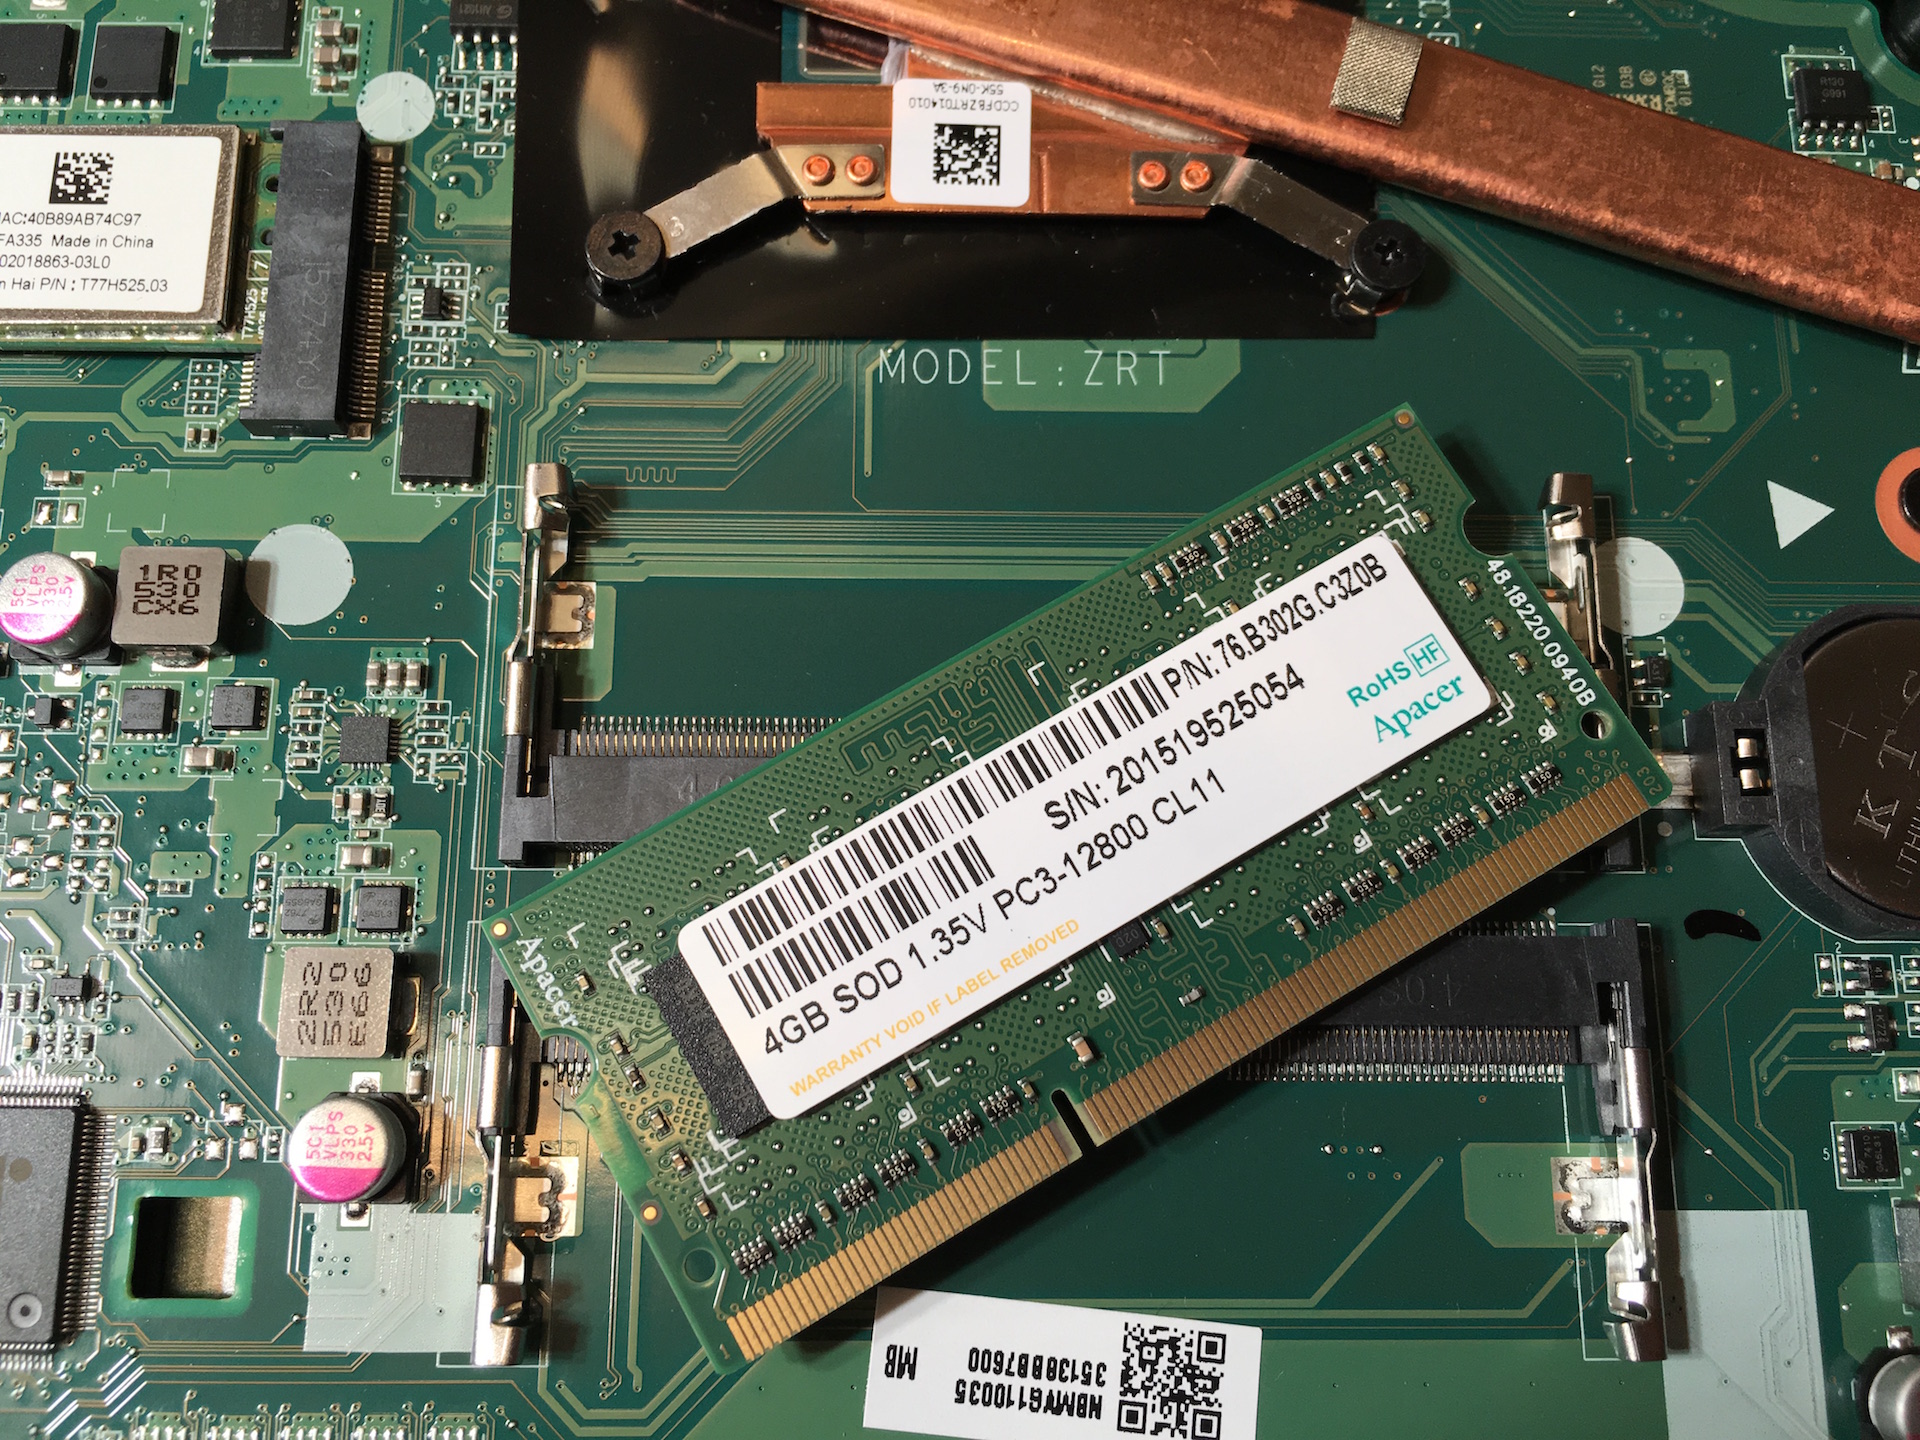
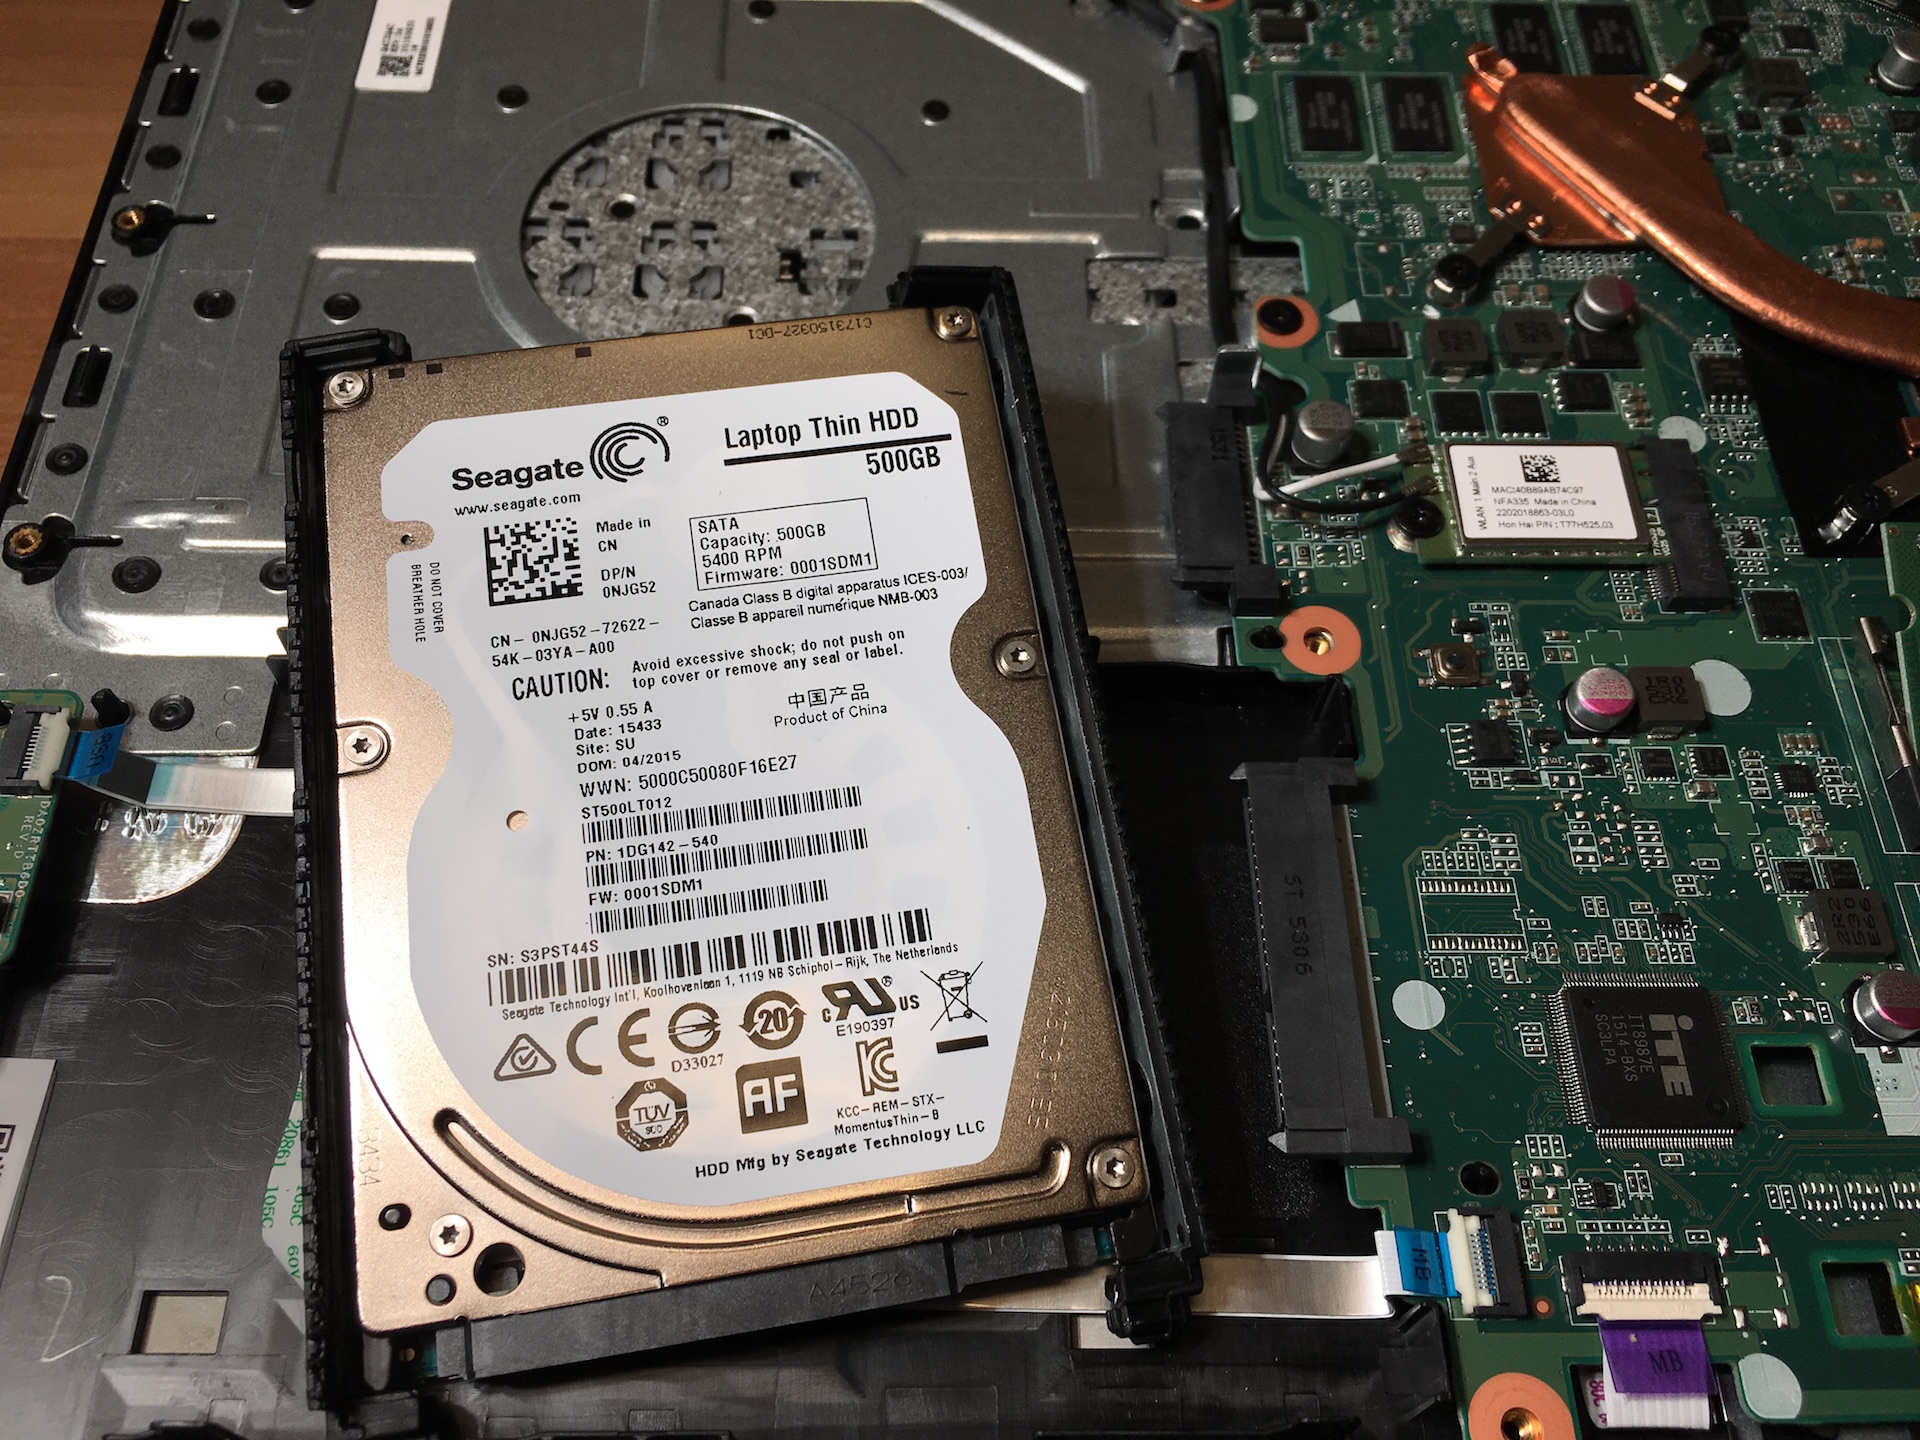
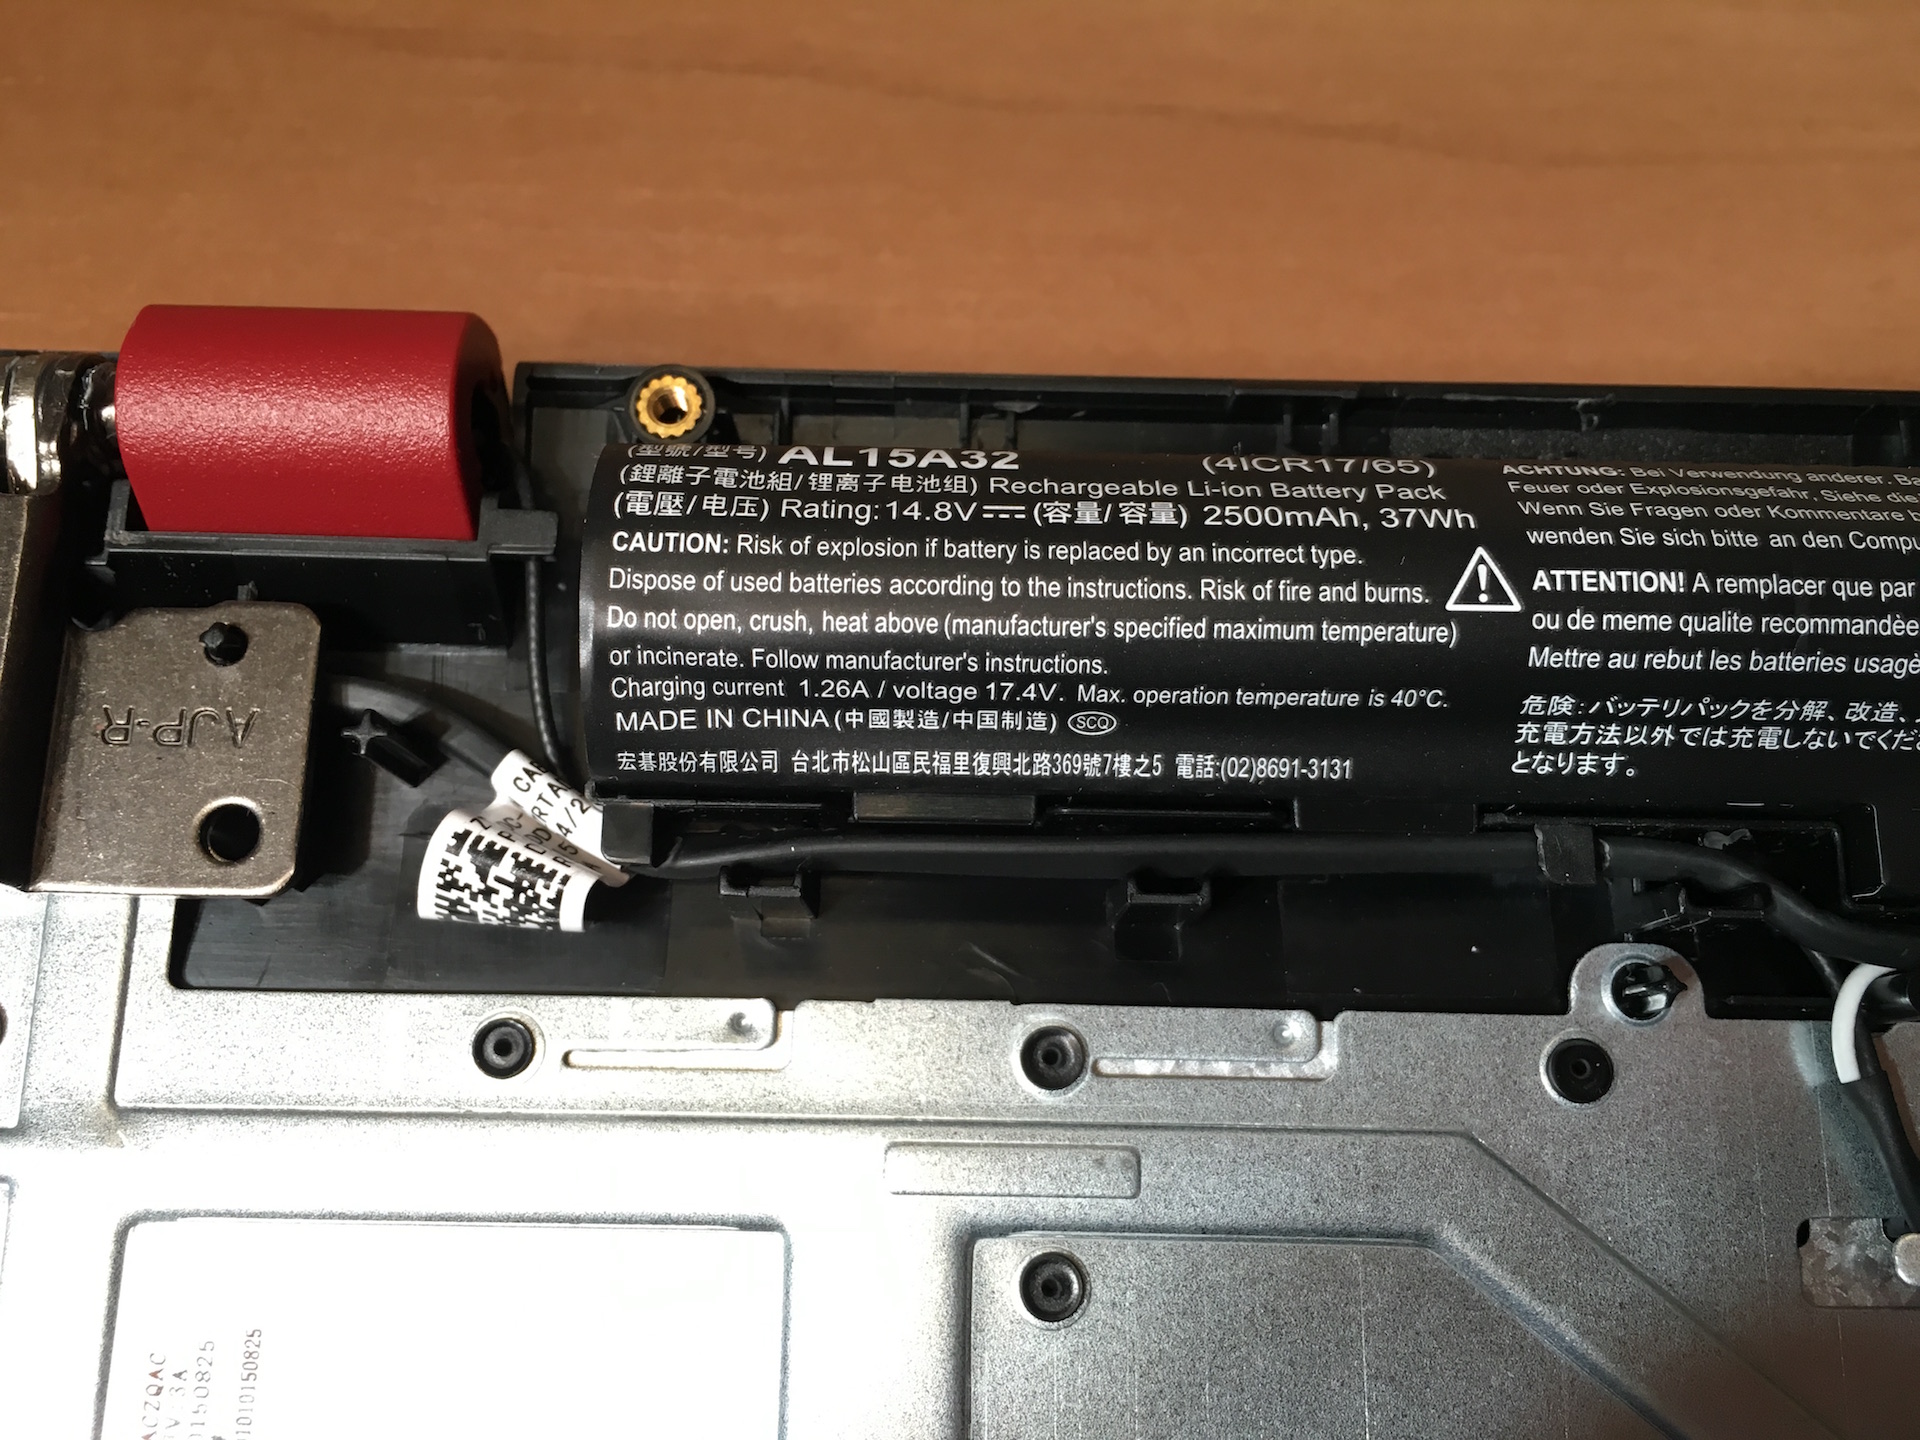
That was easy, wasn’t it? Now you can upgrade your notebook with more RAM (our system has 4GBs of RAM, on one slot), change your HDD (or upgrade it to 2.5” SSD), swap your battery or clean your cooling system.
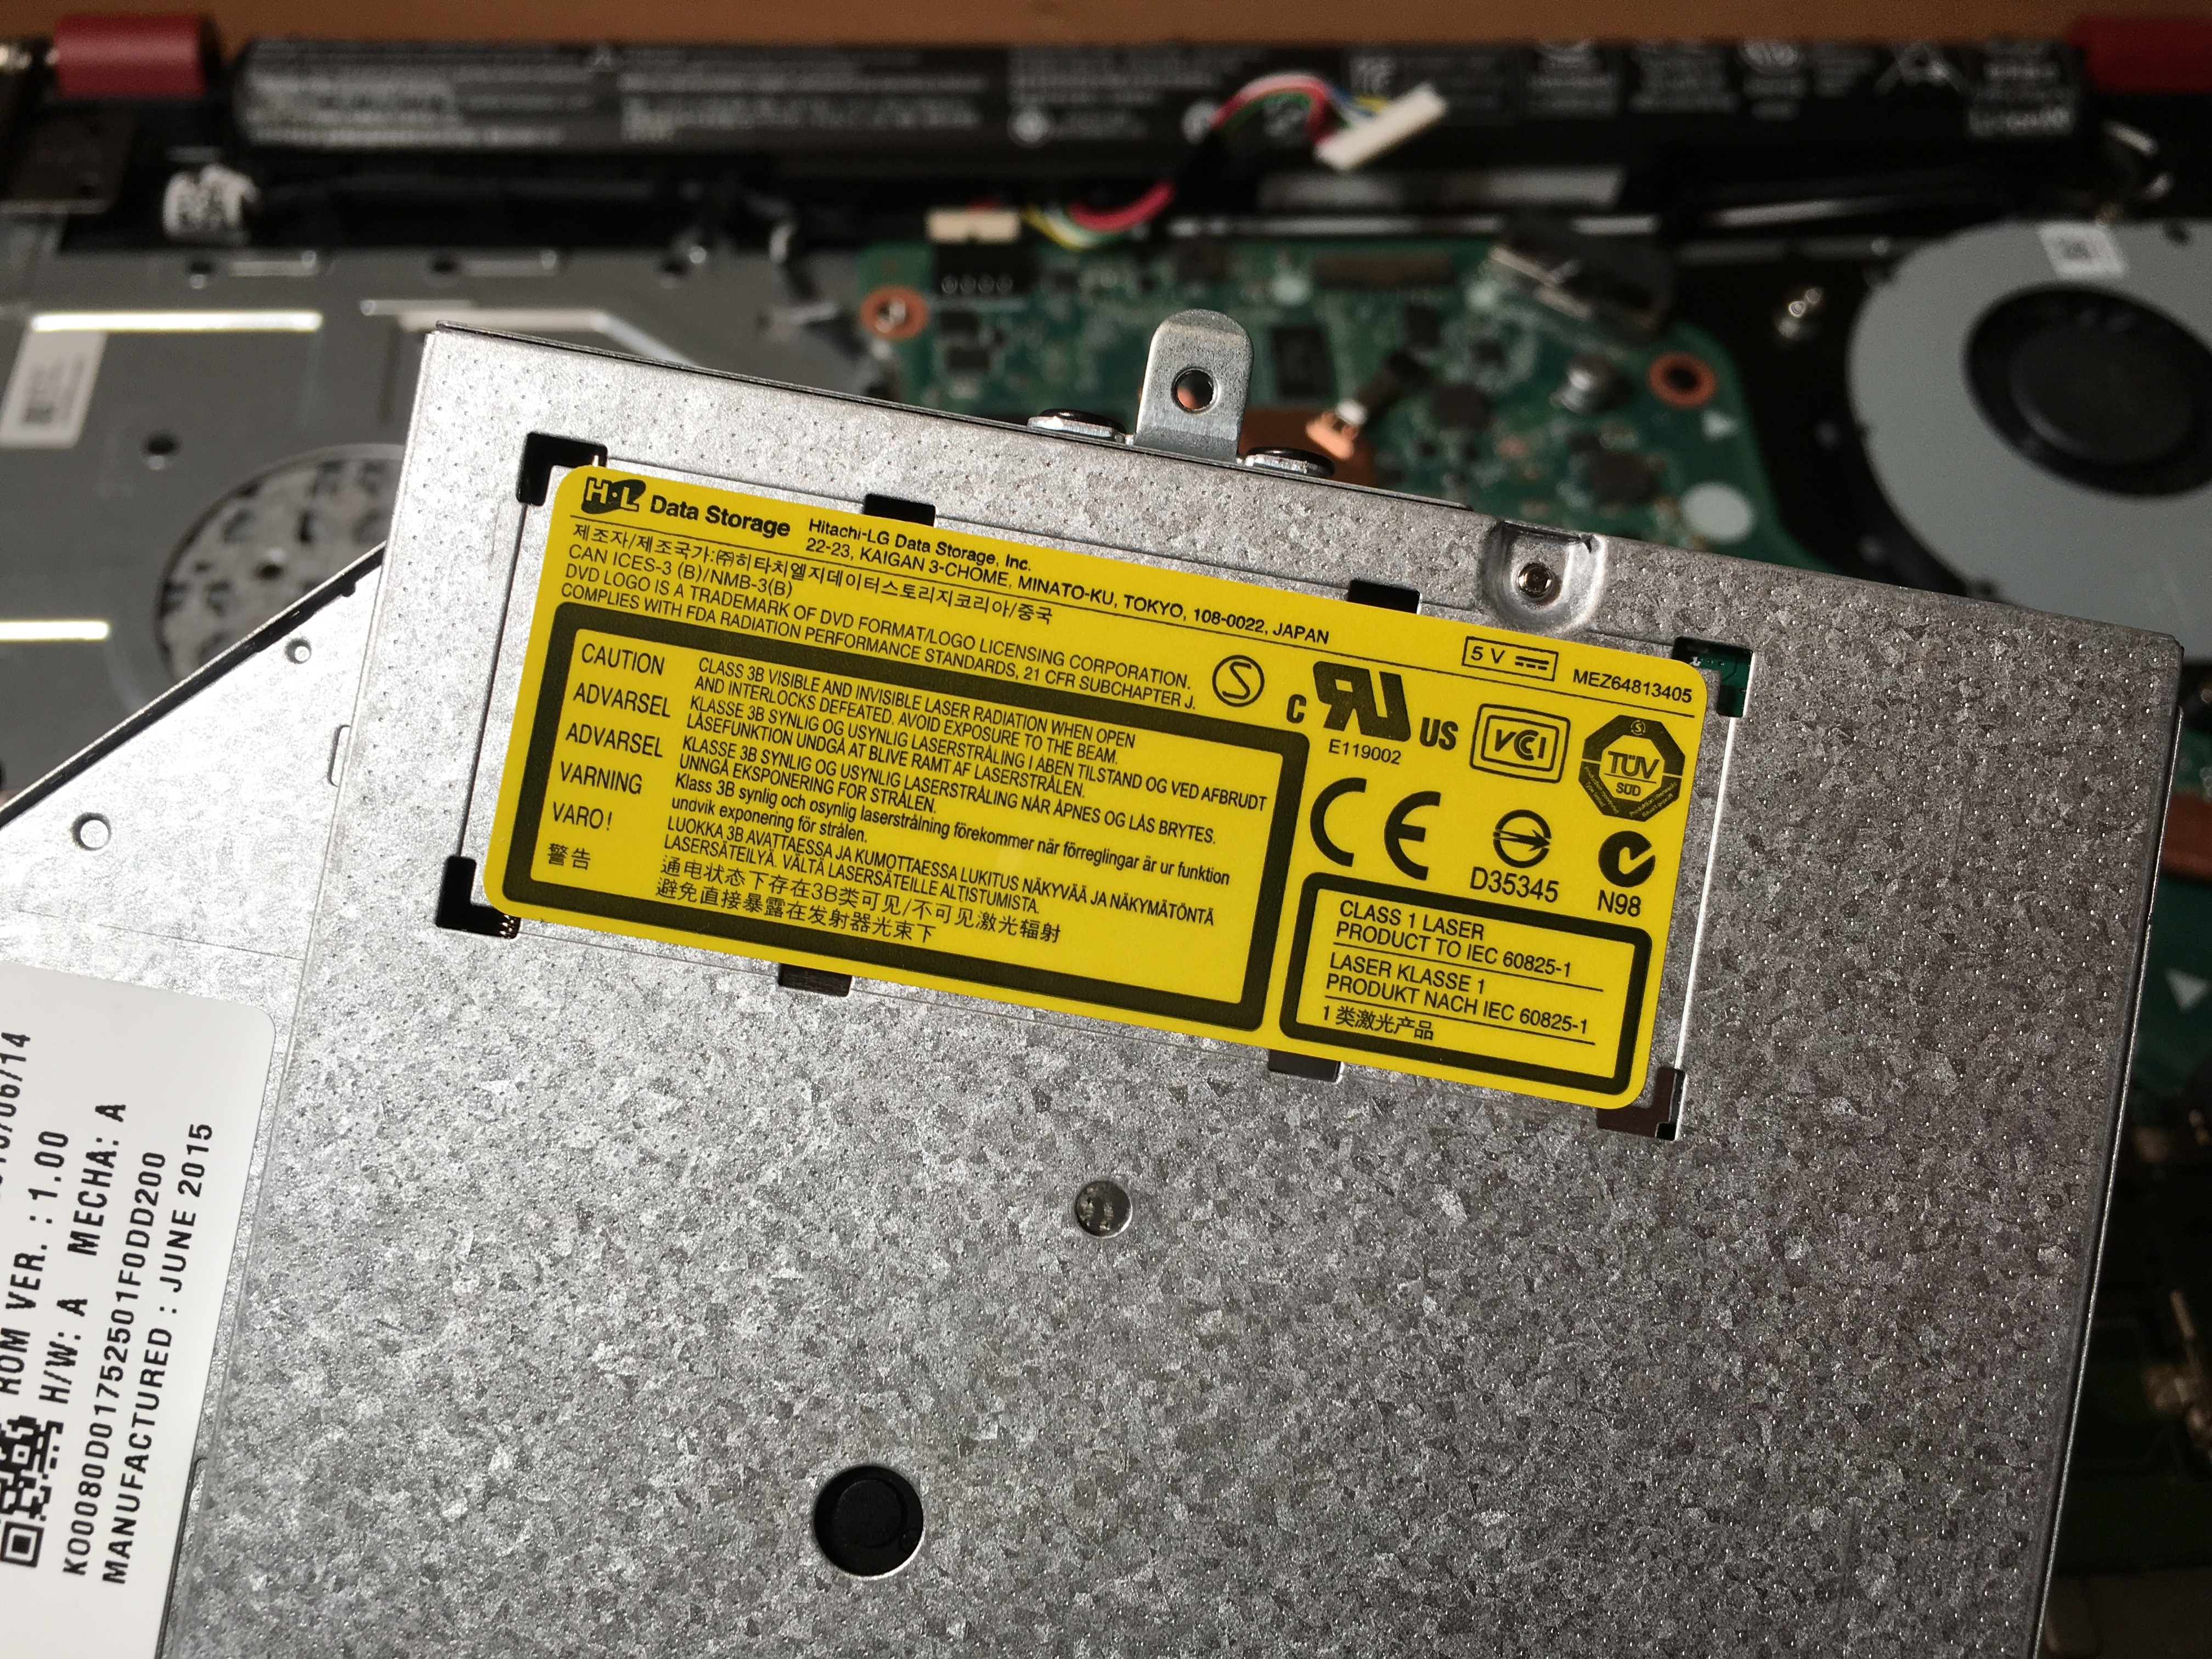
Unfortunately, Aspire F5 doesn’t have an M.2 slot for additional fast storage, but there is a DVD that should come in handy once in a (very) blue moon, right? Or, you could buy a caddy and use your HDD in place of the optical drive and an SSD in you 2.5” slot.

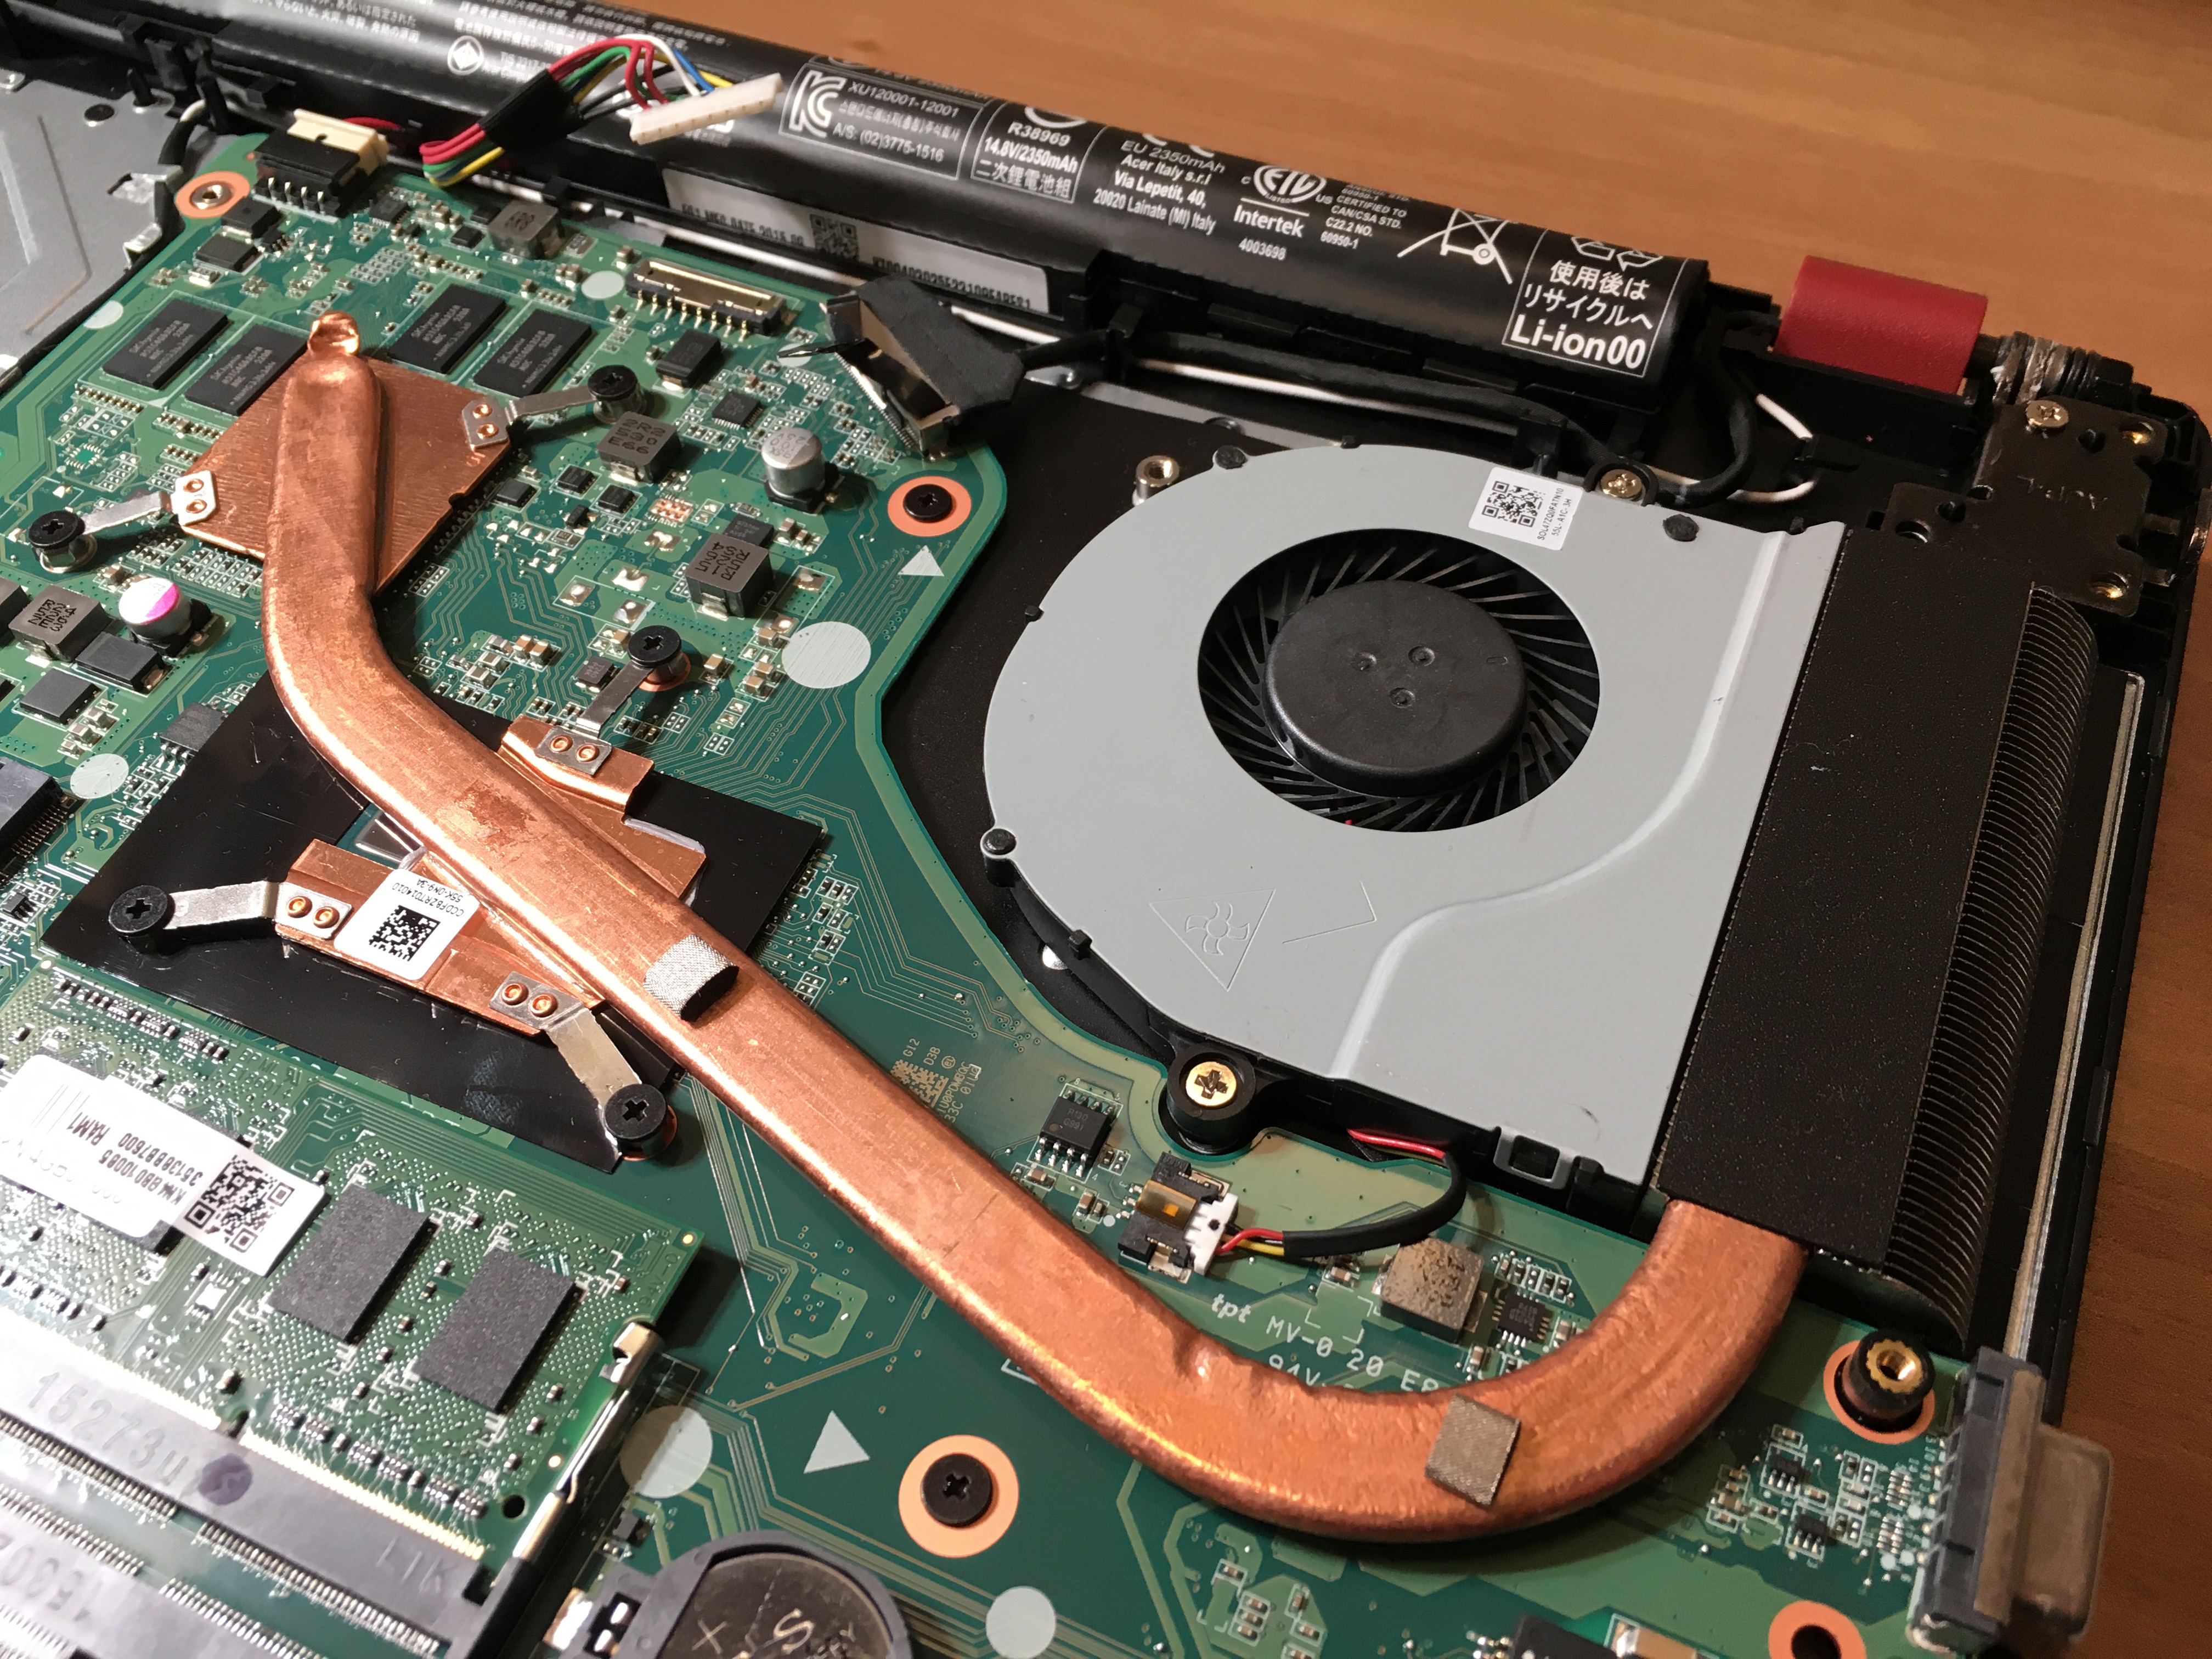
Acer Aspire F5 has just one heat pipe and air vent located at the left side of the notebook. That way the zone where the mouse is won’t be under hot air attack when the computer is heavily loaded, although we don’t expect much heat from a ULV processor and GeForce 940M anyway.
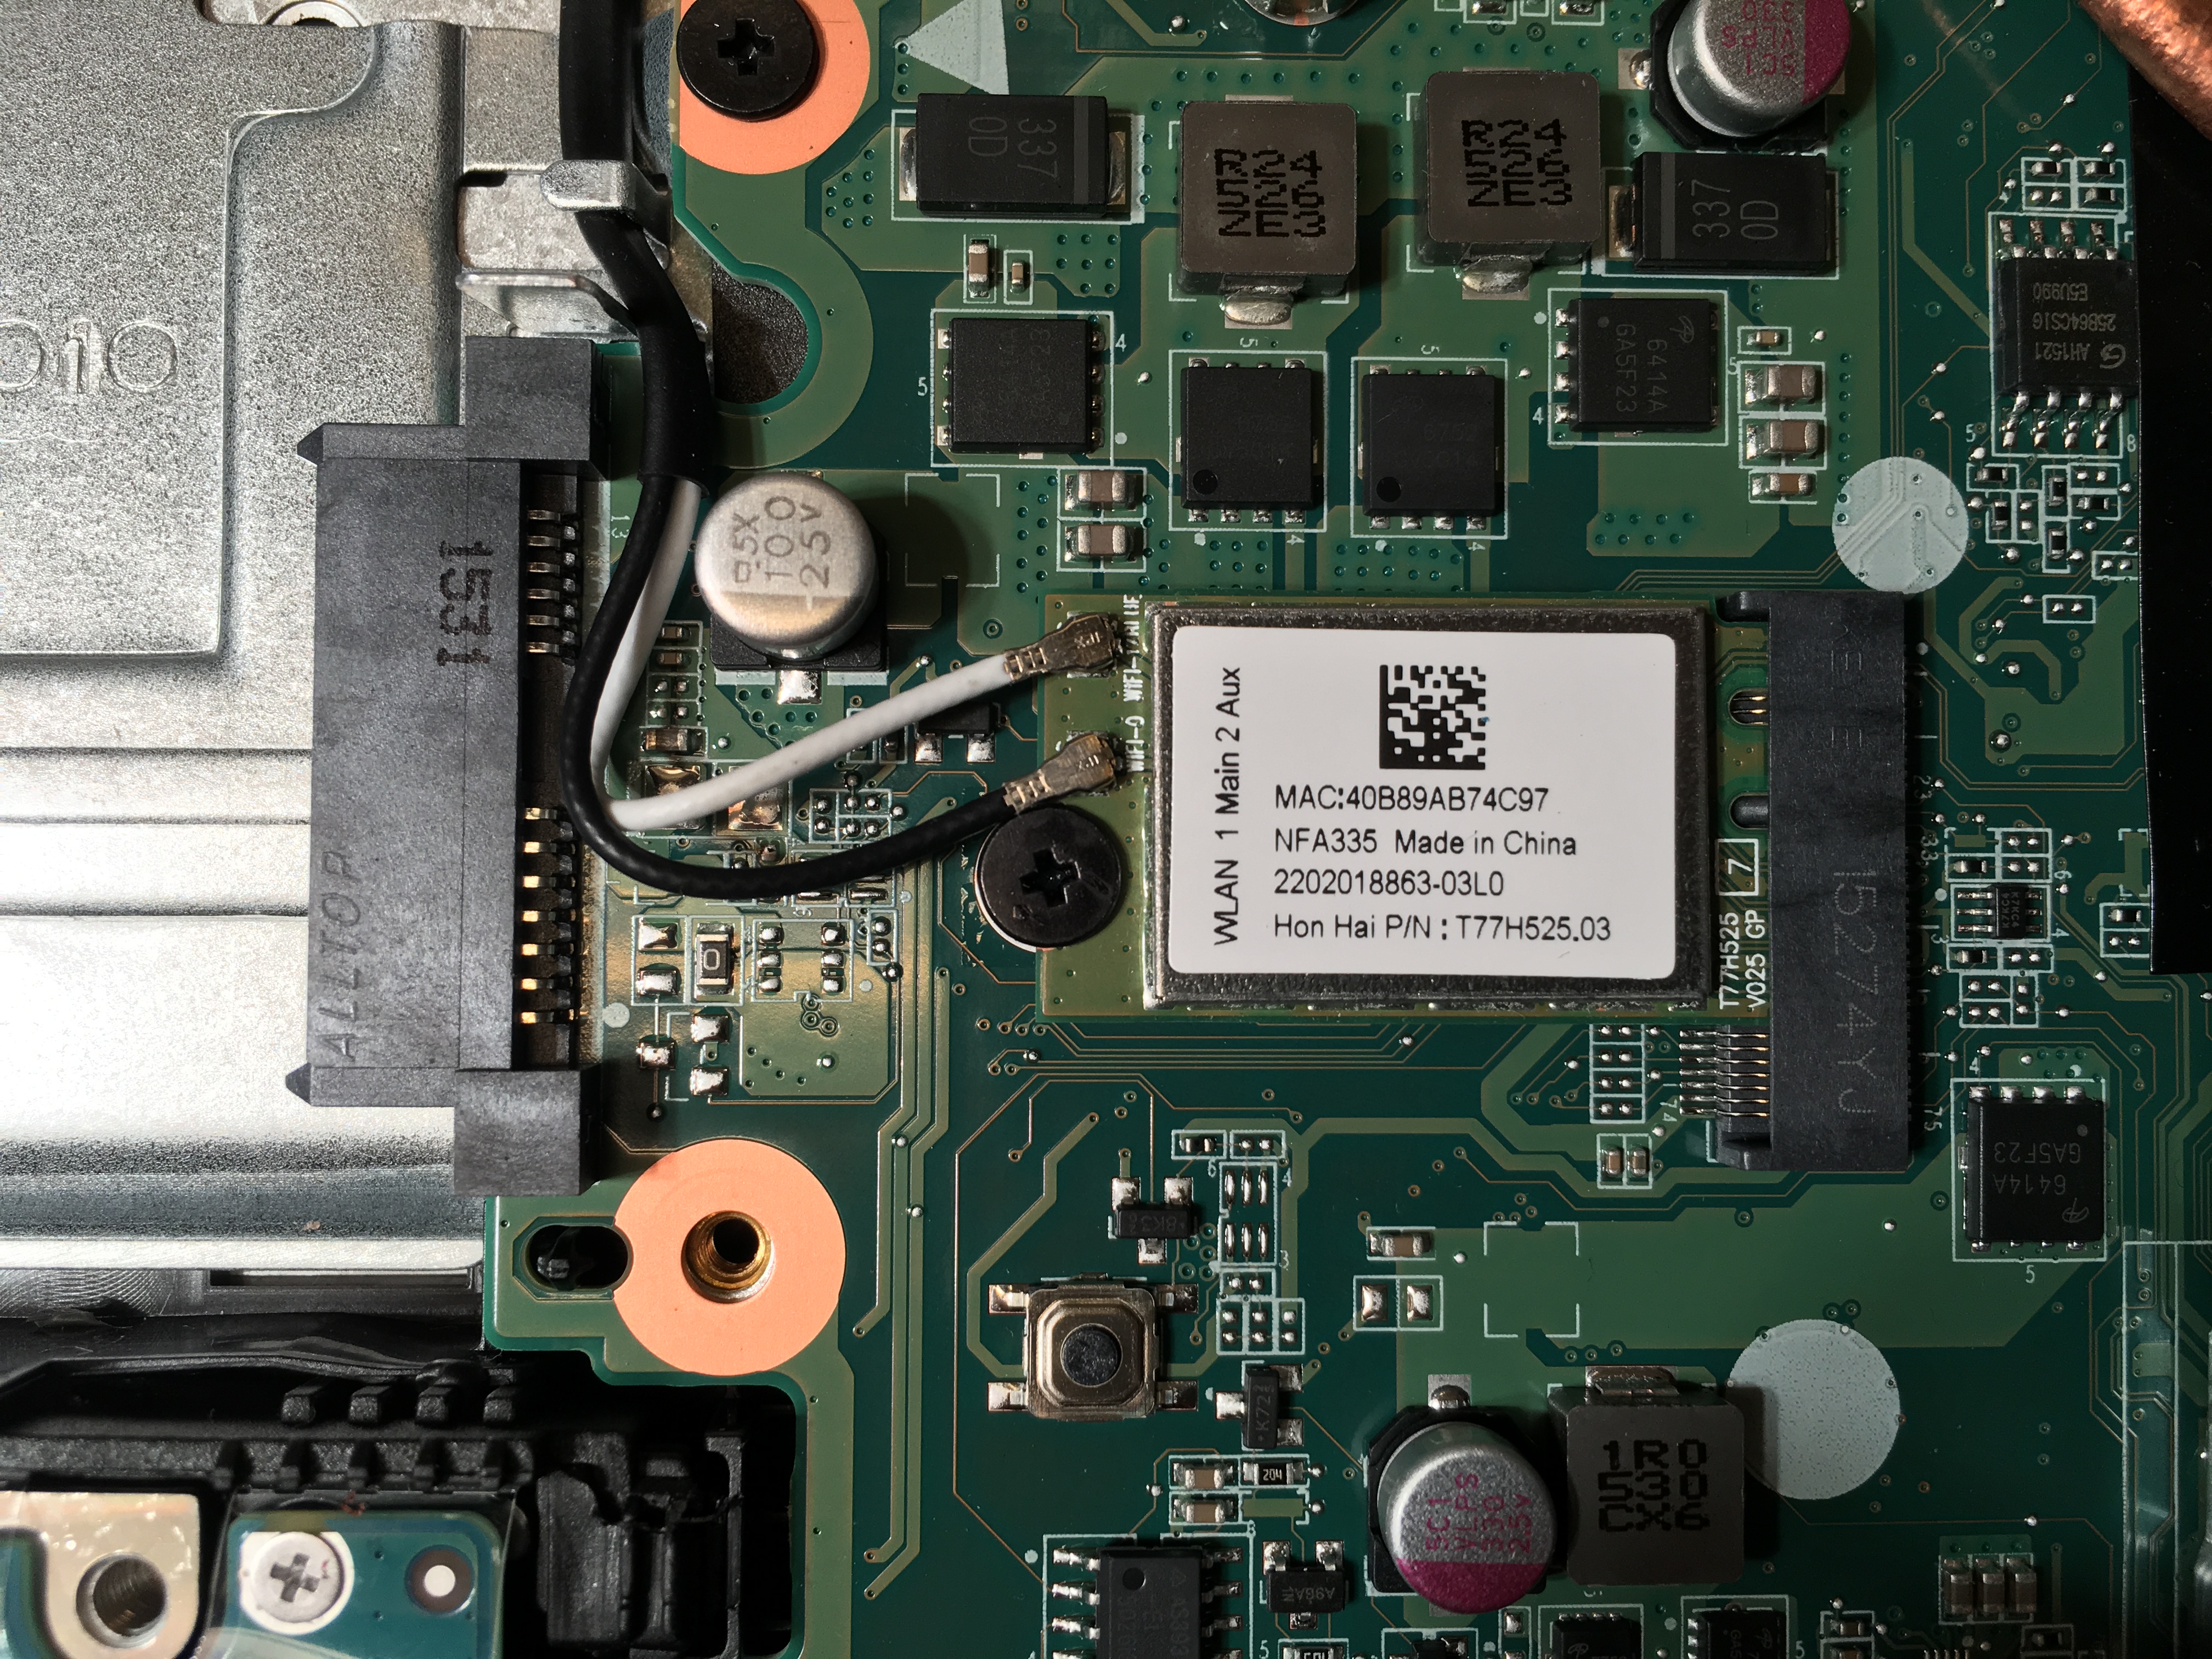
Here are the main components we found in our Acer Aspire F5 / F15:
- Hard Drive: Seagate Laptop Thin ST500LT012 500GB 5400 RPM 16MB Cache SATA 6.0Gb/s (Check Price)
- Battery: Acer AL15A32 (2500 mAh, 37Wh)
- RAM: Apacer 4GB SOD 1.35V PC3-12800 CL11
- Wi-Fi: Foxconn T77H525.03
All of the available Acer Aspire F5 / F15 configurations and their prices can be found here:
http://amzn.to/1WPoisA


![[June 2026] Best-Selling Laptop Brands on Amazon Global – Apple’s Unrivaled Dominance in Units and Revenue](https://laptopmedia.com/wp-content/uploads/2026/07/GLOBAL-Best-Brands-400x225.jpg)
![[June 2026] Amazon Global: Top 10 Best-Selling Laptops – Apple’s New MacBook Neo Storms to #1, Reshaping the Market with Affordability](https://laptopmedia.com/wp-content/uploads/2026/07/Best-Selling-Laptops-GLOBAL-Top-10-400x225.jpg)
![[June 2026] Amazon Global: Top 10 Best-Selling Gaming Laptops – Acer’s Nitro V 16S AI Dominates Sales, While ASUS Leads Overall Revenue](https://laptopmedia.com/wp-content/uploads/2026/07/Best-Selling-Gaming-Laptops-GLOBAL-Top-10-400x225.jpg)
![[June 2026] Global Ranking of Best-Selling Laptop GPUs on Amazon – NVIDIA RTX 5060 is the Top-Selling Dedicated GPU](https://laptopmedia.com/wp-content/uploads/2026/07/Best-Selling-GPUs-GLOBAL-Top-10-400x225.jpg)
![[June 2026] Global Ranking of Best-Selling Laptop CPUs on Amazon – Apple M5 Dominates, AMD Ryzen 7 260 Gets Solid Premium Share](https://laptopmedia.com/wp-content/uploads/2026/07/Best-Selling-CPUs-GLOBAL-Top-10-400x225.jpg)

hi , can u tell me what component is on the left side(the case is not opened) of the mouse pad? it is really heating up and i want to know if it is normal
What size of caddy i have to buy? 9 or 9.5 mm?
Hi, to clean a fan, do I need to take everything out, or I can just clean as it it?
Thanks for the guide, as my laptop’s HDD has recently died and need to install a new one. Cheers!
know where I can buy acer f15 motherboard with shipping to argentina?
Hi,
Can anyone tell how to access the keyboard from the back to check if the cable connecting it to the mother board has come out and that is why the keyboard stopped working? i have been able to remove the back cover, can unscrew the mother board; but not sure how to get access to keyboard. Please can you advice? I have tried all other options like reinstall of windows, reset etc etc ….
Many Thanks
Venugopal
the keyboard connector is the wide grey one below the mousepad (after the whole bottom of the case has been removed)
For anybode who is insterested, the keyboard is not typically designed to be replaced in these models, the keys poke through the top inner cover, this is held in place underneath by melted plastic rivets between the chassis and a metal holster. Constructed like so.. (kb chassis, keyboard, metal bracket)-bound through with the melted rivets, then m/b and bottom cover. If you do go so far as to attempt to remove the metal panel as I did, be careful not to tear the backlight ribbon cable between the k/b and the metal holster as it is stuck on quite hard.… Read more »
Please info. Is the CPU soldered? Thnx