Lenovo Legion Pro 7 (16″, 2023) review – it receives the 175W RTX 4000 treatment too
Temperatures and comfort, Battery Life
Max CPU load
In this test we use 100% on the CPU cores, monitoring their frequencies and chip temperature. The first column shows a computer’s reaction to a short load (2-10 seconds), the second column simulates a serious task (between 15 and 30 seconds), and the third column is a good indicator of how good the laptop is for long loads such as video rendering.

Average P-core frequency; Average E-core frequency; CPU temp.; Package Power
| Intel Core i9-13900HX (55W TDP) | 0:02 – 0:10 sec | 0:15 – 0:30 sec | 10:00 – 15:00 min |
|---|---|---|---|
| Lenovo Legion Pro 7 (16″, 2023) | 3.61 GHz @ 3.05 GHz @ 84°C @ 171W | 3.42 GHz @ 2.88 GHz @ 86°C @ 148W | 3.29 GHz @ 2.81 GHz @ 87°C @ 137W |
Interestingly, the Legion Pro 7 (16″, 2023) manages to maintain extremely high power targets throughout the test. In contrast to the MSI Raider GE78 HX (13VX), Lenovo prefers to rely on the sheer count of the E-cores, allowing them to boost at higher clocks.
Real-life gaming
| NVIDIA GeForce RTX 4080 | GPU frequency/ Core temp (after 2 min) | GPU frequency/ Core temp (after 30 min) |
|---|---|---|
| Lenovo Legion Pro 7 (16″, 2023) | 2452 MHz @ 77°C @ 174W | 2455 MHz @ 77°C @ 174W |
| MSI Raider GE78 HX (13VX) | 2418 MHz @ 74°C @ 173W | 2415 MHz @ 76°C @ 173W |
While a direct comparison between the two devices was not possible with the processors, it is quite easy when looking at their GPUs. Despite its superior portability, the Legion Pro 7 provides a higher clock speed. Although, the temperature is slightly higher, and the fan noise was getting a bit out of hand. Here, we have to mention that our laptop required a BIOS update, which allowed a change in the settings that can put the device in “Extreme” performance mode. Lenovo’s Vantage app also lets you set custom power targets for both the CPU and the GPU while picking your custom fan curve.
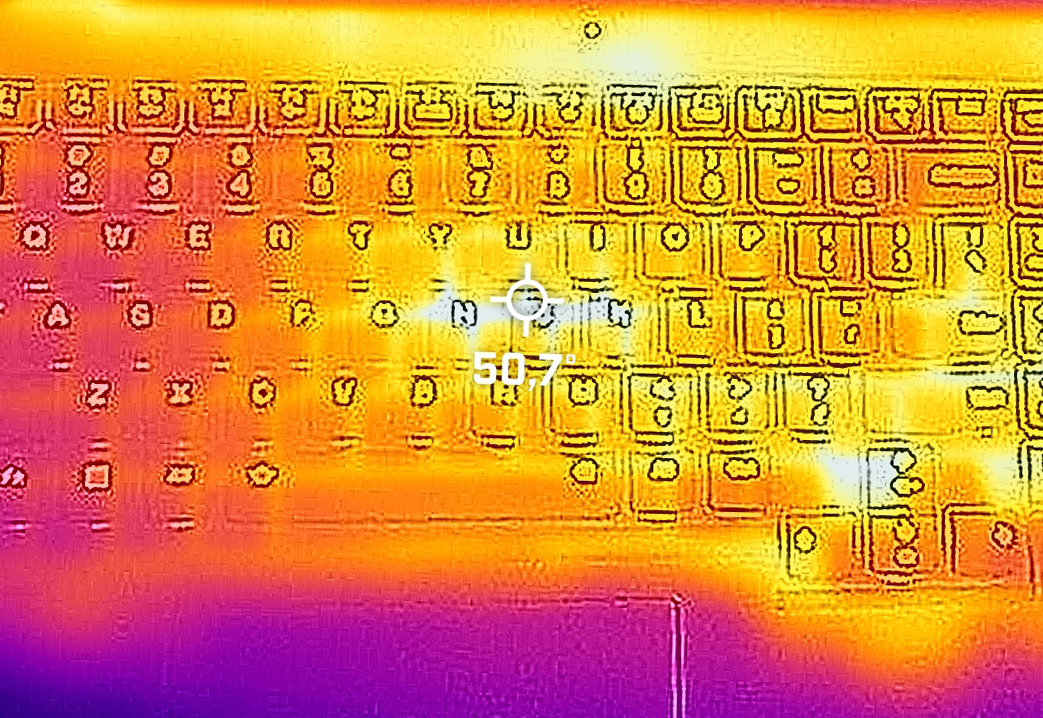
Comfort during full load
Most of the laptop remains at temperatures in the low 40°C range, but there are two or three hotspots where the heat bleeds through keys and gaps to reach about 52°C.
Battery
Now, we conduct the battery tests with the Windows Better performance setting turned on, screen brightness adjusted to 120 nits and all other programs turned off except for the one we are testing the notebook with. This device’s huge 99.9Wh battery lasts for 6 hours and 40 minutes of Web browsing, or 5 hours and 58 minutes of video playback.
Brightness: 180 nits; Display Mode: SDR
Time to Full Discharge: Higher is Better

In order to simulate real-life conditions, we used our own script for automatic web browsing through over 70 websites.


![[June 2026] Best-Selling Laptop Brands on Amazon Global – Apple’s Unrivaled Dominance in Units and Revenue](https://laptopmedia.com/wp-content/uploads/2026/07/GLOBAL-Best-Brands-400x225.jpg)
![[June 2026] Amazon Global: Top 10 Best-Selling Laptops – Apple’s New MacBook Neo Storms to #1, Reshaping the Market with Affordability](https://laptopmedia.com/wp-content/uploads/2026/07/Best-Selling-Laptops-GLOBAL-Top-10-400x225.jpg)
![[June 2026] Amazon Global: Top 10 Best-Selling Gaming Laptops – Acer’s Nitro V 16S AI Dominates Sales, While ASUS Leads Overall Revenue](https://laptopmedia.com/wp-content/uploads/2026/07/Best-Selling-Gaming-Laptops-GLOBAL-Top-10-400x225.jpg)
![[June 2026] Global Ranking of Best-Selling Laptop GPUs on Amazon – NVIDIA RTX 5060 is the Top-Selling Dedicated GPU](https://laptopmedia.com/wp-content/uploads/2026/07/Best-Selling-GPUs-GLOBAL-Top-10-400x225.jpg)
![[June 2026] Global Ranking of Best-Selling Laptop CPUs on Amazon – Apple M5 Dominates, AMD Ryzen 7 260 Gets Solid Premium Share](https://laptopmedia.com/wp-content/uploads/2026/07/Best-Selling-CPUs-GLOBAL-Top-10-400x225.jpg)

isn’t the touchpad on the legion 7 gen 8 series mylar and not glass?
Apart from the obvious CPU, GPU, RAM upgrades, there are some features removed from the previous 2022 model:
no fingerprint reader, plastic keyboard & palm rest area vs aluminium, plastic touchpad vs glass, 1000Mbps vs 2500Mbps Ethernet, 1 vs 2 USB-C Thunderbolt port, more subtle RGB lighting + no LED for rear input ports
4070 version doesn’t have Thunderbolt.
2.80 kg might seem like a lot, but considering the beastly hardware trapped inside this chassis, we feel it is kind of light. Thank you!! Finally a reviewer who understands to rate the weight and thickness of a laptop in context to its hardware! Personally would prefer an even slightly thicker chassis to get it quieter under load. The vapor chamber is very good but the fans look very shallow. The Alienware M16 has 3 fans and although it is pretty heavy at 3.3kg, this would be fine for me and I would instantly go for it, if it had… Read more »